Advertisement
Carousel
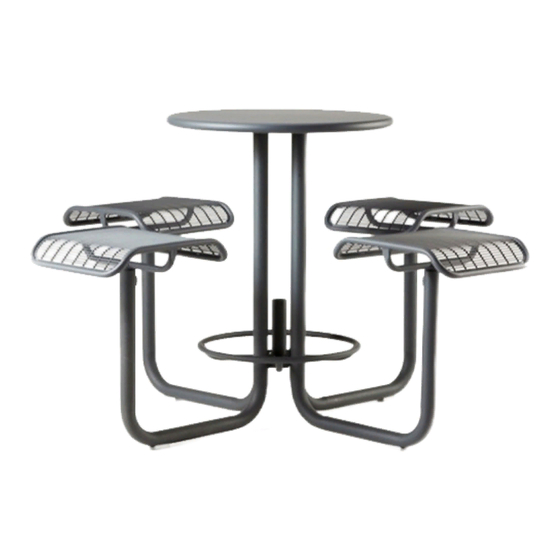
casual height table
Installation Guide
casual ht SUPPORT 'A'
casual ht SUPPORT 'A'
1X – 3 seat
27" square wood
30" dia tabletop,
Tabletop
Marneaux or Catena
Backless
Backless
Grid seat
perf seat
Included components:
• Support 'A' with surface mount tabs
• Support 'B' with surface mount tabs
• Seats (qty and style depends on order)
• 1 tabletop per unit, with attaching hardware
• (1) ¼‐20 x 2‐1/4" Phillips pan head machine screw
and lock nut
WARNING! TABLES MUST BE FASTENED SECURELY TO HARD SURFACING TO
PREVENT TIPPING.
ASSEMBLE WITH CARE! Pangard II Polyester Powdercoat is a strong, long‐lasting finish. To protect
this finish during assembly, place unwrapped powdercoated parts on packaging foam or other non‐
marring surface. Do not place or slide powdercoated parts on concrete or other hard or textured
surface – this will damage the finish causing rust to occur. Use touch‐up paint on any gouges in the
finish caused by assembly tools.
casual ht SUPPORT 'B'
1X – 3 seat
1X – 4 seat
1X – 4 seat
30" dia wood
30" square Marneaux
Tabletop
Backed
Backed
grid seat
perf seat
1X per seat ‐ 3/8‐
16 x 1‐1/2"
indented hex head
machine screw
Tools required:
• protective padding
• Phillips head screwdriver
• Non‐corrosive anchors, maximum Ø3/8" [9mm] – 3 for 3‐seat unit, 4 for 4‐seat unit
• 9/16" wrench (for seats)
• 5/32" hex key
• 7/16" wrench (for umbrella hardware)
TABLETOP ASSEMBLY: See Fig 1 and Fig 2.
Note: DO NOT DRAG unit across concrete or other rough surfaces. This could damage
the powdercoat on the bottom of the surface mount tabs.
1.
Verify that surface mount tabs are securely fastened to support legs. Tighten if
necessary.
Tabletop
2.
Place table top upside down on non‐marring level surface.
3.
Place table support "A" (has 5" ring at center) upside down on table top and align
holes.
4.
Loosely fasten support to table top with screws provided.
‐
Catena/Steelhead tables include (12) 1/4‐20 x 3/4" Phillips truss head tapping
screws
‐
Marneaux® includes (4) 1/4‐20 x 3/4" Phillips pan head machine screws and
washers.
Hoop
One screw required at the outer hole in each plate.
seat
‐
Square wood tabletop includes (12) 1/4‐20 x 1" Phillips pan head machine screws.
5.
Hold table support "B" upside down and carefully lower it over support "A" so bar
on "B" fits into notch on "A". Loosely fasten support "B" to table top.
The use of power drivers is not recommended. Threads or threaded inserts may be
damaged or broken due to over‐torqueing.
6.
Install hardware. Tighten all table top fasteners until snug, then tighten
1X per seat –
additional 1/4 turn.
3/8 washer
7.
Turn table right side up using at least two people.
PROCEDURE FOR ASSEMBLING SEATS: See Fig 3.
Note: These instructions apply to all seat styles for Carousel units. Seats were NOT
designed to swivel. Allowing the seat to swivel will damage the finish and the product.
1.
Slide seat stem into tube on support. Backless seats should be installed with the
flat part of the stem facing in toward the center of the table.
2.
Align threaded hole in seat stem with hole in support tube. This may require
lifting the seat slightly.
3.
Insert washer and hex head machine screw through the support hole and tighten.
Screws are coated with a dry thread locking compound that cures in 24 hours.
Wiggle seats and tighten as necessary until seat is securely fastened.
Date: June 21, 2018
www.landscapeforms.com
Ph: 800.521.2546
Page 1 of 2
Advertisement
Table of Contents

Related Manuals for Landscape Forms Carousel


Summary of Contents for Landscape Forms Carousel
- Page 1 Carousel casual height table Date: June 21, 2018 Installation Guide www.landscapeforms.com Ph: 800.521.2546 Tools required: • protective padding • Phillips head screwdriver • Non‐corrosive anchors, maximum Ø3/8” [9mm] – 3 for 3‐seat unit, 4 for 4‐seat unit casual ht SUPPORT ‘A’ casual ht SUPPORT ‘B’ casual ht SUPPORT ‘A’ • 9/16” wrench (for seats) 1X – 3 seat 1X – 3 seat 1X – 4 seat • 5/32” hex key 1X – 4 seat • 7/16” wrench (for umbrella hardware) TABLETOP ASSEMBLY: See Fig 1 and Fig 2.
- Page 2 Carousel casual height table Date: June 21, 2018 Installation Guide www.landscapeforms.com Ph: 800.521.2546 SURFACE MOUNT INSTALLATION: Place unit in desired position and mark anchor locations through holes SUPPORT ‘A’ provided in surface mount tabs. TIGHTEN Move unit and drill holes. SCREWS IF Clear the holes of dust and debris using compressed air. LOOSE TABLETOP Place unit in desired position and install all of the anchors. After all anchors (CATENA SHOWN) are installed, tighten as recommended by anchor manufacturer. Periodically check fasteners and tighten if required. UMBRELLA ASSEMBLY: To install umbrella, slide umbrella pole through hole in table and into tube on support “B”. 1/4‐20 SCREW Align holes in base tube and umbrella pole. Insert long 1/4‐20 machine screw and secure with lock nut. ATTACH AT THIS CAUTION: Do not let go of the umbrella until the pole has been secured. LOCATION FOR WARNING! All casual height units must be anchored. MARNEAUX TABLETOPS Fig. 1 –...
Need help?
Do you have a question about the Carousel and is the answer not in the manual?
Questions and answers