Table of Contents
Advertisement
Quick Links
Advertisement
Table of Contents

Related Manuals for Pilz PSEN ml b 1.1


Summary of Contents for Pilz PSEN ml b 1.1
- Page 1 PSEN ml b 1.1/2.1/2.2 PSEN sensor technology Operating Manual-1003884-EN-12...
- Page 2 Preface This document is the original document. All rights to this documentation are reserved by Pilz GmbH & Co. KG. Copies may be made for the user's internal purposes. Suggestions and comments for improving this documenta- tion will be gratefully received.
-
Page 3: Table Of Contents
Connection to control systems and evaluation devices ............ Important information........................ Minimum requirements for activation of guard locking ............. Single connection ........................Connection to Pilz evaluation devices ..................Teaching in the actuator ....................... Installation ..........................Important information........................ Operating Manual PSEN ml b 1.1/2.1/2.2 1003884-EN-12... - Page 4 Technical details for escape release 570460 - 570462, 570470 ..........16.5 Technical details for escape release 570463 ................16.6 Technical details escape release 570466-570469 ..............16.7 Technical details escape release 570471-570473 ..............16.8 Technical details escape release 570474-570475 ..............Operating Manual PSEN ml b 1.1/2.1/2.2 1003884-EN-12...
- Page 5 Contents 16.9 Technical details for auxiliary release 570461................Order reference ........................17.1 System ............................17.2 Accessories ..........................Appendix ..........................EC declaration of conformity ....................Operating Manual PSEN ml b 1.1/2.1/2.2 1003884-EN-12...
-
Page 6: Introduction
This operating manual explains the function and operation, describes the installation and provides guidelines on how to connect the product. This documentation is valid for the product PSEN ml b 1.1/2.1/2.2 from Version 2.0. Using the documentation This document is intended for instruction. Only install and commission the product if you have read and understood this document. - Page 7 Introduction INFORMATION This gives advice on applications and provides information on special fea- tures. Operating Manual PSEN ml b 1.1/2.1/2.2 1003884-EN-12...
-
Page 8: Safety
– EN ISO 13849-1: PL e (Cat. 4 ) EN ISO 14119 – Coding level with actuator PSEN ml b 1.1: low, type 4 – Coding level with actuator PSEN ml b 2.1/2.2: high, type 4 The safety switch may only be used with one of the approved actuators (see... -
Page 9: Safety Regulations
Are familiar with the basic regulations concerning health and safety / accident prevention, Have read and understood the information provided in the section entitled Safety Have a good knowledge of the generic and specialist standards applicable to the specific application. Operating Manual PSEN ml b 1.1/2.1/2.2 1003884-EN-12... -
Page 10: Warranty And Liability
– Keep the substitute actuator in a safe place and protect it from unau- thorised access. – Install substitute actuators as described in Installation [ 31]. – Destroy any used actuators before disposal. Operating Manual PSEN ml b 1.1/2.1/2.2 | 10 1003884-EN-12... -
Page 11: Overview
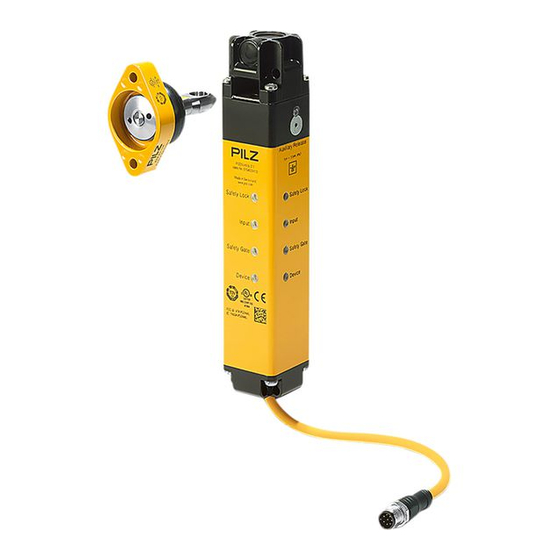
Auxiliary release for opening the safety gate 1 signal output Suitable for left and right hinged safety gates Pilz coding type – PSEN ml b 1.1: coded – PSEN ml b 2.1: fully coded – PSEN ml b 2.2: uniquely coded M12, 8-pin male connector Operating Manual PSEN ml b 1.1/2.1/2.2... - Page 12 Order reference: Accessories [ 75]). The actuator is available in two types (see Order reference: Accessories [ 75]). – Standard actuator – Actuator with rounded tip Standard actuator Actuator with rounded tip Operating Manual PSEN ml b 1.1/2.1/2.2 | 12 1003884-EN-12...
-
Page 13: Function Description
Signal output/diagnostic output Y32 The status of the actuator is output. If a fieldbus module of the SDD is used, the signal output/diagnostic output for the writing of data is activated. Operating Manual PSEN ml b 1.1/2.1/2.2 | 13 1003884-EN-12... -
Page 14: Activation Of Safety Inputs S31 And S41 (Solenoid Operation)
Maximum time between the rising edges from S31 and S42 4.2.2 Activation without specification of direction The guard locking changes its state when the time between the rising edges from S31 and S41 < 20 ms. Operating Manual PSEN ml b 1.1/2.1/2.2 | 14 1003884-EN-12... -
Page 15: Safety Device Diagnostics
Operation with passive use of the Safety Device Diagnostics – Safety switch supplies diagnostic data to Safety Device Diagnostics – Activating/deactivating the guard locking is only via the signals S31 and S41 Operating Manual PSEN ml b 1.1/2.1/2.2 | 15 1003884-EN-12... - Page 16 [5] Execution of the hazardous machine function is permitted [6] Outputs will be deactivated [7] Guard locking will be deactivated [8] Gate is open [t1] Processing time of guard locking signal = 100 ms Operating Manual PSEN ml b 1.1/2.1/2.2 | 16 1003884-EN-12...
- Page 17 [5] Outputs will be deactivated [6] Guard locking will be deactivated [7] Gate is open [t1] Processing time of guard locking signal = 100 ms [t2] Time window for changing guard locking status Operating Manual PSEN ml b 1.1/2.1/2.2 | 17 1003884-EN-12...
-
Page 18: Block Diagram
Safety Gate Receiver Actuator Auxiliary release The auxiliary release enables guard locking to be opened from the access side to the danger zone. The safety switch has auxiliary releases on three sides. Operating Manual PSEN ml b 1.1/2.1/2.2 | 18 1003884-EN-12... - Page 19 2. Rotate the auxiliary release screw [1] half a turn anti-clockwise using a Torx T10 screw- driver. The guard locking pin is displaced and the bolt is released. The safety gate to the danger zone can be opened. Operating Manual PSEN ml b 1.1/2.1/2.2 | 19 1003884-EN-12...
-
Page 20: Recommissioning
[1] Through hole on the actuator for attaching a padlock [2] Padlock [3] Actuator If the actuator is to blocked using several locks in parallel, a multiple lock can be used (e.g. Brady – Lockout device, article no. 852439). Operating Manual PSEN ml b 1.1/2.1/2.2 | 20 1003884-EN-12... -
Page 21: Escape Release Accessory
EN ISO 14119. Legend [1] Escape release stationary [2] Escape release externally [3] Tension pressure cables in lengths of 0.50 m to 4 m [4] Button of the escape release pin [5] Escape release pin Operating Manual PSEN ml b 1.1/2.1/2.2 | 21 1003884-EN-12... -
Page 22: Recommissioning
1. Reset the handle. 2. Switch the voltage off and then on again. 3. Carry out a function test using the escape release. The safety function may only be checked by qualified personnel. Operating Manual PSEN ml b 1.1/2.1/2.2 | 22 1003884-EN-12... -
Page 23: Wiring
Safety output channel 1 Green Safety output channel 2 Yellow Signal output/diagnostic output Y32 grey Operation of solenoid to open Pink and close guard locking (chan- nel 1) 0 V UB Blue Diagnostics input Operating Manual PSEN ml b 1.1/2.1/2.2 | 23 1003884-EN-12... -
Page 24: Emc Requirements
Only use safety relays with a 24 VDC supply voltage. Safety relays with a wide-range power supply or in AC device versions have internal potential isolation and are not suitable as evaluation devices. Operating Manual PSEN ml b 1.1/2.1/2.2 | 24 1003884-EN-12... -
Page 25: Connection To Control Systems And Evaluation Devices
– Use an evaluation device/safety system to test whether the plant is in a safe condition. – Do not operate the solenoid via S31/S41 unless the plant is in a safe condition. Operating Manual PSEN ml b 1.1/2.1/2.2 | 25 1003884-EN-12... -
Page 26: Minimum Requirements For Activation Of Guard Locking
Monitoring of shorts across signal cables through activation of guard locking 24 V Safety control system Activation of guard locking PSEN ml PSEN ml actuator safety switch Lock/Unlock Request 2 Lock/Unlock Request 1 Operating Manual PSEN ml b 1.1/2.1/2.2 | 26 1003884-EN-12... - Page 27 EN ISO 13849-2) 24 V Safety control system Activation of guard locking PSEN ml PSEN ml actuator safety switch 24 V Lock/Unlock Request 2 Lock/Unlock Request 1 Legend [1] Protected cable layout Operating Manual PSEN ml b 1.1/2.1/2.2 | 27 1003884-EN-12...
-
Page 28: Single Connection
Lock/Unlock Request Single connection Safety switch 24 V 0 V Actuator 24 V I1 (FS) I2 (FS) O2 (FS) O1 (FS) Programmable safety system Activation of guard locking FS: Failsafe Operating Manual PSEN ml b 1.1/2.1/2.2 | 28 1003884-EN-12... -
Page 29: Connection To Pilz Evaluation Devices
Connection to control systems and evaluation devices Connection to Pilz evaluation devices The safety switch can be connected to Pilz evaluation devices. Suitable Pilz evaluation devices are, for example: PNOZmulti for safety gate monitoring Configure the switch in the PNOZmulti Configurator with switch type 3. -
Page 30: Teaching In The Actuator
Technical details [ 65]) is taught in automatically as soon as it is brought into the response range. NOTICE No other actuator may be taught in once this actuator has been taught. Operating Manual PSEN ml b 1.1/2.1/2.2 | 30 1003884-EN-12... -
Page 31: Installation
– On the actuator: By complying with the max. torque setting (see Technical details [ 65]) and medium-strength threadlockers. Pilz recommends that you use the PSEN ml actuator center ring (see Order reference [ 75]) only with small door radiuses (see... -
Page 32: Installation Types
[ side-on to actuator [ on the gate frame. 2. Use two M5 screws to fix the actuator to the gate. Operating Manual PSEN ml b 1.1/2.1/2.2 | 32 1003884-EN-12... -
Page 33: Installation On Swing Gate
Install the safety switch horizontally at a swing gate Depending on the installation boundary conditions, a larger gate radius may be required (see diagram). Please contact Pilz when smaller gate radiuses are required. Operating Manual PSEN ml b 1.1/2.1/2.2 | 33... - Page 34 α Tilt angle when installing the actuator Tilt the actuator by 10° when installing, when the door radius is R < 600 mm. Pilz recommends that you use the PSEN ml actuator 10° adapter for correctly installing the actuator. Operating Manual PSEN ml b 1.1/2.1/2.2...
-
Page 35: Installation Safety Switch
Fixing screws crosswise to actuator with L- Tapped holes for two M6 screws on the bracket mounting surface, for attaching the mount- ing surface Operating Manual PSEN ml b 1.1/2.1/2.2 | 35 1003884-EN-12... -
Page 36: Installation Without Mounting Plate
Provide the mounting surface with tapped holes as indicated. ø 8,5 1. Attach the mounting plate to the swing gate/sliding gate. 2. Use four M5 screws to fix the safety switch to the mounting plate. Operating Manual PSEN ml b 1.1/2.1/2.2 | 36 1003884-EN-12... -
Page 37: Installation Using L-Brackets
1. Use two M6 screws to fix the mounting bracket to the gate. The position of the drill holes can be taken from the section entitled Dimensions. 2. Use four M5 screws to fix the safety switch to the mounting bracket. Operating Manual PSEN ml b 1.1/2.1/2.2 | 37 1003884-EN-12... -
Page 38: Actuator Installation
1. Use two M6 screws to fix the mounting bracket to the gate. The position of the drill holes can be taken from the section entitled Dimensions. 2. Use two M5 screws to fix the actuator to the mounting bracket. Fig.: Actuator, installed on mounting bracket Operating Manual PSEN ml b 1.1/2.1/2.2 | 38 1003884-EN-12... -
Page 39: Install Fixing Screws Side-On To Actuator
Technical details [ 65]. Fig.: Fixing screws of the safety switch in parallel to actuator Legend [1] Safety switch [2] Actuator [3] Fixing screws of the safety switch in parallel to actuator Operating Manual PSEN ml b 1.1/2.1/2.2 | 39 1003884-EN-12... -
Page 40: Centre The Bolt In The Actuator Housing
After 50.000 cycles it may happen that the actuator misaligns, and that it has to be realigned regularly. Bolt centred within the actu- Bolt not centred within the actuator Bolt with PSEN ml actuator center ator housing housing ring in the actuator housing Operating Manual PSEN ml b 1.1/2.1/2.2 | 40 1003884-EN-12... -
Page 41: Rotate The Bolt In The Actuator Housing 90
2. Rotate the bolt in the housing skin by 90° in the required direction ([2]). Legend [1] Spring plate in the housing skin [2] Bolt, can be rotated 90° [3] Housing skin 3. Centre the bolt in the actuator housing [ 40]. Operating Manual PSEN ml b 1.1/2.1/2.2 | 41 1003884-EN-12... -
Page 42: Escape Release
Ensure that these versions are installed as straight as possible. The mounting surface has to completely cover the bottom of the escape release housing. The bottom of the escape release housing must not be accessible after installation. Operating Manual PSEN ml b 1.1/2.1/2.2 | 42 1003884-EN-12... -
Page 43: Installation Positions For Escape Release
Installation positions for escape release The stationary escape release can be installed on the three auxiliary releases in three dif- ferent directions each. Legend Installation options at the sides Installation options at the back Operating Manual PSEN ml b 1.1/2.1/2.2 | 43 1003884-EN-12... - Page 44 The external escape release can be installed on the three auxiliary releases in four different directions each. The push/pull cable can be led out on different sides. Legend Installation options at the sides Installation options at the back Operating Manual PSEN ml b 1.1/2.1/2.2 | 44 1003884-EN-12...
-
Page 45: Installation Stationary Escape Release
To bridge larger distances the escape release pin can be extended by a max. of 25 mm two times (see Order reference: Accessories [ 75]). Operating Manual PSEN ml b 1.1/2.1/2.2 | 45 1003884-EN-12... - Page 46 Installation Legend [1] Button of the escape release pin [2] Escape release pin Operating Manual PSEN ml b 1.1/2.1/2.2 | 46 1003884-EN-12...
-
Page 47: Installation External Escape Release
[2] Pin in the adapter disk [3] Hexagon sockets M3x8 3. Screw the escape release with the four raised head screws M3x12 to the adapter disk with 1,2 - 1,5 Nm (see diagram). Operating Manual PSEN ml b 1.1/2.1/2.2 | 47 1003884-EN-12... - Page 48 Screw the housing of the escape release with the screws [1] to a mounting surface with 6 - 6,5 Nm (see diagram). Legend [1] Screwing the escape release to the mounting area [2] Screwing the cable Operating Manual PSEN ml b 1.1/2.1/2.2 | 48 1003884-EN-12...
- Page 49 Installation Fastening for the escape release (order no. 570463) The escape release is fastened using a bracket (not in the Pilz portfolio). The bracket must have the following properties: Corrosion-resistant material Material thickness: 4 +/- 0.5 mm Only low elastic deformation may occur at a force of 150 N. The cable must be able to move with it.
-
Page 50: Dismantling Of Escape Release (Order No. 570466 - 570 475)
6. Push the cable with the fork head [3] on the fork in the escape release. The slot nut [4] must be fitted into the nut again. 7. Tighten the nut [2] with 6 - 6,5 Nm. 8. Put the lid [1] back on. Operating Manual PSEN ml b 1.1/2.1/2.2 | 50 1003884-EN-12... -
Page 51: Auxiliary Release
Max. torque setting: 1 Nm Deactivated To activate the auxiliary release the button handle must be unscrewed and then screwed back on to the piston rod rotated 180°. Activated Operating Manual PSEN ml b 1.1/2.1/2.2 | 51 1003884-EN-12... -
Page 52: Adjustment
M5 screw for an M5 locking screw. 3. Tighten up the M5 screw or M5 locking screw. Please note the max. torque setting stated in the Technical details [ 65]. Operating Manual PSEN ml b 1.1/2.1/2.2 | 52 1003884-EN-12... -
Page 53: Operation
The safety switch is started Green Yellow Yel- Green Safety gate open, actuator not de- tected, guard locking deactivated Green Yel- Safety gate closed, actuator detec- ted, guard locking deactivated Green Yellow Yel- Operating Manual PSEN ml b 1.1/2.1/2.2 | 53 1003884-EN-12... - Page 54 If safety inputs voltage Yellow Yel- S31 and S41 are activated or de- activated while an undervoltage warning is present, the safety switch switches to a fault condition. Operating Manual PSEN ml b 1.1/2.1/2.2 | 54 1003884-EN-12...
-
Page 55: Error Display
Display not definitive Safety switch Change the safety switch. does not start Display not Wrong actuator Use only approved combinations Dis- definitive (see Approved play combinations [ 11]) Green Yellow defin- itive Operating Manual PSEN ml b 1.1/2.1/2.2 | 55 1003884-EN-12... -
Page 56: Checks And Maintenance
If one of these conditions is not met, the signal at the safety outputs will be low. Escape release Test whether the button of the escape release pin can be detected and reached. Check the function of the escape release. Operating Manual PSEN ml b 1.1/2.1/2.2 | 56 1003884-EN-12... -
Page 57: Dimensions
Dimensions Dimensions Actuator without center ring, rear view PSEN ml 1.1/PSEN ml 2.1 actuator 61,7 PSEN ml 1.1/PSEN ml 2.1 round ac- tuator Safety switch Actuator Operating Manual PSEN ml b 1.1/2.1/2.2 | 57 1003884-EN-12... - Page 58 Dimensions Mounting plate (see Accessories [ 75]) Fig.: Order no.: 570 490 Operating Manual PSEN ml b 1.1/2.1/2.2 | 58 1003884-EN-12...
- Page 59 Dimensions Mounting bracket for sliding gate (see Accessories [ 75]) Fig.: Order no.: 570 492 Operating Manual PSEN ml b 1.1/2.1/2.2 | 59 1003884-EN-12...
- Page 60 Dimensions Mounting bracket for swing gate (see Accessories [ 75]) 15,5 69,5 89,5 Fig.: Order no.: 570 493 15,5 89,5 69,5 Fig.: Order no.: 570 494 Operating Manual PSEN ml b 1.1/2.1/2.2 | 60 1003884-EN-12...
- Page 61 Dimensions Mounting bracket with handle unit for sliding gate (see Accessories [ 75]) Fig.: Order no.: 570 495 Operating Manual PSEN ml b 1.1/2.1/2.2 | 61 1003884-EN-12...
- Page 62 Dimensions Mounting bracket with handle unit for swing gate (see Accessories [ 75]) 69,5 Fig.: Order no.: 570 496 Operating Manual PSEN ml b 1.1/2.1/2.2 | 62 1003884-EN-12...
- Page 63 Dimensions 79,5 Fig.: Order no.: 570 497 Operating Manual PSEN ml b 1.1/2.1/2.2 | 63 1003884-EN-12...
- Page 64 Dimensions L-bracket for the safety switch (see Accessories [ 75]) 19,2 193,5 217,2 178,8 Fig.: Order no.: 570 476 Distance between safety switch mounting surface and actuator mounting surface 69,5 Operating Manual PSEN ml b 1.1/2.1/2.2 | 64 1003884-EN-12...
-
Page 65: Technical Details
40 mA 40 mA Inputs 570404 570402 570400 Number Voltage at inputs 24 V DC 24 V DC 24 V DC Current at solenoid input 500 mA 500 mA 500 mA Operating Manual PSEN ml b 1.1/2.1/2.2 | 65 1003884-EN-12... - Page 66 40 °C 40 °C Ambient temperature In accordance with the standard EN 60068-2-14 EN 60068-2-14 EN 60068-2-14 Temperature range 0 - 60 °C 0 - 60 °C 0 - 60 °C Operating Manual PSEN ml b 1.1/2.1/2.2 | 66 1003884-EN-12...
- Page 67 50,000 cycles 50,000 cycles Holding force FZh Fixing screws in paral- lel to actuator 7.500 N 7.500 N 7.500 N Fixing screws side-on to actuator 5.000 N 5.000 N 5.000 N Operating Manual PSEN ml b 1.1/2.1/2.2 | 67 1003884-EN-12...
- Page 68 40 mm 40 mm 40 mm Depth 67,2 mm 67,2 mm 67,2 mm Weight of safety switch 950 g 950 g 950 g Weight of actuator 145 g 145 g 145 g Operating Manual PSEN ml b 1.1/2.1/2.2 | 68 1003884-EN-12...
- Page 69 Technical details Mechanical data 570404 570402 570400 Weight 1.100 g 1.100 g 1.100 g Where standards are undated, the 2015-11 latest editions shall apply. Operating Manual PSEN ml b 1.1/2.1/2.2 | 69 1003884-EN-12...
-
Page 70: Classification According To Zvei, Cb24I
1,5 nF Safe 1-pole HL outputs Source Drain Safety switch Evaluation device C1, C2 Source parameters Min. Typ. Max. Test impulse duration 450 µs Rated current 0,1 A Capacitive load 70 nF Operating Manual PSEN ml b 1.1/2.1/2.2 | 70 1003884-EN-12... -
Page 71: Safety Characteristic Data
PAScal software tool to calculate the safety function's SIL/PL values. NOTICE Be sure that you observe the mechanical life. The safety characteristic data are only valid as long as the values of mechanical life are met. Operating Manual PSEN ml b 1.1/2.1/2.2 | 71 1003884-EN-12... -
Page 72: Supplementary Data
2) this product must accept any interference received, including interference that may cause undesired operation. Changes or modifications made to this product not expressly approved by Pilz may void the FCC authorization to operate this equipment. NOTE: This equipment has been tested and found to comply with the limits for a Class A digital device, pursuant to Part 15 of the FCC Rules. -
Page 73: Technical Details For Escape Release 570460 - 570462, 570470
570471 570472 570473 Certifications Mechanical data 570471 570472 570473 Release force escape re- lease 80 N 80 N 80 N Service life escape re- lease 6050 cycles 6050 cycles 6050 cycles Operating Manual PSEN ml b 1.1/2.1/2.2 | 73 1003884-EN-12... -
Page 74: Technical Details Escape Release 570474-570475
Technical details for auxiliary release 570461 General Certifications Environmental data Temperature range 0 - 60 °C Mechanical data Release force escape release 80 N Service life escape release 6050 cycles Weight 100 g Operating Manual PSEN ml b 1.1/2.1/2.2 | 74 1003884-EN-12... -
Page 75: Order Reference
Mechanical safety gate system with 8-pin M12 connector 570400 guard locking, coded, for single con- nection PSEN ml b 1.1 unit r Mechanical safety gate system with 8-pin M12 connector 570438 guard locking, coded, for single con- nection, PSEN ml 1.1 round actuator PSEN ml b 1.1... - Page 76 Screw set for installing the actuator on a mounting bracket for swing 570498 bracket swinging gates, with 2 hexagonal socket head screws and 1 tamper-proof door pan head locking screw, M5x12 Operating Manual PSEN ml b 1.1/2.1/2.2 | 76 1003884-EN-12...
- Page 77 M12-8sf M12-8sm, male con- male con- nector, straight nector, straight PSEN ml / PSENcs M12, 8-pin fe- M12, 8-pin M12, 8-pin fe- 570489 Y junction M12 male connector male connector male connector Operating Manual PSEN ml b 1.1/2.1/2.2 | 77 1003884-EN-12...
-
Page 78: Appendix
We recommend that you keep the completed check list and store it with the machine docu- mentation for reference. Date Action Safety Actuator OK Not OK Notes Signature switch Number Number Operating Manual PSEN ml b 1.1/2.1/2.2 | 78 1003884-EN-12... -
Page 79: Ec Declaration Of Conformity
European Parliament and of the Council. The complete EC Declaration of Conformity is available on the Internet at www.pilz.com/downloads. Authorised representative: Norbert Fröhlich, Pilz GmbH & Co. KG, Felix-Wankel-Str. 2, 73760 Ostfildern, Germany Operating Manual PSEN ml b 1.1/2.1/2.2... - Page 80 We are represented internationally. Please refer to our homepage www.pilz.com for further details or contact our headquarters. Headquarters: Pilz GmbH & Co. KG, Felix-Wankel-Straße 2, 73760 Ostfildern, Germany Telephone: +49 711 3409-0, Telefax: +49 711 3409-133, E-Mail: info@pilz.com, Internet: www.pilz.com...
Need help?
Do you have a question about the PSEN ml b 1.1 and is the answer not in the manual?
Questions and answers