
Related Manuals for Spacetronik SPE-142


Summary of Contents for Spacetronik SPE-142
- Page 2 Warning / Warnung / Ostrzeżenie Make sure no obstacles are in the desk's path. Make sure the desktop is not touching any walls. Make sure all cords are appropriate length to accommodate the change in height. WARNING! PINCH POINT Keep Hands And Fingers Clear - Keep children away from electric height adjustable desk, control &...
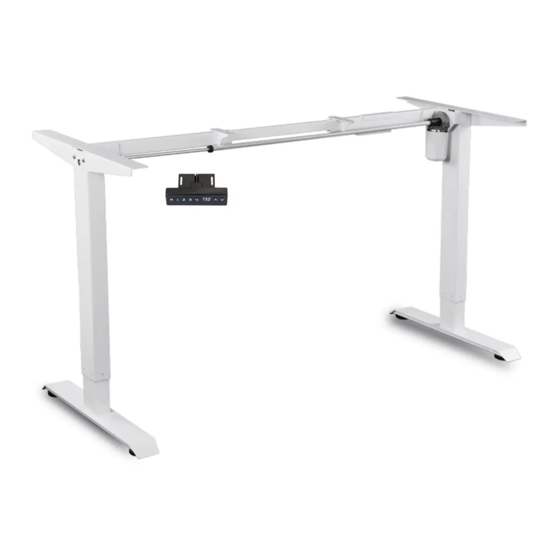
- Page 3 Parts & Components / Teile & Komponenten / Elementy składowe Tools Required / Werkzeuge benötigt / Wymagane narzędzia 4 mm Allen Wrench & Wrench (include) Phillips Head Screwdriver and/or Power Drill Components Included / / Elementy składowe Legs Feet Crossbar No.3 No.1 x2 No.2 x2...
- Page 4 Components Diagram / Komponentendiagramm / Zawartość opakowania Description / Beschreibung / Opis Legs / Beine / Nogi Feet /Füße / Stopa Crossbar / Querlatte / Poprzeczka Side Plate / Beilagenteller / Płyta boczna Control Box / Kontrollkasten / Zasilacz Handset / Regler / Sterownik Power Cord / Netzkabel / Kabel zasilający Lift Cables / Kabel / Hebekabel Leveling Studs / Nivellierbolzen / Kołki poziomujące...
- Page 5 Assembly Instruction / Bauanleitung / Instrukcja montażu BEFORE YOU BEGIN Lay out all Parts and Components to ensure that you have all the parts listed on the parts page. BEVOR SIE BEGINNEN Legen Sie alle Teile und Komponenten so aus, dass alle Teile auf der Teileseite aufgeführt sind.
- Page 6 Step 3 Assemble side plate with 4 M6x10 screws Sc hritt 3 Montieren Sie die Seitenplatte mit 4 M6x10- Schrauben K rok 3 Zamontuj płytę boczną za pomocą 4 śrub M6x10 S chritt 4 Step 4 1: Hängen Sie die Halterung an die Querstange und befes- 1: Hang bracket to crossbar and use M5x10 to fix tigen Sie die Steuerbox mit M5x10.
-
Page 7: Troubleshooting
Error Code Solution / Rozwiązywanie problemów Error Code Troubleshooting Issue 1. Wait 18 minutes. 2. Or Plug out power cable(until Control Box continous service over 5 handset without display), then plug minutes. in the power again. The error code will auto disappear. Check all lines are connected. -
Page 8: Up And Down
Operation Instruction / Bedienungsanleitung / Instrukcja operacji R ESET Press “DOWN” button and hold, the handset will display “rES” and the desk will fall to lowest position then rise slightly and display height. Release button Drücken Sie die Taste „DOWN“ und halten Sie sie gedrückt. Naciśnij przycisk „W DÓŁ”... - Page 9 Programming Setting Interface How to access the programming setting mode. Step 1: Press and hold “M” button until handset display “S_ _” then release Step 2: Press again “M” button then access setup mode Step 3: Press “Up” or “Down” to select the programing menu Step 4: Press “M”...
- Page 10 Programing Item / Programmierelement / Elementy programowania Please go to “PROGRAMMING SETTING INTERFACE" before proceeding to the below item settings 1Un - Change numeric display to show height in inch or centimeter Press “UP” or “DOWN” to get a selection “S1”...
- Page 11 5SH - Minimum and Maximum height settings Press “UP” or “DOWN” to get a selection. H1b - Original height setting. For example: The original display height is 70.0 and change it to 52.0, so the controller will display 52.0-97.0. This function not change real height. L1L - Lowest height setting.
- Page 12 9d - Fatigue testing setting, press „M” button, display „PH”, then press „1” button 5 times Press „UP” or „DOWN” button to get a selection. Then press „UP” until desk starts auto move „OFF” means turn off the test „S1” means the desk will test all the time without rest (No more than 20 minutes at a time) „S2”...
- Page 13 Hereby DMTrade Mikolaj Tomaszewski declares under our sole responsibility that the pro-ducts SPE142 are in conformity with following directives: MD (2006/42/EU), EMC (2014/30/EU), LVD (2014/35/EU), RoHS (2011/65/EU + 2015/863/EU). Full document (dec-laration of conformity) is available for download from www.dmtrade.pl. The WEEE symbol (the crossed-out wheeled bin) using indicates that this product is not home waste.
Need help?
Do you have a question about the SPE-142 and is the answer not in the manual?
Questions and answers