Table of Contents
Advertisement
Quick Links
Scan the QR code and select the Manuals and Support quick links from
the product page for the most up-to-date manual information.
Scannen Sie den QR-Code und wählen Sie auf der Produktseite
die Quicklinks Handbücher und Unterstützung, um die aktuellsten
Scannez le code QR et sélectionnez les liens rapides Manuals and Support
sur la page du produit pour obtenir les informations les plus récentes sur
Scannerizzare il codice QR e selezionare i Link veloci Manuali e Supporto
dalla pagina del prodotto per le informazioni manuali più aggiornate.
Instruction Manual
Bedienungsanleitung
Manuel d'utilisation
Manuale di Istruzioni
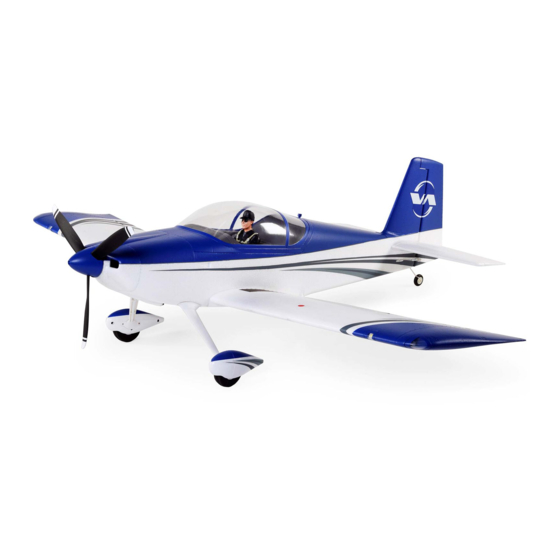
RV-7 1.1m
Informationen zu Handbücher.
le manuel.
EFL01850
EFL01875
Advertisement
Table of Contents
Troubleshooting

Subscribe to Our Youtube Channel
Related Manuals for Horizon Hobby E-FLITE RV-7 1.1m


Summary of Contents for Horizon Hobby E-FLITE RV-7 1.1m
- Page 1 RV-7 1.1m Scan the QR code and select the Manuals and Support quick links from the product page for the most up-to-date manual information. Scannen Sie den QR-Code und wählen Sie auf der Produktseite die Quicklinks Handbücher und Unterstützung, um die aktuellsten Informationen zu Handbücher.
-
Page 2: Safety Precautions And Warnings
This product is not intended for use by children without direct adult supervision. Do not use with incompatible components or alter this product in any way outside of the instructions provided by Horizon Hobby, LLC. This manual contains instructions for safety, operation and maintenance. -
Page 3: Table Of Contents
Box Contents Quick Start Information 1. Blank (Acro) Model 2. Wing Type: 1 Aileron, 1 Flap Transmitter Setup 3. Servo Reversing: All Channels Normal 4. Travel Adjust (All Surfaces): 100% High Rate Low Rate p = 16mm p = 12mm Aileron q = 16mm q = 12mm... -
Page 4: Select Technology Bnf
SAFE Select Technology BNF ® The BNF Basic version of this airplane includes SAFE Select technology which can SAFE Select can be configured three ways: offer an extra level of protection in flight. Use the following instructions to make the •... -
Page 5: Model Assembly
WARNING: Before proceeding, remove the spinner and propeller from the motor shaft. Never attempt to program the radio components, assemble the aircraft or perform maintenance of any kind without removing the propeller or engaging throttle cut. Serious injury could result if the motor starts inadvertently with the propeller still attached. - Page 6 Connect the Pushrods to the Control Surfaces Horns Arms Control Horn and Servo Arm Settings The table to the right shows the factory settings for the control horns and servo arms. Fly the aircraft at factory settings before making changes. Elevator NOTICE: If control throws are changed from the factory settings, the AR631 gain values may need to be adjusted.
- Page 7 Landing Gear Installation M3 x 10mm counter sunk Mount the Landing Gear to the Fuselage machine screw 1. Determine the left and right side inserts. There is a left and right indicator marked on the inside of the insert. 2. Insert the landing gear and inserts into the slots in the fuselage and secure using two M3 x 10mm screws for each landing gear assembly, as shown.
-
Page 8: Receiver Selection And Installation Pnp
Receiver Selection and Installation PNP The recommended receiver for this aircraft is the Spektrum AR631. If you choose to AR631 Port Assignments install a different receiver, ensure that it is at least a 6-channel full range receiver. BND/PRG = BIND/Lights Refer to the manual of your chosen receiver for correct installation and operation 1 = Throttle 4 = Rudder... -
Page 9: General Binding Tips And Failsafe Bnf
General Binding Tips and Failsafe BNF • The included receiver has been specifically programmed for operation of this • Once bound, the receiver will retain its bind settings for that transmitter until you aircraft. Refer to the receiver manual for correct setup if the receiver is replaced. re-bind. -
Page 10: Control Surface Centering
Control Surface Centering After assembly and transmitter setup, confirm that the control surfaces are centered. The model must be powered, bound to the transmitter in AS3X mode, with the throttle left at zero. When enabled, SAFE mode is active at power up. AS3X mode is activated when the throttle is raised above 25% for the first time 90˚... -
Page 11: Integrated Esc Telemetry
Integrated ESC Telemetry BNF: This aircraft includes telemetry between the ESC and receiver, which can Telemetry Setup provide information including RPM, voltage, motor current, throttle setting (%), and 1. Begin with the transmitter bound to the receiver. FET (speed controller) temperature. 2. -
Page 12: Center Of Gravity (Cg)
Center of Gravity (CG) The CG location is measured from the leading edge of the wing at the root. 56mm back from the leading edge. Check the CG with the aircraft inverted. NOTICE: Install the battery and hatch but do not arm the ESC while checking the CG. -
Page 13: Control Response Test Bnf
AS3X Control Response Test BNF ® WARNING: Do not perform any testing or maintenance with the propeller Aircraft movement AS3X Reaction installed on the aircraft. Serious injury or property damage could result from the motor starting inadvertently. This test ensures that the AS3X control system is functioning properly. Assemble the aircraft and bind your transmitter to the receiver before performing this test. -
Page 14: Flying Tips And Repairs
Flying Tips and Repairs Consult local laws and ordinances before choosing a flying location. NOTICE: If a crash is imminent, reduce the throttle and trim fully. Failure to do so Flying Field could result in extra damage to the airframe, as well as damage to the ESC and motor. -
Page 15: In Flight Trimming Bnf
In Flight Trimming BNF During your first flight, trim the aircraft for level flight at 3/4 throttle with flaps up. Make small trim adjustments with your transmitter’s trim switches to straighten the aircraft’s flight path. 3 Seconds After adjusting the trim, do not touch the control sticks for 3 seconds. This allows the receiver to learn the correct settings to optimize AS3X performance. -
Page 16: Troubleshooting Guide
Troubleshooting Guide Problem Possible Cause Solution Throttle not at idle and/or throttle trim too high Reset controls with throttle stick and throttle trim at lowest setting Aircraft will not Throttle servo travel is lower than 100% Make sure throttle servo travel is 100% or greater respond to throttle but responds to other Throttle channel is reversed... -
Page 17: Replacement Parts
Replacement Parts Recommended Items Part # Description Part # Description EFL01876 Fuselage: RV-7 1.1m SPMR6775 NX6 Transmitter Only EFL01877 Wing: RV-7 1.1m SPMX224S50 14.8V 2200mAh 4S 50C Smart LiPo G2: IC3 EFL01878 Horizontal Stab: RV-7 1.1m SPMXCA300 LiPo Charge Protection Bag, Large EFL01879 Rudder: RV-7 1.1m SPMXC1000... -
Page 18: Limited Warranty
(iii) modification of or to any part process found on our website or call Horizon to obtain a Return Merchandise of the Product, (iv) attempted service by anyone other than a Horizon Hobby authorized Authorization (RMA) number. Pack the Product securely using a shipping carton. -
Page 19: Fcc Information
Champaign, IL 61822 USA Directive - Amending 2011/65/EU Annex II 2015/863. EU Importer of Record: RV-7 BNF Basic (EFL01850); Hereby, Horizon Hobby, LLC declares that the device Horizon Hobby, GmbH is in compliance with the following: EU Radio Equipment Directive 2014/53/ Hanskampring 9 EU;... - Page 20 E-flite, Avian, DSM, DSM2, DSMX, Bind-N-Fly, BNF, the BNF logo, Plug-N-Play, AS3X, SAFE, the SAFE logo, ModelMatch, IC3, EC3, and the Horizon Hobby logo are trademarks or registered trademarks of Horizon Hobby, LLC. The Spektrum trademark is used with permission of Bachmann Industries, Inc.
Need help?
Do you have a question about the E-FLITE RV-7 1.1m and is the answer not in the manual?
Questions and answers