
Related Manuals for ekwb EK-Classic 160 SPC PWM D-RGB


Summary of Contents for ekwb EK-Classic 160 SPC PWM D-RGB
- Page 1 EK-Classic Pump Reservoir 160 / 260 SPC PWM D-RGB PUMP-RESERVOIR COMBO INSTALLATION AND MOUNTING MANUAL 1st Revision, Jun 4th 2020...
- Page 2 The following instructions are subject to change without notice. Please visit our web site at www.ekwb.com for updates. Before installation of this product please read important notice, disclosure and warranty conditions printed on the back of the box.
- Page 3 TABLE OF CONTENT INSTALLING THE ASSEMBLY USING ENCLOSED BRACKET (Bracket - XRES Classic Spider - OPTION 1) INSTALLING THE ASSEMBLY - OPTION 2 ATTACHING THE FITTINGS CONNECTING THE D-RGB LED STRIP SUPPORT AND SERVICE SOCIAL MEDIA - 3 -...
- Page 4 BRACKET (Bracket - XRES Classic Spider - OPTION 1) If you have an option to mount the assembly on 120mm fan or Bracket – XRES Classic Spider 120mm FAN mounting holes, EKWB recommends enclosed spider assembly M4 × 4mm screw mount - Bracket –...
- Page 5 INSTALLING THE ASSEMBLY - OPTION 2 The assembly can be mounted on any flat surface inside your computer chassis. One must drill four (4) 4.2mm holes using powerdrill in a 50x50mm square pattern. Please follow these steps: 1. Screw on Vibration Dampers on Custom SPC Screws. 2.
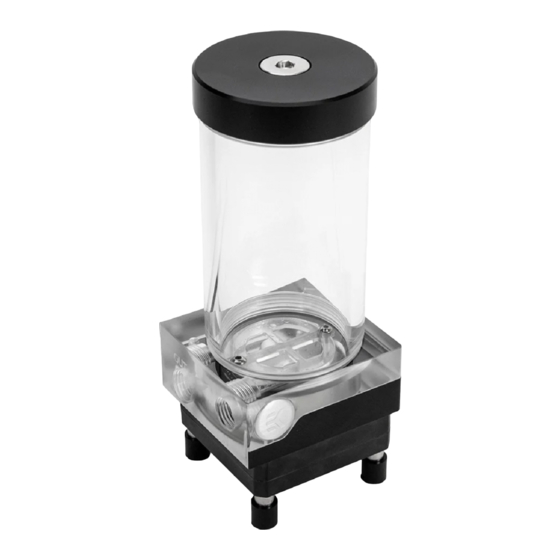
- Page 6 EK-Classic Pump Reservoir 160 / 260 SPC PWM D-RGB series reservoir pump combo featured 2 (two) G1/4 threaded opening on the main body of which are inlet and outlet (clearly marked with ‘OUT’). EKWB recommends using EK-ACF fittings with the EK-XRES SPC series reservoir pump combo units.
- Page 7 CONNECTING THE D-RGB LED STRIP STEP 1 Plug in the 3-pin D-RGB connector from your GPU Water Block to a D-RGB header on your motherboard or controller. The LED Strip will only work if the pin layout on the header is as follows: +5V, Digital, Empty, Ground.
- Page 8 SUPPORT AND SERVICE For assistance please contact: http://support.ekwb.com/ EKWB d.o.o. Pod lipami 18 1218 Komenda Slovenia - EU SOCIAL MEDIA EKWaterBlocks @EKWaterBlocks ekwaterblocks EKWBofficial ekwaterblocks...
Need help?
Do you have a question about the EK-Classic 160 SPC PWM D-RGB and is the answer not in the manual?
Questions and answers