Table of Contents
Advertisement
Quick Links
Advertisement
Table of Contents

Related Manuals for Plura PBM-4K Series


Summary of Contents for Plura PBM-4K Series
- Page 1 Operating Instructions PBM-224-4K-Dual PBM-4K "COMPREHENSIVE AND POWERFUL4K/UHD" Series PBM-217-4K / PBM-217-4K-DUAL PBM-224-4K / PBM-224-4K-DUAL PBM-324-4K PBM-232-4K PBM-332-4K PBM-243-4K PBM-249-4K PBM-255-4K PBM-265-4K PBM-286-4K Re-imagine Beyond Technology sales@plurainc.com...
-
Page 2: Table Of Contents
Operating Instructions PBM-4K SERIES • PRECAUTION ------------------------------------------------------------------------------------------------------- 5 • OVERVIEW---------------------------------------------------------------------------------------------------------- 8 • ADVANCED FEATURES -------------------------------------------------------------------------------------------- 8 • FUNCTIONAL EXPLANATION OF EACH PART------------------------------------------------------------------- 10 ------------------------------------------------------------------------------------------------------- 10 RONT ANEL PBM-224-4K---------------------------------------------------------------------------------------------------- 10 Front Keys Arrangements ------------------------------------------------------------------------------------- 10 Front Keys Operations ----------------------------------------------------------------------------------------- 11 ... - Page 3 Operating Instructions PBM-4K SERIES ------------------------------------------------------------------------------------------------------------- 18 DJUST ------------------------------------------------------------------------------------- 18 OLOR EMPERATURE ONTROL ------------------------------------------------------------------------------------------------------ 19 SPECT ATIO ------------------------------------------------------------------------------------------------- 19 ----------------------------------------------------------------------------------------------------- 20 EAKING ILTER ------------------------------------------------------------------------------------------------------- 20 ALSE OLOR HDR M -------------------------------------------------------------------------------------------------------- 20 ----------------------------------------------------------------------------------------------------- 21 UTPUT ANGE • AUDIO MENU OPTIONS ---------------------------------------------------------------------------------------- 21...
- Page 4 Operating Instructions PBM-4K SERIES ---------------------------------------------------------------------------- 31 APTION ORTH MERICAN ARKET ID ------------------------------------------------------------------------------------------------------------- 32 ------------------------------------------------------------------------------------------------------- 32 IDEO ANGE • OSD TREE ---------------------------------------------------------------------------------------------------------- 33 1. V --------------------------------------------------------------------------------------------------------------- 34 IDEO 2. A --------------------------------------------------------------------------------------------------------------- 35 UDIO 3. M ------------------------------------------------------------------------------------------------------------- 36 ARKER 4. GPI ----------------------------------------------------------------------------------------------------------------- 37 5.
-
Page 5: Precaution
Operating Instructions PBM-4K SERIES • PRECAUTION Before operating this unit, please read this manual carefully. WARNING: To reduce the risk of any electric shock, please do not remove the back cover. No user serviceable parts inside. Refer any service matters to qualified service personnel. - Page 6 This product should be moved with care. Quick stops, excessive force and uneven surfaces may cause the product damages. Accessories Do not use accessories not recommended by PLURA Inc. as they may cause hazards. Ventilation Do not block any of the ventilation openings.
- Page 7 Operating Instructions PBM-4K SERIES If the product exhibits a distinct change in performance. 17. Safety Check Upon completion of any service or repairs to this product, ask the service technician to perform safety checks to determine that the product is in proper operating condition and the warranty seal is provided 18.
-
Page 8: Overview
(i.e. additional features and functionalities) can and will be implemented in the field via the Ethernet interface. The PBM-4K series comes in multiple sizes 17”, 24”, 32”, 43”, 55” & 65” & 84”, all sizes offer the extensive and well-know Plura prominent features. - Page 9 Operating Instructions PBM-4K SERIES Various and User defined Markers Display, Safe Area Programmable 6 User Front Pushbutton Controls & GPI Closed Caption (608/708) – North American Market Cutting edge De-interlacing and Scaling Technology Fast Response Time for high motion video ...
-
Page 10: Functional Explanation Of Each Part
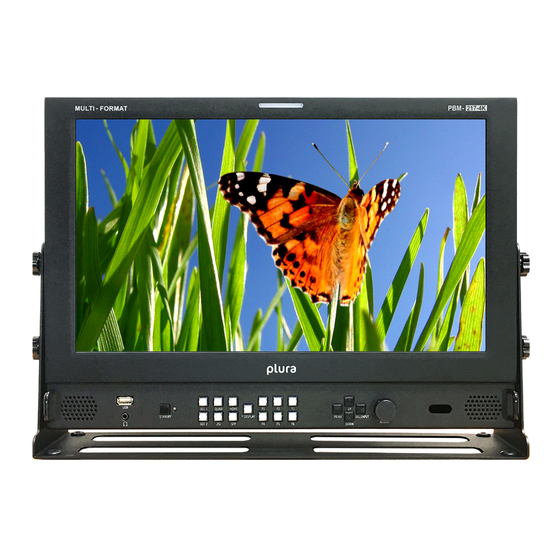
Operating Instructions PBM-4K SERIES Functional explanation of each part 1. Front Panel Tally LED PBM-224-4K Speaker Headphone Front Key Front Keys Arrangements Re-imagine Beyond Technology sales@plurainc.com... -
Page 11: Front Keys Operations
Operating Instructions PBM-4K SERIES Front Keys Operations Key Name Operation ►Power ON/OFF Button. STANDBY SDI 1 ► Select SDI 1. SDI 2 ► Select SDI 2. QUAD ► Select QUAD. ► Select 2SI. HDMI ► Select HDMI. ► Select SFP. -
Page 12: Rear Panel
Operating Instructions PBM-4K SERIES 2. Rear Panel I/O Details DC Battery IN PIN NO Description 2 , 3 DC IN 12V PBM-217-4K ONLY DC IN 24V PBM-224-4K & PBM-324-4K ONLY 12-24V RJ-45 Connections CONTROL LAN 1 CONTROL LAN 2... -
Page 13: Interface Description
Operating Instructions PBM-4K SERIES - Firmware Upgrade/ System Controller / Ember+ (Ethernet) & GPI Remote PIN Assignment 8 PIN COMMON(GND) 4 PIN GPI 4 PORT GPI 7 PORT 7 PIN 3 PIN GPI 3 PORT (STAND BY/POWER ON/OFF) 6 PIN... -
Page 14: Menu Overview
Operating Instructions PBM-4K SERIES • MENU OVERVIEW In this system menu, there are several ways to maneuver the menu settings. Most menus consist of three levels to select the necessary option, but some settings require greater depth. If you press the MENU button, the first and second level of the menu system will appear on the monitor screen. -
Page 15: Basic Operation
Operating Instructions PBM-4K SERIES • BASIC OPERATION Turning On the Monitor Firstly, make sure you have connected the AC power cord or DC XLR connector. The monitor will switch to standby or power on mode. If the monitor is in standby mode, press the ST-BY button to turn on the monitor. -
Page 16: On Screen Menus Selection And Adjustment
Operating Instructions PBM-4K SERIES • On Screen Menus Selection and Adjustment How to adjust the OSD screen 1. Press the MENU button and then UP/DOWN button to select each menu. button and then use UP/DOWN (SEL/INPUT)/MENU button to display the 2. -
Page 17: Select Video Input
Operating Instructions PBM-4K SERIES • SELECT VIDEO INPUT 1. How to Select Video Source by OSD 1. Press the SET/INPUT button and then UP/DOWN button to select the required video source. 2. Press the SET/INPUT button to select the desired video source. -
Page 18: Video Menu Options
Operating Instructions PBM-4K SERIES • VIDEO MENU OPTIONS 1. Adjust - Adjust the values of Brightness, Contrast, Color, Tint and Sharpness range from -50 to 50 2. Color Temperature Control - For Setting the Color temperature or adjusting RGB gain value - User (User setting RGB gain value), VAR(3200K ~ 9300K), Most common value ( 9300K, 6500K, 5400K,3200K) and 3D LUT Calibration value(D65 –... -
Page 19: Aspect Ratio
Operating Instructions PBM-4K SERIES 3. Aspect Ratio - For setting the aspect ratio. - Pixel to Pixel: Video input will match the video display resolution (NO Scaling). If input resolution is higher than panel resolution, the video will be downscaled to match the panel resolution. -
Page 20: Peaking Filter
Operating Instructions PBM-4K SERIES 5. Peaking Filter -Peaking Filter: Peaking Filter On/Off. -Peaking Color: Red/Blue/White/Violet. -Peaking Level: 0~100. 6. False Color - False Color on/off 7. HDR Mode - ST 2084-300 / ST 2084-1000 / ST 2084-10000 / Re-imagine Beyond Technology... -
Page 21: Output Range
Operating Instructions PBM-4K SERIES 8. Output Range - Normal (16~235)/Full (0~255) • AUDIO MENU OPTIONS 1. SDI Output Re-imagine Beyond Technology sales@plurainc.com... -
Page 22: Level Meter
Operating Instructions PBM-4K SERIES - Select primary or secondary audio group to extract. (Group 1~4) - Audio output channel source select. (Channel1~4, Channel1/2, Channel3/4, off) 2. Level Meter - Display the audio level meter on screen in SDI input. -Pair: Respectively By Audio Pair (L&R) display -Group: Respectively By Audio Group display - Level Meter Position selects. -
Page 23: Volume
Operating Instructions PBM-4K SERIES 3. Volume - Adjust the speaker or headphone Volume level. (0~32) Re-imagine Beyond Technology sales@plurainc.com... -
Page 24: Marker Menu Options
Operating Instructions PBM-4K SERIES • Marker MENU OPTIONS 1. Marker & User Marker - Marker : 16:9, 4:3, 14:9, 13:9, 1.85:1, 2.35:1, 1.85:1&4:3, User1, User2, User3 (Customized markers). - User Marker: The user defined Marker size setting. 2. Safety Area -Safety Area: Draw dotted line Marker on screen. -
Page 25: Center Maker
Operating Instructions PBM-4K SERIES 3. Center Maker - “+” display Marker on center of screen 4. Marker Width -Marker line thickness setting. (0~10) 5. Marker Color - Marker Line Color: Select Marker line color (White, Yellow, Blue, RED, Black) - Safety Line Color: Select Safety line color (White, Yellow, Blue, RED, Black) - Marker Back Color: Select Marker Back Color. -
Page 26: Gpi Menu Options
Operating Instructions PBM-4K SERIES • GPI MENU OPTIONS 1. GPI Control & GPI Ports - For programming selected functions to particular GPI ports. - GPI Controller can be utilized to remotely control the monitor. - GPI Control: GPI function Enable/Disable... -
Page 27: Setup Menu Options
Operating Instructions PBM-4K SERIES Menu Key, Enter Key, Up Key, Down Key Use the key function by GPI. Left Key, Right Key Function key1 ~ 6 Function key1 ~ 6 H/V delay H delay, V delay, HV delay, Off Aspect Full Screen, 16:9, 4:3, 14:9, 13:9, 1.85:1,... -
Page 28: Function 1 ~6
Operating Instructions PBM-4K SERIES - Factory Default: User Reset. 2. Function 1 ~6 - Function 1~6: Select the required function to be allocated to the FUNCTION Keys 1, 2, 3, 4, 5, 6. Function1~6 button Description UNDEF Not set (no function allocated) -
Page 29: O Nscreen Display
Operating Instructions PBM-4K SERIES 3. On Screen Display OSD Option OSD Transparency: Disable blending OSD background with video image. OSD Time out: OSD time display setting. (3~200) Time code Time code Enable: Time code Display (off/LTC/DVITC, SDI only) Time code size: Time code size select. -
Page 30: Advanced
Operating Instructions PBM-4K SERIES UMD BG Color: UMD BG color Select (RGB_255_192_128_Transparent) 4. Advanced - Information, Control, Screen Control, Network Configuration Information - Version, Release day, Release time, operating time, FPGA Version Control - FRONT LED: Front LED on/off - Local Enable: Power, up and down key is only operational, if Local enable is off. -
Page 31: Network Configuration
Operating Instructions PBM-4K SERIES Inverter dimming Level select (0~100) -Gamma Select Gamma Level Select (0.8 ~ 3.0) - Internal Pattern: 100% Color Bars, 75% Color Bars, Luma, RGB, White, Black, RED, Blue, Green Network Configuration DHCP: DHCP on/off (Manual IP settings – DHCP on) * “Apply”... -
Page 32: Set Id
Operating Instructions PBM-4K SERIES 6. Set ID - Set ID is required for remote control. Set ID range (01~99). 7. Video Range -Range Check: Range Check on/off. -Y Max: Maximum luminance level. -Y Min: Minimum luminance level. -C Max: Maximum chroma level. -
Page 33: Osd Tree
Operating Instructions PBM-4K SERIES • OSD TREE Re-imagine Beyond Technology sales@plurainc.com... -
Page 34: Video
Operating Instructions PBM-4K SERIES 1. Video Re-imagine Beyond Technology sales@plurainc.com... -
Page 35: Audio
Operating Instructions PBM-4K SERIES 2. Audio Re-imagine Beyond Technology sales@plurainc.com... -
Page 36: Marker
Operating Instructions PBM-4K SERIES 3. Marker Re-imagine Beyond Technology sales@plurainc.com... -
Page 37: Gpi
Operating Instructions PBM-4K SERIES 4. GPI Re-imagine Beyond Technology sales@plurainc.com... -
Page 38: Setup
Operating Instructions PBM-4K SERIES 5. Setup Re-imagine Beyond Technology sales@plurainc.com... - Page 39 Operating Instructions PBM-4K SERIES Contact Us U.S.A. Corporate Offices: Plura Broadcast, Inc. Ph: +1-602-944-1044 Sales@plurainc.com GERMANY Plura Europe GmbH Ph: +49-6725-918006-70 Sales@plurainc.com U.A.E. Plura MEA Ph: +971-50-715-9625 Sales@plurainc.com S. KOREA Plura Asia Ph: +82-10-6688-8826 Sales@plurainc.com Re-imagine Beyond Technology sales@plurainc.com...
Need help?
Do you have a question about the PBM-4K Series and is the answer not in the manual?
Questions and answers