
Related Manuals for Plura PBM-070


Summary of Contents for Plura PBM-070
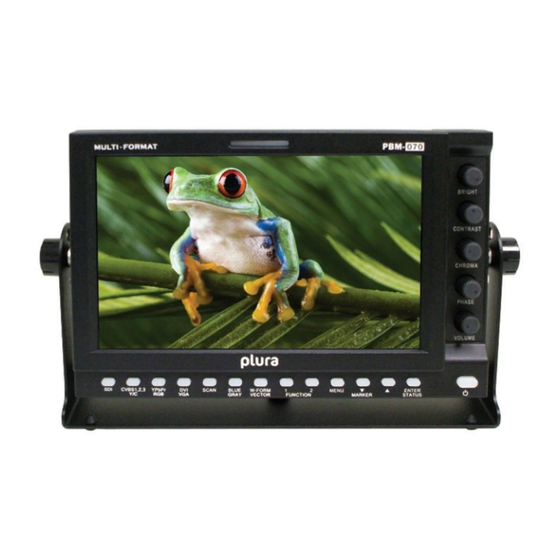
- Page 1 Operating Instructions Multi Format HD Broadcast Monitor PBM-070 (7”) PBM-070X (7”)
-
Page 2: Important Safety Instructions
Important Safety Instructions Please read this manual thoroughly before operating the monitor. Unplug monitor from the wall outlet before cleaning the LCD screen. Do not use liquid cleaners or aerosol cleaners. Use ONLY a damp cloth provided. Don’t use any unauthorized accessories not recommended by the manufacturer as they may cause hazards. -
Page 3: Fcc Notice
FCC Notice This device complies with Part 15 of FCC Rules. Operation is subject to the following two conditions: (1)This device may not cause harmful interference, and (2) this device must accept any interference received, including interference that may cause undesired operation. To assure continued compliance, follow the attached installation instruction and do not make any unauthorized modifications. -
Page 4: Safety Precautions
Safety Precautions WARNING: CAUTION TO REDUCE THE RISK OF FIRE OR SHOCK HAZARD, DO NOT EXPOSE THIS EQUIPMENT TO RAIN OR MOISTURE. RISK OF ELECTRICAL SHOCK TO REDUCE THE RISK OF FIRE OR SHOCK HAZARD, DO NOT OPEN KEEP THIS EQUIPMENT AWAY FROM ALL LIQUIDS. USE AND STORE ONLY IN LOCATIONS WHICH ARE NOT EXPOSED TO THE RISK OF DRIPPING OR SPLASHING CAUTION: TO REDUCE THE ELECTRICK SHOCK. - Page 5 Safety Precautions continued Caution for AC Power Cord FOR YOUR SAFETY PLEASE READ THE FOLLOWING TEXT CAREFULLY. Appropriate AC Power Cord must be used in each local area. FOR CONTINENTAL EUROPE, ETC FOR U.K. ONLY Not for use in the U.K. If the plug supplied is not suitable for your socket outlet, it should be cut off and appropriate one fitted.
-
Page 6: Table Of Contents
Contents 1. Outline ........................7 2. Main Features ......................7 3. Controls and Functions ....................8 3-1. Front Panel ......................8 3-2. Rear Panel ....................... 10 3-3. Tally & Audio ....................11 3-4. Function Buttons for FUNCTION 1 and FUNCTION 2 ........13 4. -
Page 7: Outline
1. Outline The PLURA PBM-070/PBM-070X is a comprehensiveand powerful monitor that consists of true black wide screen 7” LCD with LED backlighting technology that gratifies all type of users. The PBM-070/PBM-070X Series supports HD / SD-SDI, RGB, Component and Composite signals. -
Page 8: Controls And Functions
3. Controls 3-1. Front Panel Front Push Buttons PBM–070 STANDBY Power ON/OFF Button. SDI INPUT SELECT This is for selecting SDI Input. Additional OSD LOGO is displayed. CVBS 1, CVBS 2, CVBS3 Y/C (S-VIDEO) INPUT SELECT This is for selecting CVBS & S-Video Input. Additional OSD LOGO is displayed. Each time the user presses this button, it converts CVBS1,2,3 Mode. - Page 9 3. Controls continued MENU When pressing this button, the OSD MENU is displayed. Please refer to section 6 “OSD MENU DISPLAY” for more detailed information. Marker ( This activates the marker display function When using the OSD Menu, this works as a Down Button.
-
Page 10: Rear Panel
3. Controls continued 3-2. Rear Panel Rear PBM-070/PBM-070X Use only the designated power cord to ensure the Safety and EMC regulation for the specific country of use. - Page 11 3. Controls continued SDI 1 Input Terminal ,BNC These connectors are for HD/SD-SDI input signal and support SMPTE standard and 16 ch. audio signals. SDI LOOP OUT Active Terminal ,BNC Output terminals for HD/SD-SDI signals. CVBS (Composite) 1,2,3 /Y, Pr, Pb / G, R, B / Y,C Input Terminal (BNC) This is the Analog input terminal.
-
Page 12: Tally & Audio
3. Controls continued 3-3. Tally & Audio 1. Tally Tally Lamp Three Tally Colors are supported by external contact terminal GPI 5 ON=> RED, GPI 6 ON GREEN, GPI 5&6 ON => YELLOW 2. Audio Input/Output Analog Audio L/R Input Terminal (RCA Phone Jack) Analog Audio L/R Input Terminal The external audio signal is available through the speaker by a Menu setting Analog Audio L/R Output Port (Stereo Pin Jack) -
Page 13: Function Buttons For Function 1 And Function 2
3. Controls continued 3-4. Function Buttons for FUNCTION 1 and FUNCTION 2 Used to select the functions to be assigned to individual buttons F1 and F2 (front-panel buttons). Selectable Functions: Note: H/V Delay On/Off When the input modes are DVI, PC-RGB signal, the following functions are not available: Blue Only-Grayscale On/Off Audio Display On/Off... -
Page 14: Input Select Menu
4. Display Status continued 1. Audio Level Meter Display Set “ON/OFF” and “ Position” from the Audio Level Display Menu. On: Left (even channel), Right (odd channel), OFF : Hide Level Bar Level Meter Position: Position audio display at the top or bottom of the screen. 2) Waveform Monitor/Vector Scope Display Set “ON/OFF”... -
Page 15: Control And Use Of Osd Menu
6. Control and Use of OSD Menu Press “MENU” button for OSD Display . Press “ENTER” button after menu selection by using UP ( ) / DOWN ( ) buttons. Adjust status on the selected item with ENTER and UP ( ) / DOWN ( ) buttons. -
Page 16: Display
6. Control and Use of OSD Menu continued 6-1-1. VIDEO (PC-RGB Mode) Setup This Menu is displayed when selecting Auto Color Adjust as User Adjust in YPbPr, RGB, PC-RGB Input Mode • Red Gain: Controls Gain of Read Input • Green Gain: Controls Gain of Green Input • Blue Gain: Controls Gain of Blue Input. - Page 17 6. Control and Use of OSD Menu continued 6-2-1. DISPLAY (PC-RGB) This is displayed when PC-RGB signal is selected. • PC SCAN: Set output status as Fill or Aspect mode. • V. Position: Adjust vertical position of screen for PC mode input. • H. Position: Adjust horizontal position of screen for PC mode input.
-
Page 18: Color
6. Control and Use of OSD Menu continued 6-3. COLOR Setup • Color Temperature: Set the color temperature or White Balance on screen among VAR 3200°K, 5400°K, 6500°K, 9300°K, USER. • VAR Number -> Selectable in steps from 1 to 63 from 3000°K ~ 9300°K • USER ->... -
Page 19: Marker
6. Control and Use of OSD Menu continued 6-4. MARKER Setup • Marker 16:9 Set the type of marker when the aspect ratio setting is 16 : 9 in HD signal. • Type of Marker 4:3,15:9,14:9,13:9,1.85:1,2.35:1, USER, Off • Safety Area 16:9 Selects the size of the safe area in 16 : 9 HD screen. 95%, 93%, 90%, 88%, 85%, 80%, Off EBU Action 16:9,EBU Graphic 16:9, EBU Action 14:9,EBU Graphic 14:9,... -
Page 20: Osd Setup
6. Control and Use of OSD Menu continued 6-5. OSD Setup • Status/Menu Display Time Sets Menu and Information. Select one of off, 0(continute)~60 seconds. • Status/Menu Blend Set transparency of menus and Indication windows on the screen Selects 0~15 levels • Menu Position Select for Center, Left Top, Right Top, Left Bottom, Right Bottom. -
Page 21: Audio
6. Control and Use of OSD Menu continued 6-6. AUDIO Setup • Embedded Audio (L): Select Digital Audio (L) output from 1 to 16 channels when using SDI input. • Embedded Audio (R): Select Digital Audio (R) output from 1 to 16 channels when using SDI input. • Audio Level Meter: Select ON/OFF for the function which can display the SDI Embedded Audio signal level on a... -
Page 22: System Configuration
6. Control and Use of OSD Menu continued 6-8. SYSTEM Setup • Function 1,2: Select the functions to be assigned to individual buttons F1 and F2. Please refer to section 3-4 for detailed information. • Back Light: Adjust brightness of LCD Panel. • FAN Motor: Sets ON/Off internal Fan motor. Only available in 17”... -
Page 23: Remote Terminal Assignment
7. Program Update Port continued 7-2. Multi Monitor Control (through Update Port) Multi Monitor Control can be operated by professional Adaptor (RS-232C - Serial Conversion) Converting device and by PC where exclusive use program (Wall System Controller) is installed. (Optional) PC (Control S/W) Adaptor (RS-232C <->... - Page 24 8. Remote Terminal Assignment continued 8-3. Remote Terminal Assignment (GPI Port) Port Assignment Items Function Operating conditions CVBS1 Input Switches the input CVBS1 CVBS2 Input Switches the input CVBS2 CVBS3 Input Switches the input CVBS3 SDI1 Input Switches the input SDI-1 SDI2 Input Switches the input SDI-2 (except for 7”) DVI Input...
-
Page 25: List Of Compatible Signal Formats
9. List of Compatible Signal Formats 9-1. Video Signals Composite Component No Input Signal Formats Video HD/SD-SDI HDMI Y,Pb,Pr R,G,B (SOG) NTSC 525/60i (SD) 625/50i (SD) 720*480/59.94p 720*576/50p 1280*720/23.98p 1280*720/24p 1280*720/50p 1280*720/59.94p 1280*720/60p 1920*1035/59.94i 1920*1035/60i 1920*1080/50i 1920*1080/59.94i 1920*1080/60i 1920*1080/23.98p 1920*1080/23.98psf 1920*1080/24p 1920*1080/24psf 1920*1080/25p... - Page 26 9. List of Compatible Signal Formats continued 9-2. Computer Signal (PC-RGB/DVI) Input Signal Names Screen Resolution VGA (PC-RGB) Vertical Frequency 640*480 60Hz ~ 100Hz SVGA 800*600 56Hz ~ 85Hz 1024*768 86Hz ~ 100Hz WXGA 1280*768 50Hz ~ 85Hz SXGA 1280*1024 60Hz ~ 76Hz WSXGA+ 1680*1050...
-
Page 27: Specifications
10. Specifications Function PBM-070/PBM-070X INPUT HD/SD-SDI Input 1EA, HD/SD Serial Digital , 1.485G/270M ,BNC Jack Analog Input 3EA,Composite,YC(S-Video),YPbPr,RGB,BNC Jack PC-RGB(DVI) Input 1EA,DVI + Analog Jack (with gender) (24Pin + 5Pin) DVI Input 1EA, DVI-I, 24pin, Female OUTPUT SDI Output 1EA, BNC, Active Loop Output... -
Page 28: Dimensions
12. Product Dimensions PBM-070/PBM-070X unit: mm & inches VESA Mounting Hole (75*75mm) Size M4, Depth 10mm Battery Pack V-Mount Hole 9.47” 7.99” 2.04” 2.71”... -
Page 29: Troubleshooting
13. Troubleshooting Solutions to common problems related to the monitor are described here. If none of the solutions presented here solves the problem, unplug the monitor and consult an Authorized Dealer or Service Center. Symptom Probable cause and corrective action No power •... - Page 30 Notes...
- Page 31 Plura Broadcast, Inc. - West Coast 2033 W. North Lane Phoenix, AZ 85021 Tel: (602) 944-1044 Fax: (602) 324-9688 Plura Broadcast, Inc. - East Coast 67 Grand Avenue Masapequa, NY 11758 Tel: (516) 997-5675 Fax: (516) 593-7900 PLURAPBM070MV0309...
Need help?
Do you have a question about the PBM-070 and is the answer not in the manual?
Questions and answers