
Subscribe to Our Youtube Channel
Related Manuals for Thermo Scientific Heraeus Multifuge X3F


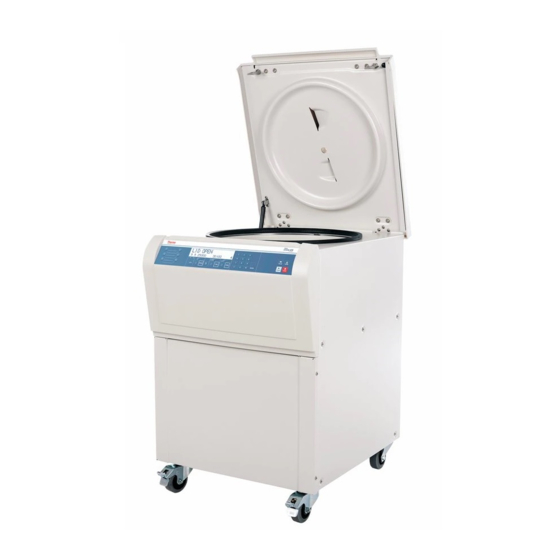
Summary of Contents for Thermo Scientific Heraeus Multifuge X3F
- Page 1 Thermo Scientific Heraeus Multifuge X3F / X3FR Centrifuge Instruction Manual 50156635-b • 03 / 2020 Visit us online to register your warranty: thermofisher.com/labwarranty...
-
Page 3: Table Of Contents
Lid Opening ......................4-2 Close Lid ........................4-2 Rotor Installation .....................4-2 Entering Parameters ....................4-4 Centrifugation ......................4-10 Temperature Adaptation during Standstill ..............4-11 Short-term Centrifugation ..................4-11 Removing the Rotor ....................4-12 Aerosol-tight Rotors ....................4-12 Aligning the Centrifuge ..................4-13 Heraeus Multifuge X3F / X3FR Thermo Scientific... - Page 4 Service of Thermo Fisher Scientific ................6-5 Chapter 7 Trouble Shooting ........................7-1 Mechanical Emergency Door Release ..............7-2 Troubleshooting by User ..................7-3 When to contact Customer Service ................7-5 Chemical Compatibility Chart ................A-1 Heraeus Multifuge X3F / X3FR Thermo Scientific...
-
Page 5: Preface
Failure to follow the instructions and safety information in this instruction manual will result in the expiration of the sellers warranty. Scope of Supply Article Number Quantity Check Centrifuge Heraeus Multifuge X3F/ X3FR Power supply cable 50156635 Instruction manual 70009824 Anti-corrosion oil If any parts are missing, please contact your nearest Thermo Fisher Scientific representative. -
Page 6: Accident Prevention
• The mains plug must be freely accessible at all times. Pull out the power supply plug or disconnect the power supply in an emergency. Precautions In order to ensure safe operation of the Heraeus Multifuge X3F / X3FR, the following general safety regulations must be followed: • The centrifuge should be operated by trained specialists only. - Page 7 • Highly corrosive substances which can cause material damage and impair the mechanical stability of the rotor, should only be centrifuged in corresponding protective tubes. IF A HAZARDOUS SITUATION OCCURS, TURN OFF THE POWER SUPPLY TO THE CENTRIFUGE AND LEAVE THE AREA IMMEDIATELY. Heraeus Multifuge X3F / X3FR Thermo Scientific...
- Page 8 CAUTION means that material damage could occur. WARNING means that injuries or material damage or contamination could occur. This symbol refers to biological hazards. Observe the information contained in the instruction manual to keep yourself and your environment safe. Heraeus Multifuge X3F / X3FR Thermo Scientific...
- Page 9 Introduction and Description Contents “Characteristics of the Heraeus Multifuge X3F / X3FR” page 1-2 • “Technical Data” page 1-3 • “Directives, Standards and Guidelines” page 1-4 • “Functions and Features” page 1-5 • “Mains Supply” page 1-5 • “Rotor Selection”...
-
Page 10: Chapter 1 Introduction And Description
• The integrated rotor detection systems ensures that no inadmissible speed settings can be preselected. • Electronic imbalance recognition • Lid emergency release: For emergencies only, e.g. during power failures (see “Mechanical Emergency Door Release” page 7-2) Heraeus Multifuge X3F / X3FR Thermo Scientific... -
Page 11: Technical Data
Refrigerant Centrifuge Order No. Refrigerant Pressure GWP CO2e Quantity Thermo Scientific R-404A 0.54 kg 31 bar 3922 2.12 t 75004559 Heraeus Multifuge X3 FR Contains fluorinated greenhouse gases in a hermetically sealed system. Thermo Scientific Heraeus Multifuge X3F / X3FR... -
Page 12: Directives, Standards And Guidelines
The following table contains an overview of the electrical connection data for the Heraeus Multifuge X3F / X3FR. This data is to be taken into cons ideration when selecting the mains connection socket. Table 1-4. Electrical connection data of the Heraeus Multifuge X3F / X3FR Mains... -
Page 13: Rotor Selection
Introduction and Description Rotor Selection Rotor Selection The Heraeus Multifuge X3F / X3FR is supplied without a rotor. Various rotors are available to choose from. TX-1000 75003017 with rectangular buckets 75003001 TX-750 75003180 with round buckets 75003608 with rectangular buckets... - Page 14 Before use Contents “Before Setting up” page 2-2 • “Transporting the Centrifuge” page 2-4 • “Location” page 2-4 • “Aligning the Centrifuge” page 2-4 • “Mains Connection” page 2-5 • “Storage” page 2-6 • Heraeus Multifuge X3F / X3FR Thermo Scientific...
-
Page 15: Chapter 2 Before Use
1. Place the pallet with the centrifuge so that you have at leased 1.5 m room in front of the pallet. 2. Release the rails from the pallet. 3. Screw the rails onto the pallet in front of the centrifuge. Heraeus Multifuge X3F / X3FR Thermo Scientific... - Page 16 4. Remove the protectors that locate the centrifuge on the pallet. Release the castors. Use several people in order to roll the centrifuge off the pallet. 5. Fix the castors once the centrifuge is in its final position. Thermo Scientific Heraeus Multifuge X3F / X3FR...
-
Page 17: Transporting The Centrifuge
The supporting structure must be suitable for horizontal setup of the centrifuge. CAUTION If the centrifuge isn’t level, imbalances can occur and the centrifuge can be damaged. Do not place anything under the feet to level the centrifuge. Heraeus Multifuge X3F / X3FR Thermo Scientific... -
Page 18: Mains Connection
3. Check whether the cable complies with the safety standards of your country. 4. Make sure that the voltage and frequency correspond to the figures on the rating plate. 5. Establish the connection to the power supply with the connecting cable. Heraeus Multifuge X3F / X3FR Thermo Scientific... -
Page 19: Storage
• Before storing the centrifuge and the accesories it must be cleanedand if necessary desinfected and decontaminated. • Store the centrifuge in a clean, dust-free location. • Be sure to place the centrifuge on its feet. • Avoid direct sunlight. • Fix the castors. Heraeus Multifuge X3F / X3FR Thermo Scientific... -
Page 20: Control Panel
Control Panel Contents “Control Panel” page 3-2 • “Keys” page 3-2 • Heraeus Multifuge X3F / X3FR Thermo Scientific... -
Page 21: Keys
Acceleration Curves Use the Toggle key to change the display mode. (speed / RCF value, Changing the display sample / chamber temperature, run time counter from start or preset mode speed on) Heraeus Multifuge X3F / X3FR Thermo Scientific... -
Page 22: Operation
“Entering Parameters” page 4-4 • “Centrifugation” page 4-10 • “Temperature Adaptation during Standstill” page 4-11 • “Short-term Centrifugation” page 4-11 • “Removing the Rotor” page 4-12 • “Aligning the Centrifuge” page 4-13 • Heraeus Multifuge X3F / X3FR Thermo Scientific... -
Page 23: Switch On Centrifuge
Rotor Installation The approved rotors for the Heraeus Multifuge X3 F / X3 FR are listed in section “Rotor Selection” page 1-6. Use only the rotors and accessories from this list in the centrifuge. Heraeus Multifuge X3F / X3FR Thermo Scientific... - Page 24 Check for any damage to the rotor: Damaged rotors must not be used. Keep the centrifuge spindle area of the rotor clear of objects. CAUTION Check that the rotor is properly locked on the centrifuge spindle before each use by pulling it at its handle. Thermo Scientific Heraeus Multifuge X3F / X3FR...
-
Page 25: Entering Parameters
3. Confirm your entry by pressing ENTER Preselecting Speed / RCF 1. Press the SPEED key The display shows the "RPM“ or the "RCF"-value depending on the display setting. Press the TOGGLE key to toggle between the two modes. Heraeus Multifuge X3F / X3FR Thermo Scientific... - Page 26 This can be accounted for in the calculation above if required. Running time preselection 1. Press the TIME key in order to open the runtime selection menu. The display shows the message "Set Time". Enter the desired runtime in hh.mm Thermo Scientific Heraeus Multifuge X3F / X3FR...
- Page 27 Press the TOGGLE key to toggle between the two display modes. When AIR is lit, the temperature inside the rotor chamber will be controlled. This setting is recommended when using the centrifuges pretemp feature. Heraeus Multifuge X3F / X3FR Thermo Scientific...
- Page 28 The digits show in sequential order. 3. Confirm your entry by pressing ENTER Your entry will be automatically confirmed if you do not press any key for 5 seconds. 4. The display shows: Heraeus Multifuge X3F / X3FR Thermo Scientific...
- Page 29 When you use adaptors, you will have to specify the radius. For appropriate values please refer to the instruction manual for the rotor. 1. Press ENTER to confirm your selection and open the radius input menu. Heraeus Multifuge X3F / X3FR Thermo Scientific...
- Page 30 1. Select the program you wish to change. 2. Press the program memory key to load any of the programs 1-5. Press the DIRECTORY key in order to load any of the programs 1-99 by means of the numeric pad. Heraeus Multifuge X3F / X3FR Thermo Scientific...
-
Page 31: Centrifugation
You cannot open the lid as long as the centrifuge is running. Imbalance indicator If a load is imbalanced, this will be indicated at speed higher than approx. 300 rpm by the message "Imbalanced load". The run will terminate. 4-10 Heraeus Multifuge X3F / X3FR Thermo Scientific... -
Page 32: Temperature Adaptation During Standstill
Check carefully whether you have to maintain a certain speed for your application. During the acceleration process, time is counted forwards in seconds. The reading stays displayed until the centrifuge lid is opened. Heraeus Multifuge X3F / X3FR 4-11 Thermo Scientific... -
Page 33: Removing The Rotor
. Be sure not to place the lid onto this mandrel to prevent it from beingdamaged. Figure 4-2. Auto-Lock -lid for aerosol-tight rotors WARNING Mind the Auto-Lock mandrel inside the lid. Do not touch the mandrel. Heraeus Multifuge X3F / X3FR 4-12 Thermo Scientific... -
Page 34: Aligning The Centrifuge
Operation Aligning the Centrifuge Aligning the Centrifuge 1. To turn off the centrifuge put the mains switch to "0". 4-13 Thermo Scientific Heraeus Multifuge X3F / X3FR... -
Page 35: Chapter 5 System Menu
ENTER STOP ____ Lid passcode? Set lid passcode ENTER Program passcodes? ENTER Auto lid open? ENTER Software ID: 0547V01 0547V01 ENTER 4641V05 1 Software and identification NVRAM example display Cycle count: 2368 ENTER Heraeus Multifuge X3F / X3FR Thermo Scientific... -
Page 36: Description
Press ENTER key to confirm. Program passcodes Press 1 (yes) on the numeric pad if the centrifuge programs should be protected with a passcode. Otherwise press 0 (no). Press ENTER key to confirm. Heraeus Multifuge X3F / X3FR Thermo Scientific... - Page 37 Press ENTER key to confirm. Software ID Here you fine the current software version. Press ENTER key to confirm. Cycle count Here you fine the current numbers of cycles. Press ENTER key to confirm. Heraeus Multifuge X3F / X3FR Thermo Scientific...
-
Page 38: Maintenance And Care
Maintenance and Care Contents “Cleaning Intervalls” page 6-2 • “Cleaning” page 6-2 • “Disinfection” page 6-3 • “Decontamination” page 6-4 • “Autoclaving” page 6-5 • “Service of Thermo Fisher Scientific” page 6-5 • Thermo Scientific Heraeus Multifuge X3F / X3FR... -
Page 39: Cleaning Intervalls
• After cleaning, treat the entire surface of aluminum parts with corrosion protection oil (70009824). Also treat the cavities with oil. • Store the aluminum parts at room temperature or in a cold-storage room with the cavities pointing down. Heraeus Multifuge X3F / X3FR Thermo Scientific... -
Page 40: Disinfection
CAUTION Before using any cleaning or decontamination methods except those recommended by the manufacturer, users should check with the manufacturer that the proposed method will not damage the equipment. Observe the safety precautions and handling instructions for the cleaning agents used. Heraeus Multifuge X3F / X3FR Thermo Scientific... -
Page 41: Decontamination
For general radioactive decontamination use a solution of equal parts of 70% ethanol, 10% SDS and water. 1. Open the centrifuge. 2. Turn off the centrifuge. 3. Pull out the power supply plug. Heraeus Multifuge X3F / X3FR Thermo Scientific... -
Page 42: Autoclaving
The service technicians check the following: • the electrical equipment; • the suitability of the set-up site; • the lid lock and the safety system; • the rotor; • the fixation of the rotor and the drive shaft. Heraeus Multifuge X3F / X3FR Thermo Scientific... - Page 43 Thermo Fisher Scientific offers inspection and service contracts for this work. Any necessary repairs are performed for free during the warranty period and afterwards for a charge. This is only valid if the centrifuge has only been mainained by a Thermo Fisher Scientific service technician. Heraeus Multifuge X3F / X3FR Thermo Scientific...
-
Page 44: Trouble Shooting
Trouble Shooting Contents “Mechanical Emergency Door Release” page 7-2 • “Troubleshooting by User” page 7-3 • “When to contact Customer Service” page 7-5 • Heraeus Multifuge X3F / X3FR Thermo Scientific... -
Page 45: Mechanical Emergency Door Release
Emergency Door Release Figure 7-1. Emergency Door Release Note You need to pull both levers in order to unlock both locks. 4. Push the cord back into the centrifuge and mount the plug. Heraeus Multifuge X3F / X3FR Thermo Scientific... -
Page 46: Troubleshooting By User
If an error message appears again, inform Customer Service. Motor overtemp. The centrifuge cannot be operated. Restart the centrifuge. If an error message appears again, inform Customer Service. The run does not start or the centrifuge runs down without being braked. Thermo Scientific Heraeus Multifuge X3F / X3FR... - Page 47 Time has expired for the lid lock drive while opening the lid. The run does not start or the centrifuge runs Restart the centrifuge. down without being braked. If an error message appears again, inform Customer Service. Heraeus Multifuge X3F / X3FR Thermo Scientific...
-
Page 48: When To Contact Customer Service
This information can be found on the back near the inlet for the power supply cable. To identify the software version, proceed as follows: 1. Hold down any of the keys and then switch on the centrifuge. You enter the system menu. 2. Press the START key Heraeus Multifuge X3F / X3FR Thermo Scientific... - Page 49 Trouble Shooting When to contact Customer Service 3. Press and hold the ENTER key , until the following message is displayed: Software ID: XXXXXXXX 4. Communicate the software version to the service technician. Heraeus Multifuge X3F / X3FR Thermo Scientific...
-
Page 50: Chemical Compatibility Chart
S S S S S S M S S S Benzene S S U U S U M U S U U S U U U M U M U U U S U U S U S Heraeus Multifuge X3F / X3FR Thermo Scientific... - Page 51 S S S M S S S U S M U Ethyl Alcohol (95%) Ethylene Dichloride U U - S M - U U S U U U U U U U - U S U - A-2 Heraeus Multifuge X3F / X3FR Thermo Scientific...
- Page 52 U U U U U U U - Aqua Regia Solution 555 (20%) S S S - S S S S S S S - S S S - S S S S S S Heraeus Multifuge X3F / X3FR Thermo Scientific...
- Page 53 Perchloric Acid (70%) Phenol (5%) U S U - S M M - S U M U U S U M S M S U U S U M M M S Heraeus Multifuge X3 F / X3 FR Thermo Scientific...
- Page 54 S S S S S S S S S S S S S S S S S S S Triton X-100 Urea U S S S S - S S S M S S S S - S S S M S - Heraeus Multifuge X3 F / X3 FR Thermo Scientific...
- Page 55 Chemical resistance data is included only as a guide to product use. No organized chemical resistance data exists for materials under the stress of centrifugation. When in doubt we recommend pretesting sample lots. Heraeus Multifuge X3 F / X3 FR Thermo Scientific...
- Page 56 Explanation of RCF Value ......4-5 Removing the Rotor ........4-12 Failure message ..........7-3 Rotor Installation ..........4-2 Features ............1-5 Rotor Selection ..........1-6 Running time preselection .......4-5 Imbalance indicator ........4-10 Intended Use ............v Safety features ..........1-2 Thermo Scientific Heraeus Multifuge X3F / X3FR...
- Page 57 Short-term Centrifugation ......4-11 Starting centrifuge program ......4-10 Stopping the centrifugation program ..... 4-11 Storage ............2-6 Switch on Centrifuge ........4-2 Technical Data ..........1-3 Temperature Adaptation .......4-11 Transporting the Centrifuge ......2-4 Trouble Shooting ..........7-1 Heraeus Multifuge X3F / X3FR Thermo Scientific...
- Page 58 Thermo Electron LED GmbH Zweigniederlassung Osterode Am Kalkberg, 37520 Osterode am Harz Germany thermofisher.com/centrifuge © 2020 Thermo Fisher Scientific Inc. All rights reserved. All trademarks are the property of Thermo Fisher Scientific Inc. and its subsidiaries unless otherwise indicated. Heraeus is a registered trademark of Heraeus Holding GmbH licensed to Thermo Fisher Scientific. Delrin, TEFLON, and Viton are registered trademarks of DuPont.
Need help?
Do you have a question about the Heraeus Multifuge X3F and is the answer not in the manual?
Questions and answers