Kraus KHU100-26 Installation Manual
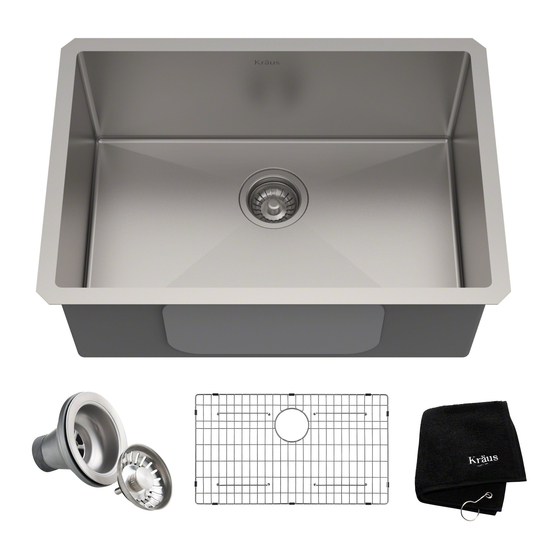
Handmade stainless steel undermount kitchen sink
Hide thumbs
Also See for KHU100-26:
- Installation manual (13 pages) ,
- Installation manual (13 pages) ,
- Installation manual (32 pages)
Table of Contents
Advertisement
R
INSTALLATION MANUAL
Handmade Stainless Steel
Undermount Kitchen Sink
KHU100-26 / KHU100-28 / KHU100-30 / KHU100-32 /
KHU101-10 / KHU101-13 / KHU101-14 / KHU101-17 /
KHU101-20 / KHU101-21 / KHU101-22 / KHU101-23 /
KHU101-24L / KHU102-33 / KHU103-32 / KHU103-33 /
KHU104-33 / KHU105-32 / KHU110-27 / KHU111-24 /
KHU111-25 / KHU121-23 / KHU122-23 / KHU123-32
www.kraususa.com I Toll Free: 1.800.775.0703 I © 2018 Kraus USA Inc. I REV. October 26, 2020
Advertisement
Table of Contents

Related Manuals for Kraus KHU100-26


Summary of Contents for Kraus KHU100-26
- Page 1 KHU101-20 / KHU101-21 / KHU101-22 / KHU101-23 / KHU101-24L / KHU102-33 / KHU103-32 / KHU103-33 / KHU104-33 / KHU105-32 / KHU110-27 / KHU111-24 / KHU111-25 / KHU121-23 / KHU122-23 / KHU123-32 www.kraususa.com I Toll Free: 1.800.775.0703 I © 2018 Kraus USA Inc. I REV. October 26, 2020...
- Page 2 Congratulations on the purchase of your new Kraus plumbing fixture! Please keep the box and packaging materials until your product is completely installed. If you have any questions, require technical assistance or have any problems with your product: STOP DO NOT RETURN TO STORE Please contact our Customer Service Team 1-800-775-0703 / customerservice@kraususa.com...
- Page 3 Toll-Free: 800-775-0703 or customerservice@kraususa.com The step-by-step guidelines in the installation instructions are a general reference for installing a Kraus sink. Should there be any discrepancies, Kraus cannot be held liable. It is recommended to install all Kraus products by hiring a licensed professional.
- Page 4 Safety Goggles Tape Measure Putty Knife Pencil Scissors Screwdriver NOTE: Specialized tools may be necessary to install Kraus Stainless Steel Kitchen sinks with countertop materials other than wood, marble or granite. Dimensions: 4 1/2" 4 1/2" 3 1/2" 3 1/2"...
- Page 5 Dimensions: 4 1/2" 4 1/2" 3 1/2" 3 1/2" (115mm) (115mm) (89mm) (89mm) 1" R3/8" 1" R3/8" 28" (25.4mm) (711mm) (10mm) 30" (762mm) (25.4mm) (10mm) 30" (762mm) 32" (813mm) R3/8" R3/8" (10mm) (10mm) KHU100-30 KHU100-32 30” x 18” x 10” 32”...
- Page 6 Dimensions: Typical note: * = Special Order 3 1/2" 3 1/2" (89mm) (89mm) 3 1/2" (89mm) R3/8" R3/8" 1" 1" (10mm) (10mm) 15" 1" (381mm) 18" (457mm) (25.4mm) 12" (25.4mm) (305mm) 17" (25.4mm) (432mm) 20" (508mm) 14" (356mm) R3/8" R3/8" R3/8"...
- Page 7 Dimensions: 3 1/2" 3 1/2" (89mm) (90mm) 1" R3/8" R3/8" (25.4mm) 1" 14 7/8" 14 7/8" (378mm) (10mm) (378mm) (10mm) (25.4mm) 12" 18" (305mm) (457mm) 32 3/4" (832mm) 32" (813mm) R3/8" R3/8" (10mm) (10mm) KHU102-33 KHU103-32 32” x 19” x 10” 32 3/4”...
- Page 8 Dimensions: 4 1/2" (114mm) 3 1/2" (89mm) 3 1/2" (90mm) R3/8" 1" 1" R3/8" (10mm) 14" 13 1/2" (356mm) (343mm) 25" (635mm) (25.4mm) (25.4mm) (10mm) 27" 30 1/2" (686mm) (775mm) R3/8" R3/8" (10mm) (10mm) KHU105-32 KHU110-27 30 1/2” x 20” x 10” 27”...
- Page 9 Dimensions: 3 1/2" 3 1/2" (89mm) (89mm) R3/8" R3/4" 1" 1" (10mm) 21 3/4" (552mm) 18" 11" (20mm) (457mm) (279mm) (25.4mm) (25.4mm) 32" (813mm) 23 3/4" (603mm) R3/4" (20mm) R3/8" (10mm) KHU123-32 KHU122-23 32” x 20" x 10” 23 3/4” x 18 3/4” x 10” Min Cabinet Size: 36”...
- Page 10 Step 1. Determine reveal type Use scissors to cut along the line of the paper template for your desired reveal type (Negative, Positive, or Flush · Reveal) KRAUS Recommended Installation Type 3/8" Positive Reveal Flush/Zero Reveal 1/8" Negative Reveal 3/8" POSITIVE 1/8"...
- Page 11 Step 2. Position template Check the cut-out template against the actual sink to ensure a proper · sized cut-out. · Place the cut-out template in the desired location on the countertop. NOTE: Make sure clearance is suitable for backsplash, faucet and plumbing for the sink. Step 3.
- Page 12 Step 4. Cut countertop · Cut the opening in the countertop by carefully following the traced line. NOTE: Please use the appropriate saw that best fits your countertop material. Step 5. Set up mounting brackets · Turn countertop over and align sink with countertop. Decide location for mounting brackets.
- Page 13 Step 6. Drill hole in countertop · Drill 3/8" diameter x 1/2" deep hole in the countertop. Step 7. Install anchors Insert anchors into drilled holes and lightly tap with a hammer until flush. ·...
-
Page 14: Step 9. Attach Mounting Hardware
Step 8. Secure sink to countertop · Use a bead of silicone (or preferred adhesive) around the rim of the sink. Check the alignment of the sink to the cutout in the countertop. Place sink over cutout hole and press firmly. Step 9. -
Page 15: Maintenance
Step 10. Install plumbing fixtures · Connect drain to sink. Connect trap to drain. Connect water supply connections to faucet according to manufacturer's instructions. Run water into sink and check for leaks. · Note: Before installation, please check that the drain kit complies with ASME A112.18.2/CSA B125.2 and with CUPC ·... - Page 16 Any product reported to the authorized dealer or to Kraus as being defective within the warranty period will be repaired or replaced with a product of equal value at the option of Kraus. This warranty extends to the original owner or end-user, and is not transferable to a subsequent owner.
- Page 17 Kraus USA, Inc. 12 Harbor Park Drive Port Washington, NY 11050 Toll-free 800-775-0703 Customerservice@kraususa.com If you are a plumbing contractor or trade professional please contact a Kraus Pro Representative at: Kraus USA, Inc. 12 Harbor Park Drive Port Washington, NY 11050 516-801-8955 Proservice@kraususa.com...
- Page 18 IMPORTANT Register Your Kraus Product Activate Your Warranty Access Premium Customer Support Get Product Information REGISTER TODAY http://www.kraususa.com/registration www.kraususa.com...
- Page 19 INSTALLATION GUIDE Kitchen Strainer ST-1 / ST-2 / ST-3 / BST-1 / BST-2 www.kraususa.com Toll Free: 1.800.775.0703 © 2018 Kraus USA Inc. REV. November 5, 2020...
- Page 20 Congratulations on the purchase of your new Kraus plumbing fixture! Please keep the box and packaging materials until your product is completely installed. If you have any questions, require technical assistance or have any problems with your product: STOP DO NOT RETURN TO STORE Please contact our Customer Service Team 1-800-775-0703 / customerservice@kraususa.com...
-
Page 21: Prior To Installation
Toll-Free: 800-775-0703 or Customerservice@kraususa.com The step-by-step guidelines in the installation instructions are a general reference for installing a Kraus Sink. Should there be any discrepancies, Kraus cannot be held liable. It is recommended to install all Kraus products by hiring a licensed professional. - Page 22 Diagram and Parts List ST-1 A. Strainer Cover B. Screw C. Metal Strainer D. Foam Gasket E. Rubber Gasket F. Main Body G. Drain Gasket H. Drain Nut ST-2 A. Strainer Cover B. Screw C. Metal Strainer D. Foam Gasket E.
- Page 23 Diagram and Parts List BST-1 A. Strainer Cover B. Basket C. Screw D. Metal Strainer E. Foam Gasket F. Rubber Gasket G. Main Body H. Drain Gasket I. Drain Nut BST-2 A. Strainer Cover B. Basket C. Screw D. Metal Strainer E.
- Page 24 Diagram and Parts List ST-3 A. Strainer Cover B. Screw C. Metal Strainer D. Foam Gasket E. Rubber Gasket F. Main Body G. Drain Gasket H. Drain Nut...
- Page 25 Dimensions Ø 4 1/2" Ø 4 1/2" Ø 4 1/2" (115mm) (115mm) (114mm) 3 3/4" 3 3/4" 4 1/2" (94mm) (94mm) (114mm) 1 1/2" - 1 1/2" - 1 1/2" - 11 1/2" Ø 4 3/4" 11 1/2" Ø 4 3/4" 4 5/8"...
- Page 26 Step 1. Disassemble strainer...
- Page 27 Step 2. Insert metal strainer into drain hole with foam gasket attached. Install rubber gasket and main body underneath the sink Strainer Cover Screw Metal Strainer Foam Gasket Rubber Gasket Main Body Drain Gasket Drain Nut...
- Page 28 Step 3. Using the screw, tighten the metal strainer and main body into place Screw Step 4. Insert strainer cover to seal water Strainer Cover...
-
Page 29: Replacement Parts
Replacement Parts ST-1 Replacement Parts List Finish Part # A. Strainer Cover KPU00010 A. Strainer Cover PGM* KPU00010-PGM B. Screw 1 1/4" KPU00003 B. Screw 1 1/4" PGM* KPU00003-PGM C. Metal Strainer KPU00011 C. Metal Strainer PGM* KPU00011-PGM D. Foam Gasket KPU00005 E. - Page 30 Replacement Parts ST-2 Replacement Parts List Finish Part # A. Strainer Cover KPU00010 B. Screw 1 5/8" KPU00013 C. Metal Strainer KPU00011 KPU00005 D. Foam Gasket KPU00006 E. Rubber Gasket KPU00012 F. Main Body KPU00008 G. Drain Gasket KPU00009 H. Drain Nut...
- Page 31 Replacement Parts BST-1 Replacement Parts List Finish Part # A. Strainer Cover KPU00001 B. Basket KPU00002 C. Screw 1 1/4" KPU00003 KPU00004 D. Metal Strainer KPU00005 E. Foam Gasket KPU00006 F. Rubber Gasket KPU00007 G. Main Body KPU00008 H. Drain Gasket KPU00009 Drain Nut BST-2...
- Page 32 Replacement Parts ST-3 Replacement Parts List Finish Part # A. Strainer Cover KP22191 B. Screw KP22198 C. Metal Strainer KP22192 KP22193 D. Foam Gasket KP22194 E. Rubber Gasket KP22195 F. Main Body KP22196 G. Drain Gasket KP22197 H. Drain Nut...
- Page 33 Any product reported to the authorized dealer or to Kraus as being defective within the warranty period will be repaired or replaced with a product of equal value at the option of Kraus. This warranty extends to the original owner or end-user, and is not transferable to a subsequent owner.
- Page 34 12 Harbor Park Drive Port Washington, NY 11050 Toll-Free : 800-775-0703 Customerservice@kraususa.com If you are a PLUMBING CONTRACTOR OR TRADE PROFESSIONAL , please contact a Kraus Pro Representative at: Kraus USA, Inc. 12 Harbor Park Drive Port Washington, NY 11050 516-801-8955 Proservice@kraususa.com...
- Page 35 IMPORTANT Register Your Kraus Product Activate Your Warranty Access Premium Customer Support Get Product Information REGISTER TODAY http://www.kraususa.com/registration www.kraususa.com...
- Page 36 Bolden Single Handle Pull Down Kitchen Faucet / Robinet de cuisine à poignée simple avec douchette rétractable Bolden KPF-1610 www.kraususa.com I Toll Free / Numéro sans frais : 1800.775.0703 I © 2018 Kraus USA Inc. I REV. December 16, 2020...
- Page 37 Congratulations on the purchase of your new Kraus plumbing fixture! Félicitations pour l’achat de votre nouvel accessoire de plomberie Kraus! Please keep the box and packaging materials until your product is completely installed. If you have any questions, require technical assistance or have any problems with your product / Veuillez conserver la boîte et le matériau d’emballage jusqu'à...
-
Page 38: Prior To Installation
Prior to Installation: · Make sure you have all necessary parts by checking the diagram and parts list. If any part is missing or damaged, please contact Kraus Customer Service at 800-775-0703 for a replacement. · Turn off the hot and cold water supply at the angle stops and turn on the old faucet to release any built up pressure. -
Page 39: Tools Required
Ruban pour tuyaux Pour obtenir un soutien technique ou des pièces de rechange, veuillez communiquer avec le service à la clientèle de Kraus et l'un de nos représentants se fera un plaisir de vous aider : Numéro sans frais : 1 800 775-0703 ou Customerservice@kraususa.com... - Page 40 Diagram and Parts List / Schéma et liste des pièces A. Spray Head B. Faucet Body C. Mounting Hardware C1. Rubber & Metal Washer C2. Mounting Nut C3. Mounting Screws D. Quick Connector E. Weight E1. Weight Clip E2. Weight F.
- Page 41 Faucet Dimension / Dimension du robinet 10 3/4" (274mm) 3 1/2" (88mm) 25° Ø 1 7/8" 8 3/4" (48mm) (221mm) 90° Ø 2 1/8" (54mm) 3/8" Compression Installer Tip / Conseil à l’intention de l'installateur : Shut off main water supply before installing new faucet. / Couper l'approvisionnement en eau principale avant d'installer le nouveau robinet.
- Page 42 Step 1. Remove mounting hardware / Étape 1. Enlever la ferrure de fixation Shut off the water supply. Remove the old faucet. Clean the mounting surface. Remove mounting hardware (C) from faucet body (B). Couper l'alimentation en eau. Retirer le vieux robinet.
- Page 43 Step 3. Securing the faucet assembly / Étape 3. Fixer l'ensemble du robinet Install the rubber washer and metal washer (C1) onto the threaded mounting shank. Thread the nut (C2) onto the mounting shank. Lock the nut (C2) into position by tightening the screws (C3).
- Page 44 Step 5. Securing the faucet assembly / Étape 5. Fixer l'ensemble du robinet Install the weight clip (E1) at the point of the hose marking "weight here". Insert the weight (E2) onto the clip (E1) by sliding it down onto the clip (E1). Installer l'attache du poids (E1) à...
- Page 45 Step 7. Flushing and checking for leaks / Étape 7. Vidange et vérification des fuites Pull the hose assembly out of the spout and remove the spray head by unscrewing it from the hose in a counterclockwise direction. Be sure to hold the end of the hose down into the sink and turn the faucet on to the warm position where it mixes hot and cold...
- Page 46 Replacement Parts Replacement Finish/Color Part # Parts List 1. Sprayer CH,SFS,SS,SB,MB,SFSB,BG, KP27087 SFACB,SFACBMB,BGMB** 2. Screen Washer KP27088 3. Sprayer Hose BLBG,BLMB,BLSFS,BLSS,GRCH KP27089 BLSFACB,GRSFS,GRSS** 4. Flow Regulator KP27074 WH** Assembly (1.8GPM) 5. Quick Connector KP27090 Assembly 6. Spring Assembly KP27220 CH,MB,SB,SFACB,SFS,BG,SFSB** CH,SFS,SS,SB,SFSMB,BG,SFACB, 7.
- Page 47 Pièces de rechange Remplacement Fini/Couleur No de Liste des pièces pièce CH,SFS,SS,SB,MB,SFSB,BG, 1. Pulvérisateur KP27087 SFACB,SFACBMB,BGMB** 2. Rondelle de l’aérateur KP27088 Tuyau de pulvérisation BLBG,BLMB,BLSFS,BLSS,GRCH KP27089 BLSFACB,GRSFS,GRSS** 4. Régulateur de débit KP27074 WH** Ensemble (1,8 gallon par minute) 5. Raccord rapide Ensemble KP27090 6.
-
Page 48: Troubleshooting
Troubleshooting If you have followed the instructions carefully and your faucet still does not work properly, take the following corrective steps: PROBLEM CAUSE ACTION Bonnet nut (11) has Remove the cover button (15). Loosen set Leakage under faucet handle come loose screw (14) with hex wrench (22). -
Page 49: Dépannage
Dépannage Si vous avez suivi attentivement les directives et que votre robinet ne fonctionne toujours pas correctement, suivez les mesures correctives suivantes : PROBLÈME CAUSE ACTION Fuite sous la poignée du robinet L'écrou de chapeau (11) s'est Retirer le bouton du couvercle (15). Desserrer la vis de pression (14) avec une clé... - Page 50 Any product reported to the authorized dealer or to Kraus as being defective within the warranty period will be repaired or replaced with a product of equal value at the option of Kraus. This warranty extends to the original owner or end-user, and is not transferable to a subsequent owner.
- Page 51 This warranty gives you specific legal rights, and you may also have other rights which vary from state to state. KRAUS USA has the right to change, modify, and/or update the warranty policy at any time. For the latest, most up to date comprehensive warranty, go to www.kraususa.com/warranty...
- Page 52 Kraus garantit que la structure et le fini du produit sont exempts de tout défaut de matériau et de fabrication dans le cadre d'une utilisation normale pendant toute la durée de vie du produit. La garantie commence à la date d'achat initiale par le propriétaire ou le professionnel, auprès d'un distributeur agréé...
- Page 53 La présente garantie vous accorde des droits spécifiques reconnus par la loi, et vous pouvez également avoir d'autres droits qui varient d'un État à l'autre. KRAUS USA a le droit de changer, de modifier ou de mettre à jour la politique de garantie en tout temps. Pour obtenir la garantie complète la plus récente, consultez le site www.kraususa.com/warranty.
- Page 54 IMPORTANT Register Your Kraus Product / Enregistrez votre produit Kraus Activate Your Warranty / Activez v otre garantie Access Premium Customer Support / Accédez au soutien à la clientèle supérieur Get Product Information / Obtenez des informations sur les produits...
- Page 55 INSTALLATION GUIDE Kraus Kitchen Soap Dispenser KSD-51 KSD-52 KSD-53 www.kraususa.com I Toll Free: 1.800.775.0703 I © 2019 Kraus USA Inc. I REV. JUL 10 , 2020...
- Page 56 Congratulations on the purchase of your new Please keep the box and packaging materials until your product is completely installed. If you have any questions, require technical assistance, or have any problems with your product: DO NOT RETURN TO STORE Please contact our Customer Service Team 1-800-775-0703 / customerservice@kraususa.com Have the model number available, and retain a copy of your receipt...
- Page 57 Toll-Free: 800.775.0703 or customerservice@kraususa.com The step-by-step guidelines in the installation instructions are a general reference for installing a Kraus Sink. Should there be any discrepancies, Kraus cannot be held liable. It is recommended to install all Kraus products by hiring a licensed professional.
- Page 58 Diagram and Parts List: a. Pump b. Dispenser Base c. Washer d. Mounting Nut e. Dispenser Bottle...
- Page 59 Step 1 Disassemble soap dispenser...
- Page 60 Step 2 Install dispenser base (b) with washer (c) attached into the hole in the countertop. Re-install mounting nut (d) on the dispenser base (b) from underneath the countertop. Tighten mounting nut (d) by hand...
- Page 61 Step 3 Screw the dispenser bottle (e) to the dispenser base (b) from underneath the countertop. Tighten as required. Fill the dispenser bottle (e) from the top with up to 17 ounces of soap...
- Page 62 Step 4 Reinsert pump (a) into dispenser base (b) from the top. Press the pump several times to make sure soap is evenly distributed Press...
- Page 63 Replacement Parts Replacement Parts List Finish / Color Part # 1. Pump KP27131 KP27134 (For KSD-53) CH, SFS, MB, KP27132 2. Dispenser Base ORB, BG, SFACB, (For KSD-51) SFSB, BB, KP27133 SFSMB* (For KSD-52) 3. Washer KP27135 4. Mounting Nut KP27136 5.
- Page 64 The warranty commences from the initial date of purchase by the owner or trade professional, from an authorized Kraus dealer, through the one (1) year term of the original owner or end-user. Any product reported to the authorized dealer or to Kraus as being defective within the warranty period will be repaired or replaced with a product of equal value at the option of Kraus.
- Page 65 (HI, AK, and Puerto Rico shipping charges may apply). International shipping fees are not included. Commercial Warranty Kraus extends the above warranty for a period of one (1) year to purchasers of products for industrial, commercial, and business use. express or implied are given, including but not limited to, any implied warranty of merchantability...
- Page 66 Kraus USA, Inc. 12 Harbor Park Drive Port Washington, NY 11050 Toll-free 800-775-0703 Customerservice@kraususa.com If you are a PLUMBING CONTRACTOR OR TRADE PROFESSIONAL please contact a Kraus Pro Representative at: Kraus USA, Inc. 12 Harbor Park Drive Port Washington, NY 11050 516-801-8955 Proservice@kraususa.com...
- Page 67 IMPORTANT Register Your Kraus Product Activate Your Warranty Access Premium Customer Support Get Product Information REGISTER TODAY http://www.kraususa.com/registration...
Need help?
Do you have a question about the KHU100-26 and is the answer not in the manual?
Questions and answers