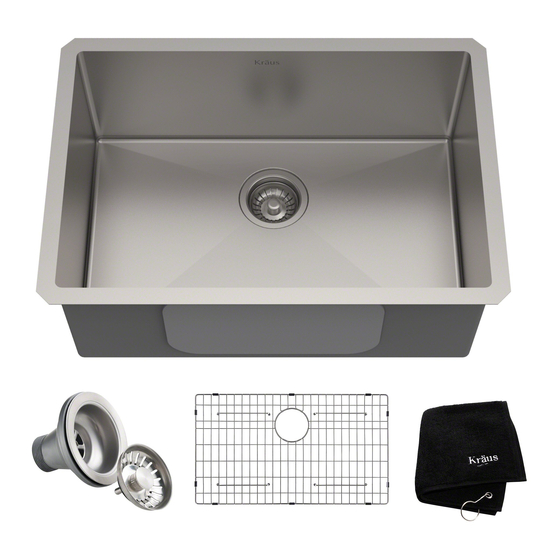
Kraus KHU100-26 Installation Manual
Handmade stainless steel
Hide thumbs
Also See for KHU100-26:
- Installation manual (13 pages) ,
- Installation manual (67 pages) ,
- Installation manual (32 pages)
Advertisement
Quick Links
R
INSTALLATION MANUAL
Handmade Stainless Steel
KHU100-26 / KHU100-28 / KHU100-30 / KHU100-32 /
KHU101-10 / KHU101-13 / KHU101-14 / KHU101-17 /
KHU101-20 / KHU101-21 / KHU101-22 / KHU101-23 /
KHU101-24L / KHU102-33 / KHU103-32 / KHU103-33 /
KHU104-33 / KHU105-32 / KHU110-27 / KHU111-24 /
KHU111-25 / KHU121-23 / KHU122-23 / KHU123-32
Advertisement

Summary of Contents for Kraus KHU100-26
- Page 1 INSTALLATION MANUAL Handmade Stainless Steel KHU100-26 / KHU100-28 / KHU100-30 / KHU100-32 / KHU101-10 / KHU101-13 / KHU101-14 / KHU101-17 / KHU101-20 / KHU101-21 / KHU101-22 / KHU101-23 / KHU101-24L / KHU102-33 / KHU103-32 / KHU103-33 / KHU104-33 / KHU105-32 / KHU110-27 / KHU111-24 /...
-
Page 2: Tools You Will Need
Safety Goggles Tape Measure Putty Knife Pencil Scissors Screwdriver NOTE: Specialized tools may be necessary to install Kraus Stainless Steel Kitchen sinks with countertop materials other than wood, marble or granite. Dimensions: 4 1/2" 4 1/2" 3 1/2" 3 1/2"... - Page 3 Dimensions: 4 1/2" 4 1/2" 3 1/2" 3 1/2" (115mm) (115mm) (89mm) (89mm) 1" R3/8" 1" R3/8" 28" (25.4mm) (711mm) (10mm) 30" (762mm) (25.4mm) (10mm) 30" (762mm) 32" (813mm) R3/8" R3/8" (10mm) (10mm) KHU100-30 KHU100-32 30” x 18” x 10” 32”...
- Page 4 Dimensions: Typical note: * = Special Order 3 1/2" 3 1/2" (89mm) (89mm) 3 1/2" (89mm) R3/8" R3/8" 1" 1" (10mm) (10mm) 15" 1" (381mm) 18" (457mm) (25.4mm) 12" (25.4mm) (305mm) 17" (25.4mm) (432mm) 20" (508mm) 14" (356mm) R3/8" R3/8" R3/8"...
- Page 5 Dimensions: 3 1/2" 3 1/2" (89mm) (90mm) 1" R3/8" R3/8" (25.4mm) 1" 14 7/8" 14 7/8" (378mm) (10mm) (378mm) (10mm) (25.4mm) 12" 18" (305mm) (457mm) 32 3/4" (832mm) 32" (813mm) R3/8" R3/8" (10mm) (10mm) KHU102-33 KHU103-32 32” x 19” x 10” 32 3/4”...
- Page 6 Dimensions: 4 1/2" (114mm) 3 1/2" (89mm) 3 1/2" (90mm) R3/8" 1" 1" R3/8" (10mm) 14" 13 1/2" (356mm) (343mm) 25" (635mm) (25.4mm) (25.4mm) (10mm) 27" 30 1/2" (686mm) (775mm) R3/8" R3/8" (10mm) (10mm) KHU105-32 KHU110-27 30 1/2” x 20” x 10” 27”...
- Page 7 Dimensions: 3 1/2" 3 1/2" (89mm) (89mm) R3/8" R3/4" 1" 1" (10mm) 21 3/4" (552mm) 18" 11" (20mm) (457mm) (279mm) (25.4mm) (25.4mm) 32" (813mm) 23 3/4" (603mm) R3/4" (20mm) R3/8" (10mm) KHU123-32 KHU122-23 32” x 20" x 10” 23 3/4” x 18 3/4” x 10” Min Cabinet Size: 36”...
- Page 8 Step 1. Determine reveal type Use scissors to cut along the line of the paper template for your desired reveal type (Negative, Positive, or Flush · Reveal) KRAUS Recommended Installation Type 3/8" Positive Reveal Flush/Zero Reveal 1/8" Negative Reveal 3/8" POSITIVE 1/8"...
- Page 9 Step 2. Position template Check the cut-out template against the actual sink to ensure a proper · sized cut-out. · Place the cut-out template in the desired location on the countertop. NOTE: Make sure clearance is suitable for backsplash, faucet and plumbing for the sink. Step 3.
- Page 10 Step 4. Cut countertop · Cut the opening in the countertop by carefully following the traced line. NOTE: Please use the appropriate saw that best fits your countertop material. Step 5. Set up mounting brackets · Turn countertop over and align sink with countertop. Decide location for mounting brackets.
- Page 11 Step 6. Drill hole in countertop · Drill 3/8" diameter x 1/2" deep hole in the countertop. Step 7. Install anchors Insert anchors into drilled holes and lightly tap with a hammer until flush. ·...
-
Page 12: Step 9. Attach Mounting Hardware
Step 8. Secure sink to countertop · Use a bead of silicone (or preferred adhesive) around the rim of the sink. Check the alignment of the sink to the cutout in the countertop. Place sink over cutout hole and press firmly. Step 9. -
Page 13: Maintenance
Step 10. Install plumbing fixtures · Connect drain to sink. Connect trap to drain. Connect water supply connections to faucet according to manufacturer's instructions. Run water into sink and check for leaks. · Maintenance Clean your sink on a regular basis with warm soapy water. Rinse the sink after using cleaning products. Wipe the sink surface with a soft cloth to remove any liquid residue.


Need help?
Do you have a question about the KHU100-26 and is the answer not in the manual?
Questions and answers