Table of Contents
Advertisement
INSTALLER: Leave this manual with party responsible for use and operation.
OWNER: Retain this manual for future reference.
Contact your dealer with questions on installation, operation, or service.
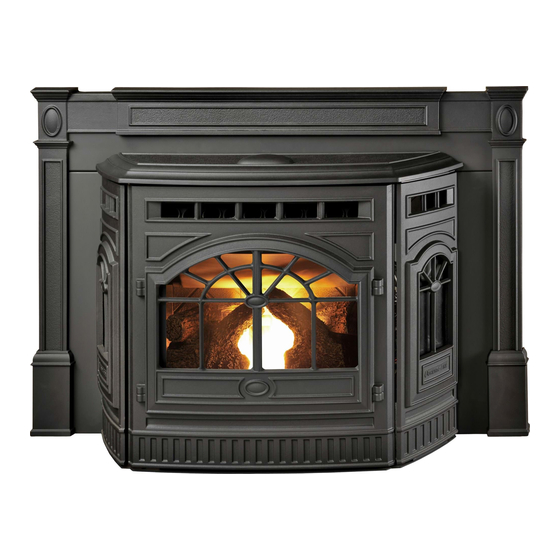
CASTILE PELLET INSERT
APPLIANCE
MODEL(S):
CASTILEI-MBK-C
CASTILEI-PMH-C
CASTILEI-TWL-C
Check building codes prior to installation.
• Installation MUST comply with local, regional, state
and national codes and regulations.
• Consult local building, fire officials or authorities
having jurisdiction about restrictions, installation
inspection, and permits.
Installation and service of this appliance should be performed by
qualified personnel. Hearth & Home Technologies recommends
HHT Factory Trained or NFI certified professionals.
1
Owner's Manual
Operation & Care
CAUTION
R
If the information in these instructions is
not followed exactly, a fire could result
causing
injury, or death.
• Do not store or use gasoline or other flammable vapors
and liquids in the vicinity of this or any other appliance.
• Do not over fire - If appliance or chimney connector
glows, you are over firing. Over firing will void
your warranty.
• Comply with all minimum clearances to combustibles
as specified. Failure to comply may cause house fire.
Hot glass will cause burns.
• Do not touch glass until it is cooled
• NEVER allow children to touch glass
• Keep children away
• CAREFULLY SUPERVISE children in same room
as fireplace.
• Alert
children
high temperatures
• High temperatures may ignite clothing or other
flammable materials.
• Keep
clothing,
flammable materials away.
Tested and approved for wood pellets only. Burning of
any other type of fuel voids your warranty.
NOTE: To obtain a French translation of this manual,
please contact your dealer or visit
REMARQUE : Pour obtenir une traduction française de
ce manuel, s'il vous plaît contacter votre revendeur ou
visitez
www.quadrafire.com
7022-802J
WARNING
property
damage,
WARNING
HOT SURFACES!
Glass and other surfaces are hot
during operation AND cool down.
and
adults
to
furniture,
draperies
CAUTION
www.quadrafire.com
personal
hazards
of
and
other
01/22
Advertisement
Table of Contents

Related Manuals for Quadra-Fire CASTILE Series


Summary of Contents for Quadra-Fire CASTILE Series
- Page 1 Owner’s Manual Operation & Care INSTALLER: Leave this manual with party responsible for use and operation. OWNER: Retain this manual for future reference. Contact your dealer with questions on installation, operation, or service. WARNING If the information in these instructions is not followed exactly, a fire could result CASTILE PELLET INSERT causing...
-
Page 2: Sample Of Serial Number / Safety Label
Welcome to the Quadra-Fire Family NOTE: Clearances may only be reduced by means approved by the regulatory authority having jurisdiction A. Sample of Serial Number / Safety Label LOCATION: Riveted to appliance behind left side panel. Remove cast side and swing label forward. -
Page 3: Table Of Contents
T. Thermostat Battery Replacement....16 U. Frequently Asked Questions ....17 Quadra-Fire is a registered trademark of Hearth & Home Technologies. 7022-802J... -
Page 4: Warranty Policy
B. Warranty Policy Hearth & Home Technologies LIMITED LIFETIME WARRANTY Hearth & Home Technologies, on behalf of its hearth brands (“HHT”), extends the following warranty for HHT gas, wood, pellet and electric hearth appliances that are purchased from an HHT authorized dealer. WARRANTY COVERAGE: WARRANTY PERIOD: distributor, whichever occurs earlier. - Page 5 WARRANTY CONDITIONS: • This warranty only covers HHT appliances that are purchased through an HHT authorized dealer or distributor. A list of HHT authorized dealers is available on the HHT branded websites. • • This warranty is only valid in the country in which the HHT authorized dealer or distributor that sold the appliance resides. •...
-
Page 6: Listing And Code Approvals
Listing and Code Approvals A. Appliance Safety Certification C. BTU & Efficiency Specifications Model CASTILEI-MBK-C, CASTILEI-PMH-C, & EPA Certification Number: 175-19 Numbers: CASTILEI-TWL-C Number: Laboratory: OMNI Test Laboratories, Inc. EPA Certified Emissions: 1.1 grams per hour Report *LHV Tested Efficiency: 70.4% 061-S-77d-6.2 Number: **HHV Tested Efficiency: 66.1%... -
Page 7: Glass Specifications
D. Glass Specifications WARNING This appliance is equipped with 5mm ceramic glass. Replace glass only with 5mm ceramic glass. Please Fire Risk. contact your dealer for replacement glass. Hearth & Home Technologies disclaims any responsibility for, and the warranty will be E. -
Page 8: Operating Instructions
Operating Instructions D. Fuel Material and Fuel Storage WARNING Pellet fuel quality can greatly fluctuate. This appliance has been designed to burn a wide variety of fuels, giving you the choice to use the fuel that is most economical in your region. -
Page 9: Before Your First Fire
E. Before Your First Fire Moisture 1. First, make sure your appliance has been properly Always burn dry fuel. Burning fuel with high moisture installed and that all safety requirements have been content takes heat from the fuel and tends to cool the met. -
Page 10: General Operating Information
G. General Operating Information H. Starting Your First Fire 1. Thermostat Calls For Heat 1. A thermostat is required for proper operation of this The appliance is like most modern furnaces; when the appliance. At this time, fill the hopper with pellets, set thermostat calls for heat, your appliance will automatically the thermostat to its lowest setting. -
Page 11: Fire Characteristics
I. Fire Characteristics J. Feed Rate Adjustment Instructions A properly adjusted fire with the heat output control button The feed adjustment control rod is factory set, and should set on “HIGH” has a short active flame pattern that extends be adequate for most fuels. The control rod will slide by out of the fire pot approximately 4 inches (102mm). -
Page 12: Ignition Cycles
K. Ignition Cycles M. Restarting the Appliance Restart Process 1. During each ignition cycle, it is normal to see some smoke in the firebox. The smoke will stop once the 1. When the unit has run out of fuel, add pellet fuel to fire starts. -
Page 13: Thermostat Controls
O. Thermostat Controls P. Thermostat Setup Options Setup options for how the thermostat will function are TEMPERATURE (HEAT / OFF) SWITCH: performed using a menu on the display screen. Set this switch to Heat to control your appliance. The off position will disable the appliance. -
Page 14: Thermostat Operation Instructions
ITEM #08 (TEMPERATURE DIFFERENTIAL): TEMPERATURE HOLD: • The thermostat works by turning your heating system Temperature hold is used for maintaining a fixed set on and off whenever the room temperature varies from temperature; once a hold is initiated, the thermostat will the desired set-point temperature. -
Page 15: Thermostat Other Features
COPY PROGRAM FEATURE: KEYPAD LOCKOUT: There is the option to lock the front panel buttons to prevent Using similar instructions as set temperature programs the unauthorized tampering of your thermostat settings. COPY button will allow a whole day of set program events to be copied to another day. -
Page 16: Thermostat Battery Replacement
T. Thermostat Battery Replacement CONNECT THERMOSTAT WIRES TO APPLIANCE: There is a 4 screw terminal block located on the back This thermostat is powered by two “AA” Alkaline batteries. lower left corner of the stove directly above the power The batteries should be replaced AT LEAST once per cord inlet. -
Page 17: Frequently Asked Questions
U. Frequently Asked Questions What causes my glass to become dirty? If the glass has white ash build up it is normal and the glass should be cleaned. If it is a black soot build up airflow through the unit may be restricted. The most often cause is overdue maintenance and cleaning; see Maintaining and Servicing section on page 18 and/or make adjustments to the feed rate adjustment control (reference Feed Rate Adjustment... -
Page 18: Maintenance And Service
Maintenance and Service When properly maintained, your fireplace will give CAUTION you many years of trouble-free service. Contact your dealer to answer question regarding proper operation, Shock and Smoke Hazard troubleshooting and service for your appliance. Visit • Turn down thermostat, let appliance www.quadrafire.com/owner-resources to view basic completely cool and exhaust blower must... -
Page 19: General Maintenance And Cleaning
C. General Maintenance and Cleaning 1. Types of Fuel The type of fuel you are burning will dictate how often you have to clean your fire pot. If the fuel you are burning has a high dirt or ash content, it may be necessary to clean the fire pot more than once a day. - Page 20 5. Disposal of Ashes 7. Cleaning Beneath Heat Exchanger • Frequency: As needed • Frequency: Monthly or every 1 ton of fuel • By: Homeowner • By: Homeowner Ashes should be placed in a metal container with a tight- a. Be sure the appliance is allowed to cool, has been fitting lid.
- Page 21 10. Soot and Fly Ash: Formation & Need for Removal 12. Door Latch Inspection in Exhaust Venting System. • Frequency: Prior to heating season • Frequency: Yearly or more frequently depending on • By: Homeowner ash build-up The door latch is non-adjustable but the gasket between •...
-
Page 22: Soot Or Creosote Fire Awareness
D. Soot or Creosote Fire Awareness E. High Ash Fuel Content Maintenance • Frequency: When the ash build-up exceeds more than The chimney should be inspected periodically during the heating season to determine if a creosote build-up has half way up the fire pot. •... -
Page 23: Troubleshooting Guide
Troubleshooting Guide With proper installation, operation, and maintenance your appliance will provide years of trouble-free service. If you do experience a problem, this troubleshooting guide will assist a qualified service person in the diagnosis of a problem and the corrective action to be taken. This troubleshooting guide can only be used by a qualified service technician. SYMPTOM POSSIBLE CAUSE CORRECTIVE ACTION... - Page 24 SYMPTOM POSSIBLE CAUSE CORRECTIVE ACTION Feed system fails to start. Out of fuel. Check hopper, fill with fuel. #2 snap disc may be defective. Replace snap disc. Firebox door must be closed securely. Vacuum switch not closing. No vacuum. Check exhaust blower is plugged in and operating. Check vacuum switch is plugged in.
-
Page 25: Service Parts Replacement
Service Parts Replacement A. Blowers 2. Convection Blower 1. Combustion (Exhaust) Blower PART NUMBER: 812-4900 PART NUMBER: 812-4400 a. The blower is located at the bottom rear of the insert. If an outside air kit is also installed, you a. If you have adequate clearance you will not have will first need to remove the outside air flange to remove the panel set and disconnect flue, if not by removing the 2 screws using a Phillips head... -
Page 26: Baffle
B. Baffle Brick is flush against back wall PART NUMBER: 7001-034 1. Follow Section A. Proper Shutdown Procedures Brick in page front of 2. The top baffle has a hook on the bottom left side that clip and rests on the top lip of the cast brick. There is a tab on Notches the bottom right side that hooks into the side bracket. -
Page 27: Igniter
D. Igniter E. Glass PART NUMBER: SRV7000-462 PART NUMBER: SRV7021-032 1. Shut down the appliance by turning down the 1. Open the face and remove door from the appliance thermostat and let the appliance completely cool down. by lifting door off of hinge pin and lay on a flat surface After the appliance has cooled down, unplug it and face down. -
Page 28: Reference Materials
Reference Materials A. Component Functions When describing the location of a 1. Control Box component, it is always AS YOU FACE THE a. The control box is located on lower right side of FRONT OF THE APPLIANCE. appliance, on top of the junction box. b. - Page 29 17. Snap Disc #1 (Convection Blower) 110°F 20. Vacuum Switch Snap disc #1 is located on the right side of the firebox. The vacuum switch is located on the lower right side of the There are 2 purple wires connected to it. This snap disc appliance behind left access panel.
-
Page 30: Component Locations
B. Component Locations 10 Heat Exchanger Tubes Cleaning Rods Figure 30.1 - Cleaning Rods & Heat Exchanger Tubes RIGHT SIDE Feed Motor Combustion Blower Vacuum Switch Leveling Bolt Convection Blower Figure 30.2 Control Box Red Call Light Fuse Power Cord Outlet Heat Output Firepot... -
Page 31: Service And Maintenance Log
C. Service and Maintenance Log Date of Service Performed By Description of Service 7022-802J 01/22... - Page 32 Date of Service Performed By Description of Service 7022-802J 01/22...
-
Page 33: Service Parts List
D. Service Parts List Castile Insert-C Service Parts Beginning Manufacturing Date: Feb 2011 Castile Pellet Insert Ending Manufacturing Date: May 2019 CASTILEI-MBK-C, CASTILEI-PMH-C, CASTILEI-TWL-C Part number list on following pages. 12/21 7022-802J 01/22... - Page 34 Castile Insert-C Service Parts Beginning Manufacturing Date: Feb 2011 Ending Manufacturing Date: May 2019 IMPORTANT: THIS IS DATED INFORMATION . Parts must be ordered from a dealer or Stocked Hearth and Home Technologies does not sell directly to consumers distributor. .
- Page 35 Castile Insert-C Service Parts Beginning Manufacturing Date: Feb 2011 Ending Manufacturing Date: May 2019 IMPORTANT: THIS IS DATED INFORMATION . Parts must be ordered from a dealer or Stocked Hearth and Home Technologies does not sell directly to consumers distributor. .
- Page 36 Castile Insert-C Service Parts Beginning Manufacturing Date: Feb 2011 Ending Manufacturing Date: May 2019 IMPORTANT: THIS IS DATED INFORMATION . Parts must be ordered from a dealer or Stocked Hearth and Home Technologies does not sell directly to consumers distributor. .
- Page 37 Castile Insert-C Service Parts Beginning Manufacturing Date: Feb 2011 Ending Manufacturing Date: May 2019 IMPORTANT: THIS IS DATED INFORMATION . Parts must be ordered from a dealer or Stocked Hearth and Home Technologies does not sell directly to consumers distributor. .
- Page 38 Castile Insert-C Service Parts Beginning Manufacturing Date: Feb 2011 Ending Manufacturing Date: May 2019 IMPORTANT: THIS IS DATED INFORMATION . Parts must be ordered from a dealer or Stocked Hearth and Home Technologies does not sell directly to consumers distributor. .
- Page 39 Castile Insert-C Service Parts Beginning Manufacturing Date: Feb 2011 Ending Manufacturing Date: May 2019 IMPORTANT: THIS IS DATED INFORMATION . Parts must be ordered from a dealer or Stocked Hearth and Home Technologies does not sell directly to consumers distributor. .
- Page 40 Hearth & Home Technologies 352 Mountain House Road Halifax, PA 17032 Division of HNI INDUSTRIES Please contact your Quadra-Fire dealer with any questions or concerns. For the number of your nearest Quadra-Fire dealer log onto www.quadrafi re.com CAUTION DO NOT DISCARD THIS MANUAL •...
Need help?
Do you have a question about the CASTILE Series and is the answer not in the manual?
Questions and answers