Table of Contents
Advertisement
Available languages
Available languages
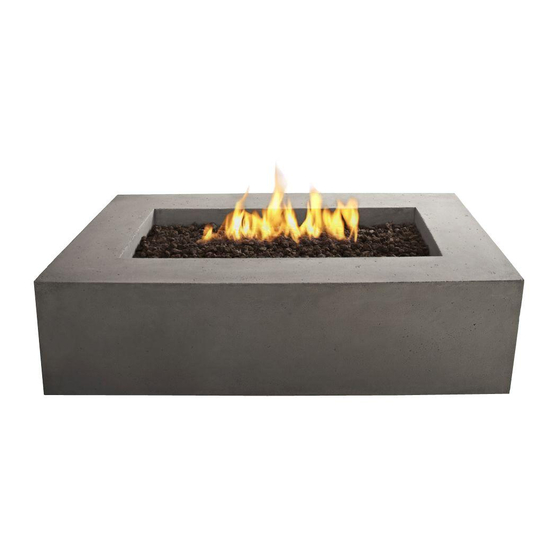
Rectangle Fire Table Owner's Manual
!
IMPORTANT
SAVE THESE
INSTRUCTIONS
!
WARNING
For outdoor use only. DO NOT use
for cooking. DO NOT use under any
overhead enclosure.
C
US
!
DANGER
If you smell gas:
1. Shut off gas to the appliance.
2. Extinguish any open flame.
3. If odor continues, keep away from the appliance and
immediately call your gas supplier or fire department.
For Technical Support Please Contact Real Flame® At: 1-800-654-1704
9650 LP
!
WARNING
If the information in this manual
is not followed exactly, a fire or
explosion may result causing
property damage personal injury
or loss of life.
Installation and service must be
performed by a qualified installer,
service agency or gas supplier.
Improper Installation, adjustment,
alteration, service or maintenance
can cause injury or property
damage.
Do not store or use gasoline or other flammable
vapors and liquids in the vicinity of this or any
other appliance.
An LP-cylinder not connected for use should be
stored in vicinity of this or any other appliance.
Read the installation, operation
and maintenance instructions
thoroughly before installing or
servicing this equipment.
Save these instructions for
future reference. If you are
assembling this unit for
someone else, give this manual
to him or her to read and save
for future reference.
!
WARNING
Advertisement
Chapters
Table of Contents

Related Manuals for Real Flame 9650 LP


Summary of Contents for Real Flame 9650 LP
- Page 1 3. If odor continues, keep away from the appliance and An LP-cylinder not connected for use should be immediately call your gas supplier or fire department. stored in vicinity of this or any other appliance. For Technical Support Please Contact Real Flame® At: 1-800-654-1704...
-
Page 2: Table Of Contents
DANGER CARBON MONOXIDE HAZARD This appliance can produce carbon monoxide which has no odor. Using it in an enclosed space can kill you. Never use this appliance in an enclosed space such as a camper, tent, car or home. TABLE OF CONTENTS Important Safety Information Propane (LP) Dangers and Warnings Hose &... -
Page 3: Important Safety Information
IMPORTANT SAFETY INFORMATION WARNING FIRE TABLE IS FOR OUTDOOR USE ONLY IF YOU SMELL GAS • Shut off gas supply to the fire table. • Extinguish any open flame. • Do not try lighting any appliance. • Do not touch any electrical switch; do not use any phone in your building. •... - Page 4 If the hose is damaged, cracked or cut, it must be replaced before using the gas fire table. The hose assembly can only be replaced with a hose assembly specified by the manufacturer. Please call Real Flame at 1-800-654-1704.
-
Page 5: Propane (Lp) Dangers And Warnings
The burner assembly cannot be replaced. Please contact Real Flame at 1-800-654-1704 for technical support. • Place the hose out of the pathways where people may trip over it. Do not place the hose in areas where it may be subjected to accidental damage. - Page 6 LP gas cylinder. Never connect to an unregulated LP gas supply. For technical support contact Real Flame at 1-800-654-1704. • Hand turn the manual gas control valve. Never use tools. If the valve will not turn by hand, do not try to repair it.
-
Page 7: Hose & Regulator Assembly And Replacement
Fix or replace the hose as required before using the appliance. For assistance with repair or replacement of the hose, call Real Flame at 1-800-654-1704. Use only replacement parts from the manufacturer. -
Page 8: Parts List
PARTS LIST Fire Table Lid LP Regulator and Hose 05600007 Glacier Grey 96504201 Feet 05600006 Kodiak Brown 96504501 Lava Rock 100040100 Adjustable Screw 100050000 Vinyl Cover 96500109 Fire Table No Number Tank Seat 05600005 Hose Guide - 100060000... -
Page 9: Assembly Instructions
ASSEMBLY INSTRUCTIONS The fire table is very heavy, make sure that another person is available to help you when moving it or flipping it over. With the fire table upside down, install the four feet (6) by screwing them into the holes located in the corners of the unit. WARNING Flip the table over with the help of another person. - Page 10 ASSEMBLY INSTRUCTIONS Install the Hose Guide 1. Carefully unwrap the hose and lay it across the gap in the base. 2. Place the hose guide (A) over the hose and attach using the provided hardware. Be careful not to damage hose while installing hose guide.
- Page 11 ASSEMBLY INSTRUCTIONS Install the AAA battery as shown in the diagram below. Battery not included. 1. Place the tank seat on the ground and place a 20 lb. propane tank into the tank seat. 2. Tighten down the screw on the side of the tank seat to secure the propane tank.
- Page 12 ASSEMBLY INSTRUCTIONS Connecting the LP Gas Tank Check to make sure there is no debris in the head of the LP gas tank or in the head of the regulator valve. Make sure you check the burner and burner ports as well. Connect gas line to tank by turning knob clockwise.
- Page 13 ASSEMBLY INSTRUCTIONS Place lava rock by hand. DO NOT dump bag out into tray to avoid clogging the burner with dust. Position the lava rock (10kgs) to a level about 1” above the top of the burner. Make sure that you do not block the igniter box with lava rock to ensure proper ignition.
- Page 14 Please refer to diagram for proper installation. If the burner pipe does not rest flush to the orifice please contact Real Flame at 1-800-654-1704 for assistance. Burner Pipe CHECKING FOR LEAKS Make a leak check solution by mixing 1 part dish washing soap with 3 parts water in a spray bottle.
-
Page 15: Lighting Instructions
LIGHTING INSTRUCTIONS Using the Ignitor 1. Read and understand all operating instructions before lighting Ensure that all protective film has been removed from stainless burn tray prior to lighting. 2. Burner control knob must be in the “OFF” position. 3. Connect propane (LP) cylinder (see previous pages). 4. -
Page 16: Care And Cleaning
DO NOT tamper with this appliance. This is DANGEROUS and will void the warranty. Any part found to be faulty must be replaced with an approved part, confirmed by manufacturer. For technical support contact Real Flame at: 1-800-654-1704. General Care and Cleaning This outdoor fireplace should be cleaned regularly to ensure safe use and extend product life. -
Page 17: Gas Component Checks
GAS COMPONENT CONNECTION CHECKS If the burner will not light or stay lit, please perform the following checks. 1. Make sure the electrode wire is correctly connected. Both electrode wires must be fully inserted into the igniter box. 2. Make sure that the pilot housing is unobstructed. Clear any debris on top of the pilot housing and make sure there is no debris between the igniter pin, thermocouple and the burner tube. - Page 18 GAS COMPONENT CONNECTION CHECKS Thermocouple Igniter Pin 3. Make sure that the igniter pin and thermocouple are correctly positioned. - The igniter pin should be pointed straight to the thermocouple. - The thermocouple should be positioned 5mm away from the burner tube. Valve Thermocouple Thermocouple Wire...
-
Page 19: Troubleshooting
-Call Real Flame at 1-800-654-1704 for technical support. Possible Cause 4: Wire loose or disconnected. -Reference page 16, step 1, reconnect wire. Call Real Flame at 1-800-654-1704. Possible Cause 5: Wire is shorting (sparking) between igniter and electrode. -Call Real Flame at 1-800-654-1704 for support. - Page 20 -Turn the control knob and the LP gas tank to “OFF”. Replace with a spare LP gas tank and resume burning. Store the spare LP gas tank in a well ventilated area, away from children. If these troubleshooting steps are unable to resolve the problem, please call Real Flame at: 1-800-654-1704...
-
Page 21: Warranty
90 days from the date of purchase. In the event of such defects Real Flame will, at its option, replace the defective product or refund the purchase price. The foregoing is the exclusive remedy and Real Flame disclaims all other warranties, including any implied warranty of merchantability or fitness for a particular purpose. - Page 22 PARTS LIST - BALTIC TANK COVER 561 The following instructions are for an optional tank cover, please contact Real Flame to purchase this tank cover. Tank Holder Top Glacier Grey 05613501 Kodiak Brown 05614301 Tank Holder Base 05613102 Feet 05610103...
- Page 23 TANK HOLDER ASSEMBLY INSTRUCTIONS Screw the Feet (3) onto the Base (2). Feed the propane tank end connection of the hose up through the bottom of the Tank Holder Base (2). Be sure to not feed the hose through the center of the base (this is where the propane tank will be seated).
- Page 24 Place the propane tank in the base and secure the tank by tightening the screw at the bottom of the base. With the propane tank secured and the regulator hose connected, place the Top (1) onto the Base (2). Do not sit on top of the tank holder. To Propane Fireplace...
- Page 25 For Technical Support Contact Real Flame at: 1-800-654-1704...
- Page 26 9650 LP Manuel d’utilisation de la table-foyer rectangulaire IMPORTANT AVERTISSEMENT CONSERVER CES Une installation, une mise au point, une modification ou un entretien La négligence à suivre INSTRUCTIONS inappropriés peuvent occasionner scrupuleusement les instructions des blessures ou des dommages à la contenues dans ce manuel peut propriété.
- Page 27 DANGER DANGER DE MONOXYDE DE CARBONE Cet appareil peut produire du monoxyde de carbone, lequel est toujours inodore. Utiliser cet appareil dans un endroit fermé peut causer la mort. Ne jamais utiliser cet appareil dans un espace fermé comme une fourgonnette de camping, une tente, une voiture ou à...
-
Page 28: Instruction De Sécurité Importante
INSTRUCTION DE SÉCURITÉ IMPORTANTE LA TABLE-FOYER EST CONÇUE EXCLUSIVEMENT AVERTISSMENT POUR L’EXTÉRIEUR SI VOUS PERCEVEZ UNE ODEUR DE GAZ • Couper l’alimentation en gaz de la table-foyer. • Éteindre toute flamme nue. • N’allumer aucun appareil. • Ne toucher aucun interrupteur électrique; n’utiliser aucun téléphone de l’immeuble. •... - Page 29 INSTRUCTION DE SÉCURITÉ IMPORTANTE • NE PAS utiliser dans un environnement où des vapeurs inflammables peuvent s’accumuler. Mettre la table-foyer dans un endroit dégagé et libre de tous matériaux combustibles, d’essence, de liquides et de vapeurs inflammables. • Cette table-foyer extérieure ne doit PAS être utilisée par des enfants. Les jeunes enfants devraient faire l’objet d’une surveillance constante lorsqu’ils sont à...
- Page 30 être utilisée. L’ensemble du brûleur ne peut être remplacé. Contacter Real Flame au 1 800-654-1704 pour un soutien technique. • Garder le tuyau hors de la circulation afin que personne ne trébuche sur celui-ci. Ne pas placer le tuyau dans un endroit où...
- Page 31 PL. Ne jamais connecter à une alimentation en gaz PL non conforme. Pour une assistance technique, contacter Real Flame au 1 800-654-1704. • Tourner à la main la soupape de contrôle du gaz. Ne jamais utiliser d’outils. Si la soupape ne tourne pas à...
-
Page 32: Remplacement Et Assemblage Du Boyau Et Du Régulateur
Pour toute assistance concernant la réparation ou le remplacement du tuyau, contacter Real Flame au 1 800-654-1704. Utiliser uniquement les pièces de remplacement proposées par le manufacturier. -
Page 33: Liste Des Pièces
LISTE DES PIÈCES Couvercle de la table-foyer Régulateur et tuyau 05600007 du gaz PL Glacier Gris 96204201 Kodiak Brun 96204501 Pieds 05600006 Vis de réglage 100050000 Pierre de lave 100040100 Table-foyer Non Nombre Recouvert de Vinyle 96500109 Assise du réservoir 05600005 Guide de Tuyau - 100060000... -
Page 34: Instructions Pour L'assemblage
INSTRUCTIONS D’ASSEMBLAGE La table-foyer est très lourde, toujours être accompagné d’une autre personne pour vous aider lorsque vous déplacez ou retournez l’appareil. Mettre la table à l’envers, installer les quatre pieds en les vissant dans les trous situés aux coins de l’appareil. AVERTISSEMENT Retourner la table avec l’aide d’une autre personne. - Page 35 INSTRUCTIONS D’ASSEMBLAGE Installez le guide de tuyau 1. Soigneusement déballer le tuyau et le poser travers l’intervalle dans la base. 2. Placez le guide de tuyau (A) sur le tuyau et fixer à l’aide du matériel fourni. Veillez à ne pas endommager le tuyau lors de l’installation guide de tuyau.
- Page 36 INSTRUCTIONS D’ASSEMBLAGE Installer la pile AAA (voir le diagramme ici-bas). La batterie n’est pas incluse. 1. Mettre l’assise du réservoir sur le sol et placer un réservoir de propane de 20 lb (9,07 kg) dans l’assise du réservoir. 2. Resserrer la vis sur le côté de l’assise du réservoir pour bien fixer le réservoir de propane.
- Page 37 INSTRUCTIONS D’ASSEMBLAGE Raccord du réservoir de gaz PL Vous assurer de l’absence de débris dans la tête du réservoir ou dans la tête de la soupape de régulation. Bien vérifier le brûleur ainsi que les orifices du brûleur. Raccorder la conduite de gaz au réservoir en tournant le bouton dans le sens des aiguilles d’une montre.
- Page 38 INSTRUCTIONS D’ASSEMBLAGE Étendre la pierre de lave à la main. NE PAS vider le sac sur la grille afin d’éviter de boucher le brûleur avec de la poussière. Mettre la pierre de lave (10kgs) jusqu’à 1 pouce (2,54 cm) au-dessus de la partie supérieure du brûleur.
- Page 39 Veuillez vous reporter au diagramme pour une bonne installation. Si le tuyau du brûleur ne s’ajuste pas parfaitement à l’orifice, contacter le service à la clientèle de Real Flame 1 800-654-1704 pour assistance. VÉRIFICATION DES FUITES Faire une solution pour détection de fuite en mélangeant 1...
-
Page 40: Instructions Pour L'allumage
INSTRUCTIONS D’ALLUMAGE Utilisant l’allumeur 1. Lire et comprendre toutes les instructions de la mise en marche avant l’allumage. Vous assurer que toutes les pellicules protectrices ont été enlevées autour du plateau du brûleur en inox avant l’allumage. 2. Le bouton de contrôle du brûleur doit être en position « OFF ». 3. - Page 41 DANGEREUX et annulerait la garantie. Toute pièce qui doit être changée doit être remplacée par une pièce approuvée et confirmée par le manufacturier. Pour l’assistance technique, contacter Real Flame au 1 800-654-1704. Soin et entretien d’usage Ce foyer pour l’extérieur devrait être nettoyé régulièrement pour vous assurer de sa sécurité et pour prolonger sa durée de vie.
- Page 42 VÉRIFICATION DES COMPOSANTES DU RACCORD EN GAZ Si le brûleur ne s’allume pas ou ne reste pas allumé, procédez aux vérifications suivantes. 1. Vous assurer que le fil de l’électrode est correctement branché. Les deux fils de l’électrode doivent être complètement insérés dans la boîte d’allumage. 2.
- Page 43 VÉRIFICATION DES COMPOSANTES DU RACCORD EN GAZ Thermocouple Aiguille d’allumage 3. Vous assurer que l’aiguille d’allumage et le thermocouple sont correctement positionnés. - L’aiguille d’allumage devrait pointer directement vers le thermocouple. - Le thermocouple devrait se situer à 5 mm de distance du tuyau du brûleur. Soupape Fil Thermocouple Thermocouple...
-
Page 44: Dépannage
- Contacter Real Flame au 1 800-654-1704 pour du soutien technique. Cause possible 4: Fil lâche ou débranché. - Voir page 16, étape 1, rebrancher le fil. Contacter Real Flame au 1-800-654-1704. Cause possible 5: Le fil est en court-circuit (formation d’étincelles) entre l’allumeur et l’électrode. - Page 45 Entreposer le réservoir de rechange dans un endroit bien ventilé et hors de portée des enfants. Si ces suggestions de dépannage ne résolvent pas le problème, contacter Real Flame au 1 800-654-1704...
-
Page 46: Garantie
(boîte ouverte). Avant de retourner les articles endommagés, veuillez contacter le service à la clientèle de Real Flame au 1 800 654-1704 pour des pièces de rechange. Avant de contacter le service à la clientèle, ayez en main les informations suivantes, se trouvant dans votre manuel d’instructions : •... - Page 47 LISTE DES PIÈCES- COUVRE-RÉSERVOIR DE PROPANE BALTIC Les instructions suivantes concernent le couvre-réservoir en option. Pour vous procurer ce couvre-réservoir, contacter un magasin Real Flame. Couvre-réservoir Glacier Gris 05613501 Kodiak Brun 05614301 Base-support du réservoir 05613102 Pieds 05610103...
- Page 48 Instructions Pour L’assemblage - Couvre-réservoir de propane Baltic 561 Visser les pieds (3) sur la base (2). Introduire l’extrémité du tuyau de raccord du réservoir de propane à travers le bas de la base-support du réservoir (2). Vous assurer de ne pas introduire le tuyau à travers le centre de la base (là où le réservoir reposera).
- Page 49 Mettre le réservoir de propane dans la base et fixer bien en place le réservoir en serrant la vis au bas de la base. Avec le réservoir de propane bien en place et le tuyau régulateur branché, mettre le couvre-réservoir (1) sur la base (2). Ne pas s’asseoir sur le couvre- réservoir.
Need help?
Do you have a question about the 9650 LP and is the answer not in the manual?
Questions and answers