Table of Contents
Advertisement
Quick Links
Advertisement
Chapters
Table of Contents
Troubleshooting

Related Manuals for Dräger Medical Caleo


Summary of Contents for Dräger Medical Caleo
- Page 1 M E D I C A L ® Caleo Neonatal incubator Instructions for Use Software 1.n...
- Page 2 How to use the Instructions for Use The headline ... Preparation specifies the subject of the main chapter Before using for the first time to help you find your way around rapidly. Preparation Before using for the first time The page ... Check that all packaging materials have been completely removed (see packing slip in the pack).
-
Page 3: Table Of Contents
Contents Contents For Your Safety and that of Your Patients Intended use What's what Operating concept Preparation Checking readiness for operation Operation Care Maintenance intervals Troubleshooting – Error Messages Troubleshooting – Faults Technical Data Description Order list Parts List Index... -
Page 4: For Your Safety And That Of Your Patients
For Your Safety and that of Your Patients For Your Safety and that of Your Patients Strictly follow the Instructions for Use Any use of the apparatus requires full understanding and strict observation of these instructions. The apparatus is only to be used for purposes specified here. -
Page 5: Intended Use
Intended use Intended use Therapy system providing a controlled supply of warmth, humidity* and O enrichment* in the patient capsule for premature babies and sick neonates up to a body weight of 5 kg or a body length of 55 cm (when treating twins, the total body weight is limited to 5 kg). -
Page 7: What's What
What's what What's what Contents What's what ............8 Front view . -
Page 8: What's What
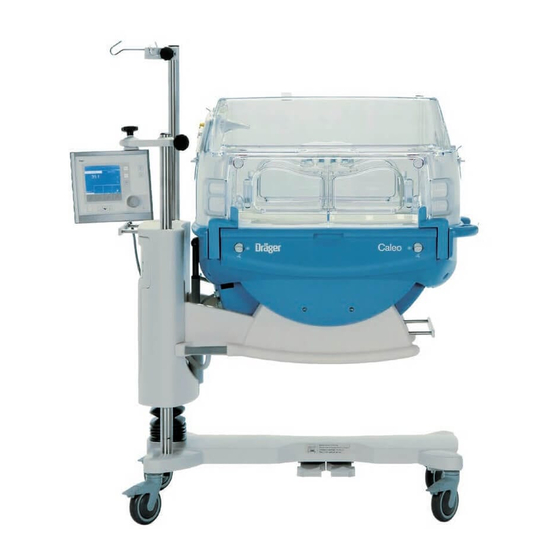
What's what What's what Front view 1 Canopy 2 Hand port 3 Front flap 4 Handle for transport 5 Housing 6 Drawer (2M 50 565) 7 Castors 8 Pedals for height adjustment 9 Height adjustable pillar / Housing support 10 Connection for water heater (LuerLock) 11 X-ray drawer / removable bed 12 Display 13 Control unit... -
Page 9: Operating Concept
2 Hot air duct Operating concept Control unit Hard Keys 15 16 these permanently defined keys enable the user to select ® various functions of Caleo 3 Scales 4 Bed tilt 5 Menu selection/configuration Menu 6 Changeover key: air/skin temperature control Skin... -
Page 10: Screen
Operating concept Rotary knob A single rotary knob is used to select and set parameters. Turn knob = select Press knob = confirm Screen By default, the measured values are displayed as numeric values (standard screen). — Set values and actual measured values for air temperature/skin temperature —... -
Page 11: Preparation
Preparation Preparation Contents Preparation ............12 Before using for the first time . -
Page 12: Preparation
Preparation Before using for the first time Preparation Before using for the first time Check that all packaging materials have been completely removed (see packing slip in the pack). Check that the mains power supply voltage matches the voltage rating specified on the nameplate (see page 123). Check that the altitude above sea level is correctly set (see page 73). - Page 13 Preparation Fitting accessories Infusion support (2M 21 514) for pole, 38 mm Place the fixing clamp on the stand pillar. Push the infusion support into the clip and secure by tightening the clamping screw. Swivel table (2M 21 186) For small articles, max. load 3 kg, for mounting on 38 mm pole Place the clamp of the swivel table on the stand pillar and tighten the clamping screw.
- Page 14 Preparation Fitting accessories Bronchial aspiration system (2M 85 125) Follow the separate Instructions for Use of the bronchial aspirator. Fix the bronchial aspirator holder to the standard rail on the wall side or handle side. Tighten the clamping lever. Establish the hose connections. Basic pole (2M 50 680) Maximum load 5 kg This pole must only be mounted by qualified technical...
- Page 15 Notebook holder (2M 22 171) Maximum load must not exceed 3 kg! ® 1 Fix the holder to the handle rail of the Caleo 2 Align the holder horizontally with the clamping screw. Check that the holder is securely fixed in position and that the swivelling mechanism is functioning correctly by turning and tilting the support plate.
- Page 16 Fix the O monitor to the handle rail with the holder. ® Place the sensor capsule in Caleo Route the sensor cable through one of the flexible tubing ports. Where applicable, push the sensor plug into the socket of the O monitor (e.g.
- Page 17 Preparation Fitting accessories Vacuum mattress (2M 17 909) The contour of the vacuum mattress can be altered as required and is then maintained after air evacuation of the mattress. Extreme positions can therefore be obtained for special applications. The foam mattress can remain in the incubator. Open the front flap.
-
Page 18: Doors, Ports And Bed
Preparation Doors, ports and bed Doors, ports and bed Hand ports To open the hand ports: 1 Press the catch: the relevant hand port swings open. To close the hand ports: Push the hand ports back into place until the catch engages. - Page 19 Preparation Doors, ports and bed Side flap The side flap is opened and closed in the same way as the front flap (see page 18). Canopy To open the canopy: 1 Grasp the handle on the canopy 2 lift open (approx. 60 Do not tilt the canopy forwards! 3 Raise the side support prop, and lower the canopy until the prop is fixed in the slot of the canopy.
- Page 20 Preparation Doors, ports and bed Double wall To remove the double wall: Remove the canopy and lay it upside down (on a soft, non-abrasive surface). 1 Squeeze the double wall inwards slightly, and 2 release the oblong holes of the double wall from the retaining lugs in the canopy.
- Page 21 5 Feeding grommet, hood (2M 50 352) Route the cables or hoses through the flexible grommets and sleeves. ® To route ventilation hoses and cables through the Caleo , use the ventilation hose holder (page 16). Drawer (2M 50 565) Drawer for storing items required for nursing or treatment.
- Page 22 Trolley (base frame) with variable height adjustment To use the height adjustment facility: ® Switch on Caleo (see page 37). ® 1 Press the left pedal – Caleo is lowered. ® 2 Press the right pedal – Caleo is raised. Adjust to a comfortable working height.
- Page 23 2 Press button = the bed will be lowered on the control unit side. The spirit levels show whether the bed is horizontal. ® 3 Spirit levels for the horizontal position of Caleo in the transverse axis. ® 4 Spirit level for the horizontal position of Caleo in the longitudinal axis.
- Page 24 4 Connect the LuerLock connection to the water connection pipe. 5 Open the clamp on the connection tube. ® Switch on the humidification module on Caleo and set the humidity value (page 51). Water bag: Use only sealed bags with sterilised Aqua dest.!
- Page 25 — SpO measuring equipment. Connections may only be made by qualified technical staff. Caleo does not monitor the power supply to external devices. Do not exceed the maximum power input of the connected accessories (all 4 sockets together: max. 2A).
-
Page 26: Checking Readiness For Operation
Connect to the mains supply. Check that the slits of the sensor unit are not fouled. ® Do not use multiple-plug adapters for the Caleo power supply! The patient leakage current may rise above the permitted limits if the protective earth conductor fails when equipment is connected to the socket strip. - Page 27 Checking readiness for operation Before each use Check that the front flap is secure Open the front flap and fold it down (see page 18). 1 Raise and press the flap closed and turn the two knobs outwards until they tangibly engage in the horizontal position.
- Page 28 Checking readiness for operation Before each use 1 Grasp the handles on the sides of the canopy with both hands. 2 Lift the canopy horizontally off the pillar elements. If the canopy holders are damaged: Call DrägerService. Check that the double wall is securely in place All 4 retaining lugs in the canopy must be seated in the oblong holes of the double wall.
- Page 29 Checking readiness for operation Before each use Activate the self-test, check audible warning tone 1 Switch on the unit = press the on/off switch until it clicks into position. During the self-test, the functions of the machine are checked. The audible signal, alarm beep sequence, screen displays and LEDs must be checked by the user.
- Page 30 Before each use Check the bed tilting mechanism 1 Tilt the bed. ® During the tilting process, the entire housing of the Caleo must move uniformly. If not: Call DrägerService. Do not reach in between the housing and the housing support while the unit is moving! Risk of injury! 2 Return the bed to the horizontal position (see page 23).
- Page 31 Checking readiness for operation Before each use Check the power failure alarm Disconnect the unit from the mains. 1 The power failure LED must flash. An intermittent tone must start. The volume of this tone must remain constant for at least 30 seconds. If the volume decreases too soon: Leave the incubator connected to the mains and switched on for 24 hours to recharge the NiCd battery.
-
Page 33: Operation
® Switching on Caleo ........... 37 Using air temperature control . -
Page 34: Operation
When treating larger babies, the higher heater output may (see page 26). ® cause the air temperature in the Caleo incubator to rise. In this case the double wall should be removed. Make sure that all hoses and cables are routed correctly... - Page 35 When using other phototherapy units, especially units ® The side flaps are not properly shut until the red latches without a built-in fan, the temperature in the Caleo are no longer visible. incubator may rise even more sharply. — Phototherapy may only be used with a stand!
- Page 36 Electrical safety Do not use multiway adapters to connect the power ® supply of the Caleo The patient leakage current may rise above the permitted limits if the protective earth conductor fails while equipment is connected to the socket strip. In such cases, the risk of electric shock cannot be excluded.
-
Page 37: Switching On Caleo
Operation ® Switching on Caleo Switching on Caleo ® Connect the unit to the mains. 1 Switch on the unit = press the on/off switch until it clicks into place. An audible signal is emitted. — The opening screen is displayed. -
Page 38: Using Air Temperature Control
The baby’s core temperature must be measured regularly with an independent thermometer! Do not leave the canopy open for any length of time, ® otherwise the air temperature in the Caleo will drop. Adjusting the set value for air temperature Standard set value range... - Page 39 Operation Using air temperature control When using the extended set value range, particular care must be taken to monitor the baby’s core temperature! If the specified set value exceeds the standard set value range — The following message is displayed at the top of the screen »confirm extended range with rotary knob«.
- Page 40 — The set value and»set: <28.0 « are displayed alternately. ® Reducing the air temperature in Caleo The cooling rate depends on the incubator design and can be increased by: — removing the double wall — reducing the outside temperature (if possible) —...
-
Page 41: Alarms
2 The measured value flashes, 6 The red alarm LED flashes. The alarm tone can be muted for 5 minutes. ® Caleo heats up if necessary to attain the desired interior air temperature setting. 2 The measured value continues to flash, 6 The red alarm LED continues to flash. -
Page 42: Using Skin Temperature Control
Operation Using skin temperature control Using skin temperature control Immediately before using the yellow skin temperature sensor or the white peripheral sensor, insert it in the yellow or white socket and wait for the measurement signal to appear on screen. 1 Measurement signal from the yellow skin temperature sensor (T1) 2 Measurement signal from the white peripheral temperature... -
Page 43: Changing Over Between Air/Skin Temperature Control
Do not use skin temperature control mode on twins, ® because Caleo only controls the temperature for one baby. Danger of hypothermia or overheating! 1 Change temperature control mode = press button. - Page 44 The display returns to the standard screen. The previous set value is retained. ® — Wait for 7 seconds: Caleo emits 4 short beeps to prompt the user to press the rotary knob. If the rotary knob is not pressed, the display automatically returns to the standard screen after 7 seconds, and the previous set value is retained.
-
Page 45: Using Skin Temperature Control
The baby’s core temperature must be measured regularly with an independent thermometer! Do not leave the canopy open for any length of time, ® because the air temperature in Caleo will drop! Adjusting the set value Standard set value range... - Page 46 The display returns to the standard screen. The previous set value is retained. ® — Wait for 7 seconds: Caleo emits 4 short beeps to prompt the user to press the rotary knob. If the rotary knob is not pressed, the display automatically returns to the standard screen after 7 seconds, and the previous set value is retained.
- Page 47 The screen returns to standard display mode. The previous set value is retained. ® — Wait for 7 seconds: Caleo emits 4 short beeps to prompt the user to press the rotary knob. If the rotary knob is not pressed, the display automatically returns to the standard screen after 7 seconds, and the previous set value is retained.
-
Page 48: Alarms
6 The red alarm LED flashes. Then: Change the skin temperature sensor. ® As long as 3 dashes appear on screen, Caleo does not heat. Danger of hypothermia for the patient! The numerical values in this description are examples. See "Setting alarms" on page 74. - Page 49 Operation Using skin temperature control The alarm tone can be muted for 5 minutes: 1 Suppress intermittent alarm tone = press button 2 Press the rotary knob. — The warning message remains on the screen, — The intermittent alarm tone is muted, —...
-
Page 50: Using Humidity Control
Operation Using humidity control Using humidity control Connect the humidifier system (see "Using humidifier systems" on page 24). 1 Set humidity control = press button. — The actual value and current setpoint of the humidity control are displayed as bar graphs and numerical values. Soft key assignments: = Do not activate new settings. -
Page 51: Setting Auto Humidity
Operation Using humidity control Setting AUTO humidity In AUTO humidity, the humidity setpoint is automatically calculated and set by the system as a function of the air temperature setting (see page 119). The maximum relative humidity depends on the ambient temperature and incubator air temperature at max. - Page 52 Operation Using humidity control — The actual value and the current set value of the humidity control are displayed as bar graphs and numerical values. — The display returns to the standard screen. The measured values and set values are displayed.
-
Page 53: Alarms
Operation Using humidity control Alarms In the event of water shortage — The following warning message appears on the screen »Water empty, please refill«, — The alarm tone sequence (3 beeps) is sounded, — The central alarm indicator lights up 1 The measured value flashes, 2 The yellow alarm LED flashes. -
Page 54: Using O 2 Control
Operation Using O2 control Using O control Note the physiological risks from O The air in the incubator should only be enriched with O when prescribed by a doctor. enrichment must be controlled on the basis of the arterially measured oxygen partial pressure in the patient’s blood. -
Page 55: Adjusting The Set Value
Operation Using O2 control Adjusting the set value Standard set value range 21 Vol.% to 40 Vol.% Extended set value range 40.1 Vol.% to 75 Vol.% Default setting 21 % 1 Increase set value = turn rotary knob clockwise. 1 Decrease set value = turn rotary knob counter-clockwise. 1 Confirm set value = press rotary knob. - Page 56 Operation Using O2 control Note the dangers of high O concentrations (see page 34)! If the set value exceeds the standard set value range — The following message is displayed at the top of the screen: »confirm extended range with rotary knob«. Confirm the extended set value range = press the rotary knob.
-
Page 57: Alarms
Operation Using O2 control Alarms Alarm limits can be changed in the configuration (see page 74). Example: if the deviation between the set and measured O concentration exceeds ±5 % — The screen displays the warning message »Oxygen deviation above 5 %«, —... -
Page 58: Selecting Menus
Ensure that all hoses and cables are routed correctly and safely without obstruction! In Kangaroo mode the incubator is operated in air temperature control mode. ® If Caleo was previously operated in air temperature mode, the set value for air will be activated in Kangaroo mode. ® If Caleo was previously operated in skin temperature mode, the last air temperature value will be loaded as set value. - Page 59 Operation Selecting menus Activating Kangaroo mode 1 Display the main menu = press »menu« button. Select ”Kangaroo mode” from the menu. 2 Select item = turn the rotary knob. 2 Confirm and activate item = press the rotary knob. — The screen displays the following advisory message: »You are leaving the current mode.
-
Page 60: Alarms
Operation Selecting menus Alarms Alarm limits can be changed in the configuration (page 74). If the skin temperature of the yellow skin temperature sensor (skin 1) falls below the alarm limit set in the configuration: — The screen displays the warning message »Skin 1 temperature below 36.0 C «... - Page 61 To maintain Kangaroo mode = press » « key. ® — Wait for 7 seconds: Caleo emits 4 short beeps to prompt the user to press the rotary knob. If the rotary knob is not pressed, the display automatically returns to the standard screen after 7 seconds, and the previous set value is retained.
-
Page 62: Trend Display
Operation Selecting menus Trend display The trend screen is used for the graphical and numerical display of the measurement parameters. The data window always shows the last data in the selected time interval. In addition, the current measured values and set values are numerically displayed. - Page 63 Operation Selecting menus — The trend for the air temperature over the last 3 hours is displayed. The current air and skin temperature values are displayed on the right next to the trend. — T1: Yellow skin temperature sensor (Skin 1) —...
- Page 64 Operation Selecting menus Select the desired trend from the displayed list. Back to menu = press » « key. 1 Display the zoom menu = press button. Select the desired zoom from the menu. 2 Select zoom = turn the rotary knob. 2 Activate zoom = press the rotary knob.
-
Page 65: Trend Analysis
Operation Selecting menus — In the illustrated example, the trend for the air temperature over the last 3 hours will be displayed. — T1: Yellow skin temperature sensor (skin 1) — T2: White peripheral sensor (skin 2) Trend analysis Trend analysis is used for the graphical and numerical display of measurement parameters and their associated set values. - Page 66 Operation Selecting menus — The trend graph for the selected measured value is displayed on the screen. Default values: Trend 1 Skin temperature Trend 2 Air temperature Zoom 3 hours The selected value is displayed as a trend graph. In this graph, the trend curve of the measured value is overlaid on the corresponding set value curve.
- Page 67 Operation Selecting menus Trend selection A trend graph can be selected with the soft keys. Soft Key assignments: = Cancel. New settings will not be activated. 2 trend 1 = Select trend 1. 3 trend 2 = Select trend 2. 4 zoom = Select time interval.
- Page 68 Operation Selecting menus The newly selected trend is displayed on the screen under- neath trend 1. In addition, a second data window containing the relevant parameters is opened next to trend 2. The time cursor and time range (zoom) are the same for both trend displays.
-
Page 69: Cleaning Mode
Cleaning mode is only available if Caleo is equipped with humidity control. ® Cleaning mode may only be used when Caleo is empty. In cleaning mode the water heater is boiled empty and then cooled. Cleaning mode lasts about 60 minutes. - Page 70 Do not disassemble Caleo during cleaning mode. — The screen indicates when cleaning mode is complete. Confirm end of cleaning mode = press rotary rotary knob. After ending cleaning mode: ® — Disinfect and clean Caleo (see "Disinfecting/Cleaning/ Sterilising" on page 84).
-
Page 71: Configuration
Operation Configuration Configuration In configuration mode, you can set — Language, date and time — System parameters and — Alarm parameters you can obtain information on — O sensors — the software version. Activating configuration mode 1 Activate configuration mode = hold down the »menu«... -
Page 72: Language/Date/Time
Operation Configuration Language/date/time 1 Select language/date/time = Turn and press the rotary knob. — The language selection box is highlighted by a bright border. 1 Select language = turn the rotary knob. 1 Confirm language = press the rotary knob. —... -
Page 73: Setting System Parameters
— The weight unit can only be set if the optional weighing ® scale is integrated in Caleo — If using 2 skin temperature sensors, the screen can display and either T or the difference between T and T (dT). -
Page 74: Setting Alarms
Operation Configuration Setting alarms 1 Select alarms = turn and push the rotary knob. — The menu that is then displayed allows the user to select Kangaroo mode, the initial volume of the audible alarms and the alarm limits for temperature control and O control. - Page 75 Operation Configuration Initial volume (sound intensity) of the alarms: Adjustment range: 1 to 8 Default: — The initial sound intensity is highlighted by a light background. Set an initial sound intensity = turn rotary knob. Confirm initial sound intensity = press rotary knob. The screen returns to the alarm settings menu (page 74).
-
Page 76: O 2 Sensor Information
Operation Configuration sensor information The screen displays the following information for the sensors used: — Date of manufacture — Date of last calibration — Date of next calibration. Viewing software information — The software version and the number of operating hours are displayed on the screen. -
Page 77: Lock Key Pad Functions
Operation Lock key pad functions Lock key pad functions 1 To lock further on-screen setting = press button. 1 The LED on the button lights up. — After 4 seconds, all screen functions are locked, except for: 1 Lock key pad function 2 Alarm suppression 3 Rotary knob 4 Bed tilt. -
Page 78: Weighing Scale
The scales must be regularly checked by a test weight. The spirit levels show whether the bed is aligned horizontally. ® 1 Spirit levels for the horizontal alignment of Caleo in the transverse axis. ® 2 Spirit level for the horizontal alignment of Caleo in the longitudinal axis. - Page 79 Weighing scale During weighing, the user is guided through the sequence of operating steps by the following prompts: ® Please adjust Caleo to horizontal position (see page 23). Turn knobs to X-ray position (see page 21). Lift baby clear of mattress.
- Page 80 1 Activate the weighing process = press soft key. ® Caleo proposes reweighing directly without obtaining a new tare. 2 Weigh without tare = press button.
-
Page 81: Ending Operation
Operation Ending operation The weighing procedure is ended. — The present and last weights are displayed. After 30 seconds, the display reverts automatically to the standard screen. Display the standard screen = press the rotary knob. The screen displays the last weight as advisory text for the next 10 minutes. -
Page 83: Care
Care Care Contents Disinfecting/Cleaning/Sterilising ......... 84 Stripping down . -
Page 84: Disinfecting/Cleaning/Sterilising
Disinfecting/Cleaning/Sterilising Disinfecting/Cleaning/Sterilising Risk of burns on contact with the heater When the incubator is closed, the heater is still hot enough to cause serious burns for a long time after switching off (still approx. 70 C after 1 hour). Clean and disinfect the incubator thoroughly: —... - Page 85 Sactiv Diversey Lever, Finland Viraclean Whiteley, Australia Note the manufacturer's directions for use. ® Do not treat Caleo and its components in formaldehyde vapour or ethylene oxide. The following materials are used in the patient capsule: Components Material Canopy, flaps...
-
Page 86: Stripping Down
Disinfecting/Cleaning/Sterilising Stripping down Stripping down Checking the fresh air filter To make the filter easier to remove, set the incubator to the tilted position. Connect to the mains power supply. Switch on the incubator = press the on/off switch until it clicks into position. - Page 87 Clean the water connection pipe in the cleaning and disinfecting machine at 93 sterilise at 134 ® Place Caleo horizontal (see page 23). Switch on cleaning mode (see page 69). After cleaning mode** is complete or if cleaning mode is not provided: Switch off the incubator and disconnect from mains.
- Page 88 Disinfecting/Cleaning/Sterilising Stripping down To remove the double wall: Remove the canopy and lay it upside down (on a soft, non-abrasive surface). 1 Squeeze the double wall inwards slightly, and 2 Release the oblong holes of the double wall from the retaining lugs in the canopy.
- Page 89 Disinfecting/Cleaning/Sterilising Stripping down Remove the X-ray drawer: Using the recessed handle, pull out the X-ray drawer as far as it will go. 1 Tilt the drawer upwards and pull it out of the unit. Remove visible soiling with a disposable cloth and detergent.
- Page 90 Disinfecting/Cleaning/Sterilising Stripping down Base frame/body Remove visible soiling with a disposable cloth and detergent. Wipe-disinfect the surfaces. After allowing the disinfectant time to take effect (see manufacturer's specifications), wipe the surface with a clean damp cloth and then rub dry. Remove any impurities near the slits of the sensor unit.
-
Page 91: Before Reusing For A Patient
Disinfecting/Cleaning/Sterilising Before reusing for a patient Before reusing for a patient Check that the system has been cleaned and disinfected in conformity with the regulations of the hospital. Reassemble the equipment with disinfected hands. Refit all equipment – see "Stripping down", page 86. When inserting the trough, make sure that both holders click into place. - Page 92 Check that the incubator is ready for operation – see "Before each use" on page 26. To remove possible disinfectant residue, we recommend running the incubator in standby mode. ® Switch on Caleo (see page 37). Activate air temperature control (see page 38). ® Run Caleo at 37 C with opened flaps.
-
Page 93: Care List
Disinfecting/Cleaning/Sterilising Care list Care list What How often Disinfect and clean Sterilise Reusable components Care intervals Wipe Cleaning and Steam 134 disinfecting machine Connection tube Replace weekly and with each change of patient Water container Change of patient/weekly Water connection pipe Change of patient/weekly Canopy Change of patient/weekly... -
Page 94: Maintenance Intervals
Maintenance intervals Maintenance intervals Disinfect and clean the incubator or the relevant parts before each maintenance operation, even when returning the equipment for repair purposes. Disconnect from the mains before each maintenance operation. Risk of electric shock. Intervals Who? when weekly every every... -
Page 95: Disposal
Maintenance intervals Disposal Disposal Disposal of the connection tube and fresh air filter — with household waste. Disposal of O sensors and battery — Do not throw into the fire. Risk of explosion. — Do not force open: risk of chemical burns. —... -
Page 97: Troubleshooting - Error Messages
Troubleshooting – Error Messages Troubleshooting – Error Messages Contents Troubleshooting – Error Messages ........98 Troubleshooting –... - Page 98 Troubleshooting – Error Messages Troubleshooting – Error Messages All error messages are displayed on the screen. They are listed in the table below in alphabetical order. See also "Alarm description" on page 121. Message Cause Remedy Duration audible alarm muted Air heater inoperable Air heater defective.
- Page 99 Troubleshooting – Error Messages Message Cause Remedy Duration audible alarm muted Humidifier inoperable Water heater is defective. Switch off humidity module. 1 min. Measured value (closed-loop humidity Call DrägerService. control) or set value (open-loop humidity control) flashes on the screen. Red alarm LED on the control panel flashes.
- Page 100 Troubleshooting – Error Messages Message Cause Remedy Duration audible alarm muted Oxygen sensor 1 inoperable Sensor for oxygen Switch off oxygen module. 1 min. Measured value flashes on screen. measurement is defective. Call DrägerService Red alarm LED on the control panel Sensor 1 is defective.
- Page 101 Troubleshooting – Error Messages Message Cause Remedy Duration audible alarm muted Skin 1 temperature below 36.0 Kangaroo mode alarm: Increase heat supply to the 15 min. (See "Configuration" on page 71) Skin temperature is falling patient. Measured value on screen flashes. below the alarm limit.
-
Page 102: Troubleshooting - Faults
Troubleshooting – Faults Troubleshooting – Faults All faults are listed in the table below in alphabetical order. See also "Alarm description" on page 121. Fault Cause Remedy Base frame cannot be set to the Motor overheating. Wait for 2 minutes. tilted position. -
Page 103: Technical Data
Technical Data Technical Data Contents Technical Data ............104 Environmental conditions . -
Page 104: Technical Data
Technical Data Technical Data Environmental conditions In normal operation Temperature C to 35 Atmospheric pressure 600 hPa to 1060 hPa applies to hospitals at altitudes of 0 to 4000 m above sea-level Relative humidity 10 to 95 %, no dew formation During storage/transport Temperature –20... -
Page 105: Performance Characteristics
Technical Data Performance characteristics Warm-up time 20 minutes from 20 C to 31 C (at 20 C ambient temperature) Increase in O concentration from 21 to 60 Vol.% <10 min Humidification Heating of sterilised Aqua dest. or demineralised water Air velocity over the bed <8 cm / second Fresh air supply 30 L/min... - Page 106 Current max. 250 mA Power max. 3 W Potential-free changeover contact The maximum attainable humidity depends on the air temperature and relative humidity. At high air temperature or low relative humidity, the ® humidity attainable in the Caleo is reduced.
-
Page 107: Dimensions
Technical Data Dimensions Unit (Width x Depth) 1090 mm x 680 mm Height of overall unit with variable pillar 1220 mm to 1520 mm Height of overall unit with fixed pillar 1270 mm / 1370 mm / 1470 mm Height of mattress surface (variable height) 800 mm to 1100 mm Height of mattress surface (fixed height) Optionally 850 mm, 950 mm or 1050 mm... -
Page 109: Description
® ® ™ Twins in the Caleo (Caleo Twincubator ) ......111 X-rays . -
Page 110: Description
5 kg and a body length ® of 55 cm. Inside the Caleo patient "capsule", the patients are supplied with a controlled amount of heat and, if necessary,... -
Page 111: Twins In The Caleo (Caleo Twincubator )
® 5 kg. When treating twins in an incubator, Caleo must be operated in air control mode. The treatment of twins together in a single incubator can help to prevent post-natal separation trauma. -
Page 112: Weighing Scale
(to ensure that the weight of the hoses and cables is not also weighed during the weighing procedure). ® The weighing scale in the Caleo comprises four weighing elements located underneath the bed, an electronic measuring and analysis unit and a special page on the control monitor. -
Page 113: Airflow Routing
The patient lies in a calm zone with low airflow speeds. Heat loss due to flow is kept to a minimum. On opening the large ® ™ flaps or hand ports (Caleo JumboPorts ), an efficient hot air curtain is formed to prevent cooling of the patient capsule. -
Page 114: Skin Temperature Measurement
A temperature reduction takes longer, due to the good thermal insulation of the incubator. ® Note on setting the air temperature set value in the Caleo The patient has limited — heat loss due to airflow, because the airflow rate above the mattress is low. -
Page 115: Skin Temperature Control
(skin 1) and compared with the set value. The difference between the set value and the measured actual ® value is used to control the air temperature in Caleo between a minimum of 20 C and a maximum of 39... -
Page 116: Kangaroo Mode
Kangaroo mode is activated, the following functions are automatically activated: Switchover to "Standby" mode ® Since the baby is no longer inside Caleo during "Kangarooing", the baby's skin temperature should no longer be used as a measure for controlling the air temperature inside the incubator. - Page 117 In order to perform this monitoring with as little nuisance as possible to mother/father ® and baby, Caleo provides the facility for activating special Kangaroo mode alarms during operation in Kangaroo mode. These alarms are set in the configuration. The following alarm limits are set: —...
-
Page 118: O 2 Enrichment
Description ∆T max: This alarm is triggered if the difference between Skin T1 and Skin T2 is above the set value (risk of hypothermia). Alarm deactivated °C Skin T 1 ∆T >4 °C Skin T 2 t (min) Alarm activated Each of these alarms can either be set or switched in advance to "OFF". -
Page 119: Closed-Loop Humidity Control
In this system, water is supplied from a separate water container (water bag or water tank) and heated. With closed-loop humidity control, the desired relative ® humidity is set, and Caleo then automatically regulates the evaporator output of the humidifier. ®... -
Page 120: Cleaning Mode
(see page 87). ® Cleaning mode may only be used if Caleo is empty. Cleaning mode is activated on the control panel after pressing the "Menu" button and selecting the "Cleaning Mode" option. -
Page 121: Alarm Description
1 Red alarm LED 2 Yellow alarm LED 3 Red LED next to the symbol ® Caleo distinguishes between 4 different alarm priorities: Serious device faults Device fault: Continuous tone that cannot be muted, and 1 the red alarm LED lights up. -
Page 122: Key To The Symbols Used
Description Central alarm indicator 1 The central alarm indicator lights up when an alarm occurs. 1 The central alarm indicator does not light up with an alarm if — the alarm muting button is pressed, or — the central alarm indicator has been deactivated in the Configuration. -
Page 123: Labelling
Description Labelling Connections for skin temperature sensors, page 42 auxiliary power sockets, page 25, Technical Data, ∑ 2 A max. page 104 Type designation for T 2 H 250V IEC127-2/V fuses for auxiliary power sockets Type designation M10A UL 198G for system fuses Equipotential bonding... - Page 124 Description Never leave baby page 26 unattended when doors are open ! Do not tilt canopy forwards, page 27 page 9 and WARNING! Never block or obstruct page 113 air vents! Risk of burning! Always close X-ray page 21 tray tightly ! page 107 max 5 kg, 11lbs page 107...
-
Page 125: Order List
Order list Order list Designation and description Part No. ® Caleo 2M 50 555 / Caleo incubator with air and skin servo 2M 50 000 ™ modes, ThermoMonitoring (temperature probes optional) With large front and rear access panels, 6 ™... - Page 126 Compact rail 2M 85 337 Tray 3020 M 24 678 Notebook Holder 2M 22 171 Accessories for bed area Ventilation Hose holder 84 11 075 ® ™ Caleo SoftBed MX 17 012 ® Fixation Set Caleo (France only) 2M 50 080...
- Page 127 Nozzle for the water container 2M 50 039 Transfer set MX 17 018 O-ring, for water connection pipe 2M 50 346 Caleo Fresh air filter (20 pcs) MX 17 015 ™ ThermoTrace , core (set of 5), yellow MX 11 000 ™...
-
Page 128: Parts List
Parts List Designation and description Part No. Upgrade kits Servo controlled humidity 2M 50 735 Servo controlled oxygen 2M 50 740 Bed scale, integrated 2M 50 745 Double wall 2M 50 421 Drawer 2M 50 565 Interface, RS 232 2M 50 750 Technical Documents on request Parts List... -
Page 129: Index
Changing over between air/skin temperature control ..43 ® Twins in the Caleo ......111 Check audible warning tone . - Page 130 Index Doors, ports and bed ....... 18 Labelling ......... 123 Bed .
- Page 131 Trough ..........28 ® Twins in the Caleo , Description ..... 111...
- Page 132 These Instructions for Use apply only to Caleo® with Serial No.: If no Serial No. has been filled in by Dräger these Instructions for Use are provided for general information only and are not intended for use with any specific machine or device ç...
Need help?
Do you have a question about the Caleo and is the answer not in the manual?
Questions and answers