Table of Contents
Advertisement
Quick Links
Advertisement
Table of Contents

Subscribe to Our Youtube Channel
Related Manuals for iDM iPUMP A 2-7

Summary of Contents for iDM iPUMP A 2-7
- Page 1 P U M P A 2 - 7 i P U M P A 3 - 1 1 W I T H N AV I G AT O R 2 . 0 AIR HEAT PUMP WITH INVERTER-TECHNOLOGY iDM iPump A/T HEAT PUMPS FROM AUSTRIA www.idm-energie.at...
-
Page 2: Table Of Contents
3.4. Connections indoor unit 3.5. Dimensions Outdoor unit 3.6. Connections Outdoor unit 3.7. Technical data 3.8. Performance data iPump A 2-7 acc. to EN 14511 3.9. Cooling data detailed iPump A 2-7 3.10. Filling quantity refrigerant 3.11. Maximum heigth difference 3.12. - Page 3 11.2. iPump A with direct heating circuit, hot water circulation and one mixer heating circuit 12. H EATING SIDE INSTALLATION 13. D ECLARATION OF CONFIRMITY PRODUCT FICHE 14. T ECHNICAL DOCUMENTATION All rights reserved for modifi cations to the technology and design! (C) IDM ENERGIESYSTEME GMBH Installation instructions iPump A 2-7, 3-11...
-
Page 4: General Information
Heat pumps may only be installed by competent spe- cialist staff and commissioned by a customer service Heat pumps should not be installed in rooms with high company trained to do so by iDM-Energiesysteme electromagentic infl uences from other installations. GmbH. -
Page 5: Sound Emission
General instructions on installing the heat operating the heat pump. It is essential that this information is observed! pump. General instructions on operating the heat Space for customer service telephone pump. number:_________________________ (C) IDM ENERGIESYSTEME GMBH Installation instructions iPump A 2-7, 3-11... -
Page 6: Acoustic Evaluation
- refl ection on acoustically hard ground e.g. glass facade and stone surfaces - attenuation due to sound absorbing porous sur- faces e.g. grass, trees - reinforcement/reduction of by wind speed/direction Source: bwp-Leitfaden-Schall (C) IDM ENERGIESYSTEME GMBH Installation instructions iPump A 2-7, 3-11... - Page 7 Finally, the determined rating level can be compared with legal limit values (e.g. „TA Lärm“). (C) IDM ENERGIESYSTEME GMBH Installation instructions iPump A 2-7, 3-11...
-
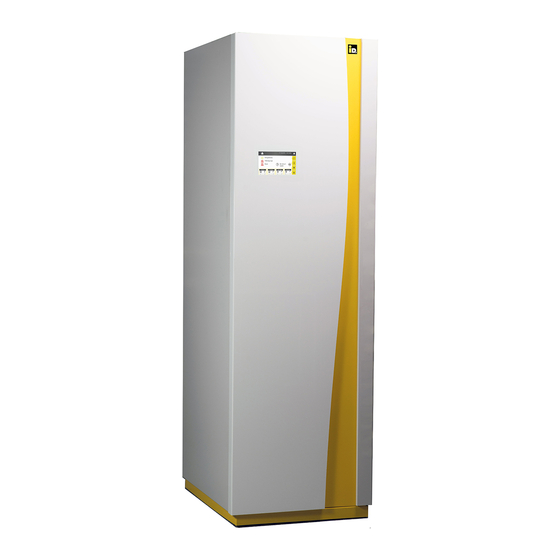
Page 8: Description
The parts are available as accessories - Stable base frame and must be connected according to the - Cladding, insulated against heat and noise technical specifi cations. - Sensor package (C) IDM ENERGIESYSTEME GMBH Installation instructions iPump A 2-7, 3-11... -
Page 9: Dimensions Indoor Unit
6 LAN-Connection 7 Circulation connection 3/4“ 8 Cable inlet main current 9 Refrigerant pipe - liquid line 12 mm 10 Refrigerant pipe - hot gas line 16 mm Front view (C) IDM ENERGIESYSTEME GMBH Installation instructions iPump A 2-7, 3-11... -
Page 10: Dimensions Outdoor Unit
3 .6. Co n n ections O ut d oor un i t ( Vi ew f ro m b el o w ) Outlet side Refrigerant pipe connections Ø10 mm and Ø12 mm resp. Ø12 mm und Ø16 mm Condensation drain 1“ Inlet side (C) IDM ENERGIESYSTEME GMBH Installation instructions iPump A 2-7, 3-11... -
Page 11: Technical Data
3 . 7. Te ch n ical d at a Heat pump type iPump A 2-7 iPump A 3-11 400 V Model 230 V 230 V Space heating water energy effi ciency class 35°C 55°C 35°C 55°C Energy effi ciency class water heating Unit Performance data acc. - Page 12 The 62°C refers to the maximum heat pump fl ow temperature. The resulting lower hot water temperature must be checked in relation to compliance with the drinking water ordinance. at 80% pump capacity *Adjustment min. speed loading pump 60%, max. 100% (C) IDM ENERGIESYSTEME GMBH Installation instructions iPump A 2-7, 3-11...
-
Page 13: Performance Data Ipump A 2-7 Acc. To En 14511
1 32 1 22 1 20 1 46 1 57 3 16 3 07 2 99 2 82 2 82 2 31 1 85 1 64 1 37 1 27 (C) IDM ENERGIESYSTEME GMBH Installation instructions iPump A 2-7, 3-11... -
Page 14: Cooling Data Detailed Ipump A
All 3 requirements must be fulfi lled independently. This is possible via the Navigator Pro. The entire distribution system has to fulfi ll the 3 mentioned requirements. To ensure a large cooling demand, the cooling limit has to be set as high as possible. (C) IDM ENERGIESYSTEME GMBH Installation instructions iPump A 2-7, 3-11... - Page 15 Heating output iPump A 2-7 at fl ow temperature 35°C temperatur [°C] Heating output iPump A 2-7 at fl ow temperature 45°C temperatur [°C] (C) IDM ENERGIESYSTEME GMBH Installation instructions iPump A 2-7, 3-11...
- Page 16 3. Description Description Heating output iPump A 2-7 at fl ow temperature 55°C temperatur [°C] Heating output iPump A 2-7 at nominal speed temperatur [°C] (C) IDM ENERGIESYSTEME GMBH Installation instructions iPump A 2-7, 3-11...
-
Page 17: Filling Quantity Refrigerant
3 . 10. Fi ll in g q ua n t it y re f rig e ran t The iPump A 2-7 is pre-fi lled with refrigerant. Up to a distance of 6 m between indoor unit and outdoor unit no refrigerant no additional needs to be refi... -
Page 18: Linits Of Use
3 . 12. Lin i ts of u se The heating of other fl uids as heating water is not permitted with the iPump A 2-7 (for heating water quality, see page 51). Heat pumps are by nature subjects to limits of use regarding of pressure and temperature (see diagram). - Page 19 5 K above the minimum heat pump fl ow temperature. The maximum power of the iPump A can be limited with the NAVIGATOR 2.0 controller. (C) IDM ENERGIESYSTEME GMBH Installation instructions iPump A 2-7, 3-11...
-
Page 20: Performance Data Ipump A 3-11 Acc. To En 14511
2.12 2.02 Heat output Power intake 4.26 3.89 3.55 3.34 3.10 2.71 2.20 1.98 Heat output Power intake temperature [°C] Heat output Power intake 3,55 3.18 2.80 2.62 2.39 2.12 (C) IDM ENERGIESYSTEME GMBH Installation instructions iPump A 2-7, 3-11... -
Page 21: Cooling Data Detailed Ipump A
All 3 requirements must be fulfi lled independently. This is possible via the Navigator Pro. The entire distribution system has to fulfi ll the 3 mentioned requirements. To ensure a large cooling demand, the cooling limit has to be set as high as possible. (C) IDM ENERGIESYSTEME GMBH Installation instructions iPump A 2-7, 3-11... - Page 22 3. Description Description Heat output iPump A 3-11 at fl ow temperature 35°C NOMINAL Air-inlet temperature [°C] Heat output iPump A 3-11 at fl ow temperature 45°C NOMINAL Air-inlet temperature [°C] (C) IDM ENERGIESYSTEME GMBH Installation instructions iPump A 2-7, 3-11...
- Page 23 Heat output iPump A 3-11 at fl ow temperature 55°C NOMINAL Air-inlet temperature [°C] Heat output iPump A 3-11 at nominal speed Air-inlet temperature [°C] (C) IDM ENERGIESYSTEME GMBH Installation instructions iPump A 2-7, 3-11...
-
Page 24: Filling Quantity Refrigerant
Height diff erence lower than 5 m Height diff erence more than 5 m Version 1 Version 2 max 5 m <5 m max 5 m max 5 m max 5 m (C) IDM ENERGIESYSTEME GMBH Installation instructions iPump A 2-7, 3-11... -
Page 25: Limits Of Use
The maximum possible management temperature depends on the hydraulic design and the confi guration, and is at least 5 K below the maximum heat pump fl ow temperature. (C) IDM ENERGIESYSTEME GMBH Installation instructions iPump A 2-7, 3-11... - Page 26 5 K above the minimum heat pump fl ow temperature. The maximum power of the iPump A can be limited with the NAVIGATOR 2.0 controller. (C) IDM ENERGIESYSTEME GMBH Installation instructions iPump A 2-7, 3-11...
-
Page 27: Transport
The device must be lifted and secured with a corresponding number of people. Sack barrow Transport over stairs for the iPump When transporting, iPump A heat pumps may not be tilted more than 30°. (C) IDM ENERGIESYSTEME GMBH Installation instructions iPump A 2-7, 3-11... -
Page 28: Disassamble The Ipump
5. Disassamble the iPump 5. Disassamble the iPump disassemble the ipump The indoor unit of iPump A 2-7 and 3-11 can be disas- sembled for the transport to the boiler room. To remove the front panel, the interlocking device must be opened with a screw driver or a pointed object. - Page 29 If the cover parts are removed, all hydraulic connec- Loos the fi xing screws tion lines between the refrigeration equipment and Safety rope the hot water tank must be loosened. Locking nut (C) IDM ENERGIESYSTEME GMBH Installation instructions iPump A 2-7, 3-11...
- Page 30 Armafl ex insulation must be opened. The insulation must be restored correctly after assembly. When opening the fi ttings, please ensure that no electrical cables are not beeing damaged. Armafl ex insulation (C) IDM ENERGIESYSTEME GMBH Installation instructions iPump A 2-7, 3-11...
- Page 31 LAN connection Hot water sensor B48 Hot water sensor B41 bottom area Flow rate transmitter B2 Heat pump fl ow sensor Plug for switching valve (C) IDM ENERGIESYSTEME GMBH Installation instructions iPump A 2-7, 3-11...
- Page 32 Also it is recommended to use safety shoes with corresponding protective caps. Refrigeration equipment Hot water tank After the iPump has been brought into the boiler room, the assembly takes place in reverse order. Timber beams (C) IDM ENERGIESYSTEME GMBH Installation instructions iPump A 2-7, 3-11...
-
Page 33: Connecting The Control Unit
(C) IDM ENERGIESYSTEME GMBH Installation instructions iPump A 2-7, 3-11... -
Page 34: Assembly And Hydraulic Installation
EN 378 parts 1 and 2 as well as BGR 500. Incorrect fl ow rates due to incorrect pi- ping, incorrect fi ttings or improper pump operation can cause damages! (C) IDM ENERGIESYSTEME GMBH Installation instructions iPump A 2-7, 3-11... - Page 35 (C) IDM ENERGIESYSTEME GMBH Installation instructions iPump A 2-7, 3-11...
-
Page 36: Replacement Of The Motor Of The Switching Valve „Heating - Hot Water
Now the motor can be pulled down to the front (pic.5). pic.4 Instructions for correct disassembly and assembly of the motor are located on the motor housing (pic.6). pic.5 pic.1 pic.6 pic.2 (C) IDM ENERGIESYSTEME GMBH Installation instructions iPump A 2-7, 3-11... -
Page 37: Drinking Water Connection
The hot gas- and the liquid line must be insulated separately. The connecting lines must be insulated in order to minimise losses through the earth. Example for bottom section (C) IDM ENERGIESYSTEME GMBH Installation instructions iPump A 2-7, 3-11... -
Page 38: Installation Variant For The Outdoor Unit
This could be 6 liters per defrost pipe openings have to be closed. cycle within 2 minutes. The condensate run-off must be frost-proof. (C) IDM ENERGIESYSTEME GMBH Installation instructions iPump A 2-7, 3-11... -
Page 39: Assembling Of The Outdoor Unit On The Concrete Base
At the end the outdoor unit will be countered and secured with the washers and the hexagon-nuts. Connection for the equipotential bonding or lightning protection Mounting of the outdoor unit (C) IDM ENERGIESYSTEME GMBH Installation instructions iPump A 2-7, 3-11... -
Page 40: Condensation Run-Off
The heating band (2 m) will be placed in the drain hose. The condensation bin and the run- off have to be checked for soiling regularly . The minimum distances must be maintained due to perform maintenance. (C) IDM ENERGIESYSTEME GMBH Installation instructions iPump A 2-7, 3-11... -
Page 41: Connection Of The Refrigerant Circuit
On the refrigerant side the indoor unit and the outdoor unit of iPump A heat pumps are „hermetically tight“. Open refrigerant pipes must be protected against moisture and dirth with caps or tapes. Refrigerant pipes may not be buckled or crushed! (C) IDM ENERGIESYSTEME GMBH Installation instructions iPump A 2-7, 3-11... -
Page 42: Connection Of The Indoor Unit On Refrigerant Side
The refrigerant pipes will be soldered to the indoor unit. The soldered connections must be made accor- ding to the requirements of the cooling technology by a trained refrigeration engineer licensed by iDM Energiesysteme GmbH. The connections for the refrigerant pipes are optional on the right or left side of the iPump A indoor unit. -
Page 43: Wall Opening
fl anging tool). Refrigerant pipes may not be sawn. It must be ensured during all work that dirt, shavings, water, etc. do not enter the refrigerant pipes. (C) IDM ENERGIESYSTEME GMBH Installation instructions iPump A 2-7, 3-11... -
Page 44: Electrical Assembly
The mains voltage at the terminals of the heat pump must be 230 V or 400 V +-10%, depending on the type. When working on the heat pump, please be sure that the device is tensionless. (C) IDM ENERGIESYSTEME GMBH Installation instructions iPump A 2-7, 3-11... -
Page 45: Electrical Connection Of The Outdoor Unit
F = B13A Power line heating element 3+N 400 V, 1+N 230 V Control current 3x1.5mm², 1x230V Network cable Data cable Li2YCYv 2x2x0.5mm² Wall opening Refrigerant connection pipes Outdoor unit Indoor unit (C) IDM ENERGIESYSTEME GMBH Installation instructions iPump A 2-7, 3-11... -
Page 46: Connection Diagram Of The Electrical Module
113 114 115 116 117 118 119 120 121 122 123 Analog inputs Mains Impuls counter 230V/50Hz Digital input SD - Card RS232 X36 132 131 130 - SH EEV2 X4 EEV1 X2 LAN X33 (C) IDM ENERGIESYSTEME GMBH Installation instructions iPump A 2-7, 3-11... -
Page 47: Connection Of The Central Unit
The sensor positions are shown in the relevant NAVIGATOR Pro additional board installation diagram. Reliable functioning can only To use the iDM single-room control, an additional be ensured by correct positioning and a good heat board must be connected to the touch display of NA- transfer (heat conducting paste). -
Page 48: Commissioning
Commissioning requirements - The heat pump may only be commissioned by a 9. 3 . Fau lt s customer service engineer specially trained by iDM iPump A is fi tted with various safety devices to ensure Energiesysteme GmbH. that no damage can be caused to the equipment in - The heating and any storage tank must be fi... -
Page 49: Magnesium Protection Anode
Please note that the measured protective current indicates the function or malfunction of the magne- sium protective anode, but there is no guarantee for adequate protection conditions in the buff er! (C) IDM ENERGIESYSTEME GMBH Installation instructions iPump A 2-7, 3-11... -
Page 50: Exchange Of The Magnesium Protection Anode
After refi lling the buff er, it must be checked for leaks in the area of the protective anode. (C) IDM ENERGIESYSTEME GMBH Installation instructions iPump A 2-7, 3-11... -
Page 51: Installing An External Current Anode
On the cable itself there is an indication that it is the ground connection. The electrical connection of the external current anode is carried out according to the enclosed wiring diagram. (C) IDM ENERGIESYSTEME GMBH Installation instructions iPump A 2-7, 3-11... -
Page 52: Hydraulic Diagrams
1 1.1. iP ump A w it h dire c t c i rc ui t f or he at ing and ho t w at e r c i r c u l at i o n (C) IDM ENERGIESYSTEME GMBH Installation instructions iPump A 2-7, 3-11... -
Page 53: Ipump A With Direct Heating Circuit, Hot Water Circulation And One Mixer Heating Circuit
1 1 .2. i Pump A w i t h dire c t h e at in g c ir cu it , ho t w at e r ci r c u l at i o n a nd o n e m ix er h e atin g c irc u it (C) IDM ENERGIESYSTEME GMBH Installation instructions iPump A 2-7, 3-11... -
Page 54: Heating Side Installation
fi lling and emptying. You must also check the pH-value of the heating water. It should be between 8.2 and 9.5. (C) IDM ENERGIESYSTEME GMBH Installation instructions iPump A 2-7, 3-11... -
Page 55: Declaration Of Confirmity, Product Fiche
13. Declaration of confirmity, product fiche declaration of confirmity, product fiche (C) IDM ENERGIESYSTEME GMBH Installation instructions iPump A 2-7, 3-11... - Page 56 IDM-Energiesysteme GmbH A-9971 Matrei i.O., Seblas 16 – 18, Telefon +43 (0)4875 6172-0 Firmenbuch.Nr. 44919h, LG Innsbruck, Firmensitz: 9971 Matrei i.O., UID-Nr.: ATU 433 604 02 (C) IDM ENERGIESYSTEME GMBH Installation instructions iPump A 2-7, 3-11...
- Page 57 IDM-Energiesysteme GmbH A-9971 Matrei i.O., Seblas 16 – 18, Telefon +43 (0)4875 6172-0 Firmenbuch.Nr. 44919h, LG Innsbruck, Firmensitz: 9971 Matrei i.O., UID-Nr.: ATU 433 604 02 (C) IDM ENERGIESYSTEME GMBH Installation instructions iPump A 2-7, 3-11...
-
Page 58: Technical Documentation
14. Technical documentation 14. Technical documentation Technical documentation (C) IDM ENERGIESYSTEME GMBH Installation instructions iPump A 2-7, 3-11... - Page 59 Technical documentation (C) IDM ENERGIESYSTEME GMBH Installation instructions iPump A 2-7, 3-11...
- Page 60 PRACTICAL KNOWLEDGE FOR SALES AND TECHNOLOGY The comprehensive range of seminars for sp ecialists at the IDM POWER FA MILY is available to you any time on our website. We look for ward to re ceiving your re gist ration.
Need help?
Do you have a question about the iPUMP A 2-7 and is the answer not in the manual?
Questions and answers