Advertisement
Quick Links
ASSEMBLY INSTRUCTIONS
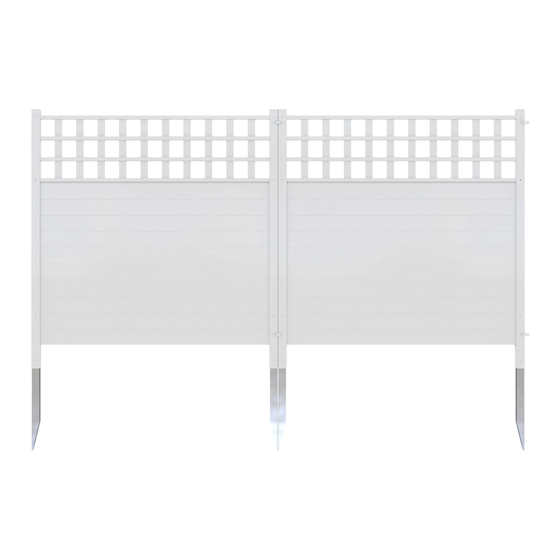
KESWICK
VINYL PRIVACY
FENCE AND SCREEN
KIT 2-PACK
(44 1/8"H X 42"W)
Approximate assembly time for 2 panels
Want to see a video on how to
assemble this product?
WWW.ZIPPITY-OUTDOOR.COM
WWW.ZIPPITY-OUTDOOR.COM
60 MIN
Scan the QR code
ASSEMBLY
INSTRUCTIONS
ZP19060
ZP19060
1
VER. 092821
Advertisement

Summary of Contents for Zippity KESWICK ZP19060
- Page 1 VINYL PRIVACY INSTRUCTIONS FENCE AND SCREEN ZP19060 KIT 2-PACK (44 1/8”H X 42”W) 60 MIN Approximate assembly time for 2 panels Want to see a video on how to assemble this product? Scan the QR code WWW.ZIPPITY-OUTDOOR.COM WWW.ZIPPITY-OUTDOOR.COM VER. 092821...
- Page 2 If you experience any further trouble with your product, please contact our customer service department. parts.nychbrands.com support@zippity-outdoor.com 704-892-5222 877-234-6196 Customer service agents are available to take calls weekdays from 9am- 5pm EST. If you call outside of business hours, please leave a voicemail.
- Page 3 ZP19060 ASSEMBLY INSTRUCTIONS 42 in 40 1/2 in 2 3/8 in 43 7/8 in 2 7/8 in 42 3/4 in 32 1/8 in 12 in WWW.ZIPPITY-OUTDOOR.COM...
- Page 4 3/8" x 8 1/2" x 41 7/8" Right Post (2) Left Post (2) 7/8" x 1 1/2" x 44" 7/8" x 1 ½" x 44" Zippity Joiner Clip (4) End Rail (4) Middle Rail (4) ¾" Self-Drilling 5/8" x 5/8" x 41 7/8"...
- Page 5 Insert (3) Board - Wide into the slot in the post. Drive (1) 3/4" self-drilling stainless steel screws into the second lowest pre-drilled hole on the left post. Preview WWW.ZIPPITY-OUTDOOR.COM...
- Page 6 NOTE: Middle rails will have picket holes on both sides. Preview ASSEMBLE PANELS STEP 5: STEP 5.1 Carefully slide the lattice top into the routed holes in the left post. Drive (2) 3/4" self-drilling stainless steel screws into the pre-drilled holes in the post. Preview WWW.ZIPPITY-OUTDOOR.COM...
- Page 7 NOTE: Ensure the boards and rails are inserted all the way into the right post before driving the screws in. Preview ASSEMBLE THE SECOND PANEL STEP 6: STEP 6.1 Repeat steps 2-5 in order to assemble the second panel. WWW.ZIPPITY-OUTDOOR.COM...
- Page 8 Step 7.2 is only to be completed if the ground is too hard. Loosen top 4” of the ground with a claw hammer as illustrated. Add water to loosen soil. Use a block of wood to protect the top of the post and gently hammer the post into the ground. WWW.ZIPPITY-OUTDOOR.COM...
- Page 9 ZP19060 ASSEMBLY INSTRUCTIONS CONNECTING THE PANELS STEP 8: STEP 8.1 Straight Line Application: Install the Zippity Joiner Clips as shown below. Corner Application: Install the Zippity Joiner Clips as shown below. WWW.ZIPPITY-OUTDOOR.COM...
- Page 10 ZP19060 ASSEMBLY INSTRUCTIONS INSTALL POST CAPS STEP 9: STEP 9.1 Insert the Post Caps over the tops of the posts. WWW.ZIPPITY-OUTDOOR.COM...
- Page 11 ZP19060 ASSEMBLY INSTRUCTIONS 6935 Reames Rd. Ste. K. Charlotte, NC 28216 support@zippity-outdoor.com 704-892-5222 877-234-6196 WWW.ZIPPITY-OUTDOOR.COM WWW.ZIPPITY-OUTDOOR.COM...


Need help?
Do you have a question about the KESWICK ZP19060 and is the answer not in the manual?
Questions and answers