Table of Contents
Advertisement
Quick Links
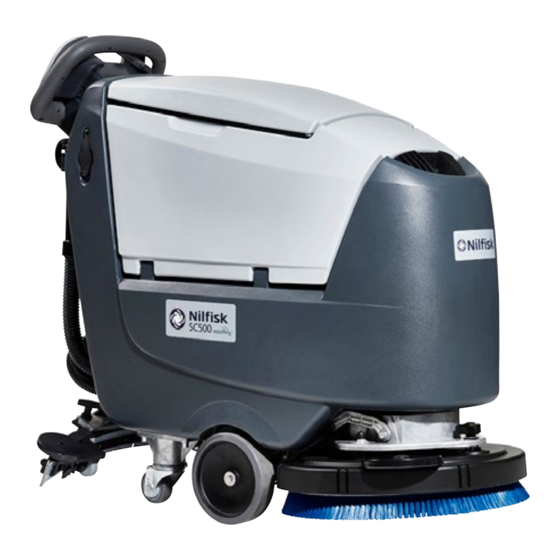
SC500
Service Manual
Advance Model Numbers:
9087352020 SC500 X20 B
9087353020 SC500 X20R B
9087354020 SC500 20D B
9087403020 SC500 X20 B V
9087405020 SC500 X20R B V
9087404020 SC500 20D B V
Nilfisk Model Numbers:
9087350020 SC500 53 B FULL PKG
9087351020 SC500 53 B
9087351020 SC500 53R B
9087400020 SC500 53 B FULL PKG V
9087401020 SC500 53 B V
9087402020 SC500 53R B V
01/2015 revised 07/2017 (E) Form No. 9099984000
English
Advertisement
Table of Contents
Troubleshooting

Related Manuals for Nilfisk-Advance Advance SC500 X20 B


Summary of Contents for Nilfisk-Advance Advance SC500 X20 B
- Page 1 SC500 Service Manual Advance Model Numbers: Nilfisk Model Numbers: 9087352020 SC500 X20 B 9087350020 SC500 53 B FULL PKG 9087353020 SC500 X20R B 9087351020 SC500 53 B 9087354020 SC500 20D B 9087351020 SC500 53R B 9087403020 SC500 X20 B V 9087400020 SC500 53 B FULL PKG V 9087405020 SC500 X20R B V 9087401020 SC500 53 B V...
-
Page 2: Table Of Contents
Service Manual – SC500 Contents Contents 03 - General Information . . . . . . . . . . . . . . . . . . . . . . . . . . . . . . . . . . . 6 Machine General Description Service Manual Purpose and Field of Application Other Reference Manuals... - Page 3 Service Manual – SC500 Contents 05 - Control System, Magnetic Smart Key . . . . . . . . . . . . . . . . . . . . . . . . 60 Model No : 9087403020, 9087404020, 9087400020,9087401020, 9087405020, 9087402020 60 Functional Description Wiring Diagram...
- Page 4 Service Manual – SC500 Contents 30 - Solution System . . . . . . . . . . . . . . . . . . . . . . . . . . . . . . . . . . . . 122 Functional Description Water Level Sensor Operation Wiring Diagram...
- Page 5 Service Manual – SC500 Contents 38 - Squeegee System . . . . . . . . . . . . . . . . . . . . . . . . . . . . . . . . . . . . 167 Functional Description Component Locations Maintenance and Adjustments...
-
Page 6: 03 - General Information
Advance SC500 X20 B 9087352020 Advance SC500 X20R B 9087353020 Advance SC500 20D B 9087354020 9099980000 9099981000 Advance SC500 X20 B V 9087403020 Advance SC500 X20R B V 9087405020 Advance SC500 20D B V 9087404020 Nilfisk SC500 53 B FULL PKG 9087350020... -
Page 7: Conventions
GVW: 207 kg/456 lb LpA = 63 dB(A) 21 A Charg.100-240Vac 50-60 Hz Battery 24 Vdc Type E Scrubber Dryer UL 583 CSA C22.2 N.68-92 3084826 “Made in Hungary” Nilfisk-Advance, Inc. Plymouth, MN, USA www.advance-us.com A Nilfisk-Advance Brand Figure 1:... -
Page 8: Safety
Service Manual – SC500 03 - General Information Safety The following symbols indicate potentially dangerous situations Always read this information carefully and take all necessary precautions to safeguard people and property Visible Symbols on the Machine WARNING: Carefully read all the instructions before performing any operation on the machine. -
Page 9: General Safety Instructions
Service Manual – SC500 03 - General Information General Safety Instructions Specific warnings and cautions to inform about potential damages to people and machine are shown below. DANGER: Before performing any maintenance, repair, cleaning or replacement procedure, remove the ignition key and disconnect the battery connector). −... - Page 10 Service Manual – SC500 03 - General Information − This machine is not intended for use by persons (including children) with reduced physical, sensory or mental capabilities, or lack of experience and knowledge, unless they have been given supervision or instruction concerning use of the machine by a person responsible for they safety.
- Page 11 Service Manual – SC500 03 - General Information − This machine cannot be used on roads or public streets. − Pay attention during machine transportation when temperature is below freezing point. The water in the recovery tank or in the hoses could freeze and seriously damage the machine.
-
Page 12: Lifting The Machine
Service Manual – SC500 03 - General Information Lifting The Machine WARNING: Do not work under the lifted machine without supporting it with safety stands. Transporting The Machine WARNING: Before transporting the machine, make sure that: − All covers are closed. −... -
Page 13: Technical Specifications
Service Manual – SC500 03 - General Information Technical Specifications SC500 Description / Model DISC Solution tank capacity 12 US gal (45 liters) Recovery tank capacity 12 US gal (45 liters) Machine length 50.3 in (1277 mm) 51.2 in (1302 mm) Machine width with squeegee 28.3 in (720 mm) Machine width without squeegee... - Page 14 Service Manual – SC500 03 - General Information SC500 Description / Model DISC Battery compartment size 13.7x13.7x10.2 in (350x350x260 mm) System voltage Standard batteries (2) 12V 105 AhC5 Battery charger 24V 13A Operating time (standard batteries) (EN 60335-2-72) 3.5 hour Weight without batteries and with empty tanks 187 lb (85 kg) 194 lb (88 kg)
-
Page 15: Maintenance Schedule
Service Manual – SC500 03 - General Information Maintenance Schedule Daily, Weekly/ Every 6 Procedure Annually after use Monthly Months Battery charging Squeegee cleaning Brush/pad cleaning Recovery tank and debris tray cleaning, and cover gasket check EcoFlex system cleaning and draining Squeegee blade check Solution Filter Cleaning Battery (WET) fluid level check... -
Page 16: Know Your Machine
Service Manual – SC500 03 - General Information Know Your Machine Control panel Disc deck (Prod. Nr.: 9087352020, 9087354020, 9087350020, 9087351020) Display One-Touch Scrub ON/OFF EcoFlex system push- push-button button Vacuum system adjustment/deactivation Brush release push-button push-button Detergent flow adjustment push-button Machine speed adjustment push-buttons... -
Page 17: Control Panel Disc Deck (Prod Nr : 9087403020, 9087404020, 9087400020,9087401020)
Service Manual – SC500 03 - General Information Control panel Disc deck (Prod. Nr.: 9087403020, 9087404020, 9087400020,9087401020) Display One-Touch Scrub ON/OFF EcoFlex system push- push-button button Vacuum system adjustment/deactivation Brush release push-button push-button Detergent flow adjustment push-button Machine speed adjustment push-buttons Detergent percentage adjustment push-button... - Page 18 Service Manual – SC500 03 - General Information Can holder Drive handlebar Recovery tank Forward/reverse cover gear and activation paddle Battery charger Control panel Tank lifting handle Battery charger cable Solution drain Battery charger and level check cable housing and hose document holder Recovery water...
- Page 19 Service Manual – SC500 03 - General Information Debris Recovery tank collection tank cover Detergent Vacuum system solution tank motor side filler cap Vacuum grid with automatic shut-off float Detergent solution tank Solution tank front filler Recovery tank Water removable filler hose EcoFlex Batteries...
-
Page 20: Service And Diagnostic Equipment
Service Manual – SC500 03 - General Information Service and Diagnostic Equipment Besides a complete set of standard meters, the following instruments are necessary to perform fast checks and repairs on Nilfisk machines: • Laptop computer charged with the current version of EzParts, Adobe Reader and (if possible) Internet connection •... -
Page 21: Dimensions
Service Manual – SC500 03 - General Information Dimensions SC500 Disc 28.3 in (720 mm) 50.3 in (1277 mm) Figure 9:... -
Page 22: Sc500 Rev
Service Manual – SC500 03 - General Information SC500 REV 28.3 in (720 mm) 51.2 in (1302 mm) Figure 10:... -
Page 23: 04 - Control System
Service Manual – SC500 04 - Control System Model No.: 9087352020, 9087354020, 9087350020, 9087351020, 9087353020, 9087355020 Functional Description The architecture of the electronic control system for The Display controller (EB2) serves mainly as an the machine’s electrical components is composed aggregator for all input signals (buttons) and outputs of a Main machine controller (EB1) and a Display (LEDs) from the User interface controller (EB3),... -
Page 24: Wiring Diagram
Service Manual – SC500 04 - Control System Wiring Diagram BATT + DISPLAY CONTROLLER (EB2) Power supply + User interface controller power supply + J1.1 J3.1 User interface contr. power supply + SIGNAL CIRCUITS User interface controller serial + J1.2 J3.2 User interface contr. -
Page 25: Component Locations
Service Manual – SC500 04 - Control System Component Locations Main machine controller (EB1) Figure 2: Flat calbes from (EB2) to (EB3) User interface Display controller (EB2) controller (EB3) Figure 3:... -
Page 26: Troubleshooting
Service Manual – SC500 04 - Control System Troubleshooting Main machine controller (EB1) Alarm Codes The Main machine controller indicates a series of alarms in case of malfunction of one or more systems, and in case of abnormal conditions detected in the input signals The alarms are shown on the display in the following format: ALARM <XX>... - Page 27 Service Manual – SC500 04 - Control System General alarms Alarm on Main machine controller - FLASHING YELLOW + RED LEDS Alarm code -------------------------- Meaning Condition Effect Service Suggestions Flashes Description Blown F1 fuse. Blown F1 fuse. Function block. F1 is a safety fuse primarily included to prevent a short circuit or serious damage ----------------------- to the Main machine controller causing...
- Page 28 Service Manual – SC500 04 - Control System Main machine controller alarms Alarm on Main machine controller - FLASHING RED LED Alarm code -------------------------- Meaning Condition Effect Service Suggestions flashes Description BRUSH motor The motor current is Brush motor Check the current draw of the brush motor. amperometric greater than the value of output stop.
- Page 29 Service Manual – SC500 04 - Control System Drive system alarms Alarm on Main machine controller - FLASHING YELLOW LED Alarm code -------------------------- Meaning Condition Effect Service Suggestions flashes Description Amperometric Drive motor current Drive blocked. Check the current draw of the drive motor protection draw greater than the (this should be around 6-8amps without...
- Page 30 Service Manual – SC500 04 - Control System On-board Battery Charger Alarms Alarm code -------------------------- Meaning Condition Effect Service Suggestions Description Communication No signal from battery The battery charger Check the wiring between the battery charger problem between charger via gate J4.4 for is performing the and the Main machine controller.
-
Page 31: Black-Box: Recording Of Alarms, Parameters (See Pages 34-35), Partial Operating Time Counter
Service Manual – SC500 04 - Control System Black-box: Recording of Alarms, Parameters (see pages 34-35), Partial Operating Time Counter The alarms activated during normal machine operation are stored and can be read in the corresponding log (Alarm Log Screen) Display, Main Screen Insert the Super User (yellow) key in place of the operator (grey) key (Figure 6) to access the main screen (Figure 7) of the display... -
Page 32: Display, Alarms Log Screen
Service Manual – SC500 04 - Control System Display, Alarms Log Screen The alarms log screen (Figure 8) function allows you to check any alarms stored on the machine To return to the main screen (Figure 6), press the One-Touch button repeatedly Figure 8: Each alarm (See table of alarms in the Main machine controller Alarm Codes section) is stored along with... -
Page 33: Display, Machine Settings Screen
Service Manual – SC500 04 - Control System Display, Machine Settings Screen The machine settings screen (Figure 9) functions allow you to customise some parameters described in the following table of modifiable parameters. Press the “hare” button to increase the Press the One-Touch button to move to value of the current parameter... - Page 34 Service Manual – SC500 04 - Control System The following parameters are displayed only when, on reaching the last parameter RESET, the One-Touch button is pressed together with the EcoFlex and vacuum buttons If the One-Touch button is not pressed, the system will return to the first parameter CHM1. Hidden Parameters Min.
-
Page 35: Display, Operating Time Counter Screen
Service Manual – SC500 04 - Control System Display, Operating Time Counter Screen The operating time counter screen (Figure 10) function allows you to check the total accumulated hours of work for each machine subsystem: • (A) TOTAL counter (machine running time): same counter display on screen after starting machine •... -
Page 36: System For Flow Rate Regulation As Function Of Speed
Service Manual – SC500 04 - Control System System for Flow Rate Regulation as Function of Speed Solution flow levels 1, 2 and 3 regulate the flow of detergent solution on the basis of the machine speed so as to keep the quantity of solution dispensed per square metre of floor treated constant. The reference flow level is level 3: based on the setting of the corresponding parameter P3, the opening time of the solenoid valve (and of the detergent pump when fitted) is regulated so that the quantity of solution in centiliters per metre travelled by the machine is constant and equal to the value set in the parameter... -
Page 37: Removal And Installation
Service Manual – SC500 04 - Control System Removal and Installation Main machine controller (EB1) Drive the machine on a level floor, remove the ignition key, and disconnect the red battery connector. Lift the recovery tank Remove the 7 screws and remove the electronic component compartment cover Disconnect the following connections sequentially (Figure 11): ◦... - Page 38 Service Manual – SC500 04 - Control System Disconnect the following connections sequentially (Figure 13): ◦ (I) Deck actuator and detergent pump connection (J1) ◦ (J) Solenoid valve connection (J2) ◦ (K) Display controller connection (J3) ◦ (L) Battery charger connection (J4) ◦...
-
Page 39: Display Controller (Eb2) And User Interface Controller (Eb3)
Service Manual – SC500 04 - Control System Display Controller (EB2) and User interface controller (EB3) Disconnect the following connections Display Controller (EB2) sequentially (Figure 16): Drive the machine on a level floor. ◦ (A) Speed potentiometer connection (J4) Remove the ignition key ◦... - Page 40 Service Manual – SC500 04 - Control System User interface controller (EB4) Perform points 1 to 5 for removal of the display controller Disconnect the following connections sequentially (Figure 17): ◦ (A) Flat connection J2 ◦ (B) Flat connection J3 10 Carefully raise the User interface controller (C), detaching it from the cover (D) Assembly 11 Assemble the components in the reverse order of disassembly and note the following:...
-
Page 41: Specifications
Service Manual – SC500 04 - Control System Specifications Main machine controller (EB1) Connectors (Figure 18) Power connections (Ø6mm male RADSOK terminals - AMPHENOL SK 200800532 101 or equivalent) Controller Ref. Description V ref. I max. Connected to in/out Main machine controller power supply + 125A BAT+ Main machine controller power supply -... - Page 42 Service Manual – SC500 04 - Control System (Figure 20) Drive connections (2-way male faston T-connectors, 6.3x0.8 – spacing 7.4mm) Controller Ref. Description V ref. I max. Connected to in/out Drive system motor + 0-24V Drive system motor - 0-24V Figure 20: (Figure 21) Vacuum connections (2-way male parallel faston connectors, 6.3x0.8 –...
- Page 43 Service Manual – SC500 04 - Control System (Figure 22) J1: MOLEX MINIFIT type, 8-ways vertical Description Controller V ref. I max. Connected to in/out Detergent pump power supply + <1A Detergent pump power supply - <1A Deck actuator power supply +/- 0/24V Deck actuator power supply -/+ 0/24V...
- Page 44 Service Manual – SC500 04 - Control System (Figure 24) J3: MOLEX MINIFIT type, 6-ways vertical Description Controller V ref. I max. Connected to in/out User interface controller power supply + <1A EB2.1 User interface controller serial + in/out <1A EB2.2 User interface controller serial - in/out...
- Page 45 Service Manual – SC500 04 - Control System (Figure 26) J5: JST VHR-3N vertical 3-way Description Controller V ref. I max. Connected to in/out Power supply for water level sensor + <1A S1.1 Water level sensor return <1A S1.2 Power supply for water level sensor - <1A S1.3 Figure 26:...
- Page 46 Service Manual – SC500 04 - Control System (Figure 28) J7: TYCO MODU II vertical 6-way Description Controller V ref. I max. Connected to in/out +24V power supply <1A TRK.RD +5V power supply <1A iButton input (CAN H channel) In (Out) 0V (0-5V) <1A TRK.YE...
-
Page 47: Connectors Of The Display Controller (Eb2)
Service Manual – SC500 04 - Control System Connectors of the Display Controller (EB2) (Figure 29) J1: MOLEX MINIFIT type, 6-ways vertical Controller Ref. Description V ref. I max. Connected to in/out Power supply + in/out <1A CFD12.J3.1 Main machine controller serial + in/out <1A CFD12.J3.2... - Page 48 Service Manual – SC500 04 - Control System (Figure 31) J3: FCI DUFLEX (2.54 pitch) 8-way, male pins Controller Ref. Description V ref. I max. in/out Power supply - common <1A SP / EXTRAPR function LED (red) (LD3R) <1A SP / EXTRAPR function LED (green) <1A (LD3V) BRUSH RELEASE function LED (LD4)
-
Page 49: Shop Measurements
Service Manual – SC500 04 - Control System Shop Measurements The following tables contain some “real world” shop voltage measurements to help you recognize what “normal” looks like All voltage values were measured with the black (Negative) voltmeter lead connected to the main battery negative unless otherwise specified. - Page 50 Service Manual – SC500 04 - Control System Brush Motor Figure 34: Color Description Measured Comments Brush motor + 24.4V (off), Constant Positive 24.2V (on) Blue Brush motor - 24.4V (off), PWM Battery Negative 0.15v (on without RPM control activated) 5.8v (on with RPM Control Active –...
- Page 51 Service Manual – SC500 04 - Control System Vacuum Motor Figure 36: Color Description Measured Comments Vacuum system power supply + 24.8v (off) Constant Positive 24.4v (on) Blue Vacuum system power supply - 24.56 (off) 1.02 Running, 9.56 Quiet Mode 1.36v (on High) 9.69v (on Quiet mode VRID parameter = 1)
- Page 52 Service Manual – SC500 04 - Control System J1 - 8 Ways Figure 37: Color Circuit Description Measured Comments Detergent pump power supply + 24.9v (off) No change seen on voltmeter when the pump pulsed. Gray Detergent pump power supply - 24.9v (off) Momentary drop to 0 when on.
- Page 53 Service Manual – SC500 04 - Control System J2 - 2 Ways Figure 38: Color Circuit Description Measured Comments Yellow Solenoid valve power supply + 24.4 (Off and On) Purple Solenoid valve power supply - 24.4 (off) Momentarily drops to 0v when on but it is Momentary drop (on) too fast for a DVOM...
- Page 54 Service Manual – SC500 04 - Control System J4 - 4 Ways Figure 40: Color Circuit Description Measured Comments White Enabling from battery charger 24.8v Not Charging May see residual voltage back-feeding from the main controller here when charging. Yellow Power supply from battery charger 0.136v Not charging 26.1v Charging...
- Page 55 Service Manual – SC500 04 - Control System Figure 42: Two way vertical jumper • What is this for? The J6 Jumper is used to configure the Main machine controller for the EcoFlex option. • What does it mean if it is jumped? The Main machine controller is set for no EcoFlex •...
-
Page 56: Shop Measurements - Display Controller (Eb2)
Service Manual – SC500 04 - Control System Shop Measurements - Display Controller (EB2) Measure and record the voltage at each of the Main machine controller pins Always use battery negative as your reference point for your black voltmeter lead J1 - 6 Ways Figure 44: Color... - Page 57 Service Manual – SC500 04 - Control System J2 - 9 way ribbon connector Figure 45: Color Circuit Description Measured Comments Power supply - common 0.003v ON/OFF button (P0) 24.2v Key off or key on DETERGENT MIX button (P4) 3.14v Not pressed 0.02v pressed EDS button (P3) (Solution Button) 3.14v Not pressed...
- Page 58 Service Manual – SC500 04 - Control System J3 - 8 Ways ribbon connector Figure 46: Color Circuit Description Measured Comments Power supply - common 0.003v SP / EXTRAPR function LED (red)(LD3R) 1.78v Red LED on 0.032v Red LED off SP / EXTRAPR function LED (green) 1.95v Grn LED on (LD3V)
- Page 59 Service Manual – SC500 04 - Control System J4 - 3 Ways Potentiometer Connector Figure 47: Color Circuit Description Measured Comments VR1 potentiometer power supply + 2.675 White VR1 potentiometer return 1.45 (Neutral) 2.48 (Full Fwd Pin 2), 0.44 (Full Rev Pin 2) Black VR1 potentiometer power supply - 0.41 (Ground)
-
Page 60: 05 - Control System, Magnetic Smart Key
Service Manual – SC500 05 - Control System, Magnetic Smart Key Model No.: 9087403020, 9087404020, 9087400020,9087401020, 9087405020, 9087402020 Functional Description The architecture of the electronic control system for The Display controller (EB2) serves mainly as an the machine’s electrical components is composed aggregator for all input signals (buttons) and outputs of a Main machine controller (EB1) and a Display (LEDs) from the User interface controller (EB3),... -
Page 61: Wiring Diagram
Service Manual – SC500 05 - Control System, Magnetic Smart Key Wiring Diagram BATT + DISPLAY CONTROLLER (EB2) Power supply + SMART KEY (IB) J5.1 cpower supply + J1.1 J3.1 User interface contr. power supply + J5.2 SIGNAL CIRCUITS User interface contr. serial + J1.2 J3.2 User interface contr. -
Page 62: Component Locations
Service Manual – SC500 05 - Control System, Magnetic Smart Key Component Locations Main machine controller (EB1) Figure 2: Flat calbes from (EB2) to (EB3) Display controller (EB2) User interface controller (EB3) Smart key reader (IB) Figure 3:... -
Page 63: Troubleshooting
Service Manual – SC500 05 - Control System, Magnetic Smart Key Troubleshooting Main machine controller (EB1) Alarm Codes The Main machine controller (EB1) indicates a series of alarms in case of malfunction of one or more systems, and in case of abnormal conditions detected in the input signals The alarms are shown on the display in the following format: ALARM <XX>... - Page 64 Service Manual – SC500 05 - Control System, Magnetic Smart Key General alarms Alarm on Main machine controller - FLASHING YELLOW + RED LEDS Alarm code -------------------------- Meaning Condition Effect Service Suggestions Flashes Description Blown F1 fuse. Blown F1 fuse. Function block.
- Page 65 Service Manual – SC500 05 - Control System, Magnetic Smart Key Main machine controller alarms Alarm on Main machine controller - FLASHING RED LED Alarm code -------------------------- Meaning Condition Effect Service Suggestions flashes Description BRUSH motor The motor current is Brush motor Check the current draw of the brush motor.
- Page 66 Service Manual – SC500 05 - Control System, Magnetic Smart Key Drive system alarms Alarm on Main machine controller - FLASHING YELLOW LED Alarm code -------------------------- Meaning Condition Effect Service Suggestions flashes Description Amperometric Drive motor current Drive blocked. Check the current draw of the drive motor protection draw greater than the (this should be around 6-8amps without...
- Page 67 Service Manual – SC500 05 - Control System, Magnetic Smart Key On-board Battery Charger Alarms Alarm code -------------------------- Meaning Condition Effect Service Suggestions Description Communication No signal from battery The battery charger Check the wiring between the battery charger problem between charger via gate J4.4 for is performing the and the Main machine controller (EB1).
-
Page 68: Black-Box: Recording Of Alarms, Parameters (See Pages 71-72), Partial Operating Time Counter
Service Manual – SC500 05 - Control System, Magnetic Smart Key Black-box: Recording of Alarms, Parameters (see pages 71-72), Partial Operating Time Counter The alarms activated during normal machine operation are stored and can be read in the corresponding log (Alarm Log Screen) Display, Main Screen Place the Supevisor key (yellow) (Figure 6), then press the the button... -
Page 69: Display, Alarms Log Screen
Service Manual – SC500 05 - Control System, Magnetic Smart Key Display, Alarms Log Screen The alarms log screen (Figure 8) function allows you to check any alarms stored on the machine To return to the main screen (Figure 6), press the One-Touch button repeatedly Figure 8: Each alarm (See table of alarms in the Main machine controller Alarm Codes section) is stored along with... -
Page 70: Display, Machine Settings Screen
Service Manual – SC500 05 - Control System, Magnetic Smart Key Display, Machine Settings Screen The machine settings screen (Figure 9) functions value of the current parameter allow you to customise some parameters described in the following table of modifiable parameters. Press the One-Touch button to move to the next parameter... - Page 71 Service Manual – SC500 05 - Control System, Magnetic Smart Key The following parameters are displayed only when, on reaching the last parameter RESET, the One-Touch button is pressed together with the EcoFlex and vacuum buttons If only the One-Touch button is pressed, the system will return to the first parameter CHM1.
- Page 72 Service Manual – SC500 05 - Control System, Magnetic Smart Key Hidden Parameters Factory Min. Max. Code Description Meaning Value Setting Value This is the maximum continuous current which can be supplied to the electric wheel drive unit. INOM Nominal drive current WARNING: increasing this value increases the risk of the motor overheating.
-
Page 73: Display, Operating Time Counter Screen
Service Manual – SC500 05 - Control System, Magnetic Smart Key Display, Operating Time Counter Screen The operating time counter screen (Figure 10) function allows you to check the total accumulated hours of work for each machine subsystem: • (A) TOTAL counter (machine running time): same counter display on screen after starting machine •... -
Page 74: Display, Magnetic Smart Keys Management Screen
Service Manual – SC500 05 - Control System, Magnetic Smart Key Display, Magnetic Smart Keys Management Screen The Magnetic Smart Keys Management Screen (Figure 11) allows you to define if the machine can be used with whatever user key (factory setting) or only with one or more specific user keys. To switch on the operator mode press the “hare”... -
Page 75: System For Flow Rate Regulation As Function Of Speed
Service Manual – SC500 05 - Control System, Magnetic Smart Key System for Flow Rate Regulation as Function of Speed Solution flow levels 1, 2 and 3 regulate the flow of detergent solution on the basis of the machine speed so as to keep the quantity of solution dispensed per square metre of floor treated constant. -
Page 76: Removal And Installation
Service Manual – SC500 05 - Control System, Magnetic Smart Key Removal and Installation Main machine controller (EB1) Drive the machine on a level floor, remove the ignition key, and disconnect the red battery connector. Lift the recovery tank Remove the 7 screws and remove the electronic component compartment cover Disconnect the following connections sequentially (Figure 12): ◦... - Page 77 Service Manual – SC500 05 - Control System, Magnetic Smart Key Disconnect the following connections sequentially (Figure 14): ◦ (I) Deck actuator and detergent pump connection (J1) ◦ (J) Solenoid valve connection (J2) ◦ (K) Display controller connection (J3) ◦ (L) Battery charger connection (J4) ◦...
-
Page 78: Display Controller (Eb2), User Interface Controller (Eb3) And Smart Key Reader (Ib)
Service Manual – SC500 05 - Control System, Magnetic Smart Key Display Controller (EB2), User interface controller (EB3) and Smart Key Reader (IB) Disconnect the following connections Display Controller (EB2) sequentially (Figure 17): Drive the machine on a level floor. ◦... - Page 79 Service Manual – SC500 05 - Control System, Magnetic Smart Key User interface controller (EB4) Perform points 1 to 5 for removal of the Display controller Disconnect the following connections sequentially (Figure 18): ◦ (A) Flat connection J2 ◦ (B) Flat connection J3 10 Carefully raise the User interface controller (C), detaching it from the cover (D) Smart Key Reader (IB) 11 Perform points 1 to 5 for removal of the Display controller...
-
Page 80: Specifications
Service Manual – SC500 05 - Control System, Magnetic Smart Key Specifications Main machine controller (EB1) Connectors (Figure 18) Power connections (Ø6mm male RADSOK terminals - AMPHENOL SK 200800532 101 or equivalent) Controller Ref. Description V ref. I max. Connected to in/out Main machine controller power supply + 125A... - Page 81 Service Manual – SC500 05 - Control System, Magnetic Smart Key (Figure 20) Drive connections (2-way male faston T-connectors, 6.3x0.8 – spacing 7.4mm) Controller Ref. Description V ref. I max. Connected to in/out Drive system motor + 0-24V Drive system motor - 0-24V Figure 21: (Figure 21) Vacuum connections (2-way male parallel faston connectors, 6.3x0.8 –...
- Page 82 Service Manual – SC500 05 - Control System, Magnetic Smart Key (Figure 22) J1: MOLEX MINIFIT type, 8-ways vertical Description Controller V ref. I max. Connected to in/out Detergent pump power supply + <1A Detergent pump power supply - <1A Deck actuator power supply +/- 0/24V Deck actuator power supply -/+...
- Page 83 Service Manual – SC500 05 - Control System, Magnetic Smart Key (Figure 24) J3: MOLEX MINIFIT type, 6-ways vertical Description Controller V ref. I max. Connected to in/out User interface controller power supply + <1A EB2.1 User interface controller serial + in/out <1A EB2.2...
- Page 84 Service Manual – SC500 05 - Control System, Magnetic Smart Key (Figure 26) J5: JST VHR-3N vertical 3-way Description Controller V ref. I max. Connected to in/out Power supply for water level sensor + <1A S1.1 Water level sensor return <1A S1.2 Power supply for water level sensor -...
- Page 85 Service Manual – SC500 05 - Control System, Magnetic Smart Key (Figure 28) J7: TYCO MODU II vertical 6-way Description Controller V ref. I max. Connected to in/out +24V power supply <1A TRK.RD +5V power supply <1A iButton input (CAN H channel) In (Out) 0V (0-5V) <1A...
-
Page 86: Connectors Of The Display Controller (Eb2)
Service Manual – SC500 05 - Control System, Magnetic Smart Key Connectors of the Display Controller (EB2) (Figure 29) J1: MOLEX MINIFIT type, 6-ways vertical Controller Ref. Description V ref. I max. Connected to in/out Power supply + in/out <1A CFD12.J3.1 Main machine controller serial + in/out... - Page 87 Service Manual – SC500 05 - Control System, Magnetic Smart Key (Figure 31) J3: FCI DUFLEX (2.54 pitch) 8-way, male pins Controller Ref. Description V ref. I max. in/out Power supply - common <1A SP / EXTRAPR function LED (red) (LD3R) <1A SP / EXTRAPR function LED (green) <1A...
- Page 88 Service Manual – SC500 05 - Control System, Magnetic Smart Key (Figure 34) J5: MOLEX MICROFIT vertical, 2 ways Controller Description V ref. I max. Connected to in/out Smart Key reader signal GND In/Out <1A KEY.1 Smart key reader signal IN/OUT In/Out 0-3V <1A...
-
Page 89: Shop Measurements
Service Manual – SC500 05 - Control System, Magnetic Smart Key Shop Measurements The following tables contain some “real world” shop voltage measurements to help you recognize what “normal” looks like All voltage values were measured with the black (Negative) voltmeter lead connected to the main battery negative unless otherwise specified. - Page 90 Service Manual – SC500 05 - Control System, Magnetic Smart Key Brush Motor Figure 37: Color Description Measured Comments Brush motor + 24.4V (off), Constant Positive 24.2V (on) Blue Brush motor - 24.4V (off), PWM Battery Negative 0.15v (on without RPM control activated) 5.8v (on with RPM Control Active –...
- Page 91 Service Manual – SC500 05 - Control System, Magnetic Smart Key Vacuum Motor Figure 39: Color Description Measured Comments Vacuum system power supply + 24.8v (off) Constant Positive 24.4v (on) Blue Vacuum system power supply - 24.56 (off) 1.02 Running, 9.56 Quiet Mode 1.36v (on High) 9.69v (on Quiet mode VRID parameter = 1)
- Page 92 Service Manual – SC500 05 - Control System, Magnetic Smart Key J1 - 8 Ways Figure 40: Color Circuit Description Measured Comments Detergent pump power supply + 24.9v (off) No change seen on voltmeter when the pump pulsed. Gray Detergent pump power supply - 24.9v (off) Momentary drop to 0 when on.
- Page 93 Service Manual – SC500 05 - Control System, Magnetic Smart Key J2 - 2 Ways Figure 41: Color Circuit Description Measured Comments Yellow Solenoid valve power supply + 24.4 (Off and On) Purple Solenoid valve power supply - 24.4 (off) Momentarily drops to 0v when on but it is Momentary drop (on)
- Page 94 Service Manual – SC500 05 - Control System, Magnetic Smart Key J4 - 4 Ways Figure 43: Color Circuit Description Measured Comments White Enabling from battery charger 24.8v Not Charging May see residual voltage back-feeding from the main controller here when charging.
- Page 95 Service Manual – SC500 05 - Control System, Magnetic Smart Key Figure 45: Two way vertical jumper • What is this for? The J6 Jumper is used to configure the Main machine controller for the EcoFlex option. • What does it mean if it is jumped? The Main machine controller is set for no EcoFlex •...
-
Page 96: Shop Measurements - Display Controller (Eb2)
Service Manual – SC500 05 - Control System, Magnetic Smart Key Shop Measurements - Display Controller (EB2) Measure and record the voltage at each of the Main machine controller pins Always use battery negative as your reference point for your black voltmeter lead J1 - 6 Ways Figure 47: Color... - Page 97 Service Manual – SC500 05 - Control System, Magnetic Smart Key J2 - 9 way ribbon connector Figure 48: Color Circuit Description Measured Comments Power supply - common 0.003v ON/OFF button (P0) 24.2v Key off or key on DETERGENT MIX button (P4) 3.14v Not pressed 0.02v pressed EDS button (P3) (Solution Button)
- Page 98 Service Manual – SC500 05 - Control System, Magnetic Smart Key J3 - 8 way ribbon connector Figure 49: Color Circuit Description Measured Comments Power supply - common 0.003v SP / EXTRAPR function LED (red)(LD3R) 1.78v Red LED on 0.032v Red LED off SP / EXTRAPR function LED (green) 1.95v Grn LED on (LD3V)
- Page 99 Service Manual – SC500 05 - Control System, Magnetic Smart Key J4 - 3 Ways Potentiometer Connector Figure 50: Color Circuit Description Measured Comments VR1 potentiometer power supply + 2.675 White VR1 potentiometer return 1.45 (Neutral) 2.48 (Full Fwd Pin 2), 0.44 (Full Rev Pin 2) Black VR1 potentiometer power supply -...
-
Page 100: 10 - Chassis System
Service Manual – SC500 10 - Chassis System Chassis (main parts) The chassis function is primarily performed by the solution tank, the support housings for the wheels and working mechanisms are integrated in the gear motor unit and the rear frame Reference to Figure 1 Deck raising levers (see also Brush System, Disc and Brush System, REV) Frame integrated in the drive motor (see also Wheels System, Drive) -
Page 101: 20 - Wheel System, Traction
Service Manual – SC500 20 - Wheel System, Traction Functional Description Machine movement is provided by the gear motor unit (M3) The gear motor unit (M3) also functions as the main support of the machine, and is composed of an electric motor, the reduction unit with differential and the drive wheels The operator regulates the transfer speed, the working speed and reverse via the paddles, which are connected directly to the speed potentiometer (RV1) Reversing is performed by pressing the back paddle... -
Page 102: Wiring Diagram
Service Manual – SC500 20 - Wheel System, Traction Wiring Diagram SPEED POTENTIOMETER (RV1) J4.1 VR1 potentiometer power supply + J4.2 VR1 potentiometer return Power supply + J4.3 VR1 potentiometer power supply - Main control board power supply + J1.1 J3.1 Main control board power supply + Main control board serial +... -
Page 103: Component Locations
Service Manual – SC500 20 - Wheel System, Traction Component Locations Forward/reverse gear and activation paddle Speed Potentiometer Maximum speed (RV1) regulation buttons Figure 2: Driving wheels Rear pivoting wheel Gear motor unit (M3) Figure 3:... - Page 104 Service Manual – SC500 20 - Wheel System, Traction Main machine controller (EB1) Drive system motor fuse (F5) Figure 4:...
-
Page 105: Troubleshooting
Service Manual – SC500 20 - Wheel System, Traction Troubleshooting Trouble Possible Causes Remedy The machine does not move Battery voltage too low Charge the battery Drive system motor fuse (F5) broken Replace Speed potentiometer (RV1) incorrectly Replace regulated or broken Main machine controller (EB1) faulty Replace Wiring damaged... -
Page 106: Drive System Gear Motor Current Draw Test
Service Manual – SC500 20 - Wheel System, Traction Drive System Gear Motor Current Draw Test WARNING: This procedure must be performed by qualified personnel only and with the help of an assistant. Drive the machine on a level floor. Use a suitable chock to raise one side of the machine approximately 2cm from the floor and allow one drive wheel to turn freely Lift the recovery tank... -
Page 107: Removal And Installation
Service Manual – SC500 20 - Wheel System, Traction Removal and Installation Speed Potentiometer Drive the machine on a level floor, remove the key, and disconnect the red battery connector. Unscrew the 2 screws (A) (Figure 4) Release the retaining tab (B), then lift up and remove the User interface controller cover (C) Disconnect the following connections: ◦... -
Page 108: Specifications
Service Manual – SC500 20 - Wheel System, Traction Specifications SC500 Description / Model DISC Driving wheel diameter 7.8 in (200 mm) Driving wheel specific pressure on the floor (*) 101 psi (0.7 N/mm Rear wheel diameter 3.1 in (80 mm) Rear wheel specific pressure on the floor (*) 304 psi (2.1 N/mm Power... -
Page 109: 24 - Electrical System
Service Manual – SC500 24 - Electrical System Functional Description The batteries (2 x 12V) are connected together in series by the cables The battery charger (CH) is connected to the machine by two connectors (C) (power connection to the batteries) and C3 (4-way signal connection) The grey and white cables (1 and 2 of connector C3) are short circuited inside the battery charger CH when this is not connected to the mains If this connection is not made, all machine functions are disabled... -
Page 110: Battery Charge State Display
Service Manual – SC500 24 - Electrical System Battery Charge State Display Low voltage cut out The Main machine controller (EB1) shuts off electrical loads to protect the batteries from damage caused by over discharging The voltage threshold where loads are turned off depends on the battery type See table below Significant levels for machine operation TRANSITION THRESHOLD (VOLT) -
Page 111: Wiring Diagram
Service Manual – SC500 24 - Electrical System Wiring Diagram MAIN BATTERY Power supply + BATTERY CONNECTOR CONNECTOR J4.1 J4.1 Enabling from battery charger SIGNAL CIRCUITS C2.A FUSE (F2) 24V BATTERIES (**) J4.2 Power supply from battery charger (BAT) J4.3 J4.3 Battery charger enabling power supply J4.4... -
Page 112: Component Locations
Service Manual – SC500 24 - Electrical System Component Locations Signal circuits fuse (F2) Battery charger (CH) Drive system motor fuse (F5) Main machine controller (EB1) Brush motor fuse (F4) Main machine controller fuse (F1) Figure 2: Batteries (BAT) Battery connections Batteries (BAT) Figure 3:... -
Page 113: Maintenance And Adjustments
Service Manual – SC500 24 - Electrical System Maintenance and Adjustments Setting the Installed Battery Type Set the machine and the on-board battery charger (where fitted) on the basis of the type of battery to be installed by modifying the BAT parameter as indicated Insert the “Supervisor”... -
Page 114: Battery Installation
Service Manual – SC500 24 - Electrical System Battery installation Remove the ingnition key, and disconnect the red battery connector Lift the recovery tank cover and check that it is empty; if not, empty it using the drain hose Grasp the handle and carefully lift the recovery tank The machine is supplied with cables suitable to install 2 12V batteries Carefully lift the batteries until the relevant compartment, then place them properly Route and install the battery cable as shown in the diagram (Figure 6), then carefully tighten the nut on... -
Page 115: Battery Charging
Service Manual – SC500 24 - Electrical System Battery Charging charger Note: Charge the batteries when there is only one flashing segment displayed Connect the battery charger to the electrical in the battery symbol, or at the end mains of each shift. Keeping the batteries charged make their life last longer. -
Page 116: Checking/Replacing Fuses
Service Manual – SC500 24 - Electrical System Checking/Replacing Fuses Drive the machine on a level floor. Remove the ignition key and disconnect the red battery connector Lift the recovery tank Remove the 7 screws and remove the electronic component compartment cover Check/replace the following fuses (Figure 7): ◦... - Page 117 Service Manual – SC500 24 - Electrical System Remove the protection cover of its fuseholder, then check/replace the following fuses (Figure 8): ◦ (F4) 50A midi fuse - brush motor (C) ◦ (F5) 30A midi fuse - Drive system motor (D) Place the Main machine controller assembly in its housing, tighten the mounting screws and install the electronic component compartment cover Figure 8:...
-
Page 118: Troubleshooting
Service Manual – SC500 24 - Electrical System Troubleshooting See the other chapters for previously provided instructions for other electrical system components Trouble Possible Causes Remedy The machine is not working Batteries (BAT) flat or connections faulty Charge the batteries or clean the connections The batteries (BAT) are broken Check the battery no-load... - Page 119 Service Manual – SC500 24 - Electrical System General Wiring Diagram (Model No.: 9087352020, 9087354020, 9087350020, 9087351020, 9087353020, 9087355020) USER INTERFACE BATTERY CONNECTOR CONTROLLER (EB3) BRUSH MOTOR FUSE (F4) FCI DUFLEX (2.54 pitch) 8-way, male pins Power supply + BRUSH MOTOR Brush motor + FCI DUFLEX (2.54 pitch) 9-way, male pins (M1)
- Page 120 Service Manual – SC500 24 - Electrical System General Wiring Diagram (Model No.: 9087403020, 9087404020, 9087400020,9087401020, 9087405020, 9087402020) BATTERY CONNECTOR Power supply + J7.1 +24V power supply TRACKUNIT (TCU) J7.5 Power supply - J7.6 Machine on signal SMART KEY (IB) BRUSH MOTOR FUSE (F4) J5.2...
-
Page 121: Specifications
Service Manual – SC500 24 - Electrical System Specifications SC500 Description / Model DISC Battery compartment size (length x width x height) 13.7x13.7x10.2 in (350x350x260 mm) Standard batteries (2) 12V 105 AhC5 Standard battery run time (capacity) 3.5 h Model 24V 13A Input voltage 85Vac÷264Vac, 50Hz÷60Hz... -
Page 122: 30 - Solution System
Service Manual – SC500 30 - Solution System Functional Description The solution system supplies water and detergent to the brush when cleaning the floor. The solution tank is also the main machine body There is a manual valve on the left side of the tank to close the water supply whenever maintenance must be performed on the machine. -
Page 123: Water Level Sensor Operation
Service Manual – SC500 30 - Solution System Water Level Sensor Operation The water level sensor (SW1) is positioned about half the height of the solution tank so as to provide the information to the electronic system on the level of water present in the tank (more than half, less than half) Through this information the times of opening of the solenoid valve (EV1) and the detergent pump (M4) are adjusted to maintain this flow more constant (Figure 1). -
Page 124: Wiring Diagram
Service Manual – SC500 30 - Solution System Wiring Diagram Power supply + DETERGENT PUMP Detergent pump power supply + J1.1 (M4) Detergent pump power supply - J1.2 SOLENOID VALVE (EV1) Solenoid valve power supply + J2.1 Solenoid valve power supply - J2.2 Power supply for water level sensor + J5.1... -
Page 125: Component Locations
Service Manual – SC500 30 - Solution System Component Locations Water removable filler hose Detergent solution tank side filler cap Detergent solution tank front filler Solution tank Figure 4: Solution drain and level check hose Figure 5:... - Page 126 Service Manual – SC500 30 - Solution System Battery compartment liquid drain hole Solution tap Solution filter Solenoid valve (EV1) Figure 6: Cap with detergent supply hose Detergent pump (M4) piston pump Detergent pump (M4) EcoFlex Water level peristaltic pump detergent tank sensor (SW1) Figure 7:...
-
Page 127: Maintenance And Adjustments
Service Manual – SC500 30 - Solution System Maintenance and Adjustments Cleaning the Detergent Solution Tank and Filter Drive the machine on a level floor. Ensure that the machine is off and the ignition key has been removed Drain the detergent solution tank with the level hose Then, rinse the tank with clean water Close the detergent solution valve (A) (Figure 8) The valve (A) is closed when it is in position (B) and it is open when it is in position (C) Remove the transparent cover (D) and the gasket (E), then remove the filter strainer (F). -
Page 128: Cleaning The Ecoflex Detergent Tank
Service Manual – SC500 30 - Solution System Cleaning the EcoFlex Detergent Tank Clean the detergent tank as follows Drive the machine to the appointed disposal area Ensure that the machine is off and the ignition key has been removed Lift the recovery tank cover by opening it with the handle and check that the tank is empty;... -
Page 129: Draining The Ecoflex System
Service Manual – SC500 30 - Solution System Draining the EcoFlex System Clean the detergent tank following the procedure in the previous section To remove residual detergent from the detergent hoses and pump, proceed as follows 11 Turn on the machine by the key and the button 12 Press the One-Touch button Check that the detergent quantity indicator on the display... -
Page 130: Troubleshooting
Service Manual – SC500 30 - Solution System Troubleshooting Trouble Possible Causes Remedy Small amount of solution or no The solution filter is clogged/dirty Clean the filter solution reaches the brush Solution supply valve locked in (semi) closed Replace the valve position Solenoid valve (EV1) broken or electrical Replace the solenoid... - Page 131 Service Manual – SC500 30 - Solution System Trouble Possible Causes Remedy The EcoFlex system will not User interface controller (EB3) faulty Replace activate and the LED does not The Main machine controller (EB1) has not If present, remove the come on been set for operation with the EcoFlex jumper (J6) (Figure 10)
-
Page 132: Removal And Installation
Service Manual – SC500 30 - Solution System Removal and Installation Solenoid Valve Remove Drive the machine on a level floor or on a hoisting system to facilitate the disassembly procedures. Turn on the machine by the key and the button Lower the brush deck by pressing the One-Touch button Switch off the machine and disconnect the battery connector Unscrew and disconnect the connection (A) (Figure 11) on the solenoid valve (B) -
Page 133: Detergent Pump (Piston Pump)
Service Manual – SC500 30 - Solution System Detergent Pump (Piston Pump) (Model No : 9087352020, 9087354020, 9087350020, 9087351020, 9087353020, 9087355020) Remove Drive the machine on a level floor. Switch off the machine and disconnect the battery connector Lift the recovery tank Unscrew the two screws (A) (Figure 12) and remove the cover (B) Disconnect the connectors (C) and the tank hose (D) and brush hose (E) Unscrew the two screws (F) and remove the detergent pump (G) -
Page 134: Detergent Pump (Peristaltic Pump)
Service Manual – SC500 30 - Solution System Detergent Pump (Peristaltic Pump) (Model No : 9087403020, 9087404020, 9087400020,9087401020, 9087405020, 9087402020) Remove Installation Drive the machine on a level floor. Assemble the components in the opposite order to that they were removed in, ensuring the supply hoses (C) Switch off the machine and disconnect the and (D) are correctly fitted on the detergent pump. -
Page 135: Checking The Water Level Sensor Operation
Service Manual – SC500 30 - Solution System Checking the Water Level Sensor Operation Insert the Supervisor key (yellow) in place of the User key (grey or blue) to access the main screen (Figure 14) of the multifunction display With the solution tank more than half full, the symbol displayed is (A) With the solution tank less than half full, the symbol displayed is (B) Figure 14:... -
Page 136: Water Level Sensor
Service Manual – SC500 30 - Solution System Water Level Sensor Remove Drive the machine on a level floor. Switch off the machine and disconnect the battery connector Lift the recovery tank Unscrew the two screws (A) (Figure 15) and remove the cover (B) Unscrew the two screws (C) and lift the tank (D) Disconnect the connector (E) Disassemble and remove the water level sensor (F) -
Page 137: Specifications
Service Manual – SC500 30 - Solution System Specifications SC500 Description / Model DISC Solution tank capacity 12 US gal (45 liters) 0.75 cl/m / 1.5 cl/m 0.38 cl/m / 0.75 cl/m Solution flow values 3.0 cl/m / 2.8 l/min 1.5 cl/m / 2.8 l/min EcoFlex kit tank capacity 1.3 US gal (5 L) -
Page 138: 34 - Scrub System, Disc
Service Manual – SC500 34 - Scrub System, Disc Functional Description The disc brush system can be started by the operator The disc brush turn counter-clockwise The rotating brush system cleans the surface of the floor. The main component of the brush system is the deck where the brush or the pad holder with pad suitable for the type of surface to be cleaned is installed The brush deck is installed on a frame to which the electrical actuator and the four levers for connection to the frame integrated with the brush motor is coupled... -
Page 139: Wiring Diagram
Service Manual – SC500 34 - Scrub System, Disc Wiring Diagram Electronic board power supply + BRUSH MOTOR FUSE (F4) BRUSH Brush motor + MOTOR (M1) MAIN MACHINE Brush motor - CONTROLLER (EB1) BRUSH DECK Deck actuator power supply +/- J1.3 ACTUATOR MOTOR (M5) -
Page 140: Brush Deck Actuator System
Service Manual – SC500 34 - Scrub System, Disc Brush Deck Actuator System The brush deck actuator of SC500 is a new generation actuator developed by SIR and ITALSEA and it is controlled directly by the Main machine controller (EB1) without electromechanical limit switches ITALSEA patented the system to control the actuator Basically the system uses deeply measurements of the current flow in the actuator to know its position in real time. -
Page 141: Component Locations
Service Manual – SC500 34 - Scrub System, Disc Component Locations Deck raising levers Brush motor (M1) Machine straight forward movement adjusting knob Brush deck support Brush Disc brush deck Figure 2: Brush deck lifting/ Drive hub lowering actuator (M5) Figure 3:... - Page 142 Service Manual – SC500 34 - Scrub System, Disc Actuator system wiring connection Main machine controller (EB1) Brush motor fuse (F4) Figure 4:...
-
Page 143: Maintenance And Adjustments
Service Manual – SC500 34 - Scrub System, Disc Maintenance and Adjustments Brush Installation/Removal According to the kind of cleaning to be performed, the machine can be equipped either with the brush (A) (Figure 5) or the pad-holder (B) with pad (C) together with the appropriate deck Turn on the machine by the key and the button Bring the machine speed to minimum by pressing the tortoise machine speed adjustment button... -
Page 144: Troubleshooting
Service Manual – SC500 34 - Scrub System, Disc Troubleshooting Trouble Possible Causes Remedy The brush does not clean The brush is excessively worn Replace properly The brush does not turn See the chapter Control System, Main machine controller (EB1) Error Codes Brush motor fuse (F4) broken Replace Brush motor carbon brushes worn... -
Page 145: Brush Motor Current Draw Test
Service Manual – SC500 34 - Scrub System, Disc Brush Motor Current Draw Test WARNING: This procedure must be performed by qualified personnel only. Drive the machine on a level floor. Remove the brush Disconnect the drive system connector (A) (Figure 6) on the Main machine controller (B) to disable machine movement Turn on the machine by the key and the button Press the One-Touch button... -
Page 146: Removal And Installation
Service Manual – SC500 34 - Scrub System, Disc Removal and Installation Brush Deck Disassembly Drive the machine on a level floor or on a hoisting system to facilitate the disassembly procedures. Remove the brush Turn on the machine by the key and the button Lower the brush deck by pressing the One-Touch button Switch off the machine and disconnect the battery connector Undo the screw (A) (Figure 7) on the pin of the actuator (B);... - Page 147 Service Manual – SC500 34 - Scrub System, Disc Figure 8: 10 Remove the 4 screws (I) (Figure 9) fastening the deck raising levers (J), retaining the bushings and washers 11 Unscrew the 2 retaining nuts (K) and disconnect the brush motor power supply cables (L) Figure 9: 12 Extract the brush deck (M) (Figure 10) from beneath the solution tank...
- Page 148 Service Manual – SC500 34 - Scrub System, Disc Figure 10: Assembly 13 Assemble the components in the opposite order they were removed in, ensuring the brush motor power supply cable polarities are correct...
-
Page 149: Checking/Replacing Brush Motor Carbon Brushes
Service Manual – SC500 34 - Scrub System, Disc Checking/Replacing Brush Motor Carbon Brushes Check Remove the brush deck Remove any dust and dirt from around the brush motor carbon brushes Remove the four protective covers (A) (Figure 11) by disconnecting the clips Remove the carbon brush nuts (B) with the lead-in wires Disengage the tabs (C) and remove the carbon brushes (D) Check the carbon brushes (D) for wear The carbon brushes are worn out when:... -
Page 150: Brush Motor Disassembly/Assembly
Service Manual – SC500 34 - Scrub System, Disc Brush Motor Disassembly/Assembly Disassembly Remove the brush deck Working at the bench, remove the screw (A) (Figure 12) of the brush motor Use a puller to remove the brush hub (B) Remove the screws (C) Remove the brush motor (D) Recover the key (E) -
Page 151: Brush Deck Actuator
Service Manual – SC500 34 - Scrub System, Disc Brush Deck Actuator Remove Lower the brush deck Switch off the machine and disconnect the battery connector Remove the cover and disconnect the actuator connector (A) (Figure 13) Unscrew the screw (B) of the lower pin, retaining the bushings Remove the screws (C), retaining the plates (D) Remove the actuator (E) installation... -
Page 152: 34 - Scrub System, Rev
Service Manual – SC401, SCRUBTEC 334 34 - Scrub System, REV Functional Description The REV brush system can be operated by the operator The REV brush has a movement with distinctive orbital movements and anticlockwise rotation The REV allows the surface concerned to be washed/cleaned by the movement of the brush The main component of the system is the deck where the brush or the pad suitable for the type of surface to be cleaned is installed The brush deck is fixed to the machine with a support to which the electrical actuator and two anchor levers... -
Page 153: Wiring Diagram
Service Manual – SC500 34 - Scrub System, REV Wiring Diagram Electronic board power supply + BRUSH MOTOR FUSE (F4) BRUSH Brush motor + MOTOR (M1) MAIN MACHINE Brush motor - CONTROLLER (EB1) BRUSH DECK Deck actuator power supply +/- J1.3 ACTUATOR MOTOR (M5) -
Page 154: Brush Deck Actuator System
Service Manual – SC500 34 - Scrub System, REV Brush Deck Actuator System The brush deck actuator of SC500 is a new generation actuator developed by SIR and ITALSEA and it is controlled directly by the Main machine controller (EB1) without electromechanical limit switches ITALSEA patented the system to control the actuator Basically the system uses deeply measurements of the current flow in the actuator to know its position in real time. -
Page 155: Component Locations
Service Manual – SC500 34 - Scrub System, REV Component Locations REV Motor (M1) Deck raising levers Brush deck support Brush deck REV pad Figure 2: Brush deck lifting/ lowering actuator (M5) Drive disc Figure 3:... - Page 156 Service Manual – SC500 34 - Scrub System, REV Actuator system wiring connection Main machine controller (EB1) Brush motor fuse (F4) Figure 4:...
-
Page 157: Maintenance And Adjustments
Service Manual – SC500 34 - Scrub System, REV Maintenance and Adjustments Brush Installation/Removal CAUTION: Ensure that the machine is off with the ignition key removed before installing or removing the REV system brush. With the REV deck raised, install the pad (A) (Figure 5) or the brush (C), depending on the type of treatment to be performed: ◦... -
Page 158: Troubleshooting
Service Manual – SC500 34 - Scrub System, REV Troubleshooting Trouble Possible Causes Remedy The brush does not clean The brush is excessively worn Replace properly The brush does not turn See the chapter Control System, Main machine controller (EB1) Error Codes Brush motor fuse (F4) broken Replace REV motor carbon brushes worn... -
Page 159: Rev Motor Current Draw Test
Service Manual – SC500 34 - Scrub System, REV REV Motor Current Draw Test WARNING: This procedure must be performed by qualified personnel only. Drive the machine on a level floor. Remove the brush Lift the machine so that the deck no longer touches the floor once lowered. Disconnect the drive system connector (A) (Figure 6) on the Main machine controller (B) to disable machine movement Turn on the machine by the key and the button... -
Page 160: Removal And Installation
Service Manual – SC500 34 - Scrub System, REV Removal and Installation REV Deck Disassembly Drive the machine on a level floor or on a hoisting system to facilitate the disassembly procedures. Turn on the machine by the key and the button Lower the brush deck by pressing the One-Touch button Switch off the machine and disconnect the battery connector Undo the screw (A) (Figure 7) on the pin of the actuator (B);... - Page 161 Service Manual – SC500 34 - Scrub System, REV Remove the 2 screws (I) (Figure 9) fastening the deck raising levers (J), retaining the bushings and washers 10 Disconnect the REV motor power supply connections (K) Figure 9: 11 Extract the REV deck (L) (Figure 10) from beneath the solution tank Figure 10: Assembly 12 Assemble the components in the opposite order they were removed in, ensuring the REV motor power...
-
Page 162: Checking/Replacing Rev Motor Carbon Brushes
Service Manual – SC500 34 - Scrub System, REV Checking/Replacing REV Motor Carbon Brushes Remove the REV deck Place the deck on a workbench Note: The motor cannot be removed with the REV deck fitted to the machine. Remove the connector holder Remove the wire mounting nut and the rubber gasket Remove the wire mounting nut and the... - Page 163 Service Manual – SC500 34 - Scrub System, REV Remove the top cover Figure 13: Replace the carbon brushes ◦ Before disassembly, note the spring position when the carbon brush is being pushed back ◦ Remove the carbon brush and the spring ◦...
- Page 164 Service Manual – SC500 34 - Scrub System, REV Figure 15: ◦ Install the other three carbon brushes Install the wave washer Install the top cover ◦ Install it far enough so that the carbon brushes make contact with the collector when the temporary support wires are removed Then remove the temporary wires Commutator Carbon brush...
-
Page 165: Brush Deck Actuator
Service Manual – SC500 34 - Scrub System, REV Brush Deck Actuator Remove Lower the brush deck Switch off the machine and disconnect the battery connector Remove the cover and disconnect the actuator connector (A) (Figure 17) Unscrew the screw (B) of the lower pin, retaining the bushings Remove the screws (C), retaining the plates (D) Remove the actuator (E) installation... -
Page 166: Specifications
Service Manual – SC500 34 - Scrub System, REV Specifications SC500 Description / Model DISC Cleaning width 20 in (530 mm) Brush/pad diameter 20 in (530/508 mm) Brush pressure with extra-pressure function turned off 49 lb (22 kg) Brush pressure with extra-pressure function turned on 66 lb (30 kg) Brush deck right/left offset 100 / 25 mm (3.9 / 1 in) -
Page 167: 38 - Squeegee System
Service Manual – SC500 38 - Squeegee System Functional Description The squeegee system cleans the liquid off the floor, which is then collected by the recovery system. The squeegee is mounted on castors and the weight of the system presses it down on the floor. The squeegee is attached with two quick-fastening handwheels which fit in the slots of the squeegee support. -
Page 168: Component Locations
Service Manual – SC500 38 - Squeegee System Component Locations (Model No : 9087352020, 9087354020, 9087350020, 9087351020, 9087353020, 9087355020) Gas spring Squeegee lifting/ lowering pedal Upper squeegee support Impact deflection wheel Squeegee adjusting knob Lower squeegee support Mounting Squeegee blades handwheels Figure 1: (Model No : 9087403020, 9087404020, 9087400020,9087401020, 9087405020, 9087402020) -
Page 169: Maintenance And Adjustments
Service Manual – SC500 38 - Squeegee System Maintenance and Adjustments Squeegee cleaning Note: The squeegee must be clean and its blades must be in good conditions in order to get a good drying. WARNING: It is advisable to wear protective gloves when cleaning the squeegee because there may be sharp debris. -
Page 170: Checking/Replacing The Squeegee Blades
Service Manual – SC500 38 - Squeegee System Checking/Replacing the Squeegee Blades Note: The squeegee must be clean and its blades must be in good conditions in order to get a good drying. WARNING: It is advisable to wear protective gloves when cleaning the squeegee because there may be sharp debris. -
Page 171: Troubleshooting
Service Manual – SC500 38 - Squeegee System Troubleshooting Trouble Possible Causes Remedy Suction of dirty water is Squeegee or vacuum hose blocked or Clean or repair/replace insufficient or non-existent damaged The squeegee leaves lining on There is debris under the blade Remove the floor or does not collect water Squeegee blade lips damaged or worn... -
Page 172: Removal And Installation
Service Manual – SC500 38 - Squeegee System Removal and Installation Gas Spring on the Squeegee Support (Model No : 9087352020, 9087354020, 9087350020, 9087351020, 9087353020, 9087355020) Drive the machine on a level floor or on a hoisting system to facilitate the disassembly procedures. Lower the squeegee and remove it from the support Unscrew the nut (A) (Figure 4), retaining the bushings, washers and spacers (B) Unscrew the screw (C), retaining the nut, washers and spacers (D) -
Page 173: Spring On The Squeegee Support
Service Manual – SC500 38 - Squeegee System Spring on the Squeegee Support (Model No : 9087403020, 9087404020, 9087400020,9087401020, 9087405020, 9087402020) Drive the machine on a level floor or on a hoisting system to facilitate the disassembly procedures. Remove the squeege from the squeegee support (A), then lower the squeegee support by slowly to the floor. -
Page 174: Specifications
Service Manual – SC500 38 - Squeegee System Specifications SC500 Description / Model DISC Squeegee width 28.3 in (720 mm) Gas spring 300 N... -
Page 175: 40 - Recovery System
Service Manual – SC500 40 - Recovery System Functional Description The recovery system removes the dirty water from the floor and pipes it to a recovery tank. When the machine is running, the dirty water on the floor is collected by the squeegee blades and collected through the slots in the same, piped through the vacuum hose and into the tank by the airflow created by vacuum motor (M2). -
Page 176: Wiring Diagram
Service Manual – SC500 40 - Recovery System Wiring Diagram VACUUM SYSTEM Vacuum system power supply + MOTOR (M2) MAIN MACHINE Vacuum system power supply - CONTROLLER (EB1) Figure 1:... -
Page 177: Component Locations
Service Manual – SC500 40 - Recovery System Component Locations Cover gasket Recovery tank cover Container with debris collection grid Recovery tank Vacuum grid with automatic shut-off float Figure 2: Squeegee vacuum Vacuum motor (M2) hose Recovery water drain Motor protection case hose Figure 3:... -
Page 178: Maintenance And Adjustments
Service Manual – SC500 40 - Recovery System Maintenance and Adjustments Recovery Tank Cleaning Drive the machine to the appointed disposal area Drain the water from the tank using the drain hose Lift the recovery tank cover Clean the vacuum grid (B) (Figure 4), release the fasteners (A), open the grid (B) and recover the float (C), then clean carefully and reinstall Remove the debris collection tank (D) and open its cover, then clean it carefully Reinstall it on the vacuum hose... -
Page 179: Troubleshooting
Service Manual – SC500 40 - Recovery System Troubleshooting Trouble Possible Causes Remedy The vacuum motor will not turn Wiring between Main machine controller (EB1) Repair and vacuum motor (M2) damaged User interface controller (EB3) faulty Replace Vacuum motor faulty Check the amperage Suction of dirty water is Activation of automatic float shut-off... -
Page 180: Vacuum Motor Current Draw Test
Service Manual – SC500 40 - Recovery System Vacuum Motor Current Draw Test WARNING: This procedure must be performed by qualified personnel only. Apply the amperometric clamp (A) to a cable (B) of the batteries (Figure 5) Turn on the machine by the key and the button Activate the vacuum by pressing the vacuum button Activate the vacuum and check that the current draw of the vacuum motor is between 13 and 17A at Stop the vacuum... -
Page 181: Removal And Installation
Service Manual – SC500 40 - Recovery System Removal and Installation Vacuum Motor Unit Removal Remove the ignition key Disconnect the red battery connector If present, drain the recovery tank, then lift it Remove the cover (A) (Figure 6), then disconnect the connector (B) Figure 6: Unscrew the 4 screws (C) (Figure 7) and remove the case (D) Unscrew the screw (E) holding the vacuum motor wiring... -
Page 182: Container And Vacuum Motor Disassembly/Assembly
Service Manual – SC500 40 - Recovery System Container and Vacuum Motor Disassembly/Assembly Disassembly Remove the ignition key Disconnect the red battery connector If present, drain the recovery tank, then lift it Unscrew the 4 screws (A) (Figure 8) and remove the case (B) Unscrew the screw (C) holding the vacuum motor wiring Unscrew the 4 screws (D) and remove the vacuum motor unit (E) Figure 8:... - Page 183 Service Manual – SC500 40 - Recovery System Unscrew the 4 screws (F) and cut the retaining strap (G) (Figure 9) Remove the external soundproofing support (H) from the internal soundproofing support (I). Clean any dirt from the space between the two containers 10 Remove the seal (J) and the internal support (K) 11 Clean any dirt from the space between the container and the motor Figure 9:...
- Page 184 Service Manual – SC500 40 - Recovery System 14 Clean and check the condition of all seals (O) (Figure 11); replace them if necessary Figure 11: Assembly 15 Check that all components are reassembled with the correct polarity and orientation 16 Assemble the components in the reverse order of disassembly...
-
Page 185: Specifications
Service Manual – SC500 40 - Recovery System Specifications SC500 Description / Model DISC Recovery tank capacity 12 US gal (45 L) 0.37 hp (280 W) Vacuum motor technical data 20.8A VDC 24V Vacuum circuit capacity 29.9 in H2O (760 mm H2O) -
Page 186: 90 - Options
Service Manual – SC500 90 - Options Description Illustration ECOFLEX KIT (EU model only) Detergent tank Insert-dry brake Refill cap Hose Pump detergent mix (piston pump for the old models) Pump detergent mix (peristaltic pump for the new models) Sensor water level Support sensor Hardware BATTERY CHARGER KIT... - Page 187 Service Manual – SC500 90 - Options Description Illustration VACUUM SYSTEM MOTOR KIT (All version) Vacuum motor group Tie cable USB KIT (Model No.: 9087412020, 9087411020, 9087410020) USB cable Plate Hardware...
- Page 188 Service Manual – SC500 90 - Options Description Illustration TRACKCLEAN KIT-US (Advance) Kit-US with reader Kit-US without reader TRACKCLEAN KIT-EU (Nilfisk) Kit-EU with reader Kit-EU without reader...
Need help?
Do you have a question about the Advance SC500 X20 B and is the answer not in the manual?
Questions and answers