Table of Contents
Advertisement
Advertisement
Table of Contents

Related Manuals for AEG COMPETENCE KB9820E


Summary of Contents for AEG COMPETENCE KB9820E
- Page 1 COMPETENCE KB9820E Built In Fan / Steam Oven User information...
-
Page 2: Dear Customer
Dear Customer, Please read this user information carefully and keep it to refer to later. Please pass the user information on to any future owner of the appli- ance. The following symbols are used in the text: Safety instructions Warning! Information that affects your personal safety. Important! Information that prevents damage to the appliance. -
Page 3: Table Of Contents
Contents Operating Instructions ........Safety instructions. - Page 4 Baking table ..........40 Table for Bakes and Gratins.
-
Page 5: Operating Instructions
Operating Instructions Safety instructions This appliance conforms with the following EU Directives: – 73/23/EEC dated 19.02.1973 Low Voltage Directive – 89/336/EEC dated 03.05.1989 EMC Directive inclusive of Amending Directive 92/31/EEC – 93/68/EEC dated 22.07.1993 CE Marking Directive Electrical safety • This appliance must be connected by a qualified electrician only. •... -
Page 6: How To Avoid Damage To The Appliance
Information about acrylamides According to the latest scientific research, intensive browning of food, especially in products containing starch, may present a health risk due to acrylamide. Therefore we recommend cooking at low temperatures and not browning foods too much. How to avoid damage to the appliance •... -
Page 7: Disposal
Disposal Packaging material The packaging materials are environmentally friendly and can be recy- cled. The plastic components are identified by markings, e.g. >PE<, >PS<, etc. Please dispose of the packaging materials in the appropriate container at your local waste disposal facilities. Old appliance The symbol on the product or on its packaging indicates that this... -
Page 8: Description Of The Appliance
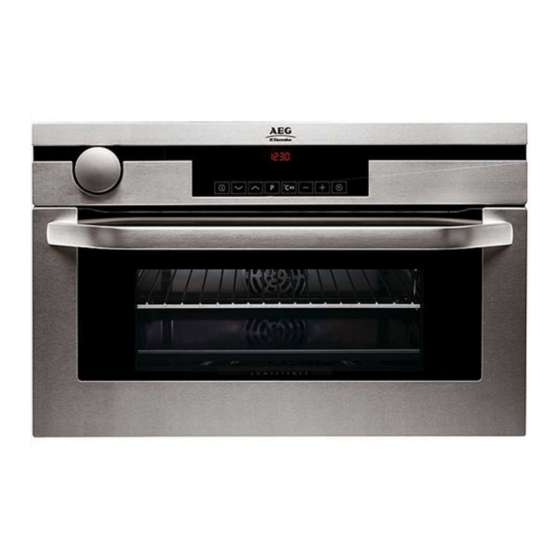
Description of the Appliance General Overview Control panel Door handle Full glass door Control Panel Oven display Water drawer Function buttons Oven... -
Page 9: Oven Features
Oven Features Grill heating element Shelf positions Oven lighting Fat Filter Fan heating element Steam generator/Steam rosette Oven shelf runners, removable Oven Accessories Shelf For dishes, cake tins, items for roasting and grilling. Baking tray For cakes and biscuits. -
Page 10: Before Using For The First Time
Before using for the first time Setting and changing the current time The oven only operates when the time has been set. When the appliance is connected to the electrical supply or when there has been a power cut, the symbol for Time flashes automatically. -
Page 11: Initial Cleaning
Initial cleaning Clean the oven before using it for the first time. Important: Do not use caustic or abrasive cleaning agents! These can damage the oven surfaces. For the metal surfaces, use commercially available cleaning agents. 1. Open the oven door. The oven light is lit. -
Page 12: Operating The Oven
Operating the Oven The Electronic Oven Control Baking and Roasting Programmes Temperature/Clock display Steam mode Thermometer symbol Oven Functions Clock functions/Operating time Memory: P / Test: d Clock Functions ON/OFF button Oven function selection Selector buttons Baking and Roasting Programmes Speedcook General instructions •... -
Page 13: Selecting The Oven Function
Selecting the oven function 1. Switch on the oven with the On/Off button. 2. Press the button repeat- edly until the desired oven function appears. • A suggested temperature appears on the temperature display. • If the suggested temperature is not changed within approx. -
Page 14: Switching Off The Oven
Switching off the oven Switch off the appliance using the On/Off button. Cooling fan The fan switches on automatically in order to keep the appliance’s sur- faces cool. When the oven is switched off, the fan continues to run to cool the appliance down, then switches itself off automatically. -
Page 15: Speedcook
Speedcook After an oven function is selected, with the use of the additional function Speedcook the empty oven can be pre-heated in a relatively short time. Important: Do not put the food to be cooked into the oven, until Speedcook is completed and the oven is operating using the desired function. -
Page 16: Oven Functions
Oven Functions The oven has the following functions: Heating element/ Oven function Steam Cooking For vegetables, potatoes, rice, pas- Steam generator, ta or other side-dishes. Interval Cooking For baking, roasting and Hot air (75%) and re-heating chilled or frozen meals. steam generator (25%) alternating Ventitherm ®... -
Page 17: Inserting The Oven Shelf And The Baking Tray
Inserting the Oven Shelf and the Baking Tray Shelf runner safety and anti-tip device As a shelf runner safety device, all insertable components have a small curved indentation at the bottom on the right and left-hand edge. Always insert insertable components so that this indentation is at the back of the oven interior. -
Page 18: Inserting/Removing The Grease Filter
Inserting/Removing the Grease Filter Only use the grease filter when roasting to protect the rear heating elements from fat splashes. Inserting the grease filter Hold the grease filter by the grip and insert the two mounts downwards into the opening on the rear wall of the oven (fan opening). -
Page 19: Steam Cooking Functions
Steam Cooking Functions Important:The Steam Cooking functions must always be set in con- junction with the clock functions Cook time or End time (see chapter Clock Functions Cook time /End time Important: Only water can be used as the liquid. A buzzing sound is heard when the water has been used up. - Page 20 After the oven has cooled down, soak up any remaining water from the steam generator using a sponge and, if necessary, wipe out with a little vinegar. Leave the door open to let the oven dry completely. Interval Cooking The continual change from fan to steam takes place automatically. 1.
-
Page 21: Additional Functions
Additional functions Baking and Roasting Programmes Use the pre-set recipes for this function. Selecting the programme 1. Switch the oven on using the On/ button. Press the baking/ roasting programmes button, then press the button re- peatedly, until the desired pro- gramme appears in the display (P 1 to P 12). -
Page 22: Memory Function
Memory function The Memory function can be used to save a setting which is fequently used. 1. Set oven function, temperature and if necessary the clock functions Cook time and/or End time 2. Press and hold the Baking/Roasting Programmes button approx. -
Page 23: Clock Functions
Clock Functions Clock indicators Clock functions Time Cook time/End time/Operating time Clock functions Selector buttons Countdown To set a countdown. A signal sounds after the time has elapsed. This function does not affect the operation of the oven. Cook time To set how long the oven is to be in use. - Page 24 Countdown 1. Press the Clock Functions button repeatedly until the symbol for Countdown flashes. 2. Set the desired Countdown time us- ing the button (max. 99.00 minutes). After about 5 seconds the display shows the time remaining. The symbol for Countdown lights up: When the time set has elapsed, an audible signal sounds for 2 minutes.
- Page 25 Cook time 1. Select oven function and using button select temperature. 2. Press the Clock Functions button repeatedly until the symbol for Cook time flashes. 3. Using the button set the desired cooking time. The oven switches itself on. The symbol for Cook time lights up.
- Page 26 End time 1. Select oven functions and using button select temperature. 2. Press the Clock Functions button repeatedly until the symbol for End time flashes. 3. Using the oder button set the desired switch-off time. The symbols for End time Cook time light up.
- Page 27 Cook time and End time combined Cook time and End time can be used simultaneously, if the oven is to be switched on and off automatically at a later time. 1. Select oven function and tempera- ture. 2. Using the Cook time function, set the time that the dish needs to cook,...
-
Page 28: Other Functions
Other Functions Switching off the display You can save energy by switching off the display. Switching off the display 1. If required, switch off the appliance using the On/Off button. No residual heat should be displayed. 2. Press the Clock Functions button and the button at the same time... -
Page 29: Child Safety Device
Child safety device As soon as the child safety device is engaged, the appliance can no longer be switched on. Activating the child safety device 1. If necessary, switch off the appli- ance using the On/Off button. No oven function may be selected 2. -
Page 30: The Oven's Safety Cut-Out Function
The oven's safety cut-out function The oven automatically switches itself off if it is not switched off after a certain period of time or if the temperature is not adjusted. The last temperature to have been set flashes in the temperature dis- play and a signal sounds. -
Page 31: Usage, Tables And Tips
Usage, Tables and Tips Cooking with steam For steam cooking, use the oven functions Steam Cooking or In- terval Cooking Warning: When cooking with Steam Cooking , do not under any circumstances open the oven door during the cooking process. Important: Only water can be used as the liquid. -
Page 32: Steam Cooking
Steam Cooking The Steam Cooking Cooking method of preparation is suitable for all types of food, fresh or frozen. It can be used for cooking, warming, defrosting, poaching or blanching vegetables, meat, fish, pasta, rice, sweet corn, semolina and eggs. Cooking of menus Complete menus can be prepared in one go. -
Page 33: Steam Cooking Table
Steam Cooking table Steam Cooking Type of food Water via wa- Tempe- Oven Time in ter drawer rature level mins. °C Risotto 25-30 Rice (with liquid 1:1) 35-40 Cornmeal (polenta, with liquid 35-40 1:3) Jacket potatoes, medium-sized 45-55 Boiled potatoes 35-40 Ratatouille 25-30... - Page 34 Steam Cooking Type of food Water via wa- Tempe- Oven Time in ter drawer rature level mins. °C Eggs, medium 10-12 Eggs, hard 15-20 The times given are for guidance only, they will vary depending upon size and number.
-
Page 35: Ventitherm ® Fan Operated Cooking And Steam Cooking In Combined
Ventitherm ® Fan Operated Cooking and Steam Cooking in combined By using Ventitherm ® Fan Operated Cooking and Steam Cooking one after the other meat, vegetables and accompani- ments can be cooked in the oven so that they are ready to serve at the same time. -
Page 36: Interval Cooking
Interval Cooking The Interval Cooking method of preparation is particularly suitable for starting the roasting of large joints of meat and for defrosting and re-heating food portions cooked previously. Interval Cooking table Cooking on more than one oven level Interval Cooking (Amount of water to be added will depend on the length of the cooking time) Type of food... - Page 37 Interval Cooking (Amount of water to be added will depend on the length of the cooking time) Type of food Temperature Time Oven in °C in mins. levels Ready-to-bake baguettes 40-50g 10-15 Ready-to-bake baguettes 40-50g, 10-15 frozen Cut up a whole roast before warming. The times given are for guidance only, they will vary depending upon size and amount.
-
Page 38: Baking
Baking Oven function: Ventitherm ® Fan Operated Cooking Baking tins • For Ventitherm ® Fan Operated Cooking bright metal tins are also suitable. Oven levels • Using Ventitherm ® Fan Operated Cooking you can bake on up to 2 baking trays at the same time: 1 baking tray: e.g. - Page 39 General instructions With Ventitherm ® Fan Operated Cooking you can also bake two cakes at the same time in tins placed next to each other on the shelf. This does not significantly increase baking time. When frozen foods are used the trays inserted may distort during cook- ing.
-
Page 40: Baking Table
Baking table Baking on one oven level Ventitherm ® Fan Operated Cooking Type of baking Temperature Time Oven level °C Hr: Mins. Baking in tins Ring cake or brioche 160-170 0:50-1:10 Madeira cake/fruit cakes 150-170 1:10-1:30 Sponge cake 160-180 0:25-0:40 Flan base - short pastry 170-190 0:10-0:25... - Page 41 Ventitherm ® Fan Operated Cooking Type of baking Temperature Time Oven level °C Hr: Mins. Unleavened bread 0:10-0:20 Tarts (CH) 190-210 0:35-0:50 Biscuits Short pastry biscuits 160-180 0:06-0:20 Viennese whirls 0:10-0:40 Biscuits made with sponge mixture 160-180 0:15-0:20 Pastries made with egg white, me- 80-100 2:00-2:30 ringues...
- Page 42 Baking on more than one oven level Ventitherm ® Fan Operat- ed Cooking Time Tempe- Type of baking Hours: Shelf positions from rature in °C Mins. bottom 2 levels Biscuits Short pastry biscuits 2 / 4 160-180 0:15-0:35 Viennese whirls 2 / 4 0:20-0:60 Biscuits made with...
-
Page 43: Tips On Baking
Tips on Baking Baking results Possible cause Remedy The cake is not Wrong oven level Place cake lower browned enough un- derneath The cake sinks (be- Oven temperature too high Use a slightly lower setting comes soggy, lumpy, Baking time too short Set a longer baking time streaky) Baking times cannot be re-... -
Page 44: Table For Bakes And Gratins
Table for Bakes and Gratins Ventitherm ® Fan Operated Cooking Dish Time Shelf position Temperature °C Hr: Mins. Pasta bake 180-200 0:45-1:00 Lasagne 180-200 0:25-0:40 Vegetables au gratin 160-170 0:15-0:30 Baguettes topped with 160-170 0:15-0:30 melted cheese Sweet bakes 180-200 0:40-0:60 Fish bakes 180-200... -
Page 45: Roasting
Roasting Oven function: Ventitherm ® Fan Operated Cooking Insert the grease filter when roasting! Ovenware for roasting • Any heat-resistant ovenware is suitable to use for roasting. (Please read the manufacturer's instructions.) • For all lean meats, we recommend roasting these in a roasting tin or dish with a lid. - Page 46 Ventitherm ® Fan Operated Cooking Type of meat Temperature Time Shelf position °C Hours mins. Beef Pot roast (1000-1500 g) 180-200 2:00-2:30 0:06-0:09 Roast beef or fillet, 210-230* per cm. of per cm. of thickness thickness Veal Roast veal (1000 g) 170-190 1:30-2:00 Knuckle of veal (1500-2000 g)
-
Page 47: Low Temperature Cooking
Low temperature cooking Oven function: Low temperature cooking With the Low temperature cooking oven function, meat be- comes beautifully tender and remains particularly succulent. We recommend Low temperature cooking for lean, tender pieces of meat and fish. Low temperature cooking is not suitable for e.g. pot roast or fatty roast pork. -
Page 48: Single Economy Grill
Single Economy Grill Oven function: Single Economy Grill with maximum tempera- ture setting Important: Always grill with the oven door closed. • When grilling, use the oven shelf and drip pan together. • The grilling times are for guidance only. •... -
Page 49: Rotitherm Roasting
Rotitherm Roasting Oven function: Rotitherm Roasting Grill Tempe- Tray Grilling shelf Turn after Dish rature time in … minutes in °C minutes oven level Chicken 180-200 50-60 25-30 (900-1000 g) Stuffed rolled pork 180-200 90-95 roast (2000 g) Pasta bake Gratinated 20-23 potato bake... -
Page 50: Defrosting
Defrosting Oven function: Defrost/Drying (30°C temperature setting) • Unwrap the food and place it on a plate on the oven shelf. • Do not cover with a plate or bowl, as these can substantially lengthen the defrosting time. • For defrosting, place the shelf in the 1st oven level from the bottom. -
Page 51: Drying
Drying Oven function: Defrost/Drying • Use with trays covered with greaseproof paper or baking parchment. • You will get a better result if you turn the oven off after half the dry- ing time, open the door and preferably leave the oven to cool down overnight. -
Page 52: Making Preserves
Making preserves Oven function: Ventitherm ® Fan Operated Cooking • For preserving, use only commercially available preserve jars of the same size. • Jars with twist-off or bayonet type lids and metal tins are not suitable. • When making preserves, use the first shelf position from the bot- tom. -
Page 53: Programmed Functions And Recipes
Programmed Functions and Recipes The appliance has 12 programmed functions and recipes, which can be selected one after the other using the Baking/Roasting Programmes button CLEANING (Cleaning programme) VEGETABLE 500-1000G (plate of vegetables) POTATO GRATIN WHITE BREAD 500-700 G ROLL PER 40 G (Party rolls 40g) FILLET OF FISH (with topping) TROUT 250-300 G PIZZA... - Page 54 Recipes VEGETABLE 500-1000G (plate of vegetables) Cookware: Any kind of cookware that is heat-resistant to at least 100°C can be used. Ingredients: – 400 g cauliflower – 200 g carrots – 200 g kohlrabi – 200 g yellow and red pepper Method: Rinse cauliflower and divide into florets.
- Page 55 POTATO GRATIN (for 4-5 people) Method: Grease a heatproof glass dish (30 x 21 cm) with butter. Ingredients: – 1000 g potatoes – 60 g grated cheese – 200 ml cream – 200 ml milk – Salt, pepper, nutmeg, garlic Method: Peel potatoes, cut into approx 3mm thick slices and layer them in a grating dish.
-
Page 56: White Bread
WHITE BREAD Ingredients: – 1000 g flour, type 405, – 40 g fresh yeast or 2 packets dried yeast – 600 ml milk – 15 g salt Method: Place flour and salt in a large bowl. Dissolve the yeast in the milk and add to the flour. - Page 57 ROLL PER 40 G (Party rolls 40g) Ingredients: – 500 g flour, type 405 – 20 g fresh yeast or 1 packet of dried yeast – 300 ml water – 10 g salt Method: Place flour and salt in a large bowl. Dissolve the yeast in the water and add to the flour.
- Page 58 FILLET OF FISH (700g) Ingredients: – 700 g cod fillet or sea trout fillet, cubed – 100 g Emmental, grated – 200 ml cream – 50 g breadcrumbs – Salt, pepper, lemon juice – Parsley, chopped – 40 g butter to grease the dish Method: Sprinkle the fish fillet with lemon juice and leave it to marinate for a while.
- Page 59 PIZZA (4 round Ø 28cm) Method: Tomato sauce Ingredients for the dough: – 500 g flour, strong plain – 250 ml water – 20 g yeast – 1 egg – 2 tblsp olive oil – 1 tsp salt Method for the dough: Dissolve the yeast in the water and knead to a soft dough with the oth- er ingredients.
-
Page 60: Quiche Lorraine
QUICHE LORRAINE Ingredients for the pastry: – 250 g flour, plain – 125 g butter – 60 ml water – 1 tsp salt – A little pepper and nutmeg Method: Mix together flour, butter and salt, add the water and knead together briefly to form a pastry. -
Page 61: Chicken 1200 G
CHICKEN 1200 G Ingredients: – 1 chicken (1000 - 1200 g) – 2 tblsp groundnut oil – Salt, pepper, paprika, curry powder Method: Wash the chicken and dry it with kitchen paper. Mix the spices with the oil and use the mixture to coat the chicken evenly inside and out. - Page 62 RACK OF VEAL (for 4-6 people) Preparation: Take meat out of the fridge 1 hour before. Ingredients: – 1000 g saddle of veal – 2 tblsp groundnut oil – Salt, pepper, paprika, a little mustard Method: Wash the saddle of veal and dry it with kitchen paper. Mix the seasoning with the groundnut oil and use the mixture to coat the meat evenly.
-
Page 63: Cleaning And Care
Cleaning and care Warning: For cleaning, the appliance must be switched off and cooled down. Warning: For safety reasons, do not clean the appliance with steam jet or high-pressure cleaning equipment. Important: Do not use any abrasive cleaners, sharp scrapers or abrasive items. -
Page 64: Oven Roof With Catalytic Self-Cleaning Surface
Oven roof with catalytic self-cleaning surface (rough, porous surface) The oven roof has a catalytic self-cleaning surface, from which small food deposits are burnt off at temperatures over 200°C. Please observe the following instructions to ensure the best working of this self-cleaning surface. -
Page 65: Side Rails
Side rails For cleaning of the sides of the oven, the left and right side rails can be removed from the oven. Taking out the side rails 1. Loosen the screw. 2. Pull the rails sideways (1). 3. Lift the rails off the rear hook (2). - Page 66 Replacing the side rails 1. Set the rails in the rear hook and press against the screw hole (1). 2. Insert the screw and tighten (2).
-
Page 67: Steam Generation System
Steam generation system Important: Wipe the steam generator dry after each use. Soak up wa- ter with a sponge. Remove any lime residue with water and vinegar. Important: Chemical descaling agents can damage the oven's surface enamel. Always follow the manufacturer's instructions exactly. Water Drawer and Steam Generator 1. -
Page 68: Oven Lighting
Oven lighting Warning: There is a danger of electric shock! Prior to changing the oven light bulb: • Switch off the oven! • Disconnect from the electricity supply. Place a cloth on the oven floor to protect the oven light and glass cover. -
Page 69: Oven Door
Oven Door The door of your appliance may be removed for cleaning. Removing the oven door 1. Open the oven door completely. 2. Completely fold back the clamp- ing levers on both door hinges. 3. Grip the oven door with both hands and close it about 3/4 going past the point of resistance. -
Page 70: What To Do If
What to do if … Problem Possible cause Remedy The oven is not heat- The oven has not been Switch oven on ing up switched on The clock has not been set Set the current time on the clock The required settings have not Check the settings been set Oven safety cut-out has been... -
Page 71: Electrical Connection
Electrical Connection The oven is designed to be connected to 230-240V~(50Hz) electricity supply. The oven has an easily accessible terminal block which is marked as follows: Letter L Live terminal Letter N Neutral terminal Earth terminal This oven must be earthed! The cable used to connect the oven to the electrical supply must comply to the specifications given below. -
Page 72: Installation Instructions
Installation Instructions Attention: The new appliance may only be installed and connected by an approved specialist. Please comply with this. If you do not, any damage resulting is not cov- ered by the warranty. Safety information for the installer • The electrical installation is to be set up so that the appliance can be isolated from the mains with a minimum 3mm all-pole contact sepa- ration. -
Page 76: Guarantee/Customer Service
Guarantee/Customer Service Standard guarantee conditions We, AEG-Electrolux, undertake that if within 12 months of the date of the purchase this AEG-Electrolux appliance or any part thereof is proved to be defective by reason only of faulty workmanship or materi- als, we will, at our option repair or replace the same FREE OF CHARGE for labour, materials or carriage on condition that: •... -
Page 77: European Guarantee
European Guarantee This appliance is guaranteed by Electrolux in each of the countries listed at the back of this user manual, for the period specified in the appliance guarantee or otherwise by law. If you move from one of these countries to another of the countries listed below the appliance guarantee will move with you subject to the following qualifications: •... - Page 78 H-1142 Budapest XIV, Magyarország +36 1 252 1773 Erzsébet királyné útja 87 Vennootsweg 1, 2404 CG - Nederland +31 17 24 68 300 Alphen aan den Rijn Norge +47 81 5 30 222 Risløkkvn. 2 , 0508 Oslo Österreich +43 18 66 400 Herziggasse 9, 1230 Wien Polska +48 22 43 47 300...
-
Page 79: Service And Spare Parts
Customer Care For general enquiries concerning your AEG-Electrolux appliance, or for further information on AEG- Electrolux products please contact our Customer Care Department by letter or telephone at the address below or visit our website at www.aeg.co.uk. - Page 80 315 7873 13-C-300107-04 Subject to change without notice...
Need help?
Do you have a question about the COMPETENCE KB9820E and is the answer not in the manual?
Questions and answers