
Related Manuals for Erbauer ERB610MSW


Summary of Contents for Erbauer ERB610MSW
- Page 1 Original Instructions Patent Pending 1008829.2 Read instructions fully before operating this tool ERB610MSW (SKU NO 61027 - J1Y-KZ12-255J) ERBAUER 254MM (10”) DOUBLE BEVEL SLIDING MITRE SAW...
- Page 2 ERBAUER 254MM (10”) DOUBLE BEVEL SLIDING MITRE SAW...
- Page 3 Congratulations on your purchase of a quality power tool from Erbauer Ltd. This product should give you reliable service for your peace of mind this power tool does carry a 24-month guarantee, the terms of which are detailed below. If this product develops a fault within the guarantee period contact your retailer.
-
Page 4: Safety Instructions
11 Do not abuse the cord - Never yank the cord to disconnect it from the socket. Keep the cord away from heat, oil and sharp edges. ERBAUER 254MM (10”) DOUBLE BEVEL SLIDING MITRE SAW... - Page 5 - This electric tool complies with the relevant safety rules. Repairs should only be carried out by qualified persons using original spare parts, otherwise this may result in considerable danger to the user. ERBAUER 254MM (10”) DOUBLE BEVEL SLIDING MITRE SAW...
-
Page 6: Health Advice
Kickback is the result of saw misuse and/or incorrect operating procedures or conditions and can be avoided by taking proper precautions as given below. ERBAUER 254MM (10”) DOUBLE BEVEL SLIDING MITRE SAW... - Page 7 Blade depth and bevel adjusting locking levers must be tight and secure before making cut. If blade adjustment shifts while cutting, it may cause binding and kickback. ERBAUER 254MM (10”) DOUBLE BEVEL SLIDING MITRE SAW...
- Page 8 17. Select saw blades in relation to the material to be cut. 18. Check the maximum depth of cut. 19. When sawing long work pieces, always use extra support to provide better support, and use clamps or other clamping devices. ERBAUER 254MM (10”) DOUBLE BEVEL SLIDING MITRE SAW...
-
Page 9: Double Insulation
These lasers do not normally present an optical hazard, although staring at the beam may causeflash blindness. WARNING! Do not stare directly at the laser beam. A hazard may exist if you deliberately stare into the beam, please observe all safety rules as follows: ERBAUER 254MM (10”) DOUBLE BEVEL SLIDING MITRE SAW... -
Page 10: Specific Safety Rules And Symbols
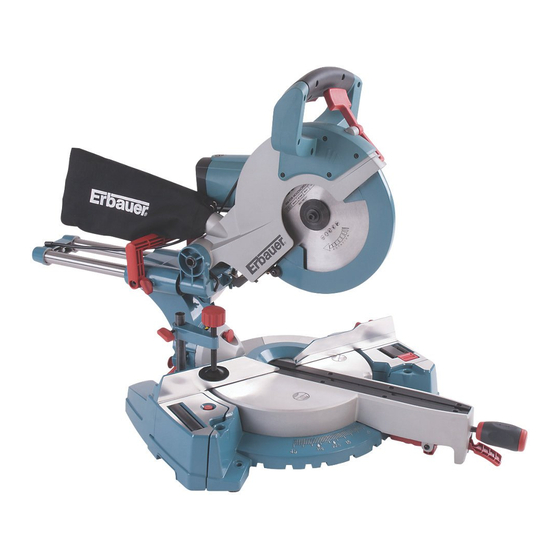
Min -1 Speed Alternating Current No Load Speed Double Insulated Wear Safety Goggles Wear Ear Protection Wear Dust Mask Read Instruction Manual Laser Warning Symbol Conforms to relevant safety standards General Warning ERBAUER 254MM (10”) DOUBLE BEVEL SLIDING MITRE SAW... - Page 11 4. LOWER BLADE GUARD 5. BLADE 6. TABLE INSERT 7. MITRE HANDLE 8. LASER GUIDE 9. BASE 10. TURNTABLE 11. LEFT EXTENSION TABLE 12. FENCE 13. HOLD-DOWN CLAMP 14. SLIDE CARRIAGE LOCK KNOB ERBAUER 254MM (10”) DOUBLE BEVEL SLIDING MITRE SAW...
- Page 12 16. SLIDE CARRIAGE 17. BEVEL LOCK HANDLE 18. RIGHT EXTENSION TABLE 19. MOTOR 20. POSITIVE STOP LOCKING LEVER 21. LOWER BLADE GUARD LOCK LEVER 22. LASER ON/OFF SWITCH 23. ADJUSTABLE CUTTING STOP ERBAUER 254MM (10”) DOUBLE BEVEL SLIDING MITRE SAW...
-
Page 13: Technical Data
ACCESSORIES Allen Key 1 pc, Dust Bag 1 pc, Hold-Down Clamp 1 pc & Mitre Handle 1 pc ERBAUER 254MM (10”) DOUBLE BEVEL SLIDING MITRE SAW... - Page 14 Health Surveillance All employees should be part of an employer’s health surveillance scheme to help identity any vibration related diseases at an early stage, prevent disease progression and help employees stay in work. ERBAUER 254MM (10”) DOUBLE BEVEL SLIDING MITRE SAW...
- Page 15 2) Push the stop latch knob (3) into the locking hole. IMPORTANT To avoid damage, never carry the mitre saw by the cutting arm or the mitre handle. ALWAYS use both designated carrying handles together. ERBAUER 254MM (10”) DOUBLE BEVEL SLIDING MITRE SAW...
- Page 16 WARNING! Always check clamp position does not interfere with any saw operation. Before switching on, lower the saw head to ensure the clamp clears the guard and saw head assembly. Fig 7 Fig 8 ERBAUER 254MM (10”) DOUBLE BEVEL SLIDING MITRE SAW...
-
Page 17: Mounting Instructions
6) Flat washer 7) Spring washer Note: Mounting hardware is not included 8) Hex nut with this tool. Bolts, nuts, washers and 9) Lock nut screws must be purchased separately. Fig 10 ERBAUER 254MM (10”) DOUBLE BEVEL SLIDING MITRE SAW... - Page 18 Note: Pay attention to the pieces removed, noting their position and direction they face. Wipe the blade collars clean of any sawdust before installing a new blade. Fig 14 ERBAUER 254MM (10”) DOUBLE BEVEL SLIDING MITRE SAW...
-
Page 19: Installing Blade
Make sure the collars are clean and properly arranged. Check that the lower blade guard is functioning correctly and does not bind or stick. ERBAUER 254MM (10”) DOUBLE BEVEL SLIDING MITRE SAW... - Page 20 2) Plug saw into socket and turn on the laser beam and line it up with the pattern line. 3) Lower saw blade to pattern line and if blade is not flush with the pattern line, adjustment may be necessary. ERBAUER 254MM (10”) DOUBLE BEVEL SLIDING MITRE SAW...
- Page 21 Turn one screw at a time and only ¼ turn in either direction before checking laser alignment. Maintain as far as possible the original factory pressure setting that these screws exert on the laser module. ERBAUER 254MM (10”) DOUBLE BEVEL SLIDING MITRE SAW...
-
Page 22: Adjustment Instructions
5) Repeat steps 1 through 4 if further adjustment is needed. 6) Tighten bevel lock handle (1) and locknut (4) when alignment is achieved. (See fig. 19) Fig 19 ERBAUER 254MM (10”) DOUBLE BEVEL SLIDING MITRE SAW... - Page 23 1) Set the cutting head to 33.9° (RH) by deploying the crown moulding pin. Check the angle of the blade against the machine table using the vernier angle gauge. (See fig. 23) ERBAUER 254MM (10”) DOUBLE BEVEL SLIDING MITRE SAW...
- Page 24 3) Using a square (3), lay the heel of the square against the blade and the ruler against the fence(2) as shown. 4) Adjust the fence 90° to the blade and tighten the four fence locking bolts. (See fig. 25) ERBAUER 254MM (10”) DOUBLE BEVEL SLIDING MITRE SAW...
- Page 25 If the blade touches the inside of the control arm, readjust the setting. Tighten the locknut when the correct setting is achieved. (See fig. 26) ERBAUER 254MM (10”) DOUBLE BEVEL SLIDING MITRE SAW...
- Page 26 • Clamp workpiece firmly against the fence to prevent movement toward the blade. • With the power switch OFF, bring the saw blade down to the workpiece to see the cutting path of the blade ERBAUER 254MM (10”) DOUBLE BEVEL SLIDING MITRE SAW...
- Page 27 • Never leave tool running unattended. Turn power OFF. Wait for all moving parts to stop. • Make workshop childproof. Lock the shop. Disconnect master switches. Store tool away from children and other unqualified users. Fig 29 ERBAUER 254MM (10”) DOUBLE BEVEL SLIDING MITRE SAW...
- Page 28 Positive stops are provided at 0°, 33.9° and 45°.(See fig 31) Note: When cutting at 45 degrees, ensure guard Fig 31 does not catch on work or machine base plate. ERBAUER 254MM (10”) DOUBLE BEVEL SLIDING MITRE SAW...
- Page 29 The cutting head assembly should be drawn back completely then pushed forward when sawing. • Let the blade reach full speed before cutting. This will help reduce the risk of a thrown workpiece. ERBAUER 254MM (10”) DOUBLE BEVEL SLIDING MITRE SAW...
- Page 30 Position where convenient to adequately support long workpieces. To replace, simply slide the satellite stand back into the machine base until the release button provides positive location. (See fig. 35) Fig 35 ERBAUER 254MM (10”) DOUBLE BEVEL SLIDING MITRE SAW...
- Page 31 (See fig. 38) 13. Extension Arm With the stop plate in its stored position the extension arm can be used to support long workpieces. (See fig. 38) ERBAUER 254MM (10”) DOUBLE BEVEL SLIDING MITRE SAW...
- Page 32 Fig 41 When setting the bevel and mitre angles for compound mitres, remember that the settings are interdependent – changing one changes the other, as well. (See fig. 41&42) ERBAUER 254MM (10”) DOUBLE BEVEL SLIDING MITRE SAW...
- Page 33 3) RIGHT side is fi nished piece. Outside Corner-right side 1)Position top of moulding against fence. 33.9 31.6 Right 2)Mitre table set at RIGHT 31.6 3)RIGHT side is finished piece. ERBAUER 216MM (8”) SLIDING MITRE SAW ERBAUER 254MM (10”) DOUBLE BEVEL SLIDING MITRE SAW...
-
Page 34: Maintenance
Develop a regular check to make sure the lower guard is working properly. Clean the lower guard of any dust or buildup with a damp cloth. ERBAUER 254MM (10”) DOUBLE BEVEL SLIDING MITRE SAW... - Page 35 ERBAUER 254MM (10”) DOUBLE BEVEL SLIDING MITRE SAW...
-
Page 36: Environmental Protection
5 AMP fuse must be fi tted. 13 AMP fuse must be fitted. 13 AMP 5 AMP FUSE BLUE N (NEUTRAL) BROWN L (LIVE) OUTER SLEEVE CABLE GRIP ERBAUER 216MM (8”) SLIDING ERBAUER 254MM (10”) DOUBLE BEVEL SLIDING MITRE SAW... - Page 37 2002/96/EC and 2003/108/EC Waste Electrical and Electronic Equipment (WEEE) Standards and technical specifications referred to: EN55014-1 EN55014-2/a2 EN61000-3-2 EN61000-3-11 EN61029-1 EN61029-2-9 EN60825-1 Authorised Signatory Date: 01/03/2013 Signature: Name: Peter Harries Erbauer (UK) Ltd Quality Manager ERBAUER 254MM (10”) DOUBLE BEVEL SLIDING MITRE SAW...
- Page 38 ERBAUER 254MM (10”) DOUBLE BEVEL SLIDING MITRE SAW...
- Page 39 ERBAUER 254MM (10”) DOUBLE BEVEL SLIDING MITRE SAW...
- Page 40 ERBAUER 254MM (10”) DOUBLE BEVEL SLIDING MITRE SAW...
Need help?
Do you have a question about the ERB610MSW and is the answer not in the manual?
Questions and answers