
Related Manuals for Sigma 6-16S


Summary of Contents for Sigma 6-16S
- Page 1 Translation of the original operating manual 07/2012 Rev. 1.22 of 08/05/2020 Sigma 6-16S; ; part no. 0702002 Sigma 6-16S from serial no. 147414 Laboratory Centrifuge Operating Manual Please retain for later use!
- Page 2 Laboratory Centrifuge Sigma 6-16S Version 07/2012, Rev. 1.22 of 08/05/2020 • sb 2 / 91 Translation of the original operating manual, part no. 0702002...
- Page 3 Laboratory Centrifuge Sigma 6-16S © Copyright by Sigma Laborzentrifugen GmbH An der Unteren Söse 50 37520 Osterode am Harz Germany Tel.: +49 (0) 5522 / 5007-0 Fax: +49 (0) 5522 / 5007-12 Web: www.sigma-zentrifugen.de E-mail: info@sigma-zentrifugen.de Version 07/2012, Rev. 1.22 of 08/05/2020 • sb 3 / 91 Translation of the original operating manual, part no.
- Page 4 Laboratory Centrifuge Sigma 6-16S Version 07/2012, Rev. 1.22 of 08/05/2020 • sb 4 / 91 Translation of the original operating manual, part no. 0702002...
-
Page 5: Table Of Contents
Laboratory Centrifuge Sigma 6-16S Table of contents General information ......................9 Importance of the operating manual .................. 9 Intended use ........................9 Warranty and liability......................9 Copyright ........................10 Standards and regulations ....................10 Scope of Supply ......................10 Layout and mode of operation ..................11 Layout of the centrifuge .................... - Page 6 Laboratory Centrifuge Sigma 6-16S Table of contents Storage and transport ....................... 25 Dimensions and weight ....................25 Storage conditions ......................25 Notes on transport ......................25 Packaging ........................26 Transport safety device ....................26 Set-up and connection ...................... 27 Installation site ........................ 27 Power supply ........................
- Page 7 Laboratory Centrifuge Sigma 6-16S Table of contents Switching the centrifuge off ..................... 56 Malfunctions and error correction ..................57 General malfunctions ...................... 57 7.1.1 Emergency lid release ....................58 Table of error codes ......................59 Service contact ....................... 60 Maintenance and service ....................61 Maintenance ........................
- Page 8 Laboratory Centrifuge Sigma 6-16S Table of contents Version 07/2012, Rev. 1.22 of 08/05/2020 • sb 8 / 91 Translation of the original operating manual, part no. 0702002...
-
Page 9: General Information
They are solely intended for this purpose. Any other use beyond this area of application is regarded as improper use. Sigma Laborzentrifugen GmbH cannot be held liable for any damage resulting from such improper use. -
Page 10: Copyright
Laboratory Centrifuge Sigma 6-16S 1 General information → Copyright The copyright concerning the operating manual remains with Sigma Laborzentrifugen GmbH. The operating manual is solely intended for the operator and their personnel. It includes instructions and information that must not be •... -
Page 11: Layout And Mode Of Operation
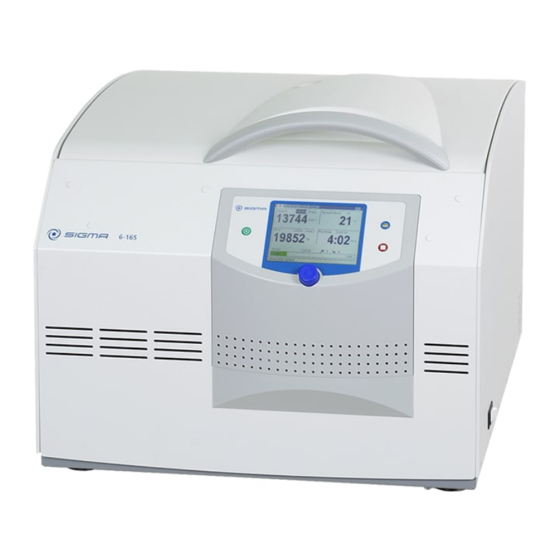
Laboratory Centrifuge Sigma 6-16S 2 Layout and mode of operation → Layout and mode of operation → Layout of the centrifuge 2.1.1 Functional and operating elements User interface (see chapter 6.3.1 - "User interface") Mains switch Fig. 1: Total view of the centrifuge Name plate (see chapter 2.1.2 -... -
Page 12: Name Plate
Laboratory Centrifuge Sigma 6-16S 2 Layout and mode of operation 2.1.2 Name plate Manufacturer Power consumption Max. speed Max. kinetic energy Serial number Part number Type Nominal voltage CE mark in compliance with the directive 2006/42/EC 10 Symbol for special disposal (see chapter 9 - "Disposal") -
Page 13: Mode Of Operation
Laboratory Centrifuge Sigma 6-16S 2 Layout and mode of operation → Mode of operation → 2.2.1 Centrifugation principle Centrifugation is a process for the separation of heterogeneous mixtures of substances (suspensions, emulsions, or gas mixtures) into their components. The mixture of substances, which rotates on a circular path, is subject to centripetal acceleration that is several times greater than the gravitational acceleration. -
Page 14: Speed, Radius, And Relative Centrifugal Force
Laboratory Centrifuge Sigma 6-16S 2 Layout and mode of operation → 2.2.2.1 Speed, radius, and relative centrifugal force The acceleration g, which the samples are subject to, can be increased by increasing the radius in the rotor chamber and by increasing the speed. -
Page 15: Safety
Laboratory Centrifuge Sigma 6-16S 3 Safety → Safety → Marking of the unit The following symbols are used for all types of centrifuges manufactured by Sigma: Dangerous voltage On (Power) Hot surface Off (Power) Name plate (see chapter Caution! Risk of bruising 2.1.2 - "Name plate") -
Page 16: Explanation Of The Symbols And Notes
Laboratory Centrifuge Sigma 6-16S 3 Safety Safety indications on the centrifuge must be kept readable at all times. If necessary, they must be replaced. NOTE Not all of the symbols/labels are used for this centrifuge type. NOTE → Explanation of the symbols and notes... -
Page 17: Responsibility Of The Operator
Laboratory Centrifuge Sigma 6-16S 3 Safety → Responsibility of the operator The operator is responsible for authorising only qualified personnel to work on the centrifuge (see chapter 3.4 - "Operating personnel"). The areas of responsibility of the personnel concerning the operation, maintenance, and care of the unit must be clearly defined. -
Page 18: Safety Instructions
Laboratory Centrifuge Sigma 6-16S 3 Safety → Safety instructions 3.6.1 Electrical safety To reduce the risk of electrical shock, the centrifuge uses a three-wire electrical cord and plug to connect the equipment to earth-ground. To preserve this safety feature: •... -
Page 19: Fire Prevention
Laboratory Centrifuge Sigma 6-16S 3 Safety • Ensure that all repairs are performed only by authorised and specialised personnel. • Prior to any start-up, check the centrifuge, rotor, and accessories for signs of damage that can be discerned from the outside. Special attention must be paid to all of the rubber parts (e.g. -
Page 20: Safety Instructions For Centrifugation
Laboratory Centrifuge Sigma 6-16S 3 Safety → 3.6.5 Safety instructions for centrifugation For safe operation, observe the following before starting the centrifuge: • Ensure that the centrifuge was set up properly (see chapter 5 - "Set-up and connection"). • Maintain a safety distance of at least 30 cm (12 inches) around the centrifuge. -
Page 21: Safety Of Rotors And Accessories
Laboratory Centrifuge Sigma 6-16S 3 Safety 3.6.7 Safety of rotors and accessories 3.6.7.1 Service life The rotors and accessories have a limited service life. Perform regular checks (at least once per month) for safety reasons! • Pay special attention to changes, such as corrosion, cracks, material abrasion, etc. -
Page 22: Marking
Laboratory Centrifuge Sigma 6-16S 3 Safety 3.6.7.2 Marking During production, every rotor and bucket receives a batch number enabling conclusions to be drawn concerning the production process and the subsequent quality inspection. Some rotors also have an additional serial number providing further detailed information. -
Page 23: Safety Devices
3.7.4 Earth conductor check An earth conductor check can be carried out by authorised and specialised personnel using a suitable measuring instrument. Please contact the Sigma service department (see chapter 7.3 - "Service contact"). → 3.7.5 Imbalance monitoring system A dialog box may pop up or emit a sound signal in order to indicate that the centrifuge is in the inadmissible imbalance range. -
Page 24: Measures In The Event Of Hazards And Accidents
Laboratory Centrifuge Sigma 6-16S 3 Safety → Measures in the event of hazards and accidents • If an emergency arises, switch off the centrifuge immediately! • If in doubt, call the emergency doctor! DANGER → Remaining hazards The centrifuge was built in accordance with the state of the art and in compliance with the generally recognized safety rules. -
Page 25: Storage And Transport
Laboratory Centrifuge Sigma 6-16S 4 Storage and transport → Storage and transport → Dimensions and weight Sigma 6-16S Height: 483 mm Height with open lid: 990 mm Width: 581 mm Depth: 711 mm Weight: 116 kg → Storage conditions The centrifuge can be stored in its original packaging for up to a year. -
Page 26: Packaging
Laboratory Centrifuge Sigma 6-16S 4 Storage and transport Packaging The centrifuge is packaged in a wooden crate. • After taking off the lid, remove the side panels. • Remove the packaging material. • Lift the centrifuge upwards with a lifting device to lift it safely. When lifting the centrifuge, always reach under the centrifuge from the side. -
Page 27: Set-Up And Connection
CAUTION Sigma centrifuges are units of protection class I. The centrifuges of this model series have a three-wire power cord with a fixed cable. They are equipped with a mains power switch with an integrated thermal circuit breaker. -
Page 28: Customer-Provided Fuses
Laboratory Centrifuge Sigma 6-16S 5 Set-up and connection 5.2.2 Customer-provided fuses Typically, the centrifuge must be protected with 16 Amp L or B fuses that are to be provided by the customer. To ensure safe disconnection in the event of a fault, an AC/DC-sensitive RCD (residual current device) must be integrated in the wiring system of the building. -
Page 29: Using The Centrifuge
Laboratory Centrifuge Sigma 6-16S 6 Using the centrifuge → Using the centrifuge → Initial start-up • Before the initial start-up, please ensure that your centrifuge is properly set up and installed (see chapter 5 - "Set-up and connection"). DANGER →... -
Page 30: Installation Of An Angle Rotor With A Hermetic Lid
Laboratory Centrifuge Sigma 6-16S 6 Using the centrifuge When using rotors for microtiter plate formats: Ensure that the plate holders are inserted together with the plates into the buckets. CAUTION The lid screw serves for the fastening of the lid onto the rotor only, not for the fastening of the rotor onto the motor shaft. - Page 31 Laboratory Centrifuge Sigma 6-16S 6 Using the centrifuge Removing a rotor • Loosen the rotor tie-down screw anti-clockwise and remove the rotor together with the lid. • Loosen the lid by turning it anti-clockwise and then remove it. Rotor tie down screw Rotor Fig.
-
Page 32: Installation Of Accessories
Laboratory Centrifuge Sigma 6-16S 6 Using the centrifuge → 6.2.2.3 Installation of accessories • Only use vessels that are suitable for the rotor. • In the case of swing-out rotors, all of the compartments must be equipped with buckets. •... - Page 33 Laboratory Centrifuge Sigma 6-16S 6 Using the centrifuge Centrifugation with low capacity • Install the sample vessels in a rotationally symmetrical manner so that the buckets and their suspensions are loaded evenly. • It is not permissible to load angle rotors on only one axis.
-
Page 34: Adapters
Laboratory Centrifuge Sigma 6-16S 6 Using the centrifuge Double rectangular bucket 13420 and bucket 13621 The double rectangular bucket 13420 and the bucket for microtiter plates 13621 are dynamically balances at the factory. Therefore, the buckets must be installed in sets of 4 an in the prescribed order (see the numbers on the buckets and on the rotor). -
Page 35: Blood Bag Systems
Laboratory Centrifuge Sigma 6-16S 6 Using the centrifuge 6.2.2.6 Blood bag systems The centrifuge tolerates an imbalance of approx. 20 g. Therefore, it is important to balance the buckets carefully. • All four places of a rotor must be loaded with buckets. It is permissible to fill just two opposite buckets with blood bag systems. -
Page 36: Centrifugation With Tubes For Mineral Oil
Laboratory Centrifuge Sigma 6-16S 6 Using the centrifuge A German blood bank works successfully using the following data: °C 3,750 4,544 20 (2 min) Full blood 3,570 4,544 20 (2 min) Full blood in 4fold bags 4,000 5,170 24 (3 min) -
Page 37: Control System "Spincontrol S
Laboratory Centrifuge Sigma 6-16S 6 Using the centrifuge → Control system "Spincontrol S" → 6.3.1 User interface The centrifuge is operated via three buttons with integrated light-emitting diodes and one function knob. The display is divided into several different fields. The various functions of the system can be called up by pressing and turning the function knob. -
Page 38: Manual Mode
Laboratory Centrifuge Sigma 6-16S 6 Using the centrifuge → 6.3.2 Manual mode → 6.3.2.1 Starting a centrifugation run The centrifuge is ready for operation when the start key is illuminated. • Press the start key in order to start a centrifugation run. -
Page 39: Standard Menu
Laboratory Centrifuge Sigma 6-16S 6 Using the centrifuge → 6.3.2.5 Standard menu The "Standard" menu is symbolised by the icon " " on the menu bar and it is displayed a few seconds after the centrifuge has been switched on. In this menu, the parameters of a centrifugation run can be displayed and modified. - Page 40 Laboratory Centrifuge Sigma 6-16S 6 Using the centrifuge Continuous run During the continuous run, the runtime of the centrifuge is unlimited and must be stopped manually. The centrifuge accelerates during the continuous run until the set speed is reached. •...
- Page 41 Laboratory Centrifuge Sigma 6-16S 6 Using the centrifuge Fig. 15: Rotor selection list; here for a swing-out rotor Automatic rotor identification The centrifuge automatically identifies the rotor that is being currently used. • If the system identifies a different rotor than the one that is set and if there are no different buckets for this rotor, the rotor input will be adapted automatically.
- Page 42 Laboratory Centrifuge Sigma 6-16S 6 Using the centrifuge Progr.: program list This field in the "Standard" menu shows the program that is currently loaded. When the field is selected, the program list is displayed (for information on how to work with the programs, please see chapter 6.3.3 - "Program mode").
-
Page 43: Process Library Menu
Laboratory Centrifuge Sigma 6-16S 6 Using the centrifuge 6.3.2.6 Process library menu The process library can be opened via the " " symbol on the menu bar. It provides the user with an overview of all of the stored programs as processes. -
Page 44: Parameters Menu
Laboratory Centrifuge Sigma 6-16S 6 Using the centrifuge → 6.3.2.7 Parameters menu The "Parameters" menu is symbolised by the " " symbol on the menu bar. It is used to specify various conditions for the centrifugation. These conditions are used to monitor the process and to control access to the centrifuge. - Page 45 Laboratory Centrifuge Sigma 6-16S 6 Using the centrifuge The runtime is considered faulty if the centrifugation run had to be stopped prematurely. Fig. 20: Example of a centrifugation monitoring message If the centrifugation monitoring system is used in combination with free acceleration or deceleration curves, unjustified error messages may result in certain cases.
- Page 46 Laboratory Centrifuge Sigma 6-16S 6 Using the centrifuge Blocking a function • Select the function that is to be blocked. The lower levels will also be automatically selected (if, for example, the "Parameters" function is selected, the "Save" function will also be selected).
-
Page 47: Setup Menu
Laboratory Centrifuge Sigma 6-16S 6 Using the centrifuge → 6.3.2.8 Setup menu The "Setup" menu is symbolised by the " " symbol on the menu bar. It is used to perform basic settings concerning the control system of the centrifuge. It enables the optimum adaptation of the centrifuge to its specific area of application. - Page 48 Laboratory Centrifuge Sigma 6-16S 6 Using the centrifuge Display Language The control system can be used in various language versions. If a language is selected by mistake, it can be changed on any screen as follows: • Press and hold the stop button.
- Page 49 Laboratory Centrifuge Sigma 6-16S 6 Using the centrifuge Name In this field, an identification will be assigned to the centrifuge. • The letters and characters can be entered when the cursor flashes in the text field. Turn the function knob in order to select a character and press it to confirm the selection.
-
Page 50: Curve Menu
Laboratory Centrifuge Sigma 6-16S 6 Using the centrifuge → 6.3.2.9 Curve menu This menu is used to create and edit customised acceleration and deceleration curves (see chapter 11.3 - "Acceleration and deceleration curves"). It is symbolised by the " " symbol on the menu bar. -
Page 51: 6.3.2.10 Help Menu
Laboratory Centrifuge Sigma 6-16S 6 Using the centrifuge Restrictions • Acceleration and deceleration curves can include intervals with a positive slope as well as intervals with a negative slope and also intervals with 0 slope. • The slope of the curve intervals can be 1 min... -
Page 52: 6.3.2.11 Changing The Contrast
Laboratory Centrifuge Sigma 6-16S 6 Using the centrifuge 6.3.2.11 Changing the contrast To change the contrast: • Press and hold the stop button and turn the function knob one notch to the left. A dialog box will be displayed once the stop button is released. -
Page 53: Saving A Program
Laboratory Centrifuge Sigma 6-16S 6 Using the centrifuge → 6.3.3.1 Saving a program • Enter the parameters that are to be included in the program. • Select the option "Progr" in the "Standard" menu and confirm the selection. The program list will be displayed. -
Page 54: Executing A Program
Laboratory Centrifuge Sigma 6-16S 6 Using the centrifuge Fig. 27: Loading a program → 6.3.3.3 Executing a program • Select the option "Progr" from the "Standard" menu and confirm the selection by pressing the function knob. The program list will be displayed. -
Page 55: Automatic Program Rotation
Laboratory Centrifuge Sigma 6-16S 6 Using the centrifuge → 6.3.3.5 Automatic program rotation With the automatic program rotation, several programs can be executed directly one after the other. • Activate the "Program rotation" function in the "Setup" menu Fig. 29: Program rotation function When a program is loaded while the program rotation function is active, this program will be used as the start program for the rotation. -
Page 56: Options For Data Input And Output
Laboratory Centrifuge Sigma 6-16S 6 Using the centrifuge → 6.3.4 Options for data input and output • Connection for a serial interface (depending on the centrifuge type, partly standard). • External signal active DC 24V, 0.5 A max. (part no. 17701) •... -
Page 57: Malfunctions And Error Correction
Laboratory Centrifuge Sigma 6-16S 7 Malfunctions and error correction → Malfunctions and error correction → General malfunctions Malfunctions are indicated by a dialog box. If the acoustic signal is activated, it sounds when the error message is displayed. • Eliminate the source of the problem (see table below). -
Page 58: Emergency Lid Release
Laboratory Centrifuge Sigma 6-16S 7 Malfunctions and error correction 7.1.1 Emergency lid release In the event of a power failure, it is possible to manually open the centrifuge lid. • Switch off the mains power switch and disconnect the power cord from the socket. -
Page 59: Table Of Error Codes
Laboratory Centrifuge Sigma 6-16S 7 Malfunctions and error correction → Table of error codes Error no. Kind of error Measures Note • System error Allow to slow down All these errors stop the centrifuge or cause it to • Power off/on decelerate brakeless •... -
Page 60: Service Contact
Laboratory Centrifuge Sigma 6-16S 7 Malfunctions and error correction → Service contact In the event of queries, malfunctions, or spare part enquiries: From Germany: Contact Sigma Laborzentrifugen GmbH An der Unteren Söse 50 37520 Osterode (Germany) Tel. +49 (0) 55 22 / 50 07-44 44 E-mail: support.lab@sigma-zentrifugen.de... -
Page 61: Maintenance And Service
Laboratory Centrifuge Sigma 6-16S 8 Maintenance and service → Maintenance and service The centrifuge, rotor, and accessories are subject to high mechanical stress. Thorough maintenance performed by the user extends the service life and prevents premature failure. If corrosion or other damage occurs due to improper care, the manufacturer cannot be held liable or subject to any warranty claims. -
Page 62: Accessories
Laboratory Centrifuge Sigma 6-16S 8 Maintenance and service → 8.1.2 Accessories For the care of the accessories, special safety measures must be considered as these are measures that will ensure operational safety at the same time! CAUTION • Immediately rinse off the rotor, buckets, or accessories under running water if they have come into contact with any liquids that may cause corrosion. -
Page 63: Rotors, Buckets And Carriers
Laboratory Centrifuge Sigma 6-16S 8 Maintenance and service → 8.1.3 Rotors, buckets and carriers Rotors, buckets and carriers are produced with the highest precision, in order to withstand the permanent high stress from high gravitational fields. Chemical reactions as well as stress-corrosion (combination of oscillating pressure and chemical reaction) can affect or destroy the metals. -
Page 64: Load Bearing Bolts
Laboratory Centrifuge Sigma 6-16S 8 Maintenance and service → 8.1.4 Load bearing bolts Only greased load-bearing bolts ensure a uniform swing-out of the buckets and, therefore, the smooth operation of the centrifuge. Load-bearing bolts that are insufficiently greased may cause the centrifuge to stop due to an imbalance. -
Page 65: Glass Breakage
Laboratory Centrifuge Sigma 6-16S 8 Maintenance and service → 8.1.5 Glass breakage In the case of glass breakage, immediately remove all glass particles (e.g. with a vacuum cleaner). Replace the rubber cushions since even thorough cleaning will not remove all glass particles. -
Page 66: 8.2.1 Autoclaving
Laboratory Centrifuge Sigma 6-16S 8 Maintenance and service → 8.2.1 Autoclaving The service life of the accessories essentially depends on the frequency of autoclaving and use. • Replace the accessories immediately when the parts show changes in colour or structure or in the occurrence of leaks etc. -
Page 67: Service
Laboratory Centrifuge Sigma 6-16S 8 Maintenance and service → Service In the event of service work that requires the removal of the panels, there is a risk of electric shock or mechanical injury. • Only qualified specialist personnel is authorised to perform this service work. -
Page 68: Return Of Defective Centrifuges Or Parts
Laboratory Centrifuge Sigma 6-16S 8 Maintenance and service → Return of defective centrifuges or parts Although we exercise great care during the production of our products, it may be necessary to return a unit or accessory to the manufacturer. In order to ensure the quick and economical processing of returns of centrifuges, spare parts, or accessories, we require complete and extensive information concerning the process. - Page 69 NOTE The forms can be downloaded online from www.sigma-zentrifugen.de → [Service] → [Overhaul and repair]. Version 07/2012, Rev. 1.22 of 08/05/2020 • sb 69 / 91 Translation of the original operating manual, part no. 0702002...
-
Page 70: Disposal
Disposal → Disposal of the centrifuge In accordance with the directive 2012/19/EU, SIGMA centrifuges are marked with the symbol shown to the left. This symbol means that it is not permissible to dispose of the unit among household waste. •... -
Page 71: 10 Technical Data
Laboratory Centrifuge Sigma 6-16S 10 Technical data → 10 Technical data → Manufacturer Sigma Laborzentrifugen GmbH An der Unteren Söse 50 37520 Osterode (Germany) Type: 6-16S Connection requirements Electr. connection: see name plate Protection class: IP code: Power consumption (kW): Input fuse (AT): 16.0 (at 220-240 V / 50 Hz),... -
Page 72: Technical Documentation
Laboratory Centrifuge Sigma 6-16S 10 Technical data → 10.2 Technical documentation For environmental reasons, the comprehensive technical documentation of the centrifuge (e.g. circuit diagrams) and the safety data sheets of the manufacturers of refrigerants and lubricants are not attached to this documentation. -
Page 73: 11 Appendix
Laboratory Centrifuge Sigma 6-16S 11 Appendix → 11 Appendix → 11.1 Range of accessories The complete list of accessories can be downloaded from www.sigma-zentrifugen.de. Some accessories come supplied together with a data sheet that includes important information and notes on safety. This data sheet must be added to the operating manual. -
Page 74: Speed-Gravitational-Field-Diagram
Laboratory Centrifuge Sigma 6-16S 11 Appendix → 11.2 Speed-gravitational-field-diagram Fig. 36: Speed-gravitational-field-diagram Version 07/2012, Rev. 1.22 of 08/05/2020 • sb 74 / 91 Translation of the original operating manual, part no. 0702002... -
Page 75: Acceleration And Deceleration Curves
Laboratory Centrifuge Sigma 6-16S 11 Appendix → 11.3 Acceleration and deceleration curves Linear as well as quadratic curves are numbered in the direction of increasing acceleration (from right to left). The deceleration curves are inverted images of the acceleration curves and are assigned the same numbers. - Page 76 Laboratory Centrifuge Sigma 6-16S 11 Appendix Fig. 39: Diagram of linear curves Fig. 40: Diagram of quadratic curves Version 07/2012, Rev. 1.22 of 08/05/2020 • sb 76 / 91 Translation of the original operating manual, part no. 0702002...
-
Page 77: Table Of The Service Life Of Rotors And Accessories
Laboratory Centrifuge Sigma 6-16S 11 Appendix → 11.4 Table of the service life of rotors and accessories • If no other data concerning the service life are engraved on the rotor or accessory, rotors and buckets must be checked by the manufacturer after 10 years. -
Page 78: Resistance Data
Laboratory Centrifuge Sigma 6-16S 11 Appendix → 11.5 Resistance data The data refer to resistance at 20°C. NOTE - no data 1 resistant 2 practically resistant 3 partially resistant 4 not resistant Medium Formula Acetaldehyde Acetamide saturated Acetone Acrylonitrile Allyl alcohol... - Page 79 Laboratory Centrifuge Sigma 6-16S 11 Appendix - no data 1 resistant 2 practically resistant 3 partially resistant 4 not resistant Medium Formula Chromic acid Chromic potassium KCr(SO saturated sulphate Citric acid Citric acid Copper sulphate CuSO x 5H Cyclohexanol Decane Diaminoethane —...
- Page 80 Laboratory Centrifuge Sigma 6-16S 11 Appendix - no data 1 resistant 2 practically resistant 3 partially resistant 4 not resistant Medium Formula Isopropyl alcohol Lactic acid Magnesium chloride MgCl Mercuric chloride HgCl Mercury Methyl acetate Methyl alcohol Methyl benzene Methyl ethyl ketone...
- Page 81 Laboratory Centrifuge Sigma 6-16S 11 Appendix - no data 1 resistant 2 practically resistant 3 partially resistant 4 not resistant Medium Formula Sodium bisulphite NaHSO Sodium carbonate Sodium chloride NaCl Sodium hydroxide NaOH Sodium hydroxide NaOH Sodium sulfate Spirits Styrene...
- Page 82 Laboratory Centrifuge Sigma 6-16S 11 Appendix Version 07/2012, Rev. 1.22 of 08/05/2020 • sb 82 / 91 Translation of the original operating manual, part no. 0702002...
-
Page 83: Ec Declaration Of Conformity
Laboratory Centrifuge Sigma 6-16S 11 Appendix 11.6 EC declaration of conformity Version 07/2012, Rev. 1.22 of 08/05/2020 • sb 83 / 91 Translation of the original operating manual, part no. 0702002... - Page 84 Laboratory Centrifuge Sigma 6-16S 11 Appendix Version 07/2012, Rev. 1.22 of 08/05/2020 • sb 84 / 91 Translation of the original operating manual, part no. 0702002...
-
Page 85: Declaration Of Conformity - China Rohs 2
Laboratory Centrifuge Sigma 6-16S 11 Appendix Declaration of conformity – China RoHS 2 11.7 Version 07/2012, Rev. 1.22 of 08/05/2020 • sb 85 / 91 Translation of the original operating manual, part no. 0702002... - Page 86 Laboratory Centrifuge Sigma 6-16S 11 Appendix Version 07/2012, Rev. 1.22 of 08/05/2020 • sb 86 / 91 Translation of the original operating manual, part no. 0702002...
-
Page 87: 12 Index
Laboratory Centrifuge Sigma 6-16S Index 12 Index Centrifugation of infectious, toxic, radioactive, or pathogenic substances ....... 19 Acceleration ..........41 Centrifugation principle ......13 Acceleration curve ......41, 50, 75 Centrifugation with low capacity ....33 Acceleration curve (changing) ....50 Centrifugation with tubes for mineral oil .. - Page 88 Laboratory Centrifuge Sigma 6-16S Index Damage of the surface ....... 63 Fire preventions ......... 19 Dangerous goods........20 Form for the return of defective parts ..68 Dangerous materials ........65 Function ............. 47 Date of manufacture ........12 Functional and operating elements .... 11 Deactivating the help function ....
- Page 89 Laboratory Centrifuge Sigma 6-16S Index IP code ............71 No power in the mains supply ....57 Noise level ..........71 Nominal voltage ......... 12 Kinetic energy ........12, 71 Notes on safety and hazards ....... 9 Notes on transport ........25 Language ...........
- Page 90 Laboratory Centrifuge Sigma 6-16S Index RCF ............39 Service life ..........61 Relative centrifugal force (RCF) ... 14, 39 Service life of rotors and accessories ... 21, 77 Removal of a rotor ........30 Service life of the accessories ....66 Removal of the transport safety device ..
- Page 91 Laboratory Centrifuge Sigma 6-16S Index Technical documentation ......72 Ungreased load- bearing bolts ....57 Temperature error ........59 Units of protection class I ......27 Temperature value not reached ....57 Useful volume Thermal stress ........... 61 - volume that is stated for the tube ..34 Time fine ............
Need help?
Do you have a question about the 6-16S and is the answer not in the manual?
Questions and answers