
Related Manuals for Baumatic BMEH94I1G


Summary of Contents for Baumatic BMEH94I1G
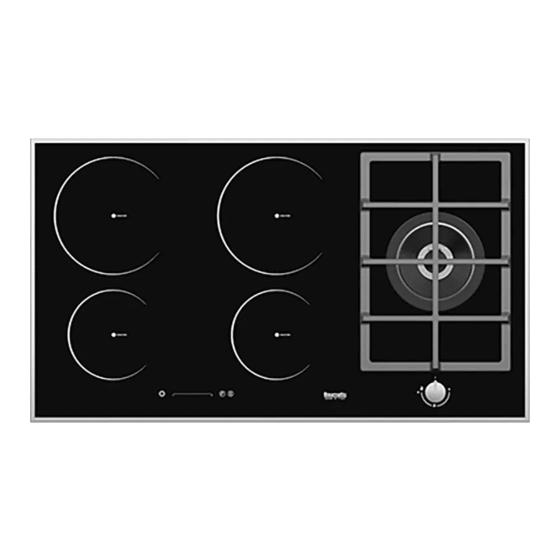
- Page 1 INSTRUCTIONS FOR USE AND INSTALLATION Hob with induction hotplates and gas burners BMEH94I1G LIB30727 R01-090516...
- Page 3 Dear customer! This appliance is intended for use in households. Our products are packed in environment-friendly materials which can be recycled, disposed of, or destroyed without imposing any burden on the environment. Instructions for use Instructions for use are intended for the user. They describe the appliance and its operation.
-
Page 4: Important Warnings
IMPORTANT WARNINGS • Installation of the appliance (installation class:3) into a kitchen worktop and its connection to the power mains and the gas supply may only be performed by an adequately qualified technician. • When the appliance is in use, additional heat and moisture are emitted into the room. When the appliance is used for a prolonged period of time at a high performance level, intensive ventilation or use of kitchen hood may is required in the room where the appliance is installed. -
Page 5: Installation
INSTALLATION Important warnings • Installation of the appliance into a kitchen worktop and its connection to the power mains may only be performed by an adequately qualified technician. • Veneer or other fi nish of the piece of kitchen furniture into which the hob is to be built in should be treated with heat resistant glue (100°C);... -
Page 6: Installing The Foam Gasket
Installing the foam Before inserting the appliance into the opening in the kitchen worktop, the supplied foam gasket gasket must be attached to the lower side of the glass ceramic (glass) cooking hob. Do not install the appliance without the foam gasket! The gasket should be attached to the appliance in the following way: ▪... -
Page 7: Connection Diagram
Connection diagram The following can be used for connection: H05V2V2V-F LIVE BROWN EARTH GREEN / YELLOW NEUTRAL BLUE CONNECTING THE COOKING HOB TO THE GAS SUPPLY • The appliance must be connected in compliance with all relevant regulations, and it may only be used in well ventilated / aerated rooms. - Page 8 C Pipe adapter for liquid gas (depending on the model) Only use pipes that comply with Standards. These pipes must be installed so that, when fully extended, their length does not exceed 2000 mm. To facilitate installation and to prevent gas leaks, firstly attach the swivel coupling to the cook top and then to the gas mains pipe.
-
Page 9: Nozzle Table
TECHNICAL INFORMATION BMEH94I1G DC5D: Dual Crown Electrical connection 220-240 V~ ; 50/60 Hz Regulated for gas G30=30mbar 5000 W TOT GAS PART 7400 W TOT INDUCTION PART Ø 16 cm / 1400 W Ø 20 cm / 2300 W (P=3000 W) -
Page 10: Power Regulation
Magnet test Use small magnet to test if the dish bottom is magnetic. Only dishes where magnet sticks to the bottom are suitable for induction cooking. Dish recognition One of great advantages of the induction hotplate is dish recognition. Even if there are no dishes upon the hotplate, or the dish diameter is smaller than the diameter of the relevant hotplate, there are no thermal energy losses. -
Page 11: Gas Cooking Zones
GAS COOKING ZONES Important warnings • If you wish to quickly fry some food, set the gas burner to the maximum power initially and reduce the power as your continue. • Gas burners are fitted with thermoelectric protection devices. If the burner flame is extinguished accidentally or unintentionally (e.g. -
Page 12: Activating The Hob
OPERATING THE INDUCTION COOKING ZONES • After turning the ceramic glass hob on all displays come on for a moment. The hob is ready for operation. • The hob is fitted with electronic sensors which are switched on if you touch the relevant circle for at least one second. -
Page 13: Switching The Hob Off
Changing hotplate power settings • Select a particular hotplate by touching the sensor (E), (E1) lights. • By touching or sliding along the slide sensor you change power setting. • When you remove the finger from the slide sensor, the hotplate starts to operate at selected power. -
Page 14: Remaining Heat Indicator
By using this function the settings may be recovered quickly, when the control was Recall switched off with the main switch by mistake. After switching off with the key (A), the operator has 6 seconds to switch on again the control and another 6 seconds to actuate the key (D). -
Page 15: Alarm Timer Function
Protection from overheating Induction hotplate is also fi tted with safety device against overheating which protects electronic parts from damages. This device operates on several levels. When temperature of the hotplate excessively rises, it switches on two-stage fan. If this is not enough, extra powerful heating is deactivated, and finally the safety device either reduces the heating power of certain hotplates or turns them off completely. - Page 16 Switching the alarm off When the preset time expires a beep is heard which you can either turn off by touching any sensor or leave it to turn off automatically after 2 minutes. If you want to switch the timer off prior expiry of preset time: •...
-
Page 17: Safety Functions And Error Display
SAFETY FUNCTIONS AND ERROR DISPLAY ERROR ERROR DESCRIPTION INSTRUCTION MANUAL CODE E blinking No error! Cooking zones configurations will be deleted. User is in configuration menu No error! Cooktop may be configured User is in configuration menu No error! Cooktop is configured User is in configuration menu C blinking No error! Cooktop will be configured... -
Page 18: Operating The Gas Burners
Er31 o Er47 specifying the error code. No error! Deactivate child-proof protection. Child-proof protection activated. Cooking Defect component on heating element. Contact authorized center for technical assistance - level back to specifying the error code. OPERATING THE GAS BURNERS Hob control elements Gas valve closed for gas cooking zones Ignition... -
Page 19: Special Warnings And Fault Reporting
SPECIAL WARNINGS AND FAULT REPORTING ▪ During the warranty period, only a service center authorized by the manufacturer may carry out any repairs. ▪ Before making any repairs, make sure the appliance is disconnected from the power mains either by removing the fuse or by disconnecting the power plug from the wall outlet. -
Page 20: Cleaning And Maintenance
CLEANING AND MAINTENANCE Do not use a steam cleaning appliance to clean this appliance. The steam could reach the electrical components and cause a short circuit. The appliance should be cleaned regularly, preferably after each use, after cooling down. To avoid water marks and limescale deposits, use a soft cloth to dry surfaces that have ... -
Page 21: Glass Surface
After each use of the glass-ceramic hob, wait for it to cool down and clean it; otherwise, Glass Surface even the smallest food residue will be burnt onto the hot surface next time you use the appliance. For regular cleaning and maintenance of the glass-ceramic surface, use special conditioning agents which form a protective layer on the surface, shielding it from dirt. - Page 22 AWAD BADI NAHAS.TRADING CO.LTD P.O.BOX -11529 JEDDAH 21463 KINGDOM OF SAUDI ARABIA +966 2 2560888 +966 2 2560555 www.awadnahas.com Dear Customer, Thank you for purchasing a quality Baumatic home appliance. We pride ourselves in supplying quality products with high level of customer service. For customers outside the U.A.E please contact your local Baumatic distributor. You can find your local distributor on our website at www.baumatic‐mea.com and click on ‘where to buy’ from the menu. Baumatic Middle East General Trading LLC P.O BOX 393720 Dubai, United Arab Emirates Tel: +971 (0) 4551 3780 – General enquires +971 (0) 4551 3953 – Service, spare parts & product enquiries ...
- Page 25 .العربية المتحدة, الرجاء اإلتصال على الموزع المحلي ألجھزة بوماتك لعمالء خارج دولة اإلمارات .انقر على 'مكان الشراء "من القائمة فقط www.baumatic-mea.com يمكنك العثور على الموزع المحلي الخاص بك على موقعنا اإللكتروني لتجارة العامة ذ م م ل بوماتك الشرق األوسط...
- Page 27 الزجاج سطح السيراميك بعد كل استخدام الفرن من الزجاج والسيراميك، انتظر حتى يبرد وتنظيفه. وإال، سيتم حرق حتى أصغر بقايا .الطعام على سطح ساخن في المرة القادمة يمكنك استخدام الجھاز لتنظيف وصيانة سطح الزجاج السيراميك منتظم، واستخدام وكالء تكييف خاص والتي تشكل طبقة واقية .ويحمي...
- Page 28 التنظيف والصيانة الكھربائية المكونات إلى تصل أن يمكن البخار األجھزة ھذه لتنظيف بالبخار التنظيف جھاز تستخدم ال كھربائى ماس وتسبب تھدئة وبعد ،استخدام كل بعد ويفضل ،منتظم بشكل الجھاز تنظيف يجب تنظيفھا تم التي األسطح لتجفيف ناعمة...
- Page 29 تحذيرات الخاصة وصدع التقارير .يقوم باإلصالحات فقط مركز خدمة معتمد من قبل الشركة المصنعة ،خالل فترة الضمان قبل اتخاذ أي إصالحات، تأكد من فصل الجھاز عن التيار الكھربائي الرئيسي إما عن طريق إزالة الفيوز )المصھر( أو عن طريق فصل القابس ...
- Page 30 تشغيل شعالت )مواقد( الغاز عناصر التحكم في الفرن صمام الغاز مغلق لمناطق الطبخ بالغاز اشعال تدفق أقصى للغاز تدفق أقصى للغاز داخلي دفق أدنى للغاز خارجي تدفق أدنى للغاز داخلي صمام الغاز مغلق خارجي تعليمات المستخدم من الشعالت استخدام ھذا الجھاز للغرض الذي ص ُ م ّ م من أجله، أي الطھي المنزلي. ويعتبر أي استخدام آخر غير يجب...
- Page 31 كود الخطأ وصف الخطأ المرجع في كتيب التعليمات ER21 فصل وحدة التحكم إشارة إلى شدة الحرارة أطلب مساعدة الجھة المختصة للعون الفني ـ وضح كود الخطأ لتجنب اإلضرار باإللكترونيات U40 إرتفاع الفولطية الثانوية لوحدة الطاقة )الضبط ( أطلب مساعدة الجھة المختصة للعون الفني ـ وضح كود الخطأ فولط( .
- Page 32 (المتطلبات المسبقة للتنظيم / إلغاء )التنظيم ترتيب مناطق الطبخ .يجب إزالة كافة أواني الطبخ من مناطق الطبخ وترك آنية واحدة فقط تكون مالئمة للحث دقيقتين بعد التوصيل بالتيار الكھربائي . ألمس زر التحكم يمكن البدء في عملية التنظيم / اإللغاء خالل ...
- Page 33 استخدام المؤقت لضبط الوقت لكل سخان على حدة يمكنك :تغيير وقت الطبخ المسبق الضبط .يمكن تغيير وقت الطبخ المضبوط مسبقا كلما رغبت أثناء عملية التشغيل .( يتم عرض الزمن المتبقى على شاشة المؤقت ) قم بإختيار السخان المطلوب ، سوف يضئ ...
- Page 34 .ھذه الوظيفة تقوم بالتسخين المسبق للموقد بطاقة قصوى ألجل كسب الحرارة المطلوبة بأسرع ما يمكن التسخين السريع التلقائي .زمني يعود مستوى الطاقة إلى وضعه األساسي وبعد مرور فاصل ألن الطاقة مضبوطة ويمكن تشغيلھا على أي من السخانات لجميع حاالت الضبط ماعدا حالة الضبط .عليھا...
- Page 35 إلغاء تفعيل قفل وحدة التحكم ( لتشغيل الفرن )إذا كان في حالة السكون( ، جميع الشاشات سوف تشير ) قم باللمس على الحساس إلى ( في نفس الوقت ) األيمن مع الحساس قم بالضغط على شاشة مناطق الطبخ على الجانب األمامي ...
- Page 36 ( لثانية واحدة على األقل. أصبح الفرن اآلن مشغال ، وجميع مؤشرات طاقة السخانات ) المس الحساس تشغيل الفرن على ھذا وتبدا النقطة العشرية في الوميض وشاشة المؤقت تشير إلى ( تشير إلى ثانية وإال فإن الفرن سوف ينطفئ ويعود إلى حالة الوضع...
- Page 37 لوحة السيراميك في حالة سقوط شيء على الفرن بحافة حادة إلى اسفل، ربما يسبب ھذا كسر في الزجاجي أو الفرن. اآلثار سوف تظھر مرئية فورا أو بعد برھة من الوقت. في حالة ظھور أي تشققات .، قم فورا بفصل الجھاز من مغذي الطاقة في...
- Page 38 يمكن ضبط طاقة حرارة السخان على تسع مستويات مختلفة. الرسم التالي يوضح االستخدام التوضيحي تنظيم الطاقة .لكل نوع من أنواع الضبط ضبط الطاقة الغرض مغلق ، يستخدم الحرارة المتبقية – على نار ھادئة خفيفة بكميات صغيرة )اقل المحافظة على الطعام دافيء، يترك (ضبط...
- Page 39 منطقة الطبخ فرن السيراميك الزجاجي مجھز بثالثة أو اربعة سخانات . سطح الفرن مسطح بالكامل وناعم، بدون اسس وظيفة السخانات .حواف يمكن أن تتجمع فيھا األوساخ الفرن مجھز بسخانات دفع طاقة عالية. يتم توليد الحرارة مباشرة على قاعدة الطبق ، حيث تشتد الحاجة ...
- Page 40 لغاز الصمامات المنظمة المركبة داخليا من قبل المصنع الھدف منھا االستخدام مع الغاز السائل ، عموما ، الصمامات مضبوطة للتشغيل مع نوع ا .المضبوط عليه الجھاز من قبل المصنع تحريره ليتوافق مع تدفق/سرعة الغاز عند موالفة الجھاز لالستخدام مع نوع آخر من الغاز يجب ان يتم احكام مسمار التنظيم )الصمام( أو ...
- Page 41 .على الجانب السفلي، تم تزويد لوحة الموقد بتوصيلة غاز ملولبة التوصيل .من الدوران عند التوصيل، يجب إحكام تثبيت مفصل األنبوب لمنعه .إلحكام ربط الوصالت مع بعضھا ، استخدم حشوات غير معدنية )جوان( ومانعات تسرب معتمدة يجب أن تستخدم الحشوات )جوان( لمرة واحدة فقط. ال ينبغي أن تتشوه الحشوات الغير المعدنية ...
- Page 42 لالتصال استخدامھا يمكن التالية الكابالت الرسومات التوضيحية للتوصيل H05V2V2-F بني مكھرب أخضر/أصفر أرضي أزرق متعادل بمأخذ الغاز لوحة الموقد توصيل يجب أن يتم توصيل الجھاز وفق ا ً لألنظمة المتداولة، يجب أن يقوم بھذه المھام فني مؤھل، معتمد من شركة توزيع الغاز أو مركز خدمة معتمد ...
- Page 43 قبل إدخال جھاز إلى فتحة في سطح العمل المطبخ، ويجب أن ترفق طوقا رغوة المورد إلى الجانب تثبيت رغوة الطوق زجاج الفرن الطھي (السفلي من السيراميك )زجاج ال تقم بتثبيت الجھاز دون طوقا رغوة يجب أن يرفق طوقا للجھاز على النحو التالي الطوق...
- Page 44 تركيب تحذيرات ھامة .تركيب الجھاز في سطح العمل المطبخ وعالقته مع التيار الكھربائي ال يجوز أداؤھا من قبل فني مؤھل بشكل كاف • درجة ) ينبغي أن يعامل القشرة أو غيرھا فاي نيش من قطعة من أثاث المطبخ في الفرن ھو الذي سيتم بناؤھا في مع الغراء مقاوم للحرارة •...
- Page 45 ھامة تحذيرات ( في مكان العمل بالمطبخ وتوصيله بالتيار الكھربائي ومغذي الغاز يجب ان يتم فقط بواسطة فني مؤھل في : تركيب الجھاز )التركيب من الفئة .ھذا الخصوص ستوى آداء عالي عندما يكون الجھاز في وضع التشغيل ، تنبعث حرارة ورطوبة اضافية داخل الغرفــة. وعندما يستخدم الجھاز لفترات طويلة بم ...
- Page 46 .تم تصنيع ط ب ّاخ الغاز الكھربائي المدمج ھذا لالستخدام المنزلي ! عزيزي المستھلك ة للبيئة والتي يمكن إعادة تدويرھا، يمكن إيداعھا أو التخلص منھا دون أي أجھزتنا معبأة بمواد مالئم .وفق ا ً لذلك مزودة بعالمة تحذيرية التعبئة والتغليف ھذه أن...
- Page 48 إرشادات اإلستخدام والتركيب فرن مع سخانات الحث ومواقد الغاز BMEH94I1G...
Need help?
Do you have a question about the BMEH94I1G and is the answer not in the manual?
Questions and answers