
Related Manuals for Golden Designs MX-J206-02S


Summary of Contents for Golden Designs MX-J206-02S
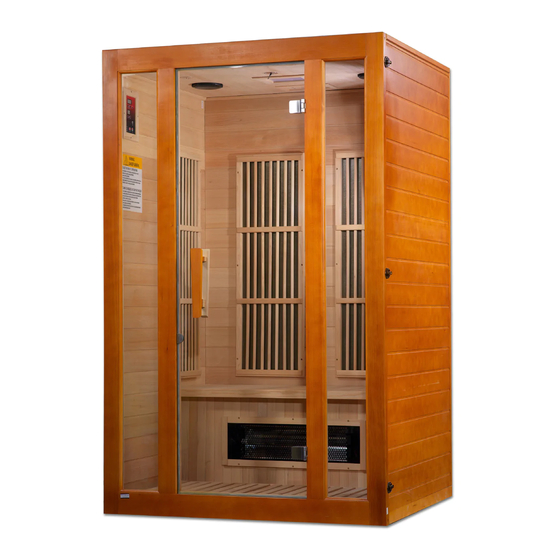
- Page 1 Model: MX-J206-02S & MX-J306-02S FOR CARBON MODEL SAUNAS HEMLOCK AND RED CEDAR MODELS FOR INDOOR USE ONLY MX-J206-02S: 120V/15AMP DEDICATED CIRCUIT REQUIRED MX-J306-02S: 120V/20AMP DEDICATED CIRCUIT REQUIRED...
-
Page 2: Table Of Contents
Thank you for your purchase of the Infrared Sauna! Index ===================================== Page Important Safety Guides…………………………………………………...… Introduction…………………………………………………………...………… Health & Beauty Benefits……………………………………………………… Highlights……………………………………………………………….……..… Assembly..…………………………………….……………………………..….. Operating Your Sauna..………………………………………………………… 12 Tips For Using Your Sauna...………………………….………………………. 14 Safety Instructions………………………………………………………………. 15 Safeguards For Your Sauna..……………………………………………..…… 16 Troubleshooting Guide..…………………………………………………………... -
Page 3: Important Safety Guides
READ IMPORTANT SAFETY GUIDES BEFORE USING! READ AND FOLLOW ALL INSTRUCTIONS A). Please following all warning labels and markings on the sauna room before using. B). Do not install any receptacles on the interior or exterior walls of the sauna room. C). -
Page 4: Introduction
M). Never sleep inside the sauna. N). Do not use any type of cleaning agents on the interior of the sauna. Only wipe down with a cloth and water. O). Do not stack or store any object on top or inside the sauna. P). -
Page 5: Highlights
Highlights a. High quality craftsmanship b. Automatic thermostat for constant temperature c. Timer and buzzer: buzzer sounds 5 minutes before the end of the sauna session d. Digital sensor and thermometer e. Infrared carbon heat emitter panels Power supply: Main Power: main power to sauna room HT1, HT2, HT3, &... - Page 6 Assembly Requirements a. You will need a Philips screwdriver, ladder, and two adults to assemble. b. Do not plug any other appliances into the power supply of the sauna room other than the designated sauna connections/plugs. c. Assemble the sauna room on a completely level surface. d.
- Page 7 1. Power Supply 6. Left Side Panel 1000 x 400mm 300W 2. Color Lights 7. Rear Wall Panels 1000 x 400mm 300W 3. Temperature Sensor 1000 x 400mm 300W 4. Speakers 1000 x 400mm 200W 5. Control Panel 8. Right Side Panel 1000 x 400mm 300W 9.
- Page 8 FIG-2.1 Cartons FIG-2.2 C/No. 4. Place the Floor Panel on a smooth/flat surface and make sure which side is the front and which side is the back. The front of the floor has no stain finish as the other three sides do. See FIG 3. FIG 3 Placing Floor Panel FIG 4 Assembling Back Panel...
- Page 9 FIG 5 Assembling Right Side Panel FIG 6 Buckle 7. Latch the Right Side Panel with the Back Panel. The buckle has a guide tab that must be placed in the guide slot for alignment. When the Back Panel and the Side Panel are attached together on the floor panel, make sure all the buckles are latched.
- Page 10 9. Place the Floor Heater on the Floor Panel making sure that the Floor Heater is in front of the Bench Heater Panel slots. Please note there is a pre-cut small hole under the Bench Heater Panel which is provided for the Floor Heater cord.
- Page 11 FIG 11 Assembling Front Panel FIG 12 Installing Roof Cover 12. Place cords/wires of Side Panel and Back Panel into the sauna room area to avoid damaging the cords/wires during the roof installation. Open the door, lift the Roof Panel up and over the sauna room, and gently lower it into place resting it on the wall panels.
- Page 12 Connect the plugs according to the respective labels. Connect the CTRL plug from the power supply to the CTRL plug from See FIG 14 – FIG 18. the control panel. Then screw the two connections together. Last, connect the buzzer connection. FIG 15 FIG 16 FIG 17...
-
Page 13: Operating Your Sauna
FIG 19 Installation Completed. Operating the Sauna NOTE: Before the sauna is turned on, remove plastic protective covering from the CONTROL PANELS. Please check and confirm that the connections to the POWER SUPPLY, HEAT EMITTERS, CD/RADIO, and TEMPERATURE SENSOR are connected properly. The power supply voltage and frequency must match the requested voltage and frequency of the sauna (120VAC 15AMP Dedicated Circuit or 120VAC 20AMP Dedicated Circuit). - Page 14 During your sauna session, set-up time will count down the minutes one by one. When the time remaining is 5 minutes, the buzzer will make a warning sound for approximately 15 seconds letting you know you only have 5 minutes remaining. At this point, you can let the time run out or adjust the time by pressing the up/down arrows under the TIME DISPLAY.
-
Page 15: Tips For Using Your Sauna
Power On/Off: Press to control the main power of the sauna Power Indicator: Indicates the status of the sauna’s main power Work Start/Stop: Press to control the working functions of the sauna Work Indicator: Indicates the working status of the sauna Heat Indicator: Indicates the status of heating function Light: Press to control the lighting function Time Display: Displays the heating time of the sauna in minutes... -
Page 16: Safety Instructions
To utilize the sauna's heat therapy effect, put oil or treatment into your hair and wrap it with a towel. After your sauna session is over, rinse your hair thoroughly. Please follow the product directions for the intended benefits. The peaceful and relaxed state rendered by a sauna session may help you to sleep easier and deepe r. 10) To conserve energy consumption, please unplug your sauna when not in use. -
Page 17: Safeguards For Your Sauna
16) Do not continuously switch the power on and off as it will compromise the life of the electrical components. 17) Your hands must be dry and free of moisture before plugging and unplugging cords and wiring harnesses from the power supply and circuit boards. - Page 18 properly connected to the cords on the roof and that those cords are properly plugged into the power suppl y. Solution: If some of the heat emitters are working, then the ones which are not working may have been damaged. Do not continue to operate. Contact the manufacturer for replacement parts.
- Page 19 RESET button to reset the power supply. The RESET button is on the same side of the power supply as all the heater cord connections. Attempt to turn the sauna on at the control panel. Contact the manufacturer for any additional troubleshooting. Solution: There could be damage to the temperature sensor.
-
Page 20: Warranty
Limited Lifetime Warranty 5 Year Limited Warranty: Golden Designs, Inc. warranties the wood, structure, heating elements, and electronics against defects in material and workmanship for a period of 1 to 5 years from the original date of purchase. This sauna is for INDOOR use only. - Page 21 Surface cracks are not considered defects in material or workmanship, as they are normal characteristics of all woods. This includes minor cracks due to wood expansion and contraction. Note: Since the wood used in construction has been kiln dried, a certain amount of expansion and contraction occurs in the wood in a sauna environment.
- Page 22 Page Intentionally Left Blank...
-
Page 23: Warranty Card
WARRANTY CARD Congratulations on your purchase of an Infrared Sauna from Golden Designs, Inc. Please take the time to complete the following Warranty Card and mail it back to: Golden Designs, Inc. 3550 Jurupa Street, Unit B Ontario, CA 91761 Please include a copy of your sales receipt showing date of purchase as this will serve as proof of purchase.
Need help?
Do you have a question about the MX-J206-02S and is the answer not in the manual?
Questions and answers