Table of Contents
Advertisement
Quick Links
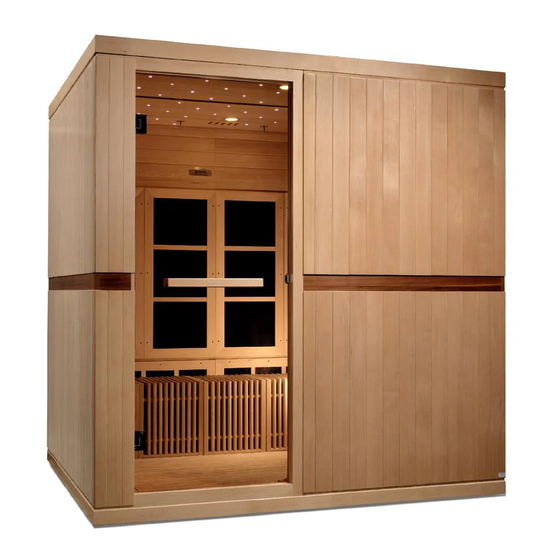
GDI-6880-01
8 Person FAR Infrared Sauna
Owner's Manual
CARBON MODEL SAUNAS
SAUNA IS FOR INDOOR USE ONLY
REQUIRES 3 SEPARATE 120VAC 20AMP DEDICATED CIRCUITS
Carefully and thoroughly read this Owner's Manual before
using/operating the sauna. We recommend keeping this Owner's
Manual for regular review and future reference.
Advertisement
Table of Contents

Related Manuals for Golden Designs GDI-6880-01


Summary of Contents for Golden Designs GDI-6880-01
- Page 1 GDI-6880-01 8 Person FAR Infrared Sauna Owner’s Manual CARBON MODEL SAUNAS SAUNA IS FOR INDOOR USE ONLY REQUIRES 3 SEPARATE 120VAC 20AMP DEDICATED CIRCUITS Carefully and thoroughly read this Owner’s Manual before using/operating the sauna. We recommend keeping this Owner’s...
- Page 2 What Are Infrared Rays? Infrared is the band of light we perceive as heat. We cannot see this band of light with the naked eye, but we can feel this type of light in the form of heat. Our sun produces most of its energy output in the infrared segment of the spectrum.
- Page 3 Health Benefits Include, But Are Not Limited To: *Pain relief from Rheumatoid Arthritis *Reduces cellulite *Relaxes muscle spasms *Removes toxins and mineral waste *Increases blood circulation *Reduces stress and fatigue *Cardiovascular conditioning *Enhances skin tone *Clears rashes, acne DISCLAIMER The infrared rays emitted by your sauna are reported to offer a wide range of possible therapeutic benefits based on research completed over the last 40 years from all around the world.
- Page 4 and wiring in buildings and appliances generate 50 and 60 Hertz fields, sometimes referred to as “power frequency” fields. Hertz is the unit for measuring the frequency of fields in the number of wave cycles each second. The lower the frequency of a field, the lower its energy.
- Page 5 *PLEASE READ INSTRUCTIONS THOROUGHLY BEFORE ASSEMBLY* GDI-6880-01 *THE ABOVE ASSEMBLY DIAGRAM IS FOR A QUICK REFERENCE VISUAL GUIDE ONLY. ALL SAUNA MODELS MAY NOT BE SHOWN. PARTS AND ACCESSORIES DO VARY AND ARE SUBJECT TO CHANGE. Page 4...
-
Page 6: Table Of Contents
TABLE OF CONTENTS Product Introduction Parts Description Assembly Instructions Operating the Sauna Tips for Using your Sauna Safety Instructions Safeguards for your Sauna Troubleshooting Guide Warranty Warranty Card WARNING: Visually inspect all heaters before assembly to make sure they are not damaged. -
Page 7: Parts Description
*PLEASE READ INSTRUCTIONS THOROUGHLY BEFORE ASSEMBLY* PARTS DESCRIPTION *THE ABOVE ASSEMBLY DIAGRAM IS FOR A QUICK REFERENCE VISUAL GUIDE ONLY. ALL SAUNA MODELS MAY NOT BE SHOWN. PARTS AND ACCESSORIES DO VARY AND ARE SUBJECT TO CHANGE. THE FLOOR RAMP IS SOLD SEPARATELY. Page 6... - Page 8 Power Supply (Control Box) The POWER SUPPLY is the control center of the sauna room. It is installed on the topside of the ROOF PANEL and has inputs/outputs connected to it. Model GDI- 6880-01 has three of these POWER SUPPLIES. (see Figure 1) Figure 1 POWER IN - main power of the sauna room HT1, HT2, HT3, HT4, HT5, HT6 –...
- Page 9 III. MP3 Auxiliary Port The MP3 Auxiliary Port allows you to connect a MP3 player or other device with the auxiliary function to the speakers in the sauna room for your listening pleasure. (see Figure 2) Figure 2 Buckles External Buckles The external buckles are used to connect the LEFT and RIGHT SIDE PANELS to the REAR PANEL.
- Page 10 Figure 4 Panel Descriptions For easier assembly, please understand and distinguish the differences between each panel. Floor Panel When the FLOOR PANEL faces upward, you will find the floor heat emitter(s) on the topside of the FLOOR PANEL. (see Figure 5) Figure 5 Front Understanding the Difference Between the Top and Bottom of...
- Page 11 Rear Panel The REAR PANEL is the panel with the buckles. The buckles are mounted on the exterior side of the REAR PANEL. (see Figure 7) Figure 7 Understanding the Difference Between the Inside and Outside of the Wall Panels You will find the heat emitters on the inside of the wall panels.
-
Page 12: Assembly Instructions
Assembly Instructions 1. Choose a good location to assembly the sauna The location must be dry, level, and away from any source of water. The dedicated outlet must be easily accessible. Two adults will be needed to assemble. Wood Cabin Assembly: FLOOR PANEL RIGHT SIDE PANELS REAR WALL PANELS... - Page 13 3. Installing the RIGHT SIDE PANELS a. One adult will need to place the first of the two RIGHT SIDE PANELS up and onto the FLOOR PANEL. Please take note of the trim molding on the FLOOR PANEL that will insert into the bottom of the wall panels. See Figure 10.
- Page 14 4. Installing the REAR WALL PANELS a. While one adult holds the RIGHT SIDE PANELS in place, a second adult will need to place the first of the two REAR WALL PANELS up and onto the FLOOR PANEL. Again, note the trim molding on the FLOOR PANEL that will insert into the bottom of the wall panels.
- Page 15 5. Installing the LEFT SIDE PANELS a. Place the first of the two LEFT SIDE PANELS up and onto the FLOOR PANEL. Again, note the trim molding on the FLOOR PANEL that will insert into the bottom of the wall panels. Pay special attention to the external buckle in Figure 8 with reference to the wall panels.
- Page 16 down easily, you can loosen the guide and guide insert screws slightly to allow for less tension and the wall panel will slide down easier. Attach the final FRONT WALL PANEL by lifting the wall panels that have the metal knob sticking outward and inserting it into the wall panel that has the guide bracket with the hole.
- Page 17 8. Installing the ROOF PANEL a. Note that the roof panel comes in two pieces. The roof panel that has a single power supply will go towards the front of the sauna. The side with the actual power supply will go towards the front/right corner of the sauna. The roof panel that has two power supplies will go towards the rear of the sauna with the ceiling vent at the rear of the sauna.
- Page 18 9. Installing the TEMPERATURE SENSOR a. Enter the sauna and remove the protective covering (tape) from the TEMPERATURE SENSOR. Situate the TEMPERATURE SENSOR so that it is vertical, pointing downward. (see Figure 24) Figure 24 Note: Some sauna models are shipped with a spare TEMPERATURE SENSOR in case the TEMPERATURE SENSOR is damaged in transit.
-
Page 19: Operating The Sauna
11. Installing the Ramp (can be purchased separately as an accessory) a. The optional wheelchair ramp can be placed in front of the door of the sauna. It must be placed close and butted up against the exterior side of the FRONT WALL PANEL. - Page 20 Since many materials absorb the infrared rays, minimal clothing is recommended for maximum effect. The infrared sauna emitters are designed to heat you and not necessarily the air inside the sauna. It is not a hot box like a traditional sauna. The temperature gauge is a guide for your safety.
- Page 21 either pre-heat the sauna to the set temperature before entering or sit inside the sauna as the temperature rises to the set temperature. Please keep in mind that you will increase the time it takes for the sauna to reach the set temperature if you enter the sauna room before it has reached the set temperature.
-
Page 22: Tips For Using Your Sauna
must unpair/disconnect from Bluetooth if your sauna model has the optional MP3 Jack at the ceiling and you choose to use the Aux Wire to connect to the speaker system. If you need to reset the Bluetooth/Aux system, you can do so by unplugging the sauna’s power cord for 15 minutes. -
Page 23: Safety Instructions
much perspiration dripping onto the floor heater. If your legs become cold, you can use a third towel to drape over your legs to trap the heat. 5. At the first sign of a cold or flu, increasing your sauna sessions may be beneficial in boosting your immune system and decreasing the reproductive rate of the virus. - Page 24 7. The use of alcohol, drugs, or medications (prescribed or non-prescribed) prior to or during the sauna session may lead to unconsciousness and/or other harmful physical injuries. 8. Persons suffering from obesity or with a medical history of heart disease, low or high blood pressure, circulatory system problems, diabetes, or other medical conditions should consult with a medical physician prior to using the sauna.
-
Page 25: Safeguards For Your Sauna
hit, or break the heating elements as it may cause an electrical short and pose a safety risk. 23. Do not make any modifications to the sauna, the sauna structure, or the sauna components. 24. Prior to each sauna session, the sauna room is to be inspected for correct operation. - Page 26 do assemble in a similar fashion. Here is the web address to the video: https://www.youtube.com/watch?v=Z7EVadjwm5s 3. No Heat Coming From Some of the Heat Emitters Solution: Check to make sure all the heat emitter cords are properly connected, including the cord to the heat emitter underneath the bench (if applicable).
- Page 27 Solution: If the control panel is showing no signs of power, then there could be a connection issue of the “CTRL” harness behind the control panel. You will need to remove the wood frame holding the control panel in place to gain access to the “CTRL”...
- Page 28 Solution: If your control panel displays “-L”, it may be an error code and we assume both control panels are displaying this. If so, then it means there is a communication issue between the control panel, power supply, and temperature sensor. Please proceed to the following: Step A: 1.
- Page 29 just not turn ON at all. We do not have an answer as to why the GFCI was fine in the beginning when supplying power to the sauna and then suddenly starts causing problems for the sauna power supply. We recommended not connecting the sauna power cord to a GFCI protected outlet.
- Page 30 emitters. As the bench heat emitter and floor heat emitter (200W/125W each) are of much less wattage than the wall heat emitters (300W each), they will not get nearly as hot as the wall heat emitter panels. We can have you run two tests.
-
Page 31: Warranty
Limited Lifetime Warranty 7 Year Limited Warranty: Golden Designs, Inc. warranties the wood, structure, heating elements, and electronics against defects in material and workmanship for a period of 1 to 7 years from the original date of purchase. This sauna is for INDOOR use only. Placing your sauna outdoors will VOID this warranty. - Page 32 PAGE INTENTIONALLY LEFT BLANK Page 31...
-
Page 33: Warranty Card
WARRANTY CARD Congratulations on your purchase of an Infrared Sauna from Golden Designs, Inc. Please take the time to complete the following Warranty Card and mail it back to: Golden Designs, Inc. 3550 Jurupa Street, Unit B Ontario, CA 91761 Please include a copy of your sales receipt showing date of purchase as this will serve as proof of purchase.
Need help?
Do you have a question about the GDI-6880-01 and is the answer not in the manual?
Questions and answers