Table of Contents
Advertisement
Advertisement
Table of Contents

Related Manuals for Gree FP-22LM/D-K


Summary of Contents for Gree FP-22LM/D-K
- Page 1 Change for life Service Manual Exposed fan coil unit...
-
Page 2: Table Of Contents
Contents PRODUCT ......................2 1 Introduction ....................2 1.1 lineup ......................2 1.2 Nomenclature ..................2 1.3 Feature ....................3 1.4 Working principle ..................3 1.5 Specifications ..................4 1.5.1 General data (nominal conditions) ..........4 1.5.2 Electrical data .................5 1.5.3 Capacity correction .................6 2 Exploded views and parts list .................8 3 Scope of supply ...................17 DESIGN AND SELECTION ................19 1 Selection principle ..................19... - Page 3 4.4.2 Precautions for installation ............29 4.4.3 Installation of water pipes .............31 4.4.4 Installation of drain hose ...............32 4.4.5 Installation of water valve ..............32 5 Electric wiring ....................34 5.1 Precautions for electric wiring ...............34 5.2 Wiring steps ..................34 5.3 External wiring diagram ................35 TEST OPERATION, TROUBLESHOOTING AND MAINTENANCE ....37 1 Commissioning ....................37 2 Troubleshooting ...................37...
- Page 4 Product Product...
-
Page 5: Product
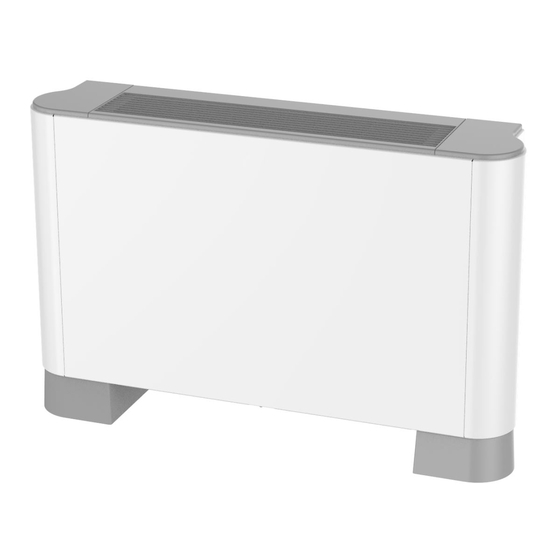
Product PRODUCT 1 Introduction 1.1 lineup Cooling Heating Product Power Name Model capacity capacity Appearance code supply (kW/ton) (kW/ton) FP-22LM/D-K EM51600300 1.4/0.40 2/0.57 FP-34LM/D-K EM51600280 1.9/0.54 2.3/0.65 FP-51LM/D-K EM51600290 2.8/0.80 3.4/0.97 FP-68LM/D-K EM51600250 3.2/0.91 3.8/1.08 FP-85LM/D-K EM51600270 4.25/1.21 4.9/1.39 220-240V... -
Page 6: Feature
Product 1.3 Feature (1) Extensive application With the airflow ranging from 300 to 1900 m /h and cooling capacity of 1.4 to 10.1kW, the FCU provides three air speed settings to satisify users. (2) High quality and reliability Good materials and strict technical processing ensure high quality and normal service life of units. (3) Low noise In terms of dynamics, the optimized proportion of fan blade angle to impeller inner and outer diameters improves airflow and reduces noises. -
Page 7: Specifications
Product 1.5 Specifications 1.5.1 General data (nominal conditions) Model FP-22LM/D-K FP-34LM/D-K FP-51LM/D-K FP-68LM/D-K Airflow m³/h Cooling capacity Heating capacity Water resistance Sound level dB(A) Type Copper, high-efficiency louvered fins Coil Pressure ≤1.6 Power supply 220-240VAC 50Hz Input power Electric shock resistance class... -
Page 8: Electrical Data
40°C . (b) The sound level is tested under the semi-anechoic chamber and the actual value will change under different conditions. (c) When conditions are out of the range, please contact GREE. 1.5.2 Electrical data Model Power supply... -
Page 9: Capacity Correction
Product 1.5.3 Capacity correction (1) Cooling and heating capacity correction factor Model FP-22 FP-34 FP-51 FP-68 FP-85 FP-102 FP-119 FP-136 FP-170 FP-204 Cooling 0.81 0.82 0.75 0.71 0.72 0.73 0.74 0.79 0.76 0.77 Middle speed Heating 0.80 0.80 0.73 0.68 0.69 0.70 0.72... - Page 10 Product (3) Heating capacity correction factor Inlet air Entering water Water flow temp. (°C) (multiple) DB16°C DB18°C DB20°C DB21°C DB22°C DB24°C 0.56 0.52 0.48 0.46 0.44 0.41 0.58 0.54 0.50 0.48 0.46 0.42 0.60 0.55 0.51 0.49 0.47 0.44 0.71 0.66 0.61 0.59...
-
Page 11: Exploded Views And Parts List
Product 2 Exploded views and parts list (1) FP-22LM/D-K, FP-34LM/D-K (list code: EM51600280) Name Quantity Display panel Cover Grille Display panel Cover Displayer Box Base Deck Assy Cellular Surface-Cooler Assy Connection Panel Cellular Centrifugal Fan Assy Right Side Plate Assy... - Page 12 Product Name Quantity Closed Panel Propeller Housing Right Side Plate Centrifugal fan blade Propeller Housing Base Panel Connection Panel Cellular Assy Filter Assy Bar Clasp Support sub-assy Motor Motor Support Assy Base Cable cross loop Wire Clamp Insulated Gasket Capacitance Terminal Board Terminal Board Cable cross loop...
- Page 13 Product (2) FP-51LM/D-K, FP-68LM/D-K, FP-85LM/D-K (list code: EM51600250) Name Quantity Display panel Cover Grille Display panel Cover Displayer Box Base Deck Assy Cellular Surface-Cooler Assy Connection Panel Cellular Centrifugal Fan Assy Right Side Plate Assy Closed Panel Propeller Housing Right Side Plate Centrifugal fan blade...
- Page 14 Product Name Quantity Propeller Housing Base Filter Assy Panel Connection Panel Support sub-assy Bar Clasp Motor Cellular Assy Motor Support Assy Cable cross loop Wire Clamp Insulated Gasket Capacitance Terminal Board Terminal Board Cable cross loop Base Electric Box Cover Left Side Plate Left Side Plate Assy Cellular...
- Page 15 Product (3) FP-102LM/D-K, FP-119LM/D-K, FP-136LM/D-K (list code: EM51600310) Name Quantity Display panel Cover Grille Display panel Cover Displayer Box Base Deck Assy Cellular Surface-Cooler Assy Connection Panel Cellular Barrier Assy Right Side Plate Assy Closed Panel Propeller Housing Right Side Plate...
- Page 16 Product Name Quantity Centrifugal fan blade Propeller Housing Base Filter Assy Connection Panel Panel Support sub-assy Bar Clasp Motor Motor Support Cellular Assy Cable cross loop Wire Clamp Insulated Gasket Capacitance Terminal Board Terminal Board Cable cross loop Base Electric Box Cover Left Side Plate Left Side Plate Assy Cellular...
- Page 17 Product (4) FP-170LM/D-K (list code: EM51600320) Name Quantity Display Board Cover Front Grill Foam Surface-Cooler Assy Display Box Right Side Plate Connection Board Foam Rear Case Right Side Plate Sub-Assy Propeller Housing(Lower) Propeller Housing(Upper)
- Page 18 Product Name Quantity Centrifugal Fan Foam Sub- Assy Air Outlet Assy Front Panel Motor Support Fan Motor Connection Sheet Sub-Assy Connection Board Connection Sheet Sub-Assy Filter Sub-Assy Rear Case Left Side Plate Sub-Assy Cable Cross Loop Left Side Plate Electric Box Cover Wire Clamp Capacitor CBB61 Display Board Cover...
- Page 19 Product (5) FP-204LM/D-K (list code: EM51600340) Name Quantity Display Board Cover Front Grill Foam Surface-Cooler Assy Display Box Right Side Plate Connection Board Foam Rear Case Right Side Plate Sub-Assy Propeller Housing(Lower) Propeller Housing(Upper) Centrifugal Fan Foam Sub- Assy Air Outlet Assy...
-
Page 20: Scope Of Supply
Product Name Quantity Front Panel Motor Support Fan Motor Connection Sheet Sub-Assy Connection Board Connection Sheet Sub-Assy Filter Sub-Assy Rear Case Left Side Plate Sub-Assy Cable Cross Loop Left Side Plate Electric Box Cover Wire Clamp Capacitor CBB61 Display Board Cover Insulation Gasket Terminal Board Terminal Board... - Page 21 Design and Selection Design and Selection...
-
Page 22: Design And Selection
Design and Selection DESIGN AND SELECTION 1 Selection principle 1.1 Selection steps (1) If the external static pressure is 0Pa, the unit cannot be connected with ducts. (2) Select the unit type based on the air flow, cooling capacity and heating capacity. (3) Select the unit model based on the indoor cooling/heating load, inlet air DB/WB temperature, entering water temperature and related data sheets. -
Page 23: Power Supply Specification
According to the table Allowed sound level, the allowable sound range for the hotel is 40~50dB (A). The designed sound level of the FP-68 is 42 dB(A) which can meet the requirements. 2 Power supply specification Model Power supply Sectional area of power cords (mm FP-22LM/D-K FP-34LM/D-K FP-51LM/D-K FP-68LM/D-K FP-85LM/D-K 220-240VAC 1Ph 50Hz 3x1.0... - Page 24 Unit Control Unit Control...
-
Page 25: Unit Control
Unit Control UNIT CONTROL Cooling mode Temperature or error codes ① ⑧ Air supplying mode Child lock ② ⑨ ⑪ Heating mode ON/OFF ③ ⑩ ⑫ Fan speed MODE ④ ⑬ Timer SPEED ⑤ ⑭ Drying function ⑥ Sleep function DOWN ⑦... - Page 26 Unit Installation Unit Installation...
-
Page 27: Unit Installation
Unit Installation UNIT INSTALLATION 1 Flow chart Installation preparation Installation of support Installation of units Installation of Installation of Installation of water valve drain pipes water pipes 2 Precautions for engineering work (1) The unit should be installed in accordance with instructions covered in the user’s manual and make sure enough maintenance space is reserved around the unit. - Page 28 Unit Installation (4) The flexible connectors or the movable joints should be used for connection of the water inlet and outlet pipes. Moreover, the water filters should be installed at the water inlet pipe. (5) The condensate pipe should not be blocked with a grade of slope no less than 5%. (6) A filter should be installed at the return air inlet and cleaned periodically so as to not affect the heat exchanging efficiency.
-
Page 29: Tools
Unit Installation 3 Tools Name Usage Image It is used for drilling holes at metals, wood or Hand-held electric drill plastics. The fiber-reinforced sheet wheel can cut the Cutter round or special shaped steel pipes, cast iron pipes, channel steel and flat steel. The fiber-reinforced line-shaped wheel can grind metal pieces and cut sectional materials. -
Page 30: Installation
Get an approval for installation work and complete disclosure of technical tasks, quality and safety. 4.2 Dismensional data Outlet pipe size Rc3/4 Inlet pipe size Rc3/4 Drain pipe size φ22 Unit: mm Model FP-22LM/D-K FP-34LM/D-K FP-51LM/D-K 1050 FP-68LM/D-K 1050 FP-85LM/D-K 1050... -
Page 31: Installation And Maintenance Space
Unit Installation Model FP-170LM/D-K 1773 1446 FP-204LM/D-K 1773 1446 4.3 Installation and maintenance space ≥60cm ≥60cm ≥60cm ≥60cm ≥10cm ≥100cm ≥100cm Vertical-mounted Wall-mounted 4.4 Installation process 4.4.1 Supports fixing It is quite common to use expansion bolt to fix supports, while recessed fitments and welding could be alternatives. -
Page 32: Precautions For Installation
18.5 80~90 4.4.2 Precautions for installation Drill four holes on the wall accordance with the piture and the table below. Suspension hole Suspension hole Unit: mm Model α β FP-22LM/D-K FP-34LM/D-K FP-51LM/D-K FP-68LM/D-K FP-85LM/D-K FP-102LM/D-K FP-119LM/D-K 1010 FP-136LM/D-K FP-170LM/D-K 1433... - Page 33 Unit Installation Insert user-provided M10 expansion bolts into the holes on the wall and fix them as shown in the picture below. Expansion bolt Open the cover. Loosen three screws and lift the decorated panels (on left or right side) 1cm above and remove them in a horizontal way.
-
Page 34: Installation Of Water Pipes
Unit Installation Wall Bolt 4.4.3 Installation of water pipes (1) Open the panel. Loosen three screws and lift the decorated panels (on left or right side) 1cm above and remove them in a horizontal way. (2) Install water valves and pipes and get wires in. (3) Metallic hoses similar to the picture below are recommended for inlet and outlet pipes. -
Page 35: Installation Of Drain Hose
Unit Installation 4.4.4 Installation of drain hose Precautions: (1) The drain hose outlet is mounted at the right rear side of the unit. (2) The diameter of the drain hose should be equal to or greater than the diameter of the connecting pipe (3) Keep at least 1/100 inclination for the drain hose. - Page 36 Unit Installation (2) In order for better sealing effect, before connection they should be wrapped with Teflon tape. (3) After the connector, the water valve and the water pipes have been finished, you may start the water pump and see if they leak or not. (4) Insulate the water valve and the pipe with sponge.
-
Page 37: Electric Wiring
Unit Installation (2) There are direct pass and bypass for the water valve and they can be selected based on actual conditions. See the figure below for the working principle for the water valve. Power lines Switch Outlet pipe Bypass Inlet pipe 5 Electric wiring 5.1 Precautions for electric wiring... -
Page 38: External Wiring Diagram
Unit Installation 5.3 External wiring diagram Note: The wiring diagram as shown above is just for reference. Those struck to the main body of the unit always prevail for repair and maintenance. - Page 39 Test Operation, Troubleshooting and Maintenance Test Operation, Troubleshooting and Maintenance...
-
Page 40: Test Operation, Troubleshooting And Maintenance
Test Operation, Troubleshooting and Maintenance TEST OPERATION, TROUBLESHOOTING AND MAINTENANCE 1 Commissioning Preparation ◆ Disconnect all power electricity before servicing. Install control lines and electric lines properly. Turn on all stop valves. Remove distributed stuff including scrap metal, line ends and forceps clips. Steps ◆... -
Page 41: Maintenance
Unit Installation Symptoms Possible causes Corrective measures The condensate pipe is clogged. Clean the drain pipe. Adjust the unit and let the unit keep The unit is not installed as required. a certain inclination degree. Do humidification and do not let the The environmental air humidity is too Water leaks. - Page 42 Unit Installation (4) Loosen screws to take away the panels. (6) Use an inner hexagonal spanner to loosen screw to take out fan blades from the motor. (7) Loosen two screws of the electric box to remove it. Take out connecting tabs between terminal (5) Press clasps hard to take away volute blocks and capacitors.
-
Page 43: Replacement Of Cooling Coil
Unit Installation 3.2 Replacement of cooling coil (1) Loosen screws of the grille move it towards (4) Loosen screws between the right seal panel right and then up. and heat exchangers to take away the seal panel. (5) Remove the defrosting pan and then the (2) Loosen screws to take away the panels. - Page 44 Add: West Jinji Rd, Qianshan, Zhuhai,Guangdong, China, 519070 Tel: (+86-756) 8522218 Fax: (+86-756) 8669426 E-mail: global@cn.gree.com www.gree.com For continuous improvement in the products, Gree reserves the right to modify the product specification and appearance in this manual without notice and without incurring any obligation. JF00304523...
Need help?
Do you have a question about the FP-22LM/D-K and is the answer not in the manual?
Questions and answers