Table of Contents
Advertisement
Vita Heat Pump
Operation Manual
Cooling Only System :
GWC09ATCXB-D3DNA3A/I - GWC09ATCXB-D3DNA1A/O
GWC12ATCXB-D3DNA3C/I - GWC12ATCXB-D3DNA1C/O
GWC18ATDXD-D3DNA3A/I - GWC18ATDXD-D3DNA1A/O
GWC24ATEXF-D3DNA3E/I - GWC24QEXF-D3DNC4C/O
Heat Pump System (115 V) :
GWH09ATCXB-A3DNA3A/I - GWH09ATCXB-A3DNA1A/O
GWH12ATCXB-A3DNA3C/I - GWH12ATCXB-A3DNA1C/O
Heat Pump System (230 V) :
GWH09ATCXB-D3DNA3A/I - GWH09ATCXB-D3DNA1A/O
GWH12ATCXB-D3DNA3C/I - GWH12ATCXB-D3DNA1C/O
GWH18ATDXD-D3DNA3A/I - GWH18ATDXD-D3DNA1A/O
GWH24ATEXF-D3DNA3E/I - GWH24QEXF-D3DNC4C/O
Freematch Indoor Units :
GWH(05)ATA-D3DNA3A/I
GWH(07)ATA-D3DNA3A/I
IMPORTANT : Please read this manual
carefully before running this unit, and
save it for future reference.
© Copyright, GREE Canada, 2022
01122022
Advertisement
Table of Contents

Subscribe to Our Youtube Channel
Related Manuals for Gree Vita GWC09ATCXB-D3DNA3A/I


Summary of Contents for Gree Vita GWC09ATCXB-D3DNA3A/I
- Page 1 GWH09ATCXB-D3DNA3A/I - GWH09ATCXB-D3DNA1A/O GWH12ATCXB-D3DNA3C/I - GWH12ATCXB-D3DNA1C/O GWH18ATDXD-D3DNA3A/I - GWH18ATDXD-D3DNA1A/O GWH24ATEXF-D3DNA3E/I - GWH24QEXF-D3DNC4C/O Freematch Indoor Units : GWH(05)ATA-D3DNA3A/I GWH(07)ATA-D3DNA3A/I IMPORTANT : Please read this manual carefully before running this unit, and save it for future reference. © Copyright, GREE Canada, 2022 01122022...
-
Page 3: Table Of Contents
Thank you for your purchase ! This manual is the universal version for this product manu- factured by GREE Canada. The appearance of the unit that you have purchased may differ from the one shown in this manual, however it does not change the basic guidelines on how to properly operate this appliance. -
Page 4: Safety Guidelines
SAFETY GUIDELINES SAFETY SYMBOLS DESCRIPTION The following symbols are used throughout this manual to indicate immediate or potential hazards. It is the owner’s responsibility to read and follow all safety information and instructions accompanying these sym- bols. Failure to heed safety information increases the risk of serious injury or death, property damage and/ or product damage. -
Page 5: Compliance Statements
SAFETY GUIDELINES COMPLIANCE STATEMENTS WARNING : GREE Canada has not approved any changes or modifications to this device by the user. Any changes or modifications could void the user’s authority to operate the equipment. FEDERAL COMMUNICATIONS COMMISSION (FCC) REGULATIONS This device complies with part 15 of the FCC Rules. Operation is subject to the following two conditions : (1) this device may not cause harmful interference, and (2) this device must accept any interference re- ceived, including interference that may cause undesired operation. -
Page 6: Operations And Maintenance Safety Instructions
SAFETY GUIDELINES OPERATION AND MAINTENANCE SAFETY INSTRUCTIONS CAUTION : ▪ This appliance is not intended for use by persons ▪ Do not stand or step on the outdoor unit casing, or (including children) with reduced physical, sen- place heavy objects on it. This could cause dam- sory or mental capabilities or lack of experience age or personal injury. -
Page 7: Component Summary
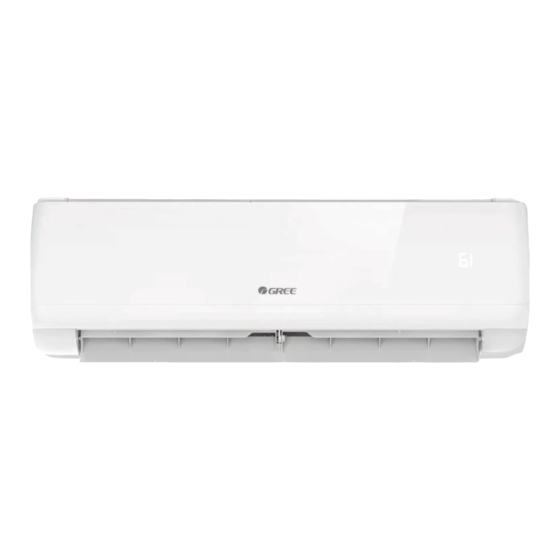
COMPONENT SUMMARY INDOOR UNIT Front panel Upper airflow deflector Lower airflow deflector Air outlet Air inlet Display (see below) Dust filter Directional louvers (inside) Emergency button Front Panel Display NOTE : The content of the display and the colours 11 Temperature indicator and shapes of the indica- 12 Power indicator tors may vary. -
Page 8: Operation Guide
OPERATION GUIDE REMOTE CONTROL BUTTONS Activates or desactivates POWER Turns the unit ON or OFF I FEEL I Feel function TIMER-ON / Increases temperature or timer Allows to set a switch-on or delay TIMER-OFF switch-on timer Decreases temperature or timer HEALTH / Activates or desactivates Heath SCAVENGING... -
Page 9: Remote Control Display Screen Indicators
OPERATION GUIDE REMOTE CONTROL DISPLAY SCREEN INDICATORS Scavenging mode I Feel function X-Fan function Set fan speed Set temperature Turbo mode Indoor ambient temperature Sending signal Temp. display type Outdoor ambient temperature Auto mode Clock Cooling mode Temperature display Drying mode WiFi function Ventilation mode Time display... -
Page 10: Basic Operating Instructions
OPERATION GUIDE BASIC OPERATING INSTRUCTIONS BATTERY REPLACEMENT 1. Remove the battery compartment cover from the back of the remote control by lifting it in the direction of the arrow. 2. Take out the depleted batteries. 3. Insert two new 7# AAA (1.5 V) dry batteries, making sure to match the polarity markings (+ and –) shown on the remote control. -
Page 11: Function Description And Setting
OPERATION GUIDE FUNCTION DESCRIPTION AND SETTING ▪ This remote control is for general use. It can be used for multi-function heat pumps and air conditioners. For the functions that the model does not have, if you press the corresponding button on the remote con- trol, the unit will keep its initial operating status. - Page 12 OPERATION GUIDE Ventilation Mode : In this operation mode, the unit will blow uncooled/unheated air. Set temperature cannot be adjusted. Heating Mode : In this operation mode, the unit will heat the room to the desired temperature. NOTE : To prevent cold air from being blown into the room as Heating mode is started, the indoor unit will delay blowing air for 1 to 5 minutes in order to preheat the air (the actual delay time depends on indoor ambient temperature).
- Page 13 OPERATION GUIDE TURBO MODE Allows the indoor unit to run at super-high fan speed to cool or heat so that the ambient temperature reaches the set temperature much quicker. While Cooling or Heating mode, press the TURBO button ( ) in the remote control to activate the function. The symbol "...
- Page 14 OPERATION GUIDE Holding the button down continuously for more than 2 seconds will cause the airflow deflectors and louvers to automatically swing back and forth, and sides to sides. When the button is released, the unit stops swing- ing at the current angle, providing the user with a personalized fixed angle. NOTE : Some angle options are only available for certain models.
- Page 15 OPERATION GUIDE on the display screen of the remote control. Once activated, the remote control will transmit the ambient temperature measured at its location to the indoor unit and the unit will automatically adjust its operation in accordance to the transmitted temperature. Pressing the button again will deactivate the I Feel function. Once activated, the user should keep the remote control in close proximity for the function to be effective.
- Page 16 WIFI FUNCTION Allows the user to control the unit remotely from their smartphone or tablet using the GREE+ App. Press the WIFI button ( ) on the remote control to activate the function. The word “ WiFi ” will appear on the display screen of the remote control.
- Page 17 OPERATION GUIDE INDOOR UNIT DISPLAY SETTING Allows the indoor unit to display of the temperature and power indicators on its front panel. Press the LIGHT button ( ) on the remote control to turn on the display of the indoor unit’s front panel. Press the button again to turn off the display.
- Page 18 OPERATION GUIDE signal being sent. ▪ The Sleep and 8 °C Heating functions cannot operate concurrently. If 8 °C Heating has been previously activated, activating Sleep mode will automatically cancel the 8 °C Heating function. Conversely, if a Sleep mode has been previously set, activating the 8 °C Heating function will automatically cancel the Sleep function.
- Page 19 OPERATION GUIDE POWER LIMIT MODE Allows the system to limit the maximum output power. Press the MODE ( ) and SLEEP ( ) buttons simultaneously on the remote control to select the desired Power Limit mode. With each press of the buttons, the setting options cycle through in the following order : Power Power Limit 1...
-
Page 20: Maintenance
MAINTENANCE WARNING : ▪ Turn off the unit and unplug the power supply before cleaning to avoid electric shock. ▪ Do not wash the indoor unit with water to avoid electric shock. ▪ Do not use volatile liquid to clean the indoor unit. ▪... -
Page 21: Pre And Post Season Maintenance
MAINTENANCE PRE AND POST SEASON MAINTENANCE PRE-SEASON 1. Clean the indoor unit and the dust filter. 2. Check for obstructions at the air inlet and outlet of the indoor and outdoor units. 3. Check that the drain pipe is not blocked or damaged. 4. -
Page 22: Troubleshooting
If your unit is performing abnormally or appears to be malfunctioning, please first review the following diag- nostics before requesting service. It may be that a simple fix will solve your problem. However, if the prob- lem persists, call 1 800 686-2175 or send an email to proservice@gree.ca for assistance. SITUATION... - Page 23 TROUBLESHOOTING The set temperature The temperature you require may exceed the Set the temperature between a minimum of 16 °C (61 °F) to a cannot be adjusted. setting range of the unit. maximum of 30 °C (86 °F). A function or mode currently enabled may be Some functions (e.g.
-
Page 24: Warranty
Canada. During the warranty period, if the appliance fails under normal use, GREE Canada will, at its option, either repair the unit or replace it, free of charge, within a reasonable period of time after the product is returned.
Need help?
Do you have a question about the Vita GWC09ATCXB-D3DNA3A/I and is the answer not in the manual?
Questions and answers