Table of Contents
Advertisement
Available languages
Available languages
Quick Links
Examine all packaging material for small parts that may have come loose during shipment. Periodic checks are recommended to insure that all
components are in proper position, tight and free from damage. Keep this assembly instruction for future reference. Adult assembly is required.
The product of Hillsdale Furniture, LLC is designed for residential use only. Customer Service Phone Number: 502-562-0000
Wood Screws 30mm
A
(8)
Allen Bolts
B
(10)
1
C
(10)
Flat Washers
Spring Washers
D
(10)
Allen Wrench
E
(1)
Back Panel
F
(1)
Side Panels
G
(2)
Front Rail
H
(1)
Rear Rail
I
(1)
Plywood Slats
J
(14)
Begin assembly by
attaching the Back Panel
(F) to the back of each
Side Panel (G) by aligning
the holes and securing with
1 Allen Bolt (B), 1 Spring
Washer (D) & 1 Flat
Washer (C) from the
backside per each end. Do
not fully tighten bolts for
this step.
STEP 2 - See Figure 1
Next attach the Rear Rail
(I) to the back of each Side
Panel (G) by aligning the
holes and securing with 2
Allen Bolts (B), 2 Spring
Washers (D) and 2 Flat
Washers (C) per each end.
Do not fully tighten bolts for
this step.
A
G
CARE & MAINTENANCE: The touch of a soft cloth is all the maintenance the finish will ever need. Please do not use harsh or abrasive cleaners for polishing,
as they may cause damage to the finish. Periodic checks are recommended to make sure that all hardware is securely tightened.
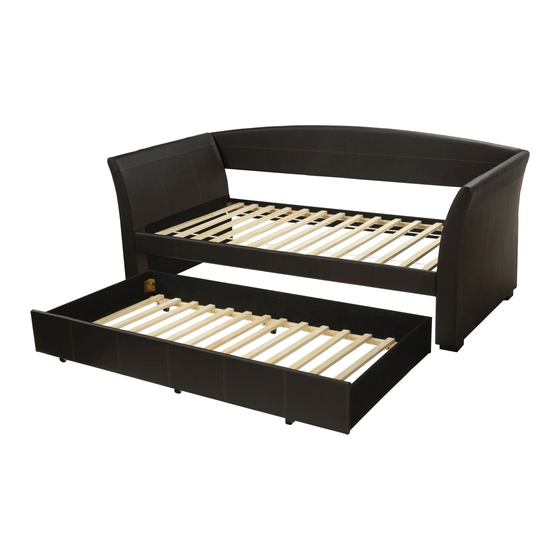
MONTGOMERY DAYBED
1560-010A Side Panels • 1560-010CA Side Panels • 1212-010 White PU Side Panels
1560-020A Back Panel • 1560-020CA Back Panel • 1212-020 White PU Back Panel
/
"
x 50mm
4
1
/
"
4
1
/
"
4
1
/
"
4
G
C C
C C
F
A
A
A
A
I
J
A
A
*
Trundle Sold Separately
Model #1021-030 Trundle Panel
PART
QTY
A
8
C
10
E
1
C C
D D
D D
B B
H
B B
D D
B B
B
D D
A
FIGURE 2
G
A
A
A
A
A
A
A
A
H
HARDWARE
PART
B
D
B B
D D
C C
F
B B
D D
C C
B B
I
B B
D D
C C
D D
C C
C C
STEP 3 - See Figure 1
Attach the Front Rail (H) to
the inside of each Side Rail in
the front by aligning the holes
and securing with 2 Allen
Bolts (B), 2 Spring Washers
(D) and 2 Flat Washers (C)
per each end. Tighten all bolts
from Steps 1 through 3 using
the Allen Wrench (E) that has
been provided.
STEP 4 - See Figure 2
Insert both ends of each
Plywood Slat (J) onto the
Front and Rear Rails (H & I)
and secure with 8 Wood
Screws (A) with philips head
screwdriver (not included).
The assembly is now
complete.
Date: 07-01-2013
Page 1 of 1
QTY
HARDWARE
10
10
FIGURE 1
C C
D D
B B
G
Advertisement
Table of Contents

Related Manuals for Hillsdale Furniture MONTGOMERY DAYBED 1560-010A


Summary of Contents for Hillsdale Furniture MONTGOMERY DAYBED 1560-010A
- Page 1 Keep this assembly instruction for future reference. Adult assembly is required. The product of Hillsdale Furniture, LLC is designed for residential use only. Customer Service Phone Number: 502-562-0000 HARDWARE LIST...
- Page 2 Examine all packaging material for small parts that may have come loose during shipment. Periodic checks are recommended to insure that all components are in proper position, tight and free from damage. Keep this assembly instruction for future reference. Adult assembly is required. The product of Hillsdale Furniture, LLC is designed for residential use only. Customer Service Phone Number: 502-562-0000...
- Page 3 MONTGOMERY LIT DE JOUR Date: 06-10-2013 1560-010A Panneaux Latéraux • 1560-010CA Panneaux Latéraux • 1212-010 Pu Blanc Panneaux Latéraux Page 1 of 1 1560-020A Panel • Panneau 1560-020CA Retour • 1212-020 White Pu Panneau Arrière Retour Examinez tous les matériaux d'emballage pour les petites pièces qui peuvent avoir bougé durant le transport. Des vérifications périodiques sont recommandées afin de s'assurer que tous les composants sont en bonne position, tendu et sans dommages.
- Page 4 MONTGOMERY LIT DE JOUR Date: 05-31-2013 1560-030A Trundle Panel • 1560-030CA Trundle Panel • 1212-030 White PU Trundle Page 1 of 1 Exclusivement Pour Montgomery Banquette: 1560-010CA / 1560-020CA (Vendu Séparément) Exclusivement Pour Montgomery Banquette: 1560-010A / 1560-020A (Vendu Séparément) Examinez tous les matériaux d'emballage pour les petites pièces qui peuvent avoir bougé...
Need help?
Do you have a question about the MONTGOMERY DAYBED 1560-010A and is the answer not in the manual?
Questions and answers