
Related Manuals for Empava EMPV-IDC24


Summary of Contents for Empava EMPV-IDC24
- Page 1 Induction Cooktop Instruction Manual / Installation Manual MODEL: EMPV-IDC12 EMPV-IDC24 EMPV-IDC30 EMPV-IDC36 EMPV-IDCF9...
-
Page 2: Safety Warnings
SAFETY WARNINGS PLEASE READ THE FOLLOWING INSTRUCTIONS CAREFULLY BEFORE USING THE APPLIANCE. Installation Electrical Shock Hazard • Disconnect the appliance from the mains electricity supply before carrying out any work or maintenance on it. • Connection to a good earth wiring system is essential and mandatory. -
Page 3: Health Hazard
• This appliance is to be properly installed and earthed only by a suitably qualified person. • This appliance should be connected to a circuit which incorporates an isolating switch providing full disconnection from the power supply. • WARNING: Use only cooktop guards designed by the manufacturer of the cooking appliance or indicated by the manufacturer of the appliance in the instructions for use as suitable or cooktop guards incorporated in the appliance. - Page 4 • During use, accessible parts of this appliance will become hot enough to cause burns. • Do not let your body, clothing or any item other than suitable cookware contact the ceramic glass until the surface is cool. • Metallic objects such as knives, forks, spoons and lids should not be placed on the cooktop surface since they can get hot •...
- Page 5 • Do not store items of interest to children in cabinets above the appliance. Children climbing on the cooktop could be seriously injured. • Do not leave children alone or unattended in the area where the appliance is in use. •...
- Page 6 • Care should be taken to avoid touching heating elements. • Children less than 8 years of age shall be kept away unless continuously supervised. • This appliance can be used by children aged from 8 years and above and persons with reduced physical, sensory or mental capabilities or lack of experience and knowledge if they have been given supervision or instruction concerning use of the appliance in a safe way and understand the...
- Page 7 Connecting the cooktop to the main power supply The power supply should be connected in compliance with the relevant standard, or a single-pole circuit breaker. The method of connection is shown as below. For 4-wire cable from home power supply For 3-wire cable from home power supply If the cable is damaged or needs replacing, this should be done by an after-sales technician using the proper tools, so as to avoid any accidents.
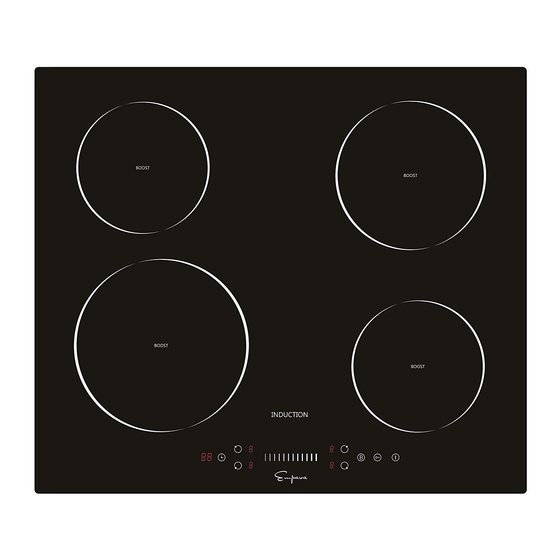
- Page 8 EMPV-IDC12 1. max. 1.71/1.99 Btu/s 2. max. 1.14/1.42 Btu/s 3. max. 1.71/1.99 Btu/s 4. max. 1.14/1.42 Btu/s 5. Control panel EMPV-IDC24 1. max. 1.14/1.42 Btu/s 2. max. 2.18/2.84 Btu/s 3. max. 1.71/1.99 Btu/s 4. max. 1.14/1.42 Btu/s 5. Control panel...
- Page 9 1. max. 1.71/1.99 Btu/s 2. max. 1.14/1.42 Btu/s 3. max. 2.18/2.84 Btu/s 4. max. 1.71/1.99 Btu/s 5. max. 1.14/1.42 Btu/s 6. Control panel EMPV-IDC36 1. max. 1.71/1.99 Btu/s 2. max. 1.71/1.99 Btu/s 3. max. 1.71/1.99 Btu/s 4. max. 1.71/1.99 Btu/s 5.
-
Page 10: The Control Panel
The Control Panel EMPV-IDC12 EMPV-IDC24 EMPV-IDC30 1. ON/OFF switch 4. Child lock 7. Keep warm 2. Select power level 5. Select heating zone 8. Pause 3. Setting the timer 6. Boost control EMPV-IDC30... -
Page 11: On/Off Switch
EMPV-IDC36 EMPV-IDCF9 1. ON/OFF switch 4. Child lock 7. Keep warm 2. Select power level 5. Select heating zone 8. Pause 3. Setting the timer 6. Boost control Product Information The ceramic/induction cooktop can meet different kinds of cuisine demands because of resistance wire heating, micro-computerized control and multi-power selection, really the optimal choice for modern families. -
Page 12: Before Using Your New Cooktop
indirectly through heating the glass surface. The glass becomes hot only because the pan eventually warms it up. iron pot magnetic circuit ceramic glass plate induction coil induced currents Before using your New Cooktop • Read this guide, taking special note of the ‘Safety Warnings’ section. Remove any protective film that may still be on your ceramic cooktop. -
Page 13: Using Your Cooktop
3. If does not flash in the display and the water is heating, the pan is suitable. Cookware made by the following materials is not suitable: pure stainless steel, • aluminum or copper without a magnetic base, glass, wood, porcelain, ceramic, and earthenware. -
Page 14: When You Have Finished Cooking
3. Touching the heating zone selection control, and an indicator next to the key will flash 4. Select a heat setting by touching the “-”、 “+” Or touching the “slider” control. If you don’t choose a heat setting within 1 minute, the Induction cooktop will •... -
Page 15: Activate The Boost Function
Using Boost function For EMPV-IDC24 EMPV-IDC30 EMPV-IDC36 Only Activate the boost function 1. Select the zone with boost function (front left zone). 2. Touching until power level indication shows “P”. Cancel Boost function 1. Select the zone with boost function (front left zone). -
Page 16: Using The Pause Function
Cancel the Keep Warm function Select the zone with the keep warm function (front left zone). Touching the “slider” to cancel the Keep warm function, and select the level you want to set. Using the Pause function For EMPV-IDC30 EMPV-IDC36 Only 1. -
Page 17: Locking The Controls
the flexi area is cancelled. Select the power level you want to set. Locking the Controls You can lock the controls to prevent unintended use (for example children • accidentally turning the cooking zones on). When the controls are locked, all the controls except the ON/OFF control are •... -
Page 18: Using The Timer As A Minute Minder
Using the Timer You can use the timer in two different ways: • You can use it as a minute minder. In this case, the timer will not turn any cooking zone off when the set time is up. • You can use it as cut-off timer to turn one or more cooking zones off after time is * You can set the timer up to 99 minutes. - Page 19 6. When the time is set, it will begin to count down immediately. The display will show the remaining time. 7. Buzzer will bips for 30 seconds and the timer indicator shows “- - “ when the setting time finished. Using the timer to switch off one or more cooking zones 1.
- Page 20 NOTE: There will be a red dot in the right bottom corner of power level indication which indicating that zone is selected. 7. When cooking timer expires, the corresponding cooking zone will be switched off automatically. Note: Other cooking zones will keep operating if they are turned on previously. If the timer is set on more than one zone: When you set timer for several cooking zones, red dots of the relevant cooking zones are indicated.
-
Page 21: Cooking Guidelines
Cooking Guidelines ke care when frying as the oil and fat heat up very quickly, particularly if you’re using Boost. At extremely high temperatures oil and fat will ignite spontaneously and this presents a serious fire risk. Cooking Tips When food comes to the boil, reduce the power setting. •... -
Page 22: Heat Settings
7. Stir the ingredients gently to make sure they are heated through. Serve immediately. Heat Settings Heat setting Suitability • delicate warming for small amounts of food 1 - 2 • melting chocolate, butter, and foods that burn quickly • gentle simmering •... -
Page 23: Hints And Tips
Boilovers, melts, and Remove these immediately with a fish • Remove stains left by melts and hot sugary spills on slice, palette knife or razor blade sugary food or spillovers as soon the glass scraper suitable for ceramic glass as possible. If left to cool on the cooktops, but beware of hot cooking glass, they may be difficult to zone surfaces:... -
Page 24: Failure Display And Inspection
The induction cooktop This is caused by the technology This is normal, but the noise should makes a low humming of induction cooking. quieten down or disappear completely noise when used on a high when you decrease the heat setting. heat setting. -
Page 25: Technical Specification
220-240V~ 50/60Hz Installed Electric Power 2.75 Btu/s Product Size D× W× H(in) 11.42x20.47x2.28 Building-in Dimensions A× B (in) 10.63x19.29 Induction Cooktop EMPV-IDC24 Cooking Zones 4 Zones Supply Voltage 220-240V~ 50/60Hz Installed Electric Power 6.82 Btu/s Product Size D× W× H(in) 23.62x20.47x2.28... -
Page 26: Selection Of Installation Equipment
Induction Cooktop EMPV-IDCF9 Cooking Zones 5 Zones Supply Voltage 220-240V~ 50/60Hz Installed Electric Power 9.67 Btu/s Product Size D× W× H(in) 35.43x20.47x2.28 Building-in Dimensions A× B (in) 33.86x19.29 Weight and Dimensions are approximate. Because we continually strive to improve our products we may change specifications and designs without prior notice. - Page 27 L(in) W(in) H(in) D(in) A(in) B(in) X(in) EMPV-IDC12 11.42 20.47 2.28 2.13 10.63 19.29 1.97mini EMPV-IDC24 23.62 20.47 2.28 2.13 22.05 19.29 1.97mini EMPV-IDC30 29.92 20.47 2.28 2.13 28.74 19.29 1.97mini EMPV-IDC36 35.43 20.47 2.28 2.13 33.86 19.29 1.97mini EMPV-IDCF9 35.43...
-
Page 28: Before Locating The Fixing Brackets
installed. You consult local building authorities and by-laws if in doubt regarding installation. • You use heat-resistant and easy-to-clean finishes (such as ceramic tiles) for the wall • surfaces surrounding the cooktop. When you have installed the cooktop, make sure that •... - Page 29 Cautions • The cooktop must be installed by qualified personnel or technicians. We have professionals at your service. Please never conduct the operation by yourself. • The cooktop shall not be mounted to cooling equipment, dishwashers and rotary dryers. • The cooktop shall be installed such that better heat radiation can be ensured to enhance its reliability.
- Page 32 This appliance is labeled in compliance with European directive 2002/96/EC for Waste Electrical and Electronic Equipment (WEEE). By ensuring that this appliance is disposed of correctly, you will help prevent any possible damage to the environment and to human health, which might otherwise be caused if it were disposed of in the wrong way.
Need help?
Do you have a question about the EMPV-IDC24 and is the answer not in the manual?
Questions and answers