
Related Manuals for Empava EMPV-IDCF9


Summary of Contents for Empava EMPV-IDCF9
- Page 1 USE AND CARE GUIDE Induction Cooktop Model: EMPV-IDCF9 Distributed by Empava Appliances Inc. Add:15253 Don Julian Road, City of Industry, CA, 91745 Tel:(888)682-8882 WWW.EMPAVA.COM...
-
Page 2: Table Of Contents
Cleaning Your Cooktop...................18 Troubleshooting Guide................19 20 Installation Instructions................21 26 Thank you for purchasing EMPAVA INDUCTION COOKTOP. Please read the entire instruction manual prior to using your unit. Before installation, record the model and serial number as found on the front of your cooktop. -
Page 3: Important Safety Instructions
Important Safety Instructions IMPORTANT Keep these instructions handy for future use. The appliance is manufactured in compliance with the relevant safety standard. Read all instructions carefully before installation and operation WARNING of the appliance. Failure to follow these warnings could result in a fire or explosion WARNING that causes property damage, personal injury or death. - Page 4 Important Safety Instructions WARNING IMPORTANT Cleaning Safety Environment of Unit To reduce the risk of fire, do not let any Do not use steam cleaners or high- objects(glass, paper, etc.) obstruct the pressure cleaners to clean the cooktop, inlet and outlet of your cooktop. as this may result in electric shock.
- Page 5 Important Safety Instructions Environment of Unit To reduce risk of burns, ignition of flammable materials, and spillage due Do not put detergents or flammable to unintentional contact with cookware, materials in the equipment installed the cookware handles should be turned under the cooktop .
- Page 6 Important Safety Instructions Service and Repair Safety WARNING Do not repair or replace any part of the appliance unless specifically recommended in the manual. All other services should be referred to a qualified technician. This product may not be treated as household waste. Instead it should be handed over to the applicable collection point for the recycling of electrical and electronic equipment.
-
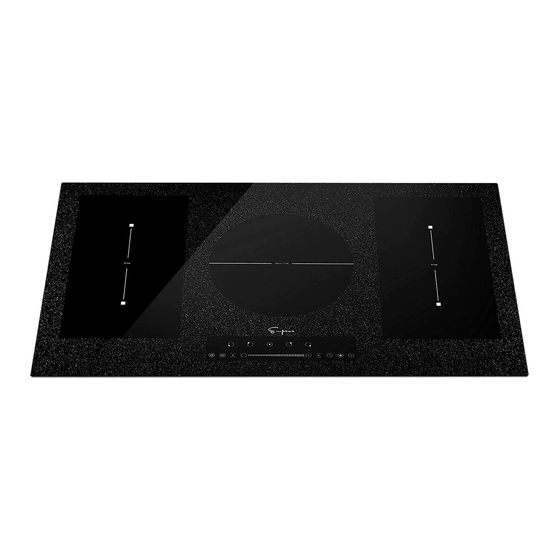
Page 7: Cooktop Features
Cooktop Features 1600W boost to 2000W 4. 1600W boost to 2000W 2. 2000W boost to 2500W 5. 2400W boost to 3700W 3. 2000W boost to 2500W 6. Flex zone,2500W boost to 3000W 7.Control panel Control Panel 1. Heating zone selection controls 5. - Page 8 Cooktop Features Specifications EMPV-IDCF9 Model Product dimension wxdxh inch 36" x 21" x " " x " Cut-out dimension(wxd) inch " x 20 " Voltage (volts) Frequency (Hz) Total power (Watts) 9300 Minimum circuit breaker Amperage Elements Front Left 2000W/2500W...
-
Page 9: Using The Cooktop
Using The Cooktop To start cooking By holding down either of these buttons, the value will adjust up or down. After power on, the buzzer beeps once, all the indicators light up for 1 second then go out, indicating that the induction cooktop has entered the state of standby mode. - Page 10 Using The Cooktop Power restrictions when using Beware of hot surfaces “H” will show which cooking zone is boost function hot to touch. It will disappear when the surface has cooled down to a safe The five zones were divided temperature.
- Page 11 Using The Cooktop Important: Make sure to place the To use the flexible area as two different cookwares centered on the single zones with different power settings, cooking zone. In case of big pot, oval, touching the”-” or sliding the setting rectangular and elon gated pans make selector and scrolling down to “0”...
- Page 12 Using The Cooktop Over-Temperature Protection Set the time by touching the “-” or “+” control or sliding The setting selector of the timer A temperature sensor equipped can monitor the temperature inside the induction hob. When an excessive temperature is monitored, the induction hob will stop operation automatically.
- Page 13 Using The Cooktop Setting the timer to turn more clean the unit. You may turn the Cooking Element back on even if the than one cooking zone off “H” is displayed. If more than one heating zone use this function, the timer indicator will show Stop/Go (e.g.
-
Page 14: Operational Cooktop Noises
Operational Cooktop Noises Cookware Noise The induction fields are generated by Cookware with irregular or warped electronics equipment, which are bottoms can vibrate audibly on the pretty much silent but they do produce ceramic glass surface, though again heat at high power level. A soft- typically only at high power settings. -
Page 15: Compatible Cookware
Compatible Cookware The quality of your cooking is dependent on the cookware you use. Because induction cooking requires a magnetic vessel for heating, only certain materials can be used on your cooktop. Induction requires pots and pans that are made of ferrous(meaning magnetic) materials. -
Page 16: Cleaning Your Cooktop
Cleaning Your Cooktop Please follow these directions along with Important Safety steps for cleaning, advised at the beginning of the manual. Use a ceramic glass cleaner on the glass cooktop. To maintain and protect the surface of your glass cooktop, follow these steps: Before using the cooktop for the first time, clean it to protect the top and makes cleanup easier. -
Page 17: Troubleshooting Guide
Troubleshooting Guide If you encounter the following problems while using your cooktop, check the guide below to see if you can correct the problem yourself before calling for assistance or service: Problem Possible Cause Solutions Cooktop controls are locked Make sure Lock mode is turned off Power outage Cooktop does not work... - Page 18 Troubleshooting Guide If you encounter the following problems while using your cooktop, check the guide below to see if you can correct the problem yourself before calling for assistance or service: Problem Possible Cause Solutions Boost function is not available if adjacent burner of the left See Power Sharing Power boost does not work...
-
Page 19: Installation Instructions
NOTE: Do not seal the cooktop to the countertop, the cooktop must be removable if service is necessary. Electrical Connection IMPORTANT Observe all governing codes and local ordinances. Model EMPV-IDCF9 needs 50 Amp service. Maximum Connected Load ..9.3 kW at 240VAC, 8.3 kW at 208VAC Model EMPV-IDC9F... - Page 20 Installation Instructions The Induction Cooktops must connect to a separate, grounded wire, single phase, AC Only electrical supply with their own circuit breaker. These appliances must be installed in accordance with National Electrical Codes, as well as all state, municipal and local codes. This appliance must be supplied with the proper voltage and frequency and amperage, which is protected by a properly sized circuit breaker or time delay fuse.
- Page 21 Installation Instructions IMPORTANT: Use the 4-wire cable from Home Power Supply where local codes do not allow grounding through neutral. Cable from Power Supply White Wire Black Wire Red Wire Junction Box Green Wire (Grounding) Cable from Appliance 4-Wire Cable from Home Power Supply Electrical ground is required on this appliance The cooktop conduit wiring is approved for copper wire WARNING...
- Page 22 Installation Instructions Installation — 36" (91.4cm) Model EMPV-IDCF9 Cooktop Dimensions B. Depth C. Height A. Width 36" 914 21" 533 "(55) * DO NOT obstruct these areas. Junction box Vent IMPORTANT: For perfect "(114) ventilation, provide a vent of Front...
- Page 23 Installation Instructions Spacer Graphic Pronfile Countertop Do not remove spacer NOTE:The cooktops include spacers on both sides to ensure proper airflow once installed.Do not remove the spacers.
- Page 24 Installation Instructions After Installation 1. Remove all the stickers and items from the top of the cooktop surface. 2. Clean cooktop before use. Dry with a soft cloth. See Cleaning Your Cooktop for reference. 3. Read Using The Cooktop. 4. Turn on the power to the cooktop. 5.
Need help?
Do you have a question about the EMPV-IDCF9 and is the answer not in the manual?
Questions and answers