Table of Contents

Related Manuals for Cabletron Systems 9A426-02


Summary of Contents for Cabletron Systems 9A426-02
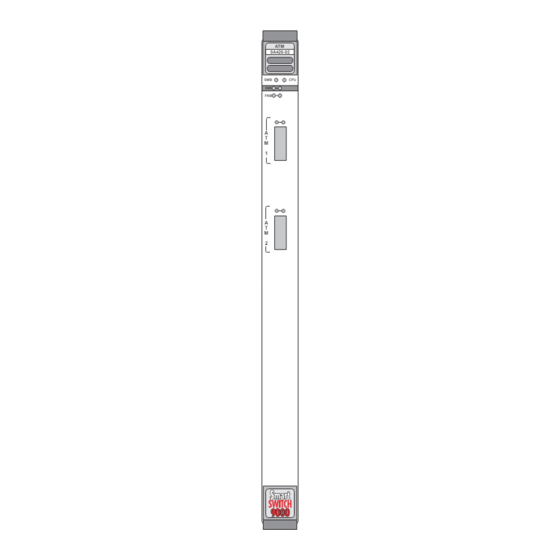
- Page 1 SmartSwitch 9000 9A426-02 User’s Guide 9031918-03...
- Page 3 Printed in the United States of America Order Number: 9031918-03 LANVIEW is a registered trademark, and SmartSwitch is a trademark of Cabletron Systems, Inc. CompuServe is a registered trademark of CompuServe, Inc. i960 microprocessor is a registered trademark of Intel Corp.
-
Page 4: Fcc Notice
Notice FCC Notice This device complies with Part 15 of the FCC rules. Operation is subject to the following two conditions: (1) this device may not cause harmful interference, and (2) this device must accept any interference received, including interference that may cause undesired operation. NOTE: This equipment has been tested and found to comply with the limits for a Class A digital device, pursuant to Part 15 of the FCC rules. -
Page 5: Declaration Of Conformity
Principal Compliance Engineer ____________________________________________________ Title Rochester, NH, USA ____________________________________________________ Location 89/336/EEC 73/23/EEC Cabletron Systems, Inc. 35 Industrial Way PO Box 5005 Rochester, NH 03867 Mr. J. Solari Cabletron Systems Limited Nexus House, Newbury Business Park London Road, Newbury Berkshire RG13 2PZ, England... - Page 6 Notice...
-
Page 7: Table Of Contents
Unpacking an APIM ... 2-5 Removing the 9A426-02 Module’s ATM-Port Retaining Plate... 2-5 Inserting an APIM into the 9A426-02 Module... 2-7 Attaching the 9A426-02 Module’s ATM-Port Retaining Plate ... 2-8 User-Accessible Components on the Module’s Daughterboard... 2-9 DIP Switch... 2-10 Removing the Daughterboard from the Motherboard... - Page 8 Contents Chapter 4 LANVIEW LEDs Chapter 5 Specifications Technical Specifications ... 5-1 CPU ... 5-1 Memory ... 5-1 Address Table Size ... 5-1 Power ... 5-1 Network Interfaces ... 5-1 Standards... 5-2 Safety... 5-2 Service ... 5-2 Physical ... 5-3 Dimensions ...
-
Page 9: Chapter 1 Introduction
Introduction The 9A426-02 ATM Module is a hardware-based switching module that supports multiple interfaces simultaneously. The module’s interconnecting interfaces include: • Up to two front panel ATM interfaces via user-installed ATM Port Interface Modules (APIMs) • A fixed interface to the SmartSwitch 9000’s Internal Network Bus (INB) •... -
Page 10: Features
Spanning Tree Protocol parameters. Connectivity The 9A426-02 Module has two front panel ATM interfaces. An ATM Port Interface Module (APIM) can be installed in one (or both) interface(s). The 9A426-02 Module also has one interface to the INB-2 backplane, and one user-configurable interface to the SmartSwitch 9000 FNB backplane (either FNB-1 or FNB-2, or neither). - Page 11 LANVIEW LEDs The 9A426-02 Module uses LANVIEW – Cabletron Systems built-in visual diagnostic and status monitoring system. With LANVIEW LEDs, you can quickly identify the device, port, and physical layer status at a glance. For a complete list of supported MIBs, refer to the release notes provided in the NOTE 9A426-02 Module package.
-
Page 12: Related Manuals
INB Terminator Modules Installation Guide SmartSwitch 9000 Local Management User’s Guide SmartSwitch 9000 9A426-01/9A426-02 Module-Specific Local Management Appendix Getting Help For additional support related to this device or document, contact the Cabletron Systems Global Call Center: Phone Internet mail Login... -
Page 13: Chapter 2 Preparing And Installing The 9A426-02 Module
Preparing and Installing the 9A426-02 Module This chapter describes the physical layout of the 9A426-02 Module and explains how to prepare and install the module in a SmartSwitch 9000 chassis. Never expose the module’s components to Electrostatic Discharge: Make sure you have attached the module’s disposable grounding strap to your wrist and always... -
Page 14: User-Accessible Components On The Module's Motherboard
Up Engines, up to two user-installed ATM Memory Upgrade SRAM SIMMs, and up to two user-installed ATM Port Interface Modules The User Accessible Components on the motherboard of a 9A426-02 Module are NOTE positioned in close proximity to one another. Therefore, to attain easier access for removing a desired component, you may opt to remove an additional component. -
Page 15: Look-Up Engines
Figure 2-2. User Accessible Components on the 9A426-02 Module’s motherboard Look-Up Engines The 9A426-02 Module is shipped with two look-up engines (one for each front panel port). These components are located at the front section of the module as shown in Figure 2-2. Each Look-Up Engine stores MAC Address/Virtual Channel Pairings. -
Page 16: Sram Simms
Preparing and Installing the 9A426-02 Module SRAM SIMMs Each front panel port on the 9A426-02 Module is equipped with two megabytes of Static Random Access Memory(SRAM). To increase the SRAM of a front panel port, install the SRAM SIMM from the ATM Memory Upgrade Kit (ATM-MEM-UGK) in the port’s corresponding SIMM... -
Page 17: Unpacking An Apim
APIM aside, and proceed. Removing the 9A426-02 Module’s ATM-Port Retaining Plate To install an APIM properly in the 9A426-02 Module, you MUST remove the module’s ATM-Port Retaining Plate. Failure to do so can damage the module and WARNING the APIM. - Page 18 Preparing and Installing the 9A426-02 Module ATM-Port Retaining Plate ATM-Port Retaining Plate Figure 2-4. The 9A426-02 Module (APIM installation area in insert)
-
Page 19: Inserting An Apim Into The 9A426-02 Module
5. Locate the APIM’s 80-pin (female) connector (see Figure 2-3). 6. Align the APIM’s female connector with the 80-pin male connector in the APIM area of the 9A426-02 Module. Also align the APIM’s mounting holes with the four standoffs in the APIM area of the module (see Figure 2-6). -
Page 20: Attaching The 9A426-02 Module's Atm-Port Retaining Plate
Preparing and Installing the 9A426-02 Module Figure 2-6. Attaching an APIM to a 9A426-02 Module 7. Press down gently on the APIM to lock its female connector into the 9A426-02 Module’s male connector. 8. Secure the APIM to the module: Use a Phillips-head screwdriver to attach four round-head screws to the four standoffs on the 9A426-02 Module. -
Page 21: User-Accessible Components On The Module's Daughterboard
Figure 2-7. Attaching the ATM-Port Retaining Plate to the 9A426-02 Module User-Accessible Components on the Module’s Daughterboard The user accessible components on the module’s daughterboard are located on the underside of the daughterboard. These components include an eight position DIP switch, a replaceable SMB-1 PROM, a replaceable BOOT PROM, and sockets for DRAM and FLASH memory. -
Page 22: Dip Switch
DIP Switch An eight-position DIP switch is located on the module’s daughterboard as shown in Figure 2-8. The functions of the switches are listed in Table 2-1. Figure 2-8. Location of DIP Switch on the 9A426-02 Module’s Daughterboard 2-10 DIP Switch... - Page 23 Reserved Reserved Reserved Reserved Do not toggle Switch 8 unless you intend to reset the user configured passwords to their factory default settings. Do not toggle Switch 7 unless you intend to reset the user parameters to the factory CAUTION default settings.
-
Page 24: Removing The Daughterboard From The Motherboard
Preparing and Installing the 9A426-02 Module Removing the Daughterboard from the Motherboard Never expose the module’s components to Electrostatic Discharge. Make sure you have attached the module’s disposable grounding strap to your wrist and always WARNING place the module on a non-conductive surface. - Page 25 Preparing and Installing the 9A426-02 Module securing screws Figure 2-9. Daughterboard Attached to the 9A426-02 Module 2-13...
- Page 26 DIP Switch Figure 2-10. User-Accessible Components on Underside of Daughterboard SMB-1 PROM The 9A426-02 Module is shipped with an SMB-1 Firmware PROM. The SMB-1 Firmware PROM is located on the underside of the module’s daughterboard as shown in Figure 2-10.
-
Page 27: Installing The Module Into The Smartswitch 9000 Chassis
To install the 9A426-02 Module into the SmartSwitch 9000 Chassis, follow the steps below: To insure proper data transmission from the 9A426-02 Module to the INB on the NOTE SmartSwitch 9000 backplane, two INB Terminator Modules must be installed on the rear of the SmartSwitch 9000 chassis. - Page 28 Preparing and Installing the 9A426-02 Module 2. Attach one end of the ESD wrist strap packaged with the SmartSwitch 9000 chassis to your wrist. Plug the other end into the ESD Wrist Strap Grounding receptacle in the lower right corner of the SmartSwitch 9000 Chassis shown in Figure 2-11.
- Page 29 Ensure that the circuit card is between the card guides. Lock down the top and bottom plastic tabs at the same time, applying even pressure. Figure 2-11. Installing the 9A426-02 Module Preparing and Installing the 9A426-02 Module Plastic Tab Jack for ESD...
-
Page 30: The Reset Switch
Preparing and Installing the 9A426-02 Module The Reset Switch The Reset switch is located under the top plastic tab as shown in Figure 2-12. Use the reset switch to reset the module’s processor, shutdown (power down) the module, and/or restart the module. -
Page 31: Chapter 3 Operation
Chapter 3 Operation The 9A426-02 Module has three fixed network interface connections: the module’s two front panel ATM ports, and the module’s INB interface each connect to the module’s SmartSwitch ASIC core. In addition to fixed interface connections, the module offers a user-configurable FNB interface. - Page 32 Operation Front Panel Interface Interface Interface Interface Interface Interface SmartSwitch Core (ASICs) ATM/FNB-1 Configuration SmartSwitch Core (ASICs) ATM/FNB-2 Configuration SmartSwitch Core (ASICs) ATM/No FNB Configuration Figure 3-1. Configuration Options Backplane FNB-1 Interface FNB-2 Interface Interface FNB-1 Interface FNB-2 Interface Interface FNB-1 Interface FNB-2...
-
Page 33: Lan Emulation
LAN Emulation The 9A426-02 Module interconnects LANs over an ATM network through a method known as LAN Emulation. LAN Emulation, or LANE, is a method that makes a connection-orientated ATM network look and behave like a shared connectionless Ethernet or Token Ring LAN Segment. Unlike other... -
Page 34: Smb-10 Bus
LCD located on the environment module. The 9A426-02 Module has been designed so that in the event of a diagnostic controller fault, the 9A426-02 Module will continue to function. -
Page 35: Fddi Network Interface Block
FDDI Network Interface Block The 9A426-02 Module’s FNB Interface includes an FDDI Network Interface Block (FNIB). Canonical frames processed by the module’s SmartSwitch ASIC core that are destined for one of the two FNBs on the SmartSwitch 9000’s backplane are first converted by the FNIB into FDDI packets and then transmitted onto the... -
Page 36: I960 Core
The host engine sends and receives packets via the CPU SmartSwitch ASIC Interface. This method allows the traditional switch to perform spanning tree protocol and other traditional switching functions. The SMB Interfaces provide communication to the Host Engine for management functions and... -
Page 37: Lanview Leds
LANVIEW LEDs The front panel LANVIEW LEDs indicate the status of the module and aid in troubleshooting the module. The LANVIEW LEDs of the 9A426-02 Module are shown in Figure 4-1. INB Receive FNB Receive ATM Receive ATM Receive Figure 4-1. The LANVIEW LEDs of the 9A426-02 Module... - Page 38 LANVIEW LEDs The functions of the System Status (SMB and CPU) LEDs are listed in Table 4-1. Table 4-1. System Status (SMB and CPU) LEDs LED Color Green Yellow/Green Yellow Yellow (Flashing) Red (Flashing) The status of the INB Receive LED is listed in Table 4-2. LED Color Green Yellow (Flashing)
- Page 39 The status of the FNB Receive LED is listed in Table 4-4. Table 4-4. FNB Receive LED LED Color Green Yellow (Flashing) Red (Flashing) The status of the FNB Transmit LED is listed in Table 4-5. Table 4-5. FNB Transmit LED LED Color Green (Flashing) Yellow (Flashing)
- Page 40 LANVIEW LEDs The status of the ATM Transmit LED is listed in Table 4-7. LED Color Green (Flashing) The following section lists the conditions of the APIM status (STS) and link (LNK) LANVIEW LED’s. An example showing the location of LANVIEW LEDs on an APIM is presented in Figure 4-2.
- Page 41 The status of the APIM Link (LNK) LED is listed in Table 4-9. Table 4-9. APIM Link (LNK) LED LED Color Green Link is established Amber Off, no link Off, no link LANVIEW LEDs State...
- Page 42 LANVIEW LEDs...
-
Page 43: Chapter 5 Specifications
Specifications Technical Specifications Intel i960 RISC-based microprocessor Memory Main Memory: Flash Memory: Address Table Size 16,000 entries (expandable) Power 100 - 125 VAC or 200 - 250 VAC @ 50 - 60 Hz Network Interfaces APIM Connectors 16 Mb standard (expandable) 4 Mb standard (expandable) Chapter 5... -
Page 44: Standards
Specifications Standards ATM Forum UNI v3.0/3.1 ITU I.361 ATM Layer Q.2931 LAN Emulation v1.0 Safety It is the responsibility of the person who sells the system to which the module will be a part to ensure that the total system meets allowed limits of conducted and radiated emissions. -
Page 45: Physical
Physical Dimensions 35.0 D x 44.0 H x 6.0 W centimeters (13.8 D x 17.4 H x 1.2 W inches) Weight Unit: Shipping: Environment Operating Temperature: +5° to 40° C (41° to 104° F) Storage Temperature: Relative Humidity: 4.525 kgs. (10 lbs.) <6.787 kgs. - Page 46 Specifications...
Need help?
Do you have a question about the 9A426-02 and is the answer not in the manual?
Questions and answers