Advertisement
Quick Links
Built-In Electric Cooktop Manual
Ceramic Cooktop:
EMPV-12REC10
EMPV-24REC11
EMPV-30REC12
EMPV-30REC13
EMPV-36REC14
Induction Cooktop:
EMPV-30EC04
EMPV-36EC05
Designed and Engineered in USA
Distributed by Empava Appliances Inc.
Add: 15253 Don Julian Road, City of Industry, CA, 91745 USA
Tel:(888)682-8882
WWW.EMPAVA.COM
Advertisement

Subscribe to Our Youtube Channel
Related Manuals for Empava EMPV-12REC10


Summary of Contents for Empava EMPV-12REC10
- Page 1 Built-In Electric Cooktop Manual Ceramic Cooktop: EMPV-12REC10 EMPV-24REC11 EMPV-30REC12 EMPV-30REC13 EMPV-36REC14 Induction Cooktop: EMPV-30EC04 EMPV-36EC05 Designed and Engineered in USA Distributed by Empava Appliances Inc. Add: 15253 Don Julian Road, City of Industry, CA, 91745 USA Tel:(888)682-8882 WWW.EMPAVA.COM...
- Page 2 CONTENTS: Part 1. Safety Warnings Part 2. Installation Part 3. Operation Instructions Part 4. Cleaning and Maintenance...
- Page 3 Congratulations on the purchase of your new cooktop and thank you for choosing us! Please read all instructions carefully before use. Part 1. Safety Warnings Safety Warnings Your safety is important to us. Please read below information carefully before installing or using your Cooktop. Important –...
- Page 4 • Disconnect the appliance from the mains electricity supply before carrying out any work or maintenance on it. • Connection to a good earth wiring system is essential and mandatory. • Alterations to the domestic wiring system must only be made by a qualified electrician. •...
- Page 5 instructions for installation. • This appliance is to be properly installed and earthed only by a suitably qualified person. • This appliance should be connected to a circuit which incorporates an isolating switch providing full disconnection from the power supply. •...
- Page 6 electromagnetic safety standards. • However, persons with cardiac pacemakers or other electrical implants (such as insulin pumps) must consult with their doctor or implant manufacturer before using this appliance to make sure that their implants will not be affected by the electromagnetic field.
- Page 7 • Do not let your body, clothing or any item other than suitable cookware contact the ceramic glass until the surface is cool. • Wear Proper Apparel – Loose-fitting or hanging garments should never be worn while using the appliance. •...
- Page 8 burns and scalds. Cut Hazard • The razor-sharp blade of a cooktop scraper is exposed when the safety cover is retracted. Use with extreme care and always store safely and out of reach of children. • Failure to use caution could result in injury or cuts.
- Page 9 components underneath to damage. • Never use your appliance for warming or heating the room. • After use, always turn off the cooking zones and the cooktop as described in this manual. Do not rely on the pan detection feature to turn off the cooking zones when you remove the pans.
- Page 10 the manual. All other servicing should be done by a qualified technician. • Do not use steam cleaner to clean cooktop. • Clean Cook-Top With Caution – If a wet sponge or cloth is used to wipe spills on a hot cooking area, be careful to avoid steam burn.
- Page 11 • Do Not Soak Removable Heating Elements – Heating elements should never be immersed in water. • If the power supply cable is damaged, it must only be replaced by qualified technician. • This appliance is intended to be used in household and similar applications such as: -staff kitchen areas in shops, offices and other working environments;...
- Page 12 breaking due to the sudden change in temperature. •This appliance can be used by children aged from 8 years and above and persons with reduced physical, sensory or mental capabilities or lack of experience and knowledge if they have been given supervision or instruction concerning use of the appliance in a safe way and understand the hazards involved.
- Page 13 -Be sure the thickness of the work surface is at least 30mm. Please select heat-resistant work surface material to avoid larger deformation caused by the heat radiation from the hotplate. As shown below (measure by unit: mm): Model EMPV-12REC10 265+5 495+5 50 min EMPV-24REC11...
- Page 14 EMPV-30EC04 745+5 495+5 50 min EMPV-36REC14 875+5 495+5 50 min EMPV-36EC05 875+5 495+5 50 min Under any circumstances, make sure the electric cooktop is well ventilated and the air inlet and outlet are not blocked. Ensure the electric cooktop is in good work state.
- Page 15 Easy Fit kits There is one easy fit kits package for each cooktop, include fixing clips and screws (for EMPV-12REC10 total 2pcs clip and 2pcs screw, for other models total 4pcs clip and 4pcs screw). Find the easy fit kit package first.
- Page 16 below diagrams, the mounted clips on the sides can secure your cooktop sturdily. Connecting the cooktop to the mains power supply The power supply should be connected in compliance with the relevant standard, or a single-pole circuit breaker. The appliance has a large power rating and must be connected to electricity by a Qualified Electrician.
- Page 17 Note: For some of the models, there might applied with a power cord with plug. If so, you can directly plug in socket. Please keep power cord plug out after use. For those model power cord without plug, the method of connections shown below.
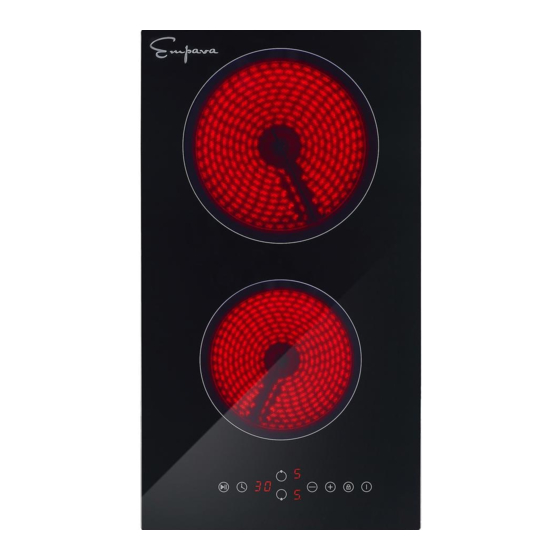
- Page 18 Part 3. Operation Instructions Ceramic Cooktop Model: EMPV-12REC10 1. 1800W Cooking Zone 2. 1200W Cooking Zone 3. Glass plate 4. Control panel Control Panel 1. Cooking Zone selection button Heating level/Timer “-” button Heating level/Timer “+” button 4. Child Lock control button Stop &...
- Page 19 Model: EMPV-24REC11 1. 1200W Cooking Zone 2. 2200/1000W Cooking Zone 3. 1800W Cooking Zone 4. 1200W Cooking Zone 5. Glass plate 6. Control panel Control Panel 1. Cooking Zone selection button 2. Timer control button Heating level/Timer “+” button 4. Heating level/Timer “-” button 5.
- Page 20 Model: EMPV-30REC12 1. 1800W Cooking Zone 2. 1200W Cooking Zone 3. 1200W Cooking Zone 4. 2500/1200W Cooking Zone 5. Glass plate 6. Control panel Control Panel 1. Cooking Zone selection button 2. Timer control button Heating level/Timer “+” button 4. Heating level/Timer “-” button 5.
- Page 21 Model: EMPV-30REC13 1. 2200/1000W Cooking Zone 2. 1200W Cooking Zone 3. 100W Cooking Zone 4. 2500/1200W Cooking Zone 5. 1200W Cooking Zone 6. Glass plate 7. Control Panel 6. Control panel Control Panel 1. Cooking Zone selection button 2. Extended zone control button 3.
- Page 22 Model: EMPV-36REC14 1. 2200/1000W Cooking Zone 2. 1200W Cooking Zone 3. 100W Cooking Zone 4. 3000/1600W Cooking Zone 6. 1200W Cooking Zone 6. Glass plate 7. Control Panel 6. Control panel Control Panel 1. Cooking Zone selection button 2. Extended zone control button 3.
- Page 23 Induction Cooktop Model: EMPV-30EC04 1. 1500W boost 2000W Cooking Zone 2. 2000W boost 2600W Cooking Zone 3. 3000W boost 3600W Flexi Bridge-Left 4. 2000W boost 2600W Cooking Zone 5. 1500W boost 2000W Cooking Zone 6. 3000W boost 3600W Flexi Bridge -Right 7.
- Page 24 Model: EMPV-36EC05 1. 1500W boost 2000W Cooking Zone 2. 2000W boost 2600W Cooking Zone 3. 3000W boost 3600W Flexi Bridge-Left 4. 2000W boost 2600W Cooking Zone 5. 1500W boost 2000W Cooking Zone 6. 3000W boost 3600W Flexi Bridge-Right 7. 2300W boost 3000W Cooking Zone 8.
- Page 25 Before using your New Cooktop • Read this guide, taking special note of the ‘Safety Warnings’ section. • Remove any protective film that may still be on your new electric cooktop. Using the Touch Controls • The controls respond to touch, so you don’t need to apply any pressure. •...
- Page 26 Do not use cookware with jagged edges or a curved base. Make sure that the base of your pan is smooth, sits flat against the glass, and is the same size as the cooking zone. If you use smaller pot efficiency could be less than expected.
- Page 27 Using your Cooktop To start cooking 1. After the cooktop be connected to electricity and power on. Press and hold the ON/OFF control button for about 3 seconds till you hear a “beep” to turn the cooktop on. Now the cooktop enters into Standby mode, all heat setting indicators and Timer setting indicators shows “-”...
- Page 28 To turn off cooktop 1. You can turn the cooking zone off by adjust heat setting to level 0, which indicator shows“-“. 2. You can also turn the whole cooktop off by touching the ON/OFF control button. Note: If there is power cut off during cooking, all setting will be cancelled. Note: The cooling fan of induction cooktop will remain on for about 1 minute after the cooktop be turned off.
- Page 29 Using Booster Function-Induction Cooktop Some of induction cooktop models might have one or several cooking zones which has Booster function. You can use the “Booster” function to boost power of relevant cooking zone for a maximum power rating for 5 minutes. This function could reduce the cooking time, which convenience for cooking when in hurry! To use booster function when cooktop is working, follows below: 1.
- Page 30 the pans centered on the cooking zone covering both cross. Active the flexible induction bridge To activate a flexible bridge as a single big zone, first press either of the two cooking zone selection buttons of this flexible area, then press the Flexible bridge control button.
- Page 31 Under the child lock mode, all controls button be disable except the ON/OFF button and child lock button. You can always turn the cooktop off with the ON/OFF control in an emergency, but you shall unlock the cooktop first in the next operation Note: Under Child Lock function, if turn the cooktop off without inactive the Child Lock function.
- Page 32 Timer overview Minute display shows the number of minutes Timer control Using the Timer as a Minute Minder If you have not selected any cooking zones 1.Touch the timer control button , the number in timer indicator flashing. 2. Then adjust Minute Minder setting follows below: 1) Touch control models: •...
- Page 33 Setting the timer to turn cooking zone off 1. Touch the heating zone selection control button to select the cooking zone you wish to set timer for. 2. Touch the timer control button , the number in timer indicator flashing. 3.
- Page 34 Note: The default setting of minute reminder and timer is 30 minutes. Note: After adjusting, the setting in timer indicator will flashing for 5 seconds and then stop flashing, then the setting be confirmed. Note: The minute reminder and timer can be use at same time, timer indicator shows the lowest time setting.
- Page 35 Power level Default working timer (hour) Over-heat Protection A temperature sensor equipped can monitor the temperature inside the cooktop. When an excessive temperature is monitored, the cooktop will auto stop operation. Over-flow Protection For your safety, the programmer will auto shut off the power if liquid boiling or wet cloth over touch control panel.
- Page 36 1. Stand the meat at room temperature for about 20 minutes before cooking. 2. Heat up a heavy-based frying pan. 3. Brush both sides of the steak with oil. Drizzle a small amount of oil into the hot pan and then lower the meat onto the hot pan. 4.
- Page 37 Heat Settings The settings below are guidelines only. The exact setting will depend on factors including your cookware and the amount you are cooking. Experiment with the cooktop to find the settings that best suit you. Heat setting Suitability • delicate warming for small amounts of food 1 - 2 •...
- Page 38 Hints and Tips What? How? Important! Everyday 1. Switch off the power • When turn off the power supply soiling on supply. of cooktop, there will be no ‘hot glass 2. Apply a vitro-ceramic surface’ indication but the (fingerprints, glass cleaner while the cooking zone may still be hot! marks, stains glass is still warm (but...
- Page 39 Maintenance of the Cooktop If you find something goes wrong for your cooktop, before contact the service or where you purchased it, please check whether below: 1. There is no power to the appliance: - Check whether there is a power cut of your department; - Check whether the appliance be connected to electricity properly;...
Need help?
Do you have a question about the EMPV-12REC10 and is the answer not in the manual?
Questions and answers