Table of Contents
Advertisement
Quick Links
Advertisement
Table of Contents

Related Manuals for Sunny SF-RW5940


Summary of Contents for Sunny SF-RW5940
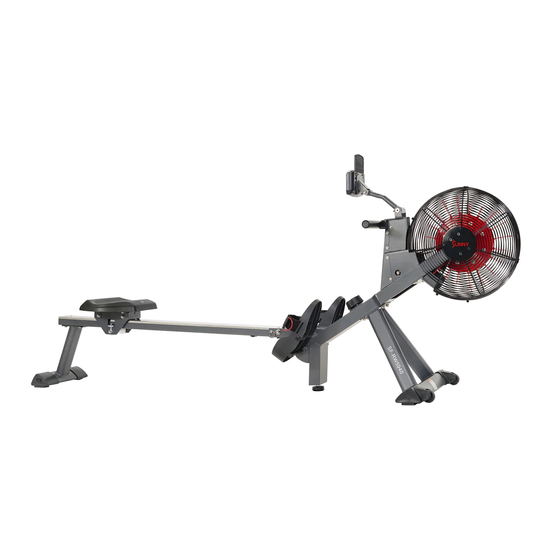
- Page 1 MAGNETIC AIR ROWER SF-RW5940 USER MANUAL IMPORTANT! Please retain owner’s manual for maintenance and adjustment instructions. Your satisfaction is very important to us, PLEASE DO NOT RETURN UNTIL YOU HAVE CONTACTED US: support@sunnyhealthfitness.com or 1- 877 - 90SUNNY (877-907-8669).
-
Page 2: Important Safety Information
IMPORTANT SAFETY INFORMATION We thank you for choosing our product. To ensure your safety and health, please use this equipment correctly. It is important to read this entire manual before assembling and using the equipment. Safe and effective use can only be achieved if the equipment is assembled, maintained, and used properly. -
Page 3: Exploded Diagram
EXPLODED DIAGRAM 1... -
Page 4: Hardware Package
EXPLODED DIAGRAM 2 HARDWARE PACKAGE... -
Page 5: Parts List
PARTS LIST Description Spec. Qty. Description Spec. Qty. Main Frame Right Pedal Sliding Rail Pedal Strap Front Stabilizer Pull Pin Ф8.0*106 Rear Stabilizer Bolt Ф10*95 Handlebar Φ28*1.5 Bolt M6*15 Seat Knob M12*30 Washer Ф8*Ф16*1.5 Washer Ф24*Ф12.5*2 Spring Washer Ф8 Left End Cap Bolt M8*20 Right End Cap... - Page 6 Description Spec. Description Spec. M10*1 Volute Spring Complete M10*1.0*9 Sets Mesh Belt Shaft Snap Ring Ф12*1.0 Belt 320PJ Inertial Wheel Shaft Bolt M6*55 Aluminium Plate Stainless Steel Shaft Snap Ring Ф10*1.0 Sleeve Belt Pulley Shaft Ф10*40 Fan Blade Bearing 6000 Washer Ф6*Ф14*1.5 Mesh Belt Pulley...
- Page 7 ASSEMBLY INSTRUCTIONS We value your experience using Sunny Health and Fitness products. For assistance with parts or troubleshooting, please contact us at support@sunnyhealthfitness.com or 1-877-90SUNNY (877-907-8669). STEP 1: Attach the Front Stabilizer (No. 3) to the Main Frame (No. 1) using 4 Spring Washers (No.
- Page 8 We value your experience using Sunny Health and Fitness products. For assistance with parts or troubleshooting, please contact us at support@sunnyhealthfitness.com or 1-877-90SUNNY (877-907-8669). STEP 3: Slide the Seat (No. 6) into the Sliding Rail (No. 2). Attach 1 Limit Mat (No. 26) and 2 Screws (No.
- Page 9 We value your experience using Sunny Health and Fitness products. For assistance with parts or troubleshooting, please contact us at support@sunnyhealthfitness.com or 1-877-90SUNNY (877-907-8669). STEP 5: Attach the Sliding Rail (No. 2) to the Main Frame (No. 1) using 1 Bolt (No.
- Page 10 ADJUSTMENTS &USAGE GUIDE CAUTION! Moving parts, such as the seat, can cut and crush. Keep hands clear of the sliding rail during use! PEDAL STRAP ADJUSTMENT The pedal strap is adjustable and can be personalized to fit the user’s foot size. MOVING THE ROWER To move the rower, lift the Rear Stabilizer (No.
-
Page 11: Storage Guide
STORAGE GUIDE CAUTION! caution when Figure A vertically fold the Sliding Rail (No. 2) as your head touch Rear Stabilizer (No. 4) CAUTION! The Seat (No. 6) will glide down when folding the Sliding Rail (No. 2)! Figure B When not in use, you can save space by folding the Sliding Rail (No. -
Page 12: Battery Installation And Replacement
BATTERY INSTALLATION & REPLACEMENT Battery Battery Cover BATTERY INSTALLATION: 1. Take out 2 AA batteries from meter box. 2. Press the buckle of battery cover on the back of the Meter (No. 50), then remove battery cover. 3. Install 2 AA batteries into the battery case on the back of the Meter (No. 50). Pay attention to the battery + and –... - Page 13 EXERCISE METER Our computerized exercise meter on the Sunny Rowing Machine allows the user to tailor a personalized workout by monitoring their progress. During a workout, the display console will alternately and repeatedly display the Time, Time/500M, SPM, Distance, Strokes, Total Strokes, Calories Burned, and Pulse.
- Page 14 FUNCTIONS TIME: Set target time (1 min ~ 99 min) by pressing UP and DOWN buttons, in 1 minute increments. TIME/500M: Your average 500M time is automatically displayed. SPM: Strokes per minute. DISTANCE: Preset target distance (100 ~ 99900 meters) by pressing UP and DOWN buttons, in 100 meters increments.
- Page 15 Fig. 2 2. The CLOCK will flash. Press UP button to set the hour. Press ENTER to confirm. Press UP to set the minutes. Press ENTER to confirm. Continue press UP button to set the YEAR (in the STROKES window); MONTH (in the CALORIES window); DAY (in the PULSE window).
- Page 16 flash. Press UP to set the value of TIME to count down. Press ENTER to confirm it. Press ENTER to skip setting up the time COUNTDOWN and go to the next function. You can set the values for DISTANCE, STROKES, CALORIES, or PULSE. (Note: You can only set the value for one function to countdown.
- Page 17 a. Press START button to start and STOP icon will disappear. USER and PC will display in the matrix (Fig.6). The meter will stop when either the user or meter has reached the race distance that was set. Then, the matrix displays “PCWIN” or “USERWIN” (Fig.7). Fig.6 Fig.
- Page 18 displays will stop except “TIME” starts counting down from 00:60 to 00:00. Screen will display your heart rate recovery status with the F1, F2….to F6.F1 is outstanding. F6 is poor. User may keep exercising to improve the heart rate recovery status. (Press the RECOVERY button again to return the main display.) ALARM Alarm only works while the meter is in sleep mode.
Need help?
Do you have a question about the SF-RW5940 and is the answer not in the manual?
Questions and answers