Advertisement
Quick Links
Download this manual
See also:
User Manual
Advertisement

Related Manuals for Sunny SF-RB921


Summary of Contents for Sunny SF-RB921
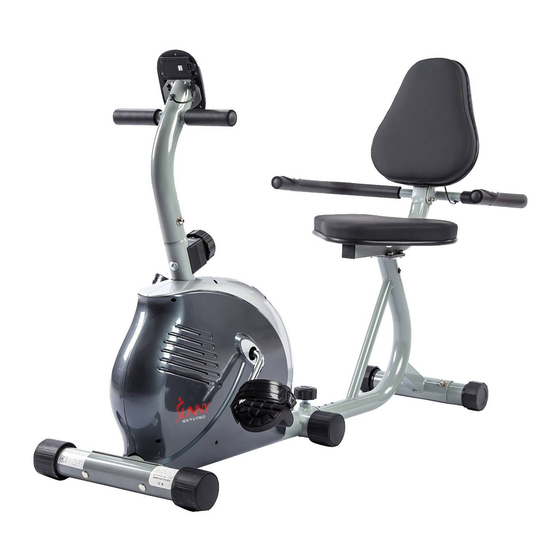
- Page 1 Sunny Magnetic Recumbent Bike SF-RB921 IMPORTANT! Please read the manual carefully before assembling and using the bike. For Customer Service, please contact: support@sunnyhealthfitness.com...
-
Page 2: Important Safety Information
IMPORTANT SAFETY INFORMATION We thank you for choosing our product. To guarantee your safety and health, please use this equipment correctly. Please read the information below carefully before using this equipment. 1. It is important to read this entire manual before assembling and using the equipment. Safe and effective use can only be achieved if the equipment is assembled, maintained and used properly. -
Page 3: Exploded View
EXPLODED VIEW... -
Page 4: Parts List
PARTS LIST DESCRIPTION Q’TY DESCRIPTION Q’TY Main frame Back cushion Computer Cushion Bracket Computer wire Foam grip 2 Hand pulse wire 1 Hand pulse sensor Bushing Trunk wire Φ60 End cap for tube φ25*1.5 Screw ST4.2*19 Foam grip 1 Handlebar Handlebar post Hand pulse wire Hand pulse wire 2... -
Page 5: Hardware Package
HARDWARE PACKAGE... - Page 6 ASSEMBLY INSTRUCTIONS STEP 1: Secure Front stabilizer (17) to Main frame (1) with Bolts (36), Arc washers (37) and Dome nuts (38).
- Page 7 STEP 2: a. Connect Hand pulse wire 1 (4) with Hand pulse wire 2 (9), Trunk wire (5) with Sensor wire (10); b. Connect Handlebar post (8) to Main frame (1) and then tighten with Bolts (35) and Arc washers (34).
- Page 8 STEP 3: Secure Pedals (14L/R) to the Crank (15) on the Main frame (1). ★ IMPORTANT: The Left Pedal (14L) should be screwed on counter-clockwise to tighten. The Right Pedal (14R) should be screwed on clockwise to tighten. You can screw in by hand first and then tighten by spanner securely.
- Page 9 STEP 4: a. Secure Rear stabilizer (20) to Seat rack combine (18) with Bolts (36), Arc washers (37) and Nuts (38); b. Connect Hand pulse wire 3 (32) with Hand pulse wire 2 (9) and insert the pulse wire completely into Seat rack combine (18). Then insert Seat rack combine (18) into Main frame (1), and secure it with Knob (39).
- Page 10 STEP 5: a. Secure Cushion bracket (24) to Seat rack combine (18) with Bolts (35), Spring washers (42) and Washers (40); *Note: Part 35, 40, 42 are preassembled on Seat rack combine (18). b. Secure Cushion (22) and Back cushion (23) to Cushion bracket (24) with Bolts (35) and Washers (40).
- Page 11 STEP 6: a. Secure Handlebar (29) to Cushion bracket (24) with Bolts (41), Washers (40), Spring washers (42) and Dome nuts (38). b. Connect Hand pulse wire (30) with Hand pulse wire 3 (32).
- Page 12 STEP 7: Connect Trunk wire (5) with Computer wire (3), and secure Computer (2) to Handlebar post (8) with Screws (33). Then insert Hand pulse wire 1 (4) to the hole on the back of computer. Assembly is complete.
Need help?
Do you have a question about the SF-RB921 and is the answer not in the manual?
Questions and answers