
Subscribe to Our Youtube Channel
Related Manuals for Lincoln Impinger 1100 Series


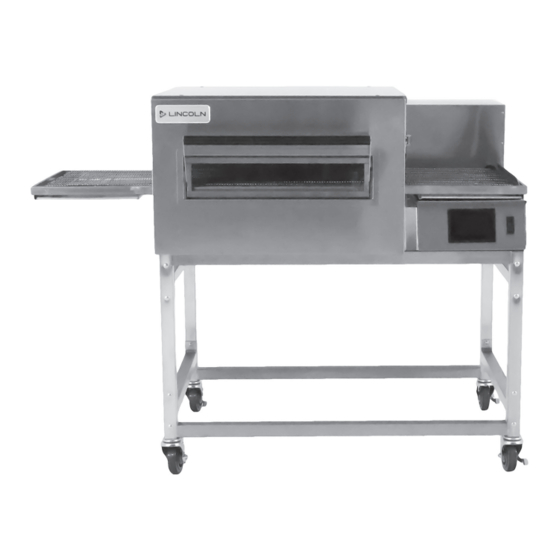
Summary of Contents for Lincoln Impinger 1100 Series
- Page 1 Impinger® II Conveyor Oven with easyTouch Controls Series 1100 Installation, Operation and Maintenance Manual FOR 50 HZ AND 60 HZ SUPPLY Original Instructions Part Number 4607056 Rev 0 6/21...
-
Page 2: Safety Notices
Safety Notices Warning Authorized Service Representatives are obligated to DEFINITIONS follow industry standard safety procedures, including, DANGER but not limited to, local/national regulations for disconnection / lock out / tag out procedures for all Indicates a hazardous situation that, if not avoided, will utilities including electric, gas, water and steam. -
Page 3: Table Of Contents
Table of Contents Safety Notices ........................2 Definitions..............................2 Section 1 General Information Purchaser’s Responsibility ....................5 Additional Requirements ........................5 Model Number Key ......................6 Section 2 Installation Exterior Dimensions......................7 Utility Specifications ......................8 Canopy Ventilation Recommendations ................9 Utility Service Layout – Models 1116 & 1117 ..............10 Installation Requirements ....................11 Gas Code Requirements ........................ - Page 4 Table of Contents (continued) Section 4 Maintenance Operator Maintenance .....................23 Cleaning Instructions ......................... 23 Daily Cleaning ........................23 Weekly Cleaning .......................23 Conveyor Removal ......................24 Finger Removal ........................24 Preventive Maintenance ....................24 Section 5 Troubleshooting Before Calling for Service Checklist ................25 Thermal Cut-Out Switch for Control Box Components ..........25 How to Obtain Service .....................25 Part Number 4607056 Rev 0 6/21...
-
Page 5: General Information
The power burner will not operate and gas will not flow of utility service has been fully inspected by a Factory through the burner without electrical power. Authorized Servicer or a Lincoln Foodservice Products, LLC • This manual should be retained for future reference. -
Page 6: Model Number Key
General Information Section 1 Model Number Key Example: 1130-000-U-K1801 CUSTOM CONFIGURATION CODE (i.e. General Market) LANGUAGE CODE 11 33 – – – K1801 OVEN PLATFORM SIZE (i.e. Impinger II) PANEL SETUP CODE INDICATES CHANGE TO BASE ASSEMBLY (i.e. Natural Gas, 230V, 1 phase, 50 Hz) AGENCY CODE Language Code Agency Code... -
Page 7: Installation
Section 2 Installation Exterior Dimensions 66.75" Dimension with Main Access Door (1695 mm) 46.12" Closed; Optional 43.62" (1171 mm) Glass Access Door (Main Access (1108 mm) Open Door Open) 28" Dimension with Main Access Door Closed; 56" Optional Glass Access Door Closed (1422 mm) 28.25"... -
Page 8: Utility Specifications
Installation Section 2 Utility Specifications Electric Ovens Recommended *Model Energy Power Voltage Current Phase Electrical Specification 1130-xxx-U-Kxxx Electric 10 kW 120/208V 48 Amps 60 Hz 4 Wires, 2 Pole + N + G 1131-xxx-U-Kxxx Electric 10 kW 120/240V 42 Amps 60 Hz 4 Wires, 2 Pole + N + G 1132-xxx-U-Kxxx... -
Page 9: Canopy Ventilation Recommendations
AFF = Above Finished Floor NOTE: The drawing shown is a typical installation and is NOTE: Lincoln can provide oven spec sheets that show intended to be a guideline. It is not a rigid specification. the dimensions of the oven, kW or BTU ratings and other... -
Page 10: Utility Service Layout - Models 1116 & 1117
Installation Section 2 Utility Service Layout – Models 1116 & 1117 Gas and electrical services for the Models 1116 and 1117 should be located as shown below. If flexible services are provided, they must meet code requirements for such installation. 17.5"... -
Page 11: Installation Requirements
Section 2 Installation Installation Requirements ELECTRICAL CODE REQUIREMENTS Warning DANGER This appliance must be properly grounded at time All utility connections and fixtures must be maintained of installation. Failure to ensure that this equipment in accordance with local and national codes. is properly grounded can result in electrocution, dismemberment or fatal injury. -
Page 12: Spacing Requirements
Proper ventilation is the oven owner’s responsibility. Lincoln 1100 ventless ovens equipped with a catalyst(s) are approved for ventless operation while single or double- stacked only. The ventilation hood must operate in harmony with the building HVAC system. -
Page 13: Restraint Requirement - Gas Oven(S) On Casters
Section 2 Installation Installation RESTRAINT REQUIREMENT – GAS OVEN(S) ON CASTERS The instructions that follow are intended as a guide for • The installation shall be made with a gas connector preparing for the installation of the Impinger® Conveyor that complies with the local codes for Connectors for Ovens. -
Page 14: Assembly Instruction
Installation Section 2 Assembly Instruction Stacking Instructions Notice FOR SINGLE OVEN DO NOT OVERTIGHTEN NUTS AND CRUSH TUBING! Caution Do not use standoffs as a lifting means. Position the two side pieces so that the holes for the oven mounting are as shown. ACORN NUT 1/4"... -
Page 15: For Triple Oven
Section 2 Installation Step 2 FOR TRIPLE OVEN Step 1 NOTE: Notch (In Top) to Rear of Unit. 1/4-20 Lockwasher and 1/4-20 1. Remove door, conveyor and finger assemblies. x 1/2 Hex Head Bolt 2. Turn unit on side, as shown. 3. -
Page 16: Start-Up Checkout
Installation Section 2 Start-Up Checkout Step 4 You are now ready for the services to be connected. NOTE: Notch (In Top) This should be done by a qualified plumber, electrician, to Rear of Unit. or installer of your choice. For installation in the state of Massachusetts: installation of this oven must be performed by a licensed plumber or gas fitter. -
Page 17: Start-Up Procedures
LLC in order to insure the oven(s) is properly installed and in working order. The warranty becomes effective upon NOTE: Use Lincoln Smoke Candle #369361 (in Australia, an verification of proper installation. alternate method of coloring the air may be used). -
Page 18: Checklist
Installation Section 2 CHECKLIST Are the correct clearances maintained? Does the ventilation system meet the requirements? Are the legs and caster securely fastened? Is the unit level? Has the restraint been installed to prevent uncontrolled movement? ... -
Page 19: Operation And Programming
Move the On/Off switch to the ON position • The display screen will energize and show the Lincoln oven model number and current software version. This screen will transition after a few seconds to the Home Screen. (Figure 1) -
Page 20: Manual Mode
Operation and Programming Section 3 2. The oven is now in pre-heat mode and the oven CHANGING TEMPERATURE AND COOK TIME [BELT SPEED] heaters will start-up. The temperature settings appear on the screen. You will see the temperature of the oven 1. -
Page 21: Settings Mode
Section 3 Operation and Programming SETTINGS MODE Settings mode allows the operator to change the oven settings such as Temperature unit of measure or Belt direction. The factory temperature unit of measure is Fahrenheit. 1. Press the Cog or Settings mode button on the Home screen. -
Page 22: Diagnostics Mode
Operation and Programming Section 3 3. Temperature Measure - Touch the white circle in the oval button on the Settings display that shows the temperature measure. The Fahrenheit or Celsius symbol will change to correspond to the desired temperature unit of measure. (Figure 15) Figure 17 OVEN SHUT DOWN 1. - Page 23 4. Clean the conveyor belt by wiping with a clean the control panel to be sure that they are good before you cloth or use a scrub brush (Lincoln Catalog Number call the Factory Authorized Servicer. The name and phone 11000115638).
- Page 24 Maintenance Section 4 Conveyor Removal 4. Slide finger cover from housing. Lift out inner Columnating Plate. 1. Remove door from front of oven by unfastening the latching mechanisms on the left side of the door Finger Cover (facing oven). Columnating 2.
- Page 25 Section 5 Troubleshooting Before Calling for Service Checklist Problem Cause Correction Doesn’t operate Breaker tripped Reset breaker Manual gas valve off Put valve in ON position Fuses not good Replace fuses on the back of oven Safety thermal cut-out trips Reset power, call for service if it repeats Uneven heating Fingers incorrectly assembled...
- Page 26 Troubleshooting Section 5 THIS PAGE INTENTIONALLY LEFT BLANK Part Number 4607056 Rev 0 6/21...
- Page 27 The foregoing NOT WARRANT ANY PRODUCTS OR SERVICES OF OTHERS. shall be the sole obligation of Lincoln under this Limited Warranty with respect to the equipment, products and services. With respect to equipment, materials, parts and REMEDIES accessories manufactured by others, Lincoln’s sole obligation shall be to use reasonable...
- Page 28 LINCOLN 11200 AIRPORT NORTH OFFICE PARK STE. A&B, FORT WAYNE, IN 46825 844-724-2273 WWW.LINCOLNFP.COM ©2021 Welbilt, Inc. except where explicitly stated otherwise. All rights reserved. Part Number 4607056 Rev 0 6/21...
Need help?
Do you have a question about the Impinger 1100 Series and is the answer not in the manual?
Questions and answers