
Subscribe to Our Youtube Channel
Related Manuals for Falco FAL-60-55RDS


Summary of Contents for Falco FAL-60-55RDS
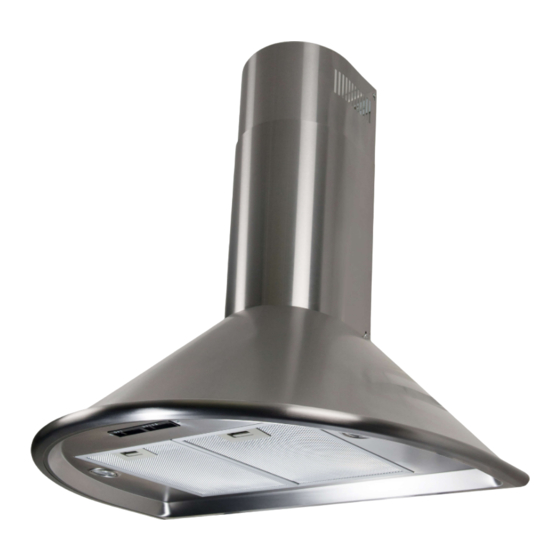
- Page 1 Cooker hood Instruction manual Model No.: FAL-60-55RDS / FAL-90-55RDS FAL-60-55SLS / FAL-90-55SLS FAL-60-52S / FAL-90-52S FAL-60-22S / FAL-90-22S FAL-90-51SG/ FAL-60-30SG / FAL-90-30SG / FAL-60-38SG / FAL-90-38SG...
- Page 2 Page 1 (Inside) Please be careful when removing and installing the Island installation Brackets and Stainless Steel chimneys. The Stain Less steel chimneys contains sharp edges and can possibly lead to cuts. Generally asked Questions and Answers: 1. Q: My extractor fan is not extracting A: before logging a service call please ensure the installation on your extractor fans was done properly to avoid a service call out fee charge.
- Page 3 You can also download it from www.falco.co.za 7. Q: How often do I have to replace my filters? A: With daily use we recommend that you replace your charcoal filters every 6 months. Your aluminium filters can be cleaned in luke warm water and dishwashing liquid.
- Page 4 11. Q: Why is there rust marks on my extractor? A: Stainless steel can rust if cleaned with abrasive cleaners. The chemicals inside abrasive cleaners react with the stainless steel and the result will be rust. There are many day to day cleaning products in our kitchens that are abrasive cleaners and unknown to the consumer.
- Page 5 A: Full range of spares are available from Lategan & Van Biljoens in Pretoria. www.appliancesspares.co.za 15. Q: What is the diameter of my ducting hose? A: 150mm 16. Q: More Queries? A: Please email any queries to: christie@falco.co.za, Tel: 011 454 6423/4314. Spares can be viewed and ordered online: www.appliancespares.co.za...
- Page 6 NOTICE 1. Thank you for choosing our cooker hood. Please read the instruction manual carefully before use. 2. The installation work must be undertaken by a qualified and competent fitter. 3. The manufacturer disclaims all liability for any damage or injury caused as a result of not following instructions for installation contained in the following text.
- Page 7 (2)FEATURE 1. The cooker hood uses high quality materials, and is made with a streamlined design. 2. Equipped with a large power low noise electric motor and centrifugal leaf, it produces strong suction, low noise, non stick grease filter and easy to clean. 3.
- Page 8 (3). Installation If the model without Glass: 3.1 The cooker hood should be placed at a distance of 65-75cm (26-30inch) from the cooking surface for the best effect. See Pic 1. 3.2 Install the hook on a suitable place once the installation height is fixed, and keep it in line.
- Page 9 If the model with Glass: 3.1 The cooker hood should be placed at a distance of 65-75cm (26-30inch) from the cooking surface for the best effect. See Pic 1. 3.2 Install the hook on a suitable place once the installation height is fixed, and keep it in line. The fixed position of the inside chimney bracket is the place of chimney.
-
Page 10: Notice Of Installation
(4) NOTICE OF INSTALLATION 1. Before installation, please ensure the area is clean to avoid suction of the remaining bits of broken wood and dust. 2. It cannot share the same air ventilation tube with other appliance such as gas tube, warmer tube, and hot wind tube. 3. -
Page 11: Safety Warning
(5) SAFETY WARNING Keep your children from using the cooker hood. Your cooker hood is for domestic use only, not suitable for barbecue, roast shop and other commercial use. Any installation work must be carried out by a qualified electrician or competent person. - Page 12 (6) Speed adjustment .See pictures Electronic Button 1. Turn on the power; the buzzer will buzz five times. The sound shows that the appliance is powered. 2. Push the low button, the indicating light 1 on, the buzzer will buzz once, and the motor runs at low speed. Push it again and the motor will stop.
- Page 13 Push button 1. Push stop button, and the motor will stop. 2. Push the Low button, the buzzer will buzz once, and the motor runs at low speed. 3. Push the high button, the buzzer will buzz once, and the motor runs at mid speed.
- Page 14 LCD Electronic button 1. Plug the hood; LCD will display 24-hour system with blue backlight. Backlight will be extinguished after 30 seconds without any operation. 2. Press “ ” button once; lights will be on and LCD will show “ ”.
- Page 15 button. Press “ ” button once; the number reduces by 01. When LCD shows 00; it doesn’t work by pressing “ ” button. After setting hour; you can start setting minute by pressing “ ” button again. on LCD flashes; which represents minutes. Press “ ”...
-
Page 16: Maintenance
(7) MAINTENANCE 7.1 The cleaning of the carbon grease filter mesh The filter mesh is made of high-density stainless steel. Please do not use the corrosive detergent on it. Keeping this filter clean will keep the appliance running correctly. Please strictly follow the guidelines below. - Page 17 8.Abnormity and Solution Fault Cause Solution The leaf blocked Get rid of the blocking The capacitor damaged Replace capacitor Light on, but motor does not work The motor jammed bearing Replace motor damaged The internal with of motor off or Replace motor a bad smell from the motor Beside the above mentioned, check the following:...
Need help?
Do you have a question about the FAL-60-55RDS and is the answer not in the manual?
Questions and answers