Advertisement
Quick Links
Advertisement

Subscribe to Our Youtube Channel
Related Manuals for Falco FAL-110-CEWG


Summary of Contents for Falco FAL-110-CEWG
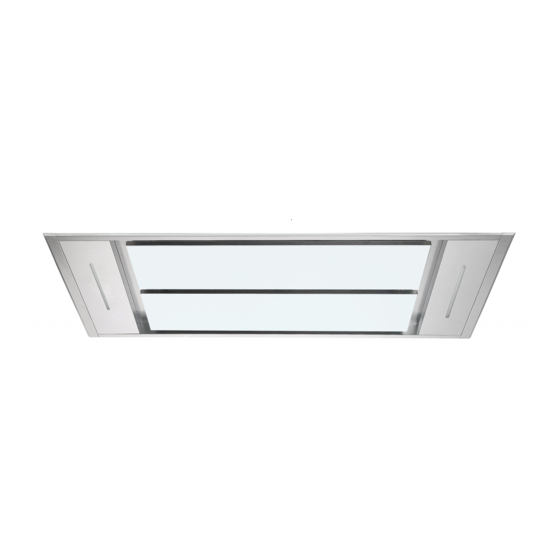
- Page 1 Cooker Hood Instruction Manual Model No.: FAL-110-CEWG...
- Page 2 Using the extractor you purchased on any commercial application poses a serious fire risk and will result in immediate void of your warranty. Please contact our Falco offices for assistance with Gas Braai Extractors. 3. Q: What is the correct installation height? A: The recommended installation height is 750mm above gas and 650mm above electrical.
- Page 3 You can also download it from www.falco.co.za 7. Q: How often do I have to replace my filters? A: With daily use we recommend that you replace your charcoal filters every 6 months. Your aluminium filters can be cleaned in luke warm water and dishwashing liquid.
- Page 4 A: Full range of spares is available from Lategan& Van Biljoens in Pretoria. www.appliancesspares.co.za 15. Q: What is the diameter of my ducting hose? A: 150mm 16. Q: More Queries? A: Please email any queries to: christie@falco.co.za, Tel: 011 454 6423/4314. Spares can be viewed and ordered online: www.appliancespares.co.za...
-
Page 5: Table Of Contents
Content 1…………………………………..………………………………Safety instructions 2…………………………………..………………………………Installation 3…………………………………..………………………………Start using your cooker hood 4…………………………………..………………………………Troubleshooting 5…………………………………..………………………………Maintenance and cleaning 6…………………………………..………………………………Environment protection... -
Page 6: Safety Instructions
SAFETY INSTRUCTIONS his manual explains the proper installation and use of your cooker hood, please read it carefully before using even if you are familiar with the product. The manual should be kept in a safe place for future reference. Never to do: Always to do: o not try to use the cooker hood... - Page 7 Always to do: Always to do: lways put lids on pots and pans aution: The appliance and its ● ● when cooking on a gas cooker. accessible parts can become hot during operation. Be careful to avoid hen in extraction mode, air in the ●...
-
Page 8: Installation
INSTALLATION (VENT OUTSIDE) MOUNTING OF THE V-FLAP If the cooker hood does not have an assembled V-flap 1, you should mount the half- parts to its body. To mount the V-flap 1 you should: • Mount two half-parts 2 into the body 6 •... - Page 9 2. The cooker hood should not be placed at a distance of more than 200cm from an electric hob or gas hob for the best performance. Refer to Pic 1. 3. The ceiling must can bear at least 120KGs weight, and the thickness of the ceiling must be ≥30MM.
- Page 10 7. Then as pic 9 shown, choose the direction of the outlet①/②/③/④ a. Refer to Pic 7,open the decorative plate in order,and take out the filter. b. Refer to Pic 8,unscrew and take away the 4 pcs ST4*8mm screws that on the panel decorative strip.
- Page 11 7. As pic 11 shown, connect the 4 adjustable angle iron bracket with the housing by 8pcs M4*12mm machine silk screw, next refer to pic 12/13, lift up the housing, use 8pcs M4*12mm machine silk screw and M4 nut with gasket to fix the housing onto the 2 hanging board, meanwhile, pull the expansion pipe outside.(Note: The expansion pipe must be fixed on the housing firmly.) 8.
-
Page 12: Start Using Your Cooker Hood
•After the installation ,make sure that the cooker hood is level to avoid grease collection at on end. •Ensure the expansion pipe selected for installation complies with relevant standards and is fire retardant. WARNING: For safety reason, please use only the same size of fixing or mounting screw which are recommended in this instruction manual. - Page 13 Connecting the remote control ·A New remote control has to establish a new connection to the cooker hood when used for first time. One remote control could possibly control several cooker hood at the same time. Connection process between remote control and cooker hood ·Press on control panel of the cooker hood, the backlight display is on, the cooker hood is in standby mode.
-
Page 14: Troubleshooting
press, Low speed press, Medium speed press High speed Turning off/Decreasing motor speed press the button and the motor begins shift to a lower speed and the LCD screen display the speed level. Repeating press the button, it keep on decreasing the motor speed to till the cooker hood turning off. -
Page 15: Maintenance And Cleaning
NOTE: Any electrical repairs to this appliance must conform to your local, state and federal laws.Please contact the service centre if in any doubt before undertaking any of the above.Always disconnect the unit from the power source when opening the unit. MAINTENANCE AND CLEANING Caution: •... - Page 16 INSTALLING GREASE MESH FILTERS • To install filters for the following four steps . - Angle the filter into slots at the back of the hood. - Push the button on handle of the filter. - Release the handle once the filter fits into a resting position. - Repeat to install all filters.
-
Page 17: Environment Protection
Change the LED light 1. Switch off the appliance and unplug it. 2. Unscrew the 2 pcs ST4*8mm big flat tapping screws on the lamp plate unit by screwdriver. 3. Pull out the terminal, and take down the lamp plate unit. 4. - Page 18 INFORMATION FOR DISMANTLING Do not dismantle the appliance in a way which is not shown in the user manual. The appliance could not be dismantled by user. At the end of life, the appliance should not be disposed of with household waste. Check with you Local Authority or retainer for recycling advice.
- Page 19 GUARANTEE AND SERVICE CONDITIONS / BOOKING A SERVICE CALL This certificate is issued by Falco Domestic Appliances, supplier of ALL Unbranded Falco Extractor fan models. Hereinafter referred to as ‘The Company’, to the original purchaser only, of the product/appliances described on the certificate and shall constitute the only guarantee given in respect of this product/appliance.
Need help?
Do you have a question about the FAL-110-CEWG and is the answer not in the manual?
Questions and answers