
Related Manuals for Coccolle Sedna


Summary of Contents for Coccolle Sedna
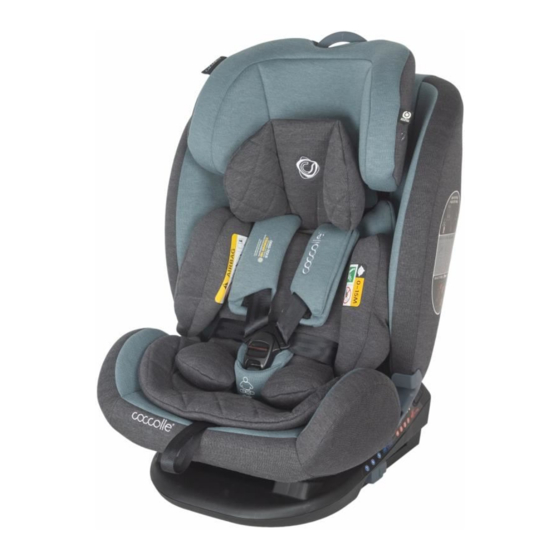
- Page 1 scaun auto, grupa 0,I,II,III car seat, group 0,I,II,III autosules, csoport 0,I,II,III Manual de instructiuni / User’s manual / Hasznalati utmutato...
- Page 2 fig.1 fig.2...
- Page 4 fig.3 fig.4 fig.5 fig.6 fig.7...
- Page 5 fig.8 fig.10 fig.11 fig.12 fig.13...
- Page 6 fig.14 fig.15 fig.16 fig.17...
- Page 7 PUSH! fig.18 fig.19 PUSH! fig.19 fig.20 PUSH! fig.21 fig.22...
- Page 8 fig.23 fig.24 fig.25 fig.26...
- Page 9 fig.27 fig.28 fig.29 fig.30 RO: imaginile din acest manual au scop ilustrativ. Produsul achizitionat de dvs poate sa difere. EN: the images shown in this instructions manual have illustrative purpose. The product purchased by you may look different. HU: Az útmutatóban bemutatott képek szemléletes célt szolgálnak.
- Page 10 Acest scaun auto pentru copii este aprobat prin Regulamentul ECE 44/04. Vă rugăm să citiți toate instrucțiunile din acest manual înainte de instalarea și utilizarea produsului. Felicitari Ați achiziționat un scaun auto pentru copii de înaltă calitate, complet certificat. Acest produs este potrivit pentru utilizarea copiilor cu greutatea de pana la 36 kg (aproximativ 12 ani sau mai puțin).
- Page 11 Componentele textile includ: tetiera, husa scaunului, centura pentru umeri, protectia de catarama și insertul pentru nou nascuti. Vă rugăm să vă asigurați că nu lipsesc piesele. Vă rugăm să contactați producatorul dacă lipsește ceva. ATENTIONARI GENERALE DE SIGURANȚĂ Acest produs este potrivit pentru utilizarea copiilor cu greutatea de pana la 36 kg (aproximativ 12 ani sau mai puțin).
- Page 12 NICIODATĂ nu folosiți un scaun pentru copii second-hand sau un scaun auto pentru copii al cărui istoric nu o cunoașteți, deoarece acesta poate avea daune structurale care pun în pericol siguranța copilului dumneavoastră. Niciodată nu folosiți funii sau orice alt înlocuitor în locul centurilor de siguranță în cazul deteriorarii sistemului de siguranta.
- Page 13 Pentru instalare cu ISOFIX (axe ISOFIX și top teather) la GRUPA I (9-18 KG) 1. Acesta este un SISTEM ISOFIX este aprobat prin Regulamentul ECE nr. 44/04 pentru uz general la vehiculele echipate cu sisteme de ancorare ISOFIX. 2. Se va potrivi cu vehicule omologate cu poziții ISOFIX (așa cum este detaliat în manualul vehiculului), în funcție de categoria scaunului auto pentru copii și a corpului de fixare.
- Page 14 Reglarea gradului de inclinare Prindeti manerul de inclinare si asezati scaunul in pozitia potrivita. Unghiurile de înclinare sunt afișate, există 3 unghiuri de înclinare pentru modul bebeluș cel in care scaunul este orientat cu spatele la directia de mers si este marcat ca un triunghi albastru.
- Page 15 3. În timp ce apăsați scaunul pentru copii, trageți centurile pentru a fixa bine și sigur scaunul pentru copii. Scaunul pentru copii nu poate fi utilizat dacă catarama centurii de siguranță a vehiculului (capătul cataramei) este prea lung pentru a ancora scaunul pentru copii în siguranță. Vă rugăm să verificați daca este fixat corespunzator, prin miscarea scaunului pentru copii înainte și înapoi.
- Page 16 Utilizarea de catre copii mici (modul toddler) (Orientare cu fata spre sensul de mers / pentru copil între 9-18 kg) Vă rugăm să instalați scaunul pentru copii pe scaunul vehiculului, apoi puneți copilul în scaunul auto. Vă rugăm să reglați scaunul auto pentru copii la unghiul corespunzător (4 poziții pentru modul de copil mic).
- Page 17 5. Conectați bine cârligul de fixare la racordul de ancorare. Utilizati Top Teather in instalarea modului de copil dacă vehiculul este echipat cu un dispozitiv de ancorare top teather și dacă sunt îndeplinite cerințele vehiculului (vezi manualul proprietarului vehiculului). 6. Asamblarea corecta a sistemului (conectori ISOFIX și top teather). Asigurați- vă...
- Page 18 4. Ridicați partea superioară a husei și apoi trageți partea inferioară a husei în față, apoi depozitați centurile pentru umeri și catarama în compartimentele lor de depozitare. 5. Trageți catarama în partea din spate a husei scaunului, apoi depozitați limbile de cataramă...
- Page 19 Pentru a asambla la loc partile moi detasate, inversați pașii de mai sus. Intretinere Dupa ce detasati insertul pentru bebelusi va rugam sa-l depozitati intr-un loc in care copilul nu va avea acces la el. Spalati partile moi cu apa pana in 30°C. Nu calcati partile moi. Nu folositi pentru curatare inalbitori sau detergenti uscati, acestea pot provoca deteriorarea materialelor.
- Page 20 This child restraint is approved to GB 27887-2011 and UN ECE regulation 44, 04 series of amendments. Please read all the instructions in this manual before installing and using the product. Congratulations You have purchased a high quality, fully certified child safety child restraint. This product is suitable for the use of children weighing UNDER 36kg (approximately 12 years old or under).
- Page 21 19 Seat Belt Guiding 20 ISOFIX Attachments Guides Soft goods include Head Support, Seat Pad, Shoulder Strap, Crotch Strap and Infant Insert. Please make sure there are no missing parts. Please contact the retailer if anything is missing. GENERAL SAFETY NOTES This child restraint is designed ONLY for child weighing under 36kg (approximately 12 years old or under).
- Page 22 ! DO NOT leave this child restraint unbelted or unsecured in your vehicle because unsecured child restraint can be thrown around and may injure occupants in a sharp turn, sudden stop, or collision. Remove it if not in regular use. ! DO NOT place the child restraint in seating positions where an active frontal airbag is installed if your child is still in rear facing mode.
- Page 23 1. This is a Gr0+ I II III (9-36kg) ABC installed ‘Universal’ child restraint. It is approved to GB 27887-2011 and UN ECE regulation 44, 04 series of amend ments, for general use in vehicles and it will fit most, but not all, car seats. 2.
- Page 24 This child seat offers a variety of installation options. The following table indicates the types of installation for respective groups: Child Installation W eight Installation Method Method 0-18Kg Vehicle 3 Points Belt 5 Points Harness rear-facing Iso f i x Connecter+ 9-18Kg 5 Points Harness T ether Hook...
- Page 25 ! When used in junior mode, the shoulder belt guides must be even with child’s shoulders. If the shoulder harnesses are not at proper height, the child may be thrown from the child restraint when there is an accident. Squeeze the head support adjustment lever, meanwhile pull up or push down the head support until it snaps into one of the 11 positions.
- Page 26 Correctly assembled vehicle belt is shown as (fig. 8) 1. Waist belt passes through the lap belt guidings. 2. Shoulder belt must passes through the shoulder-belt slots. 3. The vehicle buckle tongue is engaged with the buckle correctly. Securing your Child in the Child Restraint Use Infant Insert Remove the head support portion of the infant insert when the child’s head no...
- Page 27 Toddler Mode (Forward Facing Mode/ for Child between 9-18kg) ! Please install the child restraint on the vehicle seat, and then put the child in the child restraint. Installation for Toddler Mode ! Please adjust the child restraint to proper angle (4 positions for toddler mode). Angle indication: With top triangle and red triangle aligned.
- Page 28 ! Make sure that both ISOFIX attachments connectors are securely attached to their ISOFIX attachments anchor points. The colors of the indicators on both ISOFIX attachments connectors should be completely green. ! The ISOFIX attachments connectors must be attached and locked onto the ISOFIX attachments anchor points.
- Page 29 3. Place the child in the child restraint and engage the buckle. 4. Pull down the adjustment webbing and adjust it to the proper length so that your child is snugly secured. ! After the child is seated, recheck whether the shoulder harnesses are at proper height.
- Page 30 ! Shoulder belt must pass through shoulder belt guide. ! Waist belt must pass through lap belt guidings. ! The vehicle waist belt must cross through the middle of the crotch belt cover and then attach the loop and hook fasteners. ! The child restraint can not be used if the vehicle safety belt buckle is too long to anchor the child restraint securely.
- Page 31 ! Do not twist the soft goods to dry with great force. It may leave the soft goods with wrinkles. ! Please hang dry the soft goods in the shade. ! Please remove the child restraint from the vehicle seat if not in use for a long period of time.
- Page 32 Győződjön meg aról hogy a jármű amiben akarja használni az autósülést ellátva van 3 pontos biztonsági övvel. A biztonsági öv eltérő lehet attól függően, hogy mikor lett a jármű gyártva, milyen módel és a jármű többi funkcioja. A Sedna autósülés használható minden járműben ami 3 pontos biztonsági övvel ellátva van csak akkor hogy a biztosági öv rendszer ECE R44/04 szabály szerint...
- Page 33 Ezért kérjük, mindig ellenőrizze, hogy: - A jármű ülés háttámlájá helyesen rögzített (például rögzíteni kell az összecsukható hátsó ülés részét). - Minden nehéz vagy éles tárgyat a járműben rögzíteni kell. - A járműben lévő összes személynek rögzítve van a biztonsági öve - Az autósülést a járműben mindig az ISOFIX rendszerrel és a Top Teather vagy a hárompontos biztonsági övvel (járműöv) biztosítja még, akkor is, ha az autósülésen nincs gyermek.
- Page 34 Távolítsa el az autósülést a jármű üléséről, hogy ha hosszú ideig már nem használja. A karbantartással, javítással és alkatrészek cseréjével kapcsolatos kérdésekkel forduljon a forgalmazóhoz vagy a gyártohoz. Minden utazás elött ellenőrizze hogy az autósülés helysen rőgzitve van az ISOFIX rendszerrel. Ha problémakot vesz észre az ISOFIX rendszernél, probálja tisztitani az isofix csatlakozó...
- Page 35 Az autóülés beálitása újszülött korban (0-18 kg, menetirányal elentétesen) Ameddig az újszülött még nem érte el a 9 kg-os súlyt mindenképpen tartsa az ülést menetirányal elentetésen. Azt javasoljuk hogy minnel nagyobb súlyig a gyereket menetirányál elentetésen hordozni. A Sedna autósülésben 18 kg-ig lehet a gyereket menetirányál elentetésen hordozni.
- Page 36 A 0-18 kg, menetirányal elentétesen beszerelése Kérjük allitsa az ülést a helyes 3-as dőlésszög pozicióban. Figyelem! A felső és a kék háromszögot jelöli a 3-as poziciót. Amikor a gyerek már 18 kg-os akkor csak a 7-ik dőlésszög pozicióban (a legmesszebbi) lehet elhelyezni a menetirányal elentétesen. Ellenőrizze hogy a biztonsági öv helyesen legyen beálitva a gyerek magassága szerint.
- Page 37 A biztonsági öv: 1. A központi öv álitási gombot megnyomva, könnyen huzza meg a 2 vál hevedert (fig.11). 2. Nyomja meg a piros gombot hogy a biztonsági övet kinyissa (fig.10). 3. Ültesse a gyereket az ülésben, vezzesse át a gyerek kezeit a vál hevedereken át.
- Page 38 Figyelem: mindkét betétvezetőt használni kell és ellenőrizni muszáj azt hogy az isofix csatlakozok rájta is átmentek. Figyelem: a helyes csatlakozást ugy lehet tesztelni hogy ovatosan magunk felé huzuk az autósülést. Fontos: a dőlésszögöt kell választani amielött az isofix csatlakozást megcsinálja. Ha a csatlakozás után akarja valtoztatni a dőlésszögöt akkor a top tethert kell kinyissa és a helyes pozició...
- Page 39 Amikor a biztonsági övet igazitsa kérjük ügyeljen arra, hogy a váll és a derék övek ne legyen csavartak. 1. Nyomja meg a csat piros gombját hogy a csatot kinyissa (fig.26). 2. Vegye ki az újszülött betétet és a csat vedő textil anyagot. 3.
- Page 40 A huzat eltávolitása 1. Nyissa ki a biztonsági övet. 2. Távolitsa el az újszülött betétet és a vedőket. 3. A huzat gumizsinórral van a burkolathoz rőgzitve. A fejtámlátol kezdve kérjük huzza ki a gumizsinórt. 4. Nyissa ki a huzat összes fűzőlyukakot, vegye ki a csatot és ezután vegye ki a huzatot.
Need help?
Do you have a question about the Sedna and is the answer not in the manual?
Questions and answers