Table of Contents
Advertisement
Advertisement
Table of Contents

Related Manuals for Daikin AIRHUB


Summary of Contents for Daikin AIRHUB
- Page 1 TOUCH CONTROLLER (Linear and On/Off system) OPERATION MANUAL...
-
Page 2: Table Of Contents
CONTENTS 1. Name and Function Buttons----------------------------------------- 2. Main & Sub controller Menu Screen------------------------------- 5 3. Preparation before Operation 3.1 Time and date settings-------------------------------------------- 6 3.2 Dealer Contact------------------------------------------------------ 3.3 Maintenance-------------------------------------------------------- 3.4 Change Name------------------------------------------------------- 3.5 Screen Brightness-LED Bar--------------------------------------- 12 3.6 Software Version--------------------------------------------------- 14 3.7 Sensor Selection---------------------------------------------------- 15 3.8 Sensor Priority------------------------------------------------------- 16 3.9 Touch Sound--------------------------------------------------------- 18... -
Page 4: Name And Function Buttons
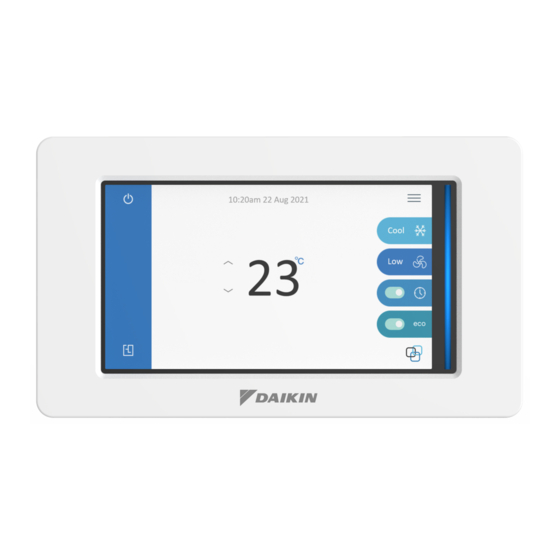
Master setpoint temperature DOWN Touch this icon to access user Economy options Touch this icon to reduce Main setpoint temperature AIRHUB logo Zone settings Touch and hold this icon for 5 secs to lock the screen Touch this icon to make zone setting... -
Page 6: Preparation Before Operation
Preparation before Operation 3.1. Time and Date Settings (1) Tap the on Main Operation Screen to access the Menu Screen. (2) Tap the Setting on Menu Screen. (3) Tap Time and Date. (4) Tap up / down to set the date and time. (5) Select either 24-hour time or 12-hour time. -
Page 7: Dealer Contact
Preparation before Operation 3.2. Dealer Contact (1) Tap the on main Operation screen to access the Menu Screen. (2) Tap setting on Menu Screen. (3) Tap Dealer & then tap the Insert Contact Details Here. The keyboard will display, you can now enter the company details & similarly the contact no. -
Page 8: Maintenance
Preparation before Operation 3.3. Maintenance (1) If maintenance warning message such as “Clean the filter” appears on Main Operation Screen. (2) Tap the on Main Operation Screen to access the Menu Screen. (3) Tap the Setting on Menu Screen. (4) Tap Maintenance. (5) Tap Clear filter change message to remove “Clean the filter”... -
Page 9: Change Name
Preparation before Operation 3.4. Name Change – Zone Names (Only for Linear control) (1) Tap on main Operation screen to access the Menu Screen. (2) Tap the Setting on Menu Screen to access the Setting Screen. (*The settings menu screen for On/Off control is different from that of Linear control.) (3) Tap Change Name icon to edit Zone names. - Page 10 Preparation before Operation 3.4. Name Change – Zone & sensor Names (Only for On/Off control) (1) Tap on main Operation screen to access the Menu Screen. (2) Tap the Setting on Menu Screen to access the Setting Screen. (3) Tap the Change Name icon to edit Zone names. (4) Select the desired Zone number you wish to name.
- Page 11 Linear control.) (3) Tap the Change Name icon to edit Zone names. (4) Tap Save icon to update changes, this will automatically synchronize the AirHub zone names with Airbase. (5) Tap to go back to main Operation screen.
-
Page 12: Screen Brightness-Led Bar
Screen Brightness-LED Bar 3.5. Screen Brightness (1) Tap on main Operation screen. (2) Tap the Setting on Menu Screen. (3) Tap Screen Brightness. (4) Tap the ON/OFF icon to activate the Screen Brightness settings. (5) Tap The Start time and set the time when the backlight begins using Brightness 1 percentage setting. - Page 13 Screen Brightness-LED Bar 3.5. LED Bar ***NOTE: In relation to the LED Bar. The LED Bar will always be active regardless of AC operation status. The LED Bar is inactivated only when the screen sleeps (Screen Timeout: default 2min). Upon touching an inactive screen, the screen will activate, a subsequent touch will activate the LED Bar.
-
Page 14: Software Version
Preparation before Operation 3.6. Software version (1) Tap the on main Operation screen to access the Menu Screen. (2) Tap Setting on Menu Screen. (3) Tap the Software version icon to go to software version screen. (4) Interface PCB and Tablet software version are shown on the screen. -
Page 15: Sensor Selection
Preparation before Operation 3.7. Sensor Selection (Only for On/Off control) (1) Tap the on main Operation screen to access the Settings Menu. (2) Tap the “Setting” on Menu Screen. (3) Tap the Sensor selection icon. (4) Select appropriate sensor or tap “AUTO SELECT”. Auto select will automatically choose a temperature sensor based on the activated zone(s) &... -
Page 16: Sensor Priority
Sensor Priority 3.8. Sensor Priority (Only On/Off system) (1) Tap on main Operation screen. (2) Tap Setting on Menu Screen. (3 ) Tap “Sensor priority” on settings screen. (4) Tap “Priority 1” & select the temperature sensor to be assigned as 1 priority. - Page 17 Sensor Priority 3.8. Sensor Priority (Only On/Off system) (6) Tap Priority 1 sensor’s name & then Go to Zone> allocate a zone or batch of zones to Priority 1 by highlighting. (7) Tap Save to save the setting. (8) Tap “<Back” to go back to sensor priority screen. (9) Follow the same method for Priority 2 &...
-
Page 18: Touch Sound
Touch sound 3.9. Touch sound (1) Tap icon to access the Menu Screen. (2) Tap setting on Menu Screen to access the setting menu. (3) Tap Touch Sound on setting menu to access the Touch Sound screen. (4) Slide the toggle switch to “ON” position to turn on the sound. (5) Or Slide the toggle switch to “OFF”... -
Page 19: Timer Operation
Timer Operation 4.1. On/Off Timer (1) Tap to access Menu Screen. (2) Tap Timer on Main/Menu Screen. * If the clock has not been set, it will revert to the Clock *If clock has not been set, it goes to clock Setting screen. - Page 20 Timer Operation To combine On timer and Off timer A sample setting for combining the two timers is shown below. Example On timer set for 1 hour Off timer set for 3 hours Timer Operation Unit switch ON Unit in operation Unit switches OFF Unit not in operation Set timer...
-
Page 21: Days Timer
Timer Operation 4.2. 7 Days Timer (1) Tap the on Main Operation Screen to access the Menu Screen. (2) Tap Timer on Main/Menu Screen to access timer screen. (3) Tap the “7 Days – Program 1” or “7 Days – Program 2” to access the 7 Days timer settings screen. - Page 22 Timer Operation 4.2. 7 Days Timer (5) Simple timer allows you to select the Mode & Start & Stop times. (6) Multi timer allows you to select the Mode, Start & Stop times as well as select the Zones you require to be air conditioned. It also allows you to manually or automatically select the room temperature sensors to use.
-
Page 23: Simple 7 Days Timer
Timer Operation 4.3. Simple 7 Days Timer Operation Mode selection * Operation Mode for each timer program can be selected individually. (1) Tap day of the week (2) Tap Operation Mode icon to select the operation mode. The color of “Mode”... - Page 24 Timer Operation 4.3. Simple 7 Days Timer Set Temperature selection (ONLY FOR ON/OFF CONTROL SYSTEM) 3-3. Set the Setpoint selection for On/Off system only ** Setpoint can be selected from a range of 16°C to 32°C. (1) Tap Setpoint icon. (2) Tap the up/down arrow to change the setpoint.
- Page 25 Timer Operation 4.3. Simple 7 Days Timer Start Time setting * The time is selectable in 10 minutes increments between 00:00 and 23:50. (1) Tap Start icon. (2) Tap the up / down arrow to select time. STOP TIMER setting (3) Stop Time, use the same procedure as the Start time setting.
-
Page 26: Multi 7 Days Timer
Timer Operation 4.4. Multi 7 Days Timer The procedure for setting the Mode, Set Temperature and Start & Stop times is the same as for the SIMPLE 7 DAY TIMER. Temperature sensor selection * This setting is only available For On/Off control systems. (1) Tap “Sensor”... -
Page 27: Explanation Of 7 Days Timer
Timer Operation 4.5. Explanation of 7 Days Timer For 7 DAY TIMER operation, two types are provided: simple and multi. Use the desired type according to your lifestyle and situation. You can use this operation as follows. The SIMPLE 7 DAY TIMER can be programmed to start & stop the air conditioning unit twice a day, 7 days a week. Individual modes & Case 1 temperatures can also be set within each time frame. -
Page 28: Simple 7 Days / Multi 7 Days Timer - Copy Mode Setting
Timer Operation 4.6. Simple 7 Days / Multi 7 Days Timer – Copy Mode Setting Day settings can be copied & pasted to other days in Simple & Multiple timer programs. * To copy a given setting to multiple days, follow the below steps: (1) Select the program and the day of the week that you want to copy. -
Page 29: Energy Saving Options
Energy Saving Options 5.1. Eco Settings List (1) Tap the on Main Operation Screen to access the Menu Screen or Tap the Eco toggle switch on Main screen. (2) Tap the Eco icon. This is the confirmation screen to switch ON / OFF the below functions: - Setpoint Range Set - Setpoint Auto Reset - Auto Off Timer... -
Page 30: Setpoint Range Set
Energy Saving Options 5.2. Setpoint Range Set (1) Tap the on Main Operation Screen to access the Menu Screen (2) Tap the Eco icon to access Eco Setting List Screen or tap the Eco toggle switch on Main screen. (3) Tap the Setpoint Range Set icon. (4) Tap the setpoint range set to change cooling or heating temperature. -
Page 31: Setpoint Auto Reset
Energy Saving Options 5.3. Setpoint Auto Reset Save energy by resetting the cool or heat setpoint temperature after a preset time interval. Prevents excessive power usage if the Master set point temperature is set too low in cool mode or too high in heat mode. (1) Tap on Main Operation Screen to access the Menu Screen. -
Page 32: Auto Off Timer
Energy Saving Options 5.4. Auto Off timer Auto Off timer will only allow the air conditioning system to operate for a fixed time interval. When Auto Off is set it will always switch off the air conditioning system after the pre-set time. (1) Tap the on Main Operation Screen to access Menu Screen. -
Page 33: Holiday Mode
Holiday Mode 5.5. Holiday Mode This function is used to disable schedule timers when users leave their home for a long period. (1) Tap the on main Operation screen to access the Menu Screen. (2) Tap the Eco on Menu Screen or tap the Eco toggle switch on Main screen. (3) Tap Holiday to access the Holiday screen. -
Page 34: Operation Mode
Operation Mode Note on COOL operation (1) Operation Mode •This air conditioner cools the room by absorbing the heat from the air within the room and releases it outside, so if the outside temperature is high, performance may drop. Note on HEAT operation •Since this air conditioner heats the room by absorbing the heat from outdoor air and releasing the heat to the indoors, the heating capacity may drop in lower outdoor temperatures. -
Page 35: Zone Control
Zone Area Zone Control (1) Tap on Main operation screen to go to the zone screen. (2) Each zone can be switched on / off from the zone screen by sliding the toggle switch located in front of the zone name. (3) Zone temperature control is only available for the Linear control system, each zone temperature can be changed individually* by tapping the zone name area and tapping the up/down temp set arrow. - Page 36 Zone Area Zone Control-Linear damper control example (1) Zone temperature control is only available for the Linear control system, each zone temperature can be changed individually by tapping the zone name area and touching Up/Down temp set arrow. (The zone temp settings can be adjusted within a range of +/- 2 degrees of master set point temperature.
-
Page 37: Fan Operation
Fan Operation Airside function •Airside function is set by the installer during the commissioning phase. The fan speed is automatically adjusted & is based on the number of active zones. Linear system On/Off system Auto fan operation •AUTO fan settings (Auto High / Auto Med / Auto Low) will only operate when the “Indoor sensor”... -
Page 38: Key Lock
(3) Tap AIRHUB logo on the Main Operation screen once again for a period of 4 seconds. This will release the screen and all function will be available for operation. - Page 39 Notes...
- Page 40 DAIKIN AUSTRALIA PTY. LIMITED 62-66 Governor Macquarie Dr, Chipping Norton, NSW 2170 Australia Phone: 1300 36 24 38 Daikin New Zealand, 525 Great South Rd, Penrose, Auckland 6 www.daikin.com.au DAIKIN INDUSTRIES LTD. Head office: Umeda Centre Bldg., 2-4-12, Nakazaki-Nishi, Kita-ku, Osaka, 530-8323 Japan Tokyo office: JR Shinagawa East Bldg., 2-18-1, Konan,...
Need help?
Do you have a question about the AIRHUB and is the answer not in the manual?
Questions and answers