Table of Contents
Advertisement
Advertisement
Table of Contents

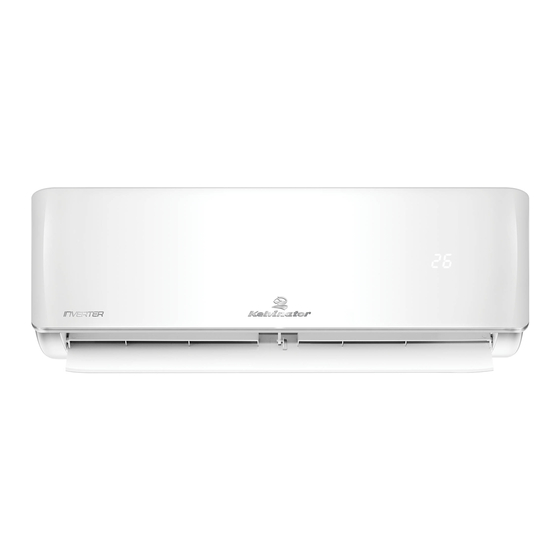
Summary of Contents for Kelvinator KSV25CRH
- Page 1 Inverter Air Conditioner Installation Manual KSV25CRH, KSV35CRH, KSV71CRH, KSV25HRH, KSV35HRH, KSV50HRH, KSV71HRH, KSV90HRH, KSD25HRH, KSD35HRH, KSD50HRH, KSD71HRH, KSD90HRH, KSV25HWH, KSV35HWH, KSV50HWH, KSV71HWH, KSV90HWH, KSD25HWH, KSD35HWH, KSD50HWH, KSD71HWH, KSD90HWH...
-
Page 2: Table Of Contents
R32 refrigerant warning This product uses R32 difluoromethane refrigerant, which is a mildly flammable gas class 2.2 according according to AS 1677 and must be handled by a refrigeration mechanic with appropriate Australian refrigerant handling licence. 2 Contents Kelvinator Air Conditioning... -
Page 3: Important Safety Instructions
Contact an authorised installer for installation of this unit. disconnected. • Contact an authorised service technician for repair or maintenance of this unit. • Installation work must be performed in accordance with the national wiring standards by authorised personnel only. Kelvinator Air Conditioning Important safety instructions 3... -
Page 4: Choosing A Location To Mount Unit
Avoid a location to which the general public have access. range of room size, please ensure the selection of your air conditioner complies with the Kelvinator selection tool available from www.kelvinator.com.au This product uses mildly ammable R32 refrigerant. Certain levels of refrigerant require minimum room sizes. -
Page 5: Installation Drawing
Remote controller Remote controller holder * 9kW models have 8 screws, other models have 5 screws. NOTE: Appearance of outdoor unit and indoor unit may differ from some models. The actual shape shall prevail. Kelvinator Air Conditioning Installation drawing 5... -
Page 6: Indoor Unit Installation
The installation plate provided with the machine differ from appliance to appliance. (Dimensions are in mm unless otherwise stated). Correct orientation of Installation Plate ✓ ✗ ✗ 6 Indoor unit installation Kelvinator Air Conditioning... -
Page 7: Drilling The Wall
2. Note most simple installation is with hole on the right side. Drill the piping hole with a hole core drill of the following size: 65mm for models: KSV25CRH, KSV25HRH, KSD25HRH, KSV25HWH, KSD25HWH, KSV35CRH, KSV35HRH, KSD35HRH, KSV35HWH, KSD35HWH. -
Page 8: Drain Piping
The power and signal cable that connects from outdoor unit to indoor unit do not carry the full compressor current, therefore 1.0mm (or larger) is suitable for this application. 8 Indoor unit installation Kelvinator Air Conditioning... - Page 9 Fasten the connection cable with a cable clamp. re box cover and secure with the screw, then close the indoor unit cover. Kelvinator Air Conditioning Indoor unit installation 9...
-
Page 10: Outdoor Unit Installation
Drain pipe KSV50HRH KSD50HRH 924 x 702 x 382 42.1 KSV50HWH KSD50HWH KSV71CRH KSV71HRH KSD71HRH 924 x 702 x 382 52.5 KSV71HWH KSD71HWH KSV90HRH KSD90HRH 1040 x 810 x 455 64.5 KSV90HWH KSD90HWH 10 Outdoor unit installation Kelvinator Air Conditioning... -
Page 11: Refrigerant Pipe Connection
KSV35HWH KSD35HWH KSV50HRH KSD50HRH ø 6.35 (1/4") ø 12.7 (1/2") KSV50HWH KSD50HWH KSV71CRH KSV71HRH KSD71HRH ø 9.52 (3/8") ø 15.9 (5/8") KSV71HWH KSD71HWH KSV90HRH KSD90HRH ø 9.52 (3/8") ø 15.9 (5/8") KSV90HWH KSD90HWH Kelvinator Air Conditioning Outdoor unit installation 11... -
Page 12: Flaring Work
Cone Dimension A (mm) as per g. 15 Outer diameter (mm) Copper Max. Min. pipe Clamp ø 6.35 (1/4") Red arrow mark handle ø 9.52 (3/8") ø 12.7 (1/2") ø 15.9 (5/8") 12 Outdoor unit installation Kelvinator Air Conditioning... - Page 13 Fit the cable clamp over the incoming wires to protect from strain, then fit the cover and fix in place with the screw. indoor pipe unit connection pipe vinyl tape (wide) wrap with vinyl tape Kelvinator Air Conditioning Outdoor unit installation 13...
- Page 14 KSV35HWH, KSD35HWH, KSV71CRH, KSV71HRH, terminal block cover and secure with screws. KSD71HRH, KSV71HWH, KSD71HWH, KSV90HRH, KSD90HRH, KSV90HWH & KSD90HWH do not require magnetic rings to be tted. Fig. 19b 1(L) 2(N) POWER SUPPLY INDOOR UNIT 14 Outdoor unit installation Kelvinator Air Conditioning...
-
Page 15: Test Running
M = (L - 5) x A Where: M = Mass of additional refrigerant (g) L = Actual installed connecting pipe length (m) A = Additional refrigerant required per meter of connecting pipe (g/m) (refer to the above table) Kelvinator Air Conditioning Test running 15... - Page 16 Remove the charge hose from the Low pressure charge hose. -76cmHg Fully open the service valve stems B and A. Securely tighten the cap of the service valve. Handle Lo Handle Hi Charge hose Charge hose Vacuum pump Low pressure valve 16 Outdoor unit installation Kelvinator Air Conditioning...
- Page 17 Pressing the button again while the air conditioner is operating will switch off the air conditioner. Outdoor unit The test operation should last about 30 minutes. check point Auto/Cool Manual control button Kelvinator Air Conditioning Electrical and gas leak check 17...
-
Page 18: Information Servicing
A degree of ventilation shall continue during the period that the work is carried out. The ventilation should safely disperse any released refrigerant and preferably expel it externally into the atmosphere. 18 Information servicing Kelvinator Air Conditioning... - Page 19 (by means of shut off valves) in a part of the system remote from the leak. Oxygen free nitrogen (OFN) shall then be purged through the system both before and during the brazing process. Kelvinator Air Conditioning Information servicing 19...
- Page 20 The maximum number of pieces of equipment permitted to be stored together will be determined by local regulations. 20 Information servicing Kelvinator Air Conditioning...
- Page 21 Notes Kelvinator Air Conditioning Notes 21...
- Page 22 Notes 22 Notes Kelvinator Air Conditioning...
-
Page 23: Warranty
Kelvinator Air Conditioning Warranty 23... - Page 24 0800 225 088 email: customercare@electrolux.co.nz web: kelvinator.co.nz Kelvinator. We are part of the Electrolux Family. To add a touch of professional inspiration to your home, visit electrolux.com.au © 2019 Electrolux Home Products Pty Ltd. ABN 51 004 762 341 KINS_Hottom_Factory_Wifi_Feb19...


Need help?
Do you have a question about the KSV25CRH and is the answer not in the manual?
Questions and answers