Advertisement
Quick Links
R
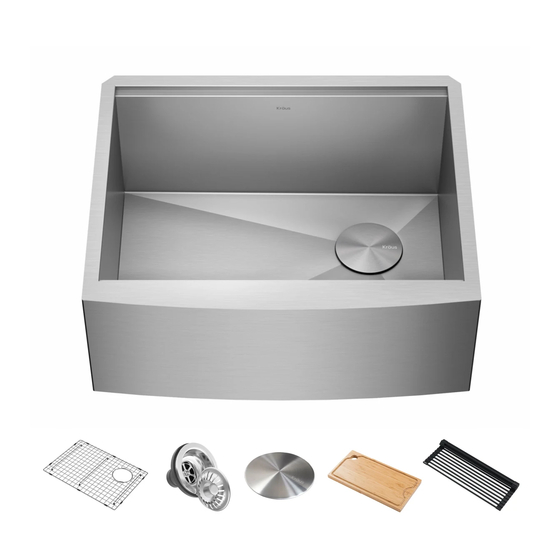
INSTALLATION MANUAL
Kore Workstation Stainless
Steel Farmhouse Kitchen Sinks
KWF210-24, KWF210-27,
KWF210-27/PGM, KWF210-30,
KWF210-33, KWF210-33/PGM,
KWF210-36, KWF410-30, KWF410-33,
KWF410-33/PGM, KWF410-36
www.kraususa.com I Toll Free: 1.800.775.0703 I © 2019 Kraus USA Inc. I REV. October 26, 2020
Advertisement

Related Manuals for Kraus Kore KWF210-24


Summary of Contents for Kraus Kore KWF210-24
- Page 1 INSTALLATION MANUAL Kore Workstation Stainless Steel Farmhouse Kitchen Sinks KWF210-24, KWF210-27, KWF210-27/PGM, KWF210-30, KWF210-33, KWF210-33/PGM, KWF210-36, KWF410-30, KWF410-33, KWF410-33/PGM, KWF410-36 www.kraususa.com I Toll Free: 1.800.775.0703 I © 2019 Kraus USA Inc. I REV. October 26, 2020...
- Page 2 Congratulations on the purchase of your new Kraus plumbing fixture! Please keep the box and packaging materials until your product is completely installed. If you have any questions, require technical assistance or have any problems with your product: STOP DO NOT RETURN TO STORE Please contact our Customer Service Team 1-800-775-0703 / customerservice@kraususa.com...
-
Page 3: Tools You Will Need
Toll-Free: 800-775-0703 or customerservice@kraususa.com The step-by-step guidelines in the installation instructions are a general reference for installing a Kraus sink. Should there be any discrepancies, Kraus cannot be held liable. It is recommended to install all Kraus products by hiring a licensed professional. -
Page 4: Parts List
Parts List KWF210-24 KWF210-33/PGM KWF410-36 · Cut-Out Template · Cut-Out Template · Cut-Out Template · Mounting Hardware · Mounting Hardware · Mounting Hardware Bottom Grid KBG-UN1-24 · · Bottom Grid KBG-UN1-33/PGM · Bottom Grid KBG-UN1-36 Strainer ST-1 · · Strainer ST-1/PGM ·... - Page 5 Dimensions: 26 7/8" 23 7/8" (606.4mm) (682.6mm) 25" 22" (558.8mm) (635mm) 5" 5" (127mm) (127mm) 3 1/2" (90mm) Model #: KWF210-24 Model #: KWF210-27 & KWF210-27/PGM Sink Dimensions: 23 7/8” x 20 1/4” x 10” Sink Dimensions: 26 7/8” x 20 1/4” x 10” Min Cabinet Size: 27”...
- Page 6 Dimensions: 35 7/8" (911.2mm) 29 7/8" (758.8mm) 34" (863.6mm) 28" (711.2mm) 5" 5" (127mm) (127mm) 3 1/2" 3 1/2" (90mm) (90mm) 2 1/4" (57.2mm) R1/8" (3mm) Model #: KWF210-36 Model #: KWF410-30 Sink Dimensions: 35 7/8” x 20 1/4” x 10” Sink Dimensions: 29 7/8”...
- Page 7 Step 1. Determine Reveal Type · Use scissors to cut along the line of the paper template for your desired reveal type (Negative, Positive, or Flushed Reveal) KRAUS Recommended Installation Type 3/8” Positive Reveal 3/8” Positive Flushed/Zero Reveal Centerline Flushed/Zero Step 2.
- Page 8 Step 3. Trace Template · Trace template on countertop with a pencil. Step 4. Cut Countertop · Cut the opening in the countertop by carefully following the traced line. NOTE: Please use the appropriate saw that best fits your countertop material.
- Page 9 Step 5. Cut Cabinet Front · Measure height of apron front. Add 1/16" to the dimension when you mark base cabinet front cutout. Use jigsaw to cut. Step 6. Set Up Mounting Brackets · Turn countertop over and align sink with countertop. Decide location for mounting brackets. ·...
- Page 10 Step 7. Drill Hole in Countertop · Drill 3/8" diameter x 1/2" deep hole in the countertop.
- Page 11 Step 8. Install Anchors · Insert anchors into drilled holes and lightly tap with a hammer until flush.
- Page 12 Step 9. Secure Sink to Countertop · Use a bead of silicone (or preferred adhesive) around the rim of the sink. Check the alignment of the sink to the cutout in the countertop. Place sink over cutout hole and press firmly.
-
Page 13: Step 10. Attach Mounting Hardware
Step 10. Attach Mounting Hardware · Attach mounting hardware to secure bowl. Remove excess sealant from inside lip. · Allow sealant to set for 30 - 60 minutes. NOTE: Use acetone or rubbing alcohol to remove any excess sealant. - Page 14 Step 11. Install Plumbing Fixtures · Connect drain to sink. Connect trap to drain. Connect water supply connections to faucet according to manufacturer's instructions. Run water into sink and check for leaks. · Note: Before installation, please check that the drain kit complies with ASME A112.18.2/CSA B125.2 and with CUPC ·...
- Page 15 Any product reported to the authorized dealer or to Kraus as being defective within the warranty period will be repaired or replaced with a product of equal value at the option of Kraus. This warranty extends to the original owner or end-user, and is not transferable to a subsequent owner.
- Page 16 Kraus USA, Inc. 12 Harbor Park Drive Port Washington, NY 11050 Toll-free 800-775-0703 Customerservice@kraususa.com If you are a plumbing contractor or trade professional please contact a Kraus Pro Representative at: Kraus USA, Inc. 12 Harbor Park Drive Port Washington, NY 11050 516-801-8955 Proservice@kraususa.com...
- Page 17 IMPORTANT Register Your Kraus Product Activate Your Warranty Access Premium Customer Support Get Product Information REGISTER TODAY http://www.kraususa.com/registration www.kraususa.com...
Need help?
Do you have a question about the Kore KWF210-24 and is the answer not in the manual?
Questions and answers