Table of Contents
Advertisement
Available languages
Available languages
INTERFACE COMPONENTS
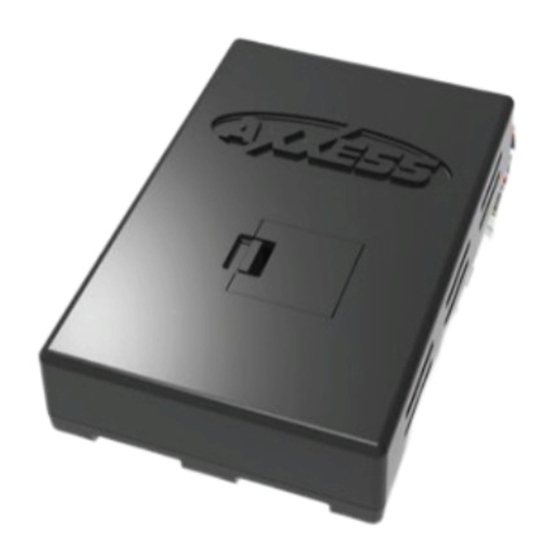
• AXDIS-GMLN29 interface • AXDIS-GMLN29 harness
• 16-pin harness with stripped leads • 4-pin to 4-pin resistor pad harness
• Female 3.5mm connector with stripped leads
• Backup camera harness • RSE harness • Antenna adapter
TOOLS REQUIRED
• Wire cutter • Crimp tool • Solder gun • Tape • Connectors (example: butt-connectors, bell caps, etc.) • Small flat-blade screwdriver
APPLICATIONS
See inside front cover
AxxessInterfaces.com
GM Data Interface with SWC
INTERFACE FEATURES
• Provides accessory power
• Retains the factory AUX-IN jack
(12-volt 10-amp)
• Retains the factory backup camera
• Retains R.A.P. (retained
•
accessory power)
• Retains SAT (satellite radio)
• Provides NAV outputs (parking
• Can be used in non-amplified, or
brake, reverse, speed sense)
• Retains chimes
• Retains balance and fade (excluding
• Retains audio controls on the
steering wheel
• Includes an antenna adapter
• Retains OnStar / OE Bluetooth
• Micro-B USB updatable
• Adjustable OnStar level
© COPYRIGHT 2020 METRA ELECTRONICS CORPORATION
AXDIS-GMLN29
I N S TA L L AT I O N I N S T R U C T I O N S
2006-Up
TABLE OF CONTENTS
Connections ........................................................ 3-6
- For models without an amplifier .......................3
- For models with an analog amplifier ................4
- For models with a digital amplifier ...................5
Installation .............................................................6
Programming .........................................................7
Retains RSE (rear seat entertainment)
Adjustments ...........................................................7
Extra features .........................................................8
analog/digital amplified models
Steering wheel control settings .......................9-11
- L.E.D. feedback ....................................................9
digital amplified models)
- Changing radio type ...........................................9
Troubleshooting ....................................................12
Product Info
REV. 8/6/20 INSTAXDIS-GMLN29
Advertisement
Table of Contents

Related Manuals for Axxess AXDIS-GMLN29


Summary of Contents for Axxess AXDIS-GMLN29
-
Page 1: Table Of Contents
INTERFACE COMPONENTS • Retains chimes • Retains balance and fade (excluding - L.E.D. feedback ............9 • AXDIS-GMLN29 interface • AXDIS-GMLN29 harness • Retains audio controls on the digital amplified models) - Changing radio type ...........9 • 16-pin harness with stripped leads • 4-pin to 4-pin resistor pad harness steering wheel •... - Page 2 APPLICATIONS BUICK CHEVROLET (CONT) PONTIAC Enclave 2008-2017 Equinox 2007-2009 Acadia 2007-2016 Torrent 2007-2009 Acadia Limited Lucerne 2006-2011 Express ‡ 2008-Up 2017 SATURN Impala 2006-2013 Savana ‡ 2008-Up CADILLAC Outlook 2007-2010 Impala Limited 2014-2016 Sierra 2500/3500 *∆ 2014 DTS † 2006-2011 2008-2010 Monte Carlo 2006-2007 Sierra (new body) *∆...
-
Page 3: Connections
• Disregard the DIN jack and Red wire. • Connect the Blue/Pink wire to the VSS/speed sense wire. Note: The relay attached to the AXDIS-GMLN29 harness is only for audible turn signal clicks. No • Connect the Green/Purple wire to the reverse wire. -
Page 4: For Models With An Analog Amplifier
• Connect the Red and White RCA jacks to the audio AUX-IN jacks of the aftermarket radio. • Disregard the DIN jack and Red wire. Note: The relay attached to the AXDIS-GMLN29 harness is only for audible turn signal clicks. No extra steps are required to retain this feature, so leave the relay as-is. -
Page 5: For Models With A Digital Amplifier
• Connect the Green wire to the left rear positive speaker output. Note: The relay attached to the AXDIS-GMLN29 harness is only for audible turn signal clicks. No • Connect the Green/Black wire to the left rear negative speaker output. -
Page 6: Mm Jack Steering Wheel Control Retention
Note: After the interface has been programmed to the vehicle, refer to the manual Attention! Do not connect the AXDIS-GMLN29 harness to the wiring harness in the vehicle just yet. provided with the radio for assigning the SWC buttons. Contact the radio manufacturer for more information. -
Page 7: Programming
• With a small flat-blade screwdriver, adjust the potentiometer clockwise to raise the audio level; counterclockwise to lower the audio level. • Connect the AXDIS-GMLN29 harness to the wiring harness in the vehicle. • Once at a desired level, audio level adjustment is complete. -
Page 8: Extra Features
• Listed below are the functions of the steering wheel control buttons while accessing the advanced features: • If the vehicle is equipped with AUX-IN, rear seat entertainment, or satellite radio, the AXDIS-GMLN29 can retain these features. • SEEK UP – Scrolls menu up. Notes when retaining AUX-IN: •... -
Page 9: Steering Wheel Control Settings
* Note: If the AXDIS-GMLN29 flashes Red (7) times, and you do not have an Alpine radio connected 5. Once the desired radio number has been selected, press and hold the Volume-Down button to it, that means the AXDIS-GMLN29 does not detect a radio connected it. -
Page 10: Remapping The Steering Wheel Control Buttons
(1) second until the L.E.D. comes on, and then release the Volume-Up button. This 1. Eclipse (Type 1) 7. Alpine 13. LG will tell the AXDIS-GMLN29 that this function is not available and it will move on to the next 2. Kenwood 8. Visteon 14. Parrot function. -
Page 11: Dual Assignment Instructions (Long Button Press)
6. ATT/Mute 11. Play/Enter 15. Fan-Up * The AXDIS-GMLN29 has the capability to assign (2) functions to a single button, except Volume- Up and Volume-Down. Follow the steps below to program the button(s) to your liking. 7. Preset-Up 2. Not allowed 12. -
Page 12: Troubleshooting
AXDIS-GMLN29 I N S TA L L AT I O N I N S T R U C T I O N S Having difficulties? We’re here to help. TROUBLESHOOTING Contact our Tech Support line at: 386-257-1187 Resetting the AXDIS-GMLN29 Or via email at: 1. - Page 13 COMPONENTES DE LA INTERFASE - Cambio de tipo de radio ........9 en el volante intensidad (excluyendo la • Interfase AXDIS-GMLN29 • Arnés AXDIS-GMLN29 • Retiene OnStar/Bluetooth de intensidad digital) - Remapeo de los botones del control en el volante .. 10 • Arnés de 16 pins con conectores pelados fabricante original •...
- Page 14 APLICACIONES BUICK CHEVROLET (CONT) PONTIAC Enclave 2008-2017 Equinox 2007-2009 Acadia 2007-2016 Torrent 2007-2009 Acadia Limited Lucerne 2006-2011 Express ‡ 2008-up 2017 SATURN Impala 2006-2013 Savana ‡ 2008-up CADILLAC Outlook 2007-2010 Impala Limited 2014-2016 Sierra 2500/3500 *∆ 2014 DTS † 2006-2011 2008-2010 Monte Carlo 2006-2007 Sierra (nueva carrocería) *∆...
- Page 15 Los siguientes (3) cables son para radios con multimedios/navegación que incluyen estos cables. Nota: El relé adjunto a la AXDIS-GMLN29 únicamente es para los chasquidos audibles de la • Conecte el cable azul/rosa al cable VSS o del sensor de velocidad.
- Page 16 • No tenga en cuenta el conector DIN y el cable rojo. Nota: El relé adjunto a la AXDIS-GMLN29 únicamente es para los chasquidos audibles de la señal direccional. No se requieren pasos adicionales para retener esta característica, así que deje el relé...
- Page 17 • Conecte el cable blanco/negro con la salida negativa de la bocina izquierda delantera. Nota: El relé adjunto a la AXDIS-GMLN29 únicamente es para los chasquidos audibles de la • Conecte el cable verde con la salida positiva de la bocina izquierda trasera.
- Page 18 Nota: Después de la interfase ha sido programado para el vehículo, consulte el manual • Conecte el arnés de 16 pins con conectores pelados, y el arnés AXDIS-GMLN29, a la interfase. suministrado con la radio para la asignación de los botones SWC. Póngase en contacto con •...
- Page 19 VOLUMEN” del volante para aumentar o bajar el nivel de OnStar. • Si el vehículo no está equipado con controles en el volante, encuentre el cable negro/amarillo del arnés AXDIS-GMLN29. • Mientras OnStar está hablando, toque el cable negro/amarillo a tierra. Una vez que el nivel de OnStar esté...
- Page 20 • A continuación verá las funciones de los botones del control en el volante al acceder a las características avanzadas: • Si su vehículo está equipado con AUX-IN, RSE o SAT, el AXDIS-GMLN29 puede conservar estas funciones. • BUSCAR SIGUIENTE – Desplaza el menú hacia arriba.
- Page 21 Los (18) parpadeos en rojo del foco L.E.D. representan la marca de radio que el AXDIS-GMLN29 cree que está conectada. Cada parpadeo representa un diferente fabricante de radio. Por ejemplo, si Cambio de tipo de radio está...
- Page 22 (1) segundo hasta que el foco L.E.D. se encienda, luego suelte “Subir 1. Eclipse (Tipo 1) 7. Alpine 13. LG volumen”. Esto le indica al AXDIS-GMLN29 que la función no está disponible y pasará a la 2. Kenwood 8. Visteon 14. Parrot siguiente función.
- Page 23 7. Subir 11. Reproducir/ 16. Disminuir El AXDIS-GMLN29 tiene la capacidad de asignar (2) funciones a un solo botón, excepto “Subir volumen” y Aceptar “Bajar volumen”. Siga los pasos que están a continuación para programar los botones según lo desee.
- Page 24 AXDIS-GMLN29 I N S T R U C C I O N E S D E I N S TA L AC I Ó N ¿Tienes dificultades? Estamos aquí para ayudar. RESOLUCIÓN DE PROBLEMAS Póngase en contacto con nuestra línea de soporte técnico en:...
Need help?
Do you have a question about the AXDIS-GMLN29 and is the answer not in the manual?
Questions and answers