Table of Contents
Advertisement
Quick Links
Söllnerstr. 9
MPI-USB user manual
Art.Nr. 9352-USB
Art.Nr. 9352-USB.05M
documentation of version XX
1 Description
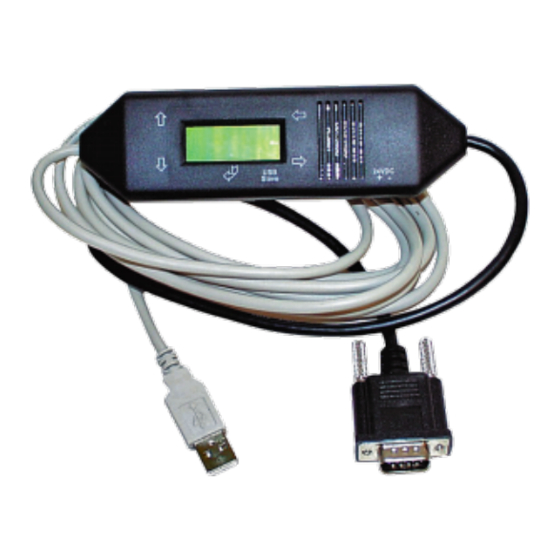
The MPI-USB cable connects the computer via USB with a MPI interface (9 pin interface of the PLC).
2 System requirements
2.1 Operating system(s)
Windows
10
8
7
Vista
XP
ME/2000/NT
2.2 Software
PLC - programming software (eg. PG2000, Step © 7, S7 for Windows, Microwin)
Direct driver for Simatic-Manager for USB PLC - VCOM Software
A video description of the installation of direct-driver and how to configure it can be found on the page
MPI-USB user manual
92637 Weiden
info@traeger.de
+49 (0)961 48 23 0 0
1 / 93
2022/01/21 01:28
Advertisement
Table of Contents

Related Manuals for Traeger 9352-USB


Summary of Contents for Traeger 9352-USB
-
Page 1: Operating System(S)
92637 Weiden info@traeger.de +49 (0)961 48 23 0 0 MPI-USB user manual Art.Nr. 9352-USB Art.Nr. 9352-USB.05M documentation of version XX 1 Description The MPI-USB cable connects the computer via USB with a MPI interface (9 pin interface of the PLC). -
Page 2: Hardware
Söllnerstr. 9 92637 Weiden info@traeger.de +49 (0)961 48 23 0 0 support! 2.3 Hardware USB 1.1 - Type A 2.4 Provided PLCs S7-200 S7-300 (provides baud rates up to 12M (when the PLC is able to support this) S7-400 (provides baud rates up to 12M) FM-devices Sinamix (Step7-direct-driver up V1.20 or PLCVCom up V2.71) -
Page 3: Hardware
Söllnerstr. 9 92637 Weiden info@traeger.de +49 (0)961 48 23 0 0 4 Installation 4.1 Hardware The S7/MPI-USB is plugged directly into the PLC. Via the USB cable of the module can be connected to the PLC as follows: Normal installation (for programming) The MPI cable will be connected to the S7 PLC via the 9 pin connector (short side of the cable). -
Page 4: Usb-Driver-Installation For 32-Bit-Systems
Söllnerstr. 9 92637 Weiden info@traeger.de +49 (0)961 48 23 0 0 4.3 USB-driver-installation for 32-bit-systems The S7-Interface S7-USB, MPI-USB or MPI-II-Kabel over USB as well as the devices of TeleService-familiy will be connected to USB 1.1-compatible port of the PC. - Page 5 Söllnerstr. 9 92637 Weiden info@traeger.de +49 (0)961 48 23 0 0 Enter as source the folder “..\USB-Treiber-x86”. Either in the folder where the downloaded drivers were extracted or the directory on the product CD: MPI-USB user manual 5 / 93...
- Page 6 Söllnerstr. 9 92637 Weiden info@traeger.de +49 (0)961 48 23 0 0 The message of windows logo test skip with “Continue Anyway”: After copying the data appears a little moment later the success message: MPI-USB user manual 6 / 93 2022/01/21 01:28...
- Page 7 Söllnerstr. 9 92637 Weiden info@traeger.de +49 (0)961 48 23 0 0 Upon a successful installation the “PI_Usb.Sys driver” will be displayed without any warnings in the device manager: MPI-USB user manual 7 / 93 2022/01/21 01:28...
- Page 8 Söllnerstr. 9 92637 Weiden info@traeger.de +49 (0)961 48 23 0 0 Will this entry in the device manager shown with a “yellow exclamation mark”, then please install the driver again or look in the driver properties about the reason. If the driver has to be updated, please use the function “Update …” in the driver properties:...
-
Page 9: Usb-Driver-Installation For Win7 64-Bit
Söllnerstr. 9 92637 Weiden info@traeger.de +49 (0)961 48 23 0 0 If the driver has to be deleted, please use the function “Uninstall” in the driver properties: If you install older versions of PLCVCom, Step7-direct-driver or S7IFC, the actual usb-driver will be possible overwritten by previous versions because it was included until 01/11/2012 in their install-shields! 4.4 USB-driver-installation for Win7 64-bit... - Page 10 Söllnerstr. 9 92637 Weiden info@traeger.de +49 (0)961 48 23 0 0 With a right mouse-button-click you will open the properties of the new device: MPI-USB user manual 10 / 93 2022/01/21 01:28...
- Page 11 Söllnerstr. 9 92637 Weiden info@traeger.de +49 (0)961 48 23 0 0 Now select “Update Driver…”: MPI-USB user manual 11 / 93 2022/01/21 01:28...
- Page 12 Söllnerstr. 9 92637 Weiden info@traeger.de +49 (0)961 48 23 0 0 Please select “Browse my computer for driver software” and define as source the folder “..\USB-Treiber- x64”. Either in the folder where the downloaded drivers were extracted or the directory on the product CD: After pressing “Next”...
- Page 13 Söllnerstr. 9 92637 Weiden info@traeger.de +49 (0)961 48 23 0 0 Please press install and a little moment later appears the success message To verify the successful installation, you can look again in the device manager: MPI-USB user manual 13 / 93...
- Page 14 Söllnerstr. 9 92637 Weiden info@traeger.de +49 (0)961 48 23 0 0 Here may appear no exclamation mark! If the driver has to be updated, please use the function “Update driver …” in the driver properties: MPI-USB user manual 14 / 93...
- Page 15 Söllnerstr. 9 92637 Weiden info@traeger.de +49 (0)961 48 23 0 0 If the driver has to be deleted, please use the function “Uninstall” and set the check-box in “Delete the driver software for this device”: If you install older versions of PLCVCom, Step7-direct-driver or S7IFC, the actual usb-driver will be possible...
-
Page 16: Keys
Söllnerstr. 9 92637 Weiden info@traeger.de +49 (0)961 48 23 0 0 5 Control elements 5.1 Keys Name Description ENTER Change menu and confirm input. LEFT Go one menu level back. Cancel input (Input will not be saved). RIGHT Select sub menu. -
Page 17: First Configuration
Söllnerstr. 9 92637 Weiden info@traeger.de +49 (0)961 48 23 0 0 the station number of the MPI – cable. (Default is „0“) (In the system configuration click on „Set PG/PC interface“. In the following dialog click “properties”. Now you can change in the registry card “MPI”... -
Page 18: Using The Plc-Vcom
Söllnerstr. 9 92637 Weiden info@traeger.de +49 (0)961 48 23 0 0 #01P? Take the cable and press the ? key. (Control elements see chapter Control elements)). !02AG MENU Press the Up / Down-key to get to the “Config” menu and press enter. -
Page 19: Programming Software To Use With Direct Access
Söllnerstr. 9 92637 Weiden info@traeger.de +49 (0)961 48 23 0 0 4. Choose the desired MPI cable and click „OK“ to go on. 5. If the connection is established the chosen cable is shown in the section state and on the left side you can see the status connected. - Page 20 Söllnerstr. 9 92637 Weiden info@traeger.de +49 (0)961 48 23 0 0 3. A dialog appears, in which you are able to set the “AG-Interface” (COM-port) in the section “Interfaces”. 4. Configure the baud rate in the section “Bus access“ to “19,2k“. Below change the value for PC - MPI to “187,5kBaud“.
-
Page 21: Set Pg/Pc Interface
Söllnerstr. 9 92637 Weiden info@traeger.de +49 (0)961 48 23 0 0 The connection between PG 2000 and the PLC is now established. A new window appears. Now you can edit the blocks in the PLC. 6.3.2 Set PG/PC interface This step is required for the following software: ⇒... -
Page 22: Pc-Adapter(Auto, Mpi, Profibus)
Söllnerstr. 9 92637 Weiden info@traeger.de +49 (0)961 48 23 0 0 3. A Dialog with a list box named “Interface Parameter Assignment Used:” appears. This box should offer some “PC - Adapter” entries If this is the case, please continue with the step MPI settings Profibus... -
Page 23: Tcp/Ip Rfc1006 Communication
Söllnerstr. 9 92637 Weiden info@traeger.de +49 (0)961 48 23 0 0 access for the PLC used. Click “Yes“ if you want to use the „MPI“communication type. Otherwise click “No“(e.g. if you want to use the “PROFIBUS“ communication type). 6.3.2.2 TCP/IP RFC1006 Communication 7. - Page 24 Söllnerstr. 9 92637 Weiden info@traeger.de +49 (0)961 48 23 0 0 11. Select “PC Adapter (MPI)” and click “Properties”. 12. Open the properties dialog Choose the register “Local Connection” 13. Set here the COM port. 14. You also change the “transfer rate” to “19200”.
-
Page 25: Profibus Setting
Söllnerstr. 9 92637 Weiden info@traeger.de +49 (0)961 48 23 0 0 15. In the register card “MPI“choose the “Transmission Rate” to “187,5 kbit/s“. Change the “Highest Station Address” (HSA) to “126”. 16. Acept your settings with “OK” and exit the “PG / PC interface setting” dialog with “OK”. - Page 26 Söllnerstr. 9 92637 Weiden info@traeger.de +49 (0)961 48 23 0 0 18. In the registry card “Locale connection” you have to set the COM Port. 19. Set the “Transmission Rate” to “19200” MPI-USB user manual 26 / 93 2022/01/21 01:28...
-
Page 27: Tcp/Ip Rfc1006 Setting
Söllnerstr. 9 92637 Weiden info@traeger.de +49 (0)961 48 23 0 0 20. Choose the registry card “PROFIBUS” and set the “Transmission Rate” to “187,5kbit/s”. 21. Set the “Profile“ to “DP“ (“decentralized Peripherals “). 22. Save your settings by clicking the “OK“button and close the opened “Set PG/PC - interface“dialog 6.3.2.5 TCP/IP RFC1006 setting... -
Page 28: Windows Control Center (Wincc) (V6.0)
“Create”. Söllnerstr. 9 92637 Weiden info@traeger.de +49 (0)961 48 23 0 0 To use one of the other options please go ahead and read in the manual of WinCC software. 5. Please wait until the project is created. The project content will be shown in the left part of the main window. -
Page 29: Mpi Configuration
Söllnerstr. 9 92637 Weiden info@traeger.de +49 (0)961 48 23 0 0 TCP/IP 6.3.4.1 MPI Configuration 9. Now you are able to type in the name of the connection. With a click on “Configuration“ a new dialog will appear. Now you are able to set the properties of the connection. Set up the station address of the PLC (in this example “2“). -
Page 30: Tcp/Ip Configuration
Söllnerstr. 9 92637 Weiden info@traeger.de +49 (0)961 48 23 0 0 6.3.4.2 TCP/IP Configuration 10. A dialog appears where you can configure the connection parameters. Set up the IP - Address of the module and configure the rack number as well as the slot number. Confirm this configuration by clicking “OK”. -
Page 31: Communication And Fault Diagnosis
Söllnerstr. 9 92637 Weiden info@traeger.de +49 (0)961 48 23 0 0 Ethernet. Open the “System parameters“dialog from the context menu (right-click on TCP/IP). 16. Choose from the registry card „Unit“ and set the “logical device name“ to your network interface card (usually the name of the NIC begins with a „TCP/IP - >... -
Page 32: Windows Control Center Flexible 2004 (Wincc Flexible) (V5.2.0.0)
Söllnerstr. 9 92637 Weiden info@traeger.de +49 (0)961 48 23 0 0 21. If you take a right-click on the error value a window opens with “Help”. Click on the “Help” window and a yellow window appears (tooltip) with detailed error descriptions. - Page 33 Söllnerstr. 9 92637 Weiden info@traeger.de +49 (0)961 48 23 0 0 3. In the “Device selection“mark the used operator panel (example: “TP 170A“) confirm with “OK“. 4. After the project has been created right-click in the project window on “Connections“of the sub menu “Communication“.
-
Page 34: Protool/Pro V6.0 Sp2
Söllnerstr. 9 92637 Weiden info@traeger.de +49 (0)961 48 23 0 0 6. Now you can start with your work. If you have finished work you can transfer this project to the panel by reading the next steps. 7. Choose „Transfer Settings“ from the sub menu „Transfer”. - Page 35 Söllnerstr. 9 92637 Weiden info@traeger.de +49 (0)961 48 23 0 0 4. „Next“ leads you to a new dialog. Type in the specfic fields the name of the PLC device and choose the used PLC in the driver selection (e.g. „SIMATIC S7 – 300/400 V6.0“).
-
Page 36: Microwin V3.2 (Only For S7 200)
Söllnerstr. 9 92637 Weiden info@traeger.de +49 (0)961 48 23 0 0 9. If you want to transfer you project to the panel you have to generate the project first. This can be done with a click on „File“ -„Compile“. 10. To transfer the project just click on „File“ „Download“ „Start Project Download“ or click on the right symbol Please wait while the project is transferred. - Page 37 Söllnerstr. 9 92637 Weiden info@traeger.de +49 (0)961 48 23 0 0 Configure the „PLC Type“ (e.g. „CPU 224“) as well as the „CPU Version“ (e.g. „01.22”) to the dialog. 3. Click on „Communications…” to start the next dialog. In the sector „Address” set up the „Remote”...
-
Page 38: Microwin V4.0 In Ppi-Multimaster-Mode
Söllnerstr. 9 92637 Weiden info@traeger.de +49 (0)961 48 23 0 0 the PLC. 5. The sector „Address“ should be updated and displays the „PLC Type”. Also the CPU of the PLC is displayed in the right part of the dialog. - Page 39 Söllnerstr. 9 92637 Weiden info@traeger.de +49 (0)961 48 23 0 0 8. In the menu „PPI“ you are able to configure diverse settings like for e.g. “HSA“. MPI-USB user manual 39 / 93 2022/01/21 01:28...
- Page 40 Söllnerstr. 9 92637 Weiden info@traeger.de +49 (0)961 48 23 0 0 9. In the menu “Local Connection“ you select the com-port “Interface to“ to the port which is served from the tool PLCVCom. 10. Click on the button “OK“ and click in the left down area in your windows on „Communikations“.
-
Page 41: S7 For Windows V5.02
Söllnerstr. 9 92637 Weiden info@traeger.de +49 (0)961 48 23 0 0 12. When the PLC was found, the picture changes it like this: 13. Prove the dialog with „OK“ until you would be in the main window. The communication to the PLC is now ready. - Page 42 Söllnerstr. 9 92637 Weiden info@traeger.de +49 (0)961 48 23 0 0 2. Choose File - >Preferences… to configure the communication configuration between the computer and the PLC. A new dialog appears which provides to set up a lot of configuration data about the communication with your PLC.
- Page 43 Söllnerstr. 9 92637 Weiden info@traeger.de +49 (0)961 48 23 0 0 address in your MPI bus. Otherwise every PLC which is higher than this number will not been seen (e.g. if there is only one PLC in your bus „15“ is more than enough).
-
Page 44: Configure Operating Terminal Via Mpi-Ii / Mpi-Usb
Söllnerstr. 9 92637 Weiden info@traeger.de +49 (0)961 48 23 0 0 The communication between the software and your PLC is established. 6.4 Configure operating terminal via MPI-II / MPI-USB Note: The TP070 and OP73 can be configured via the RS485 with the MPI-II / MPI-USB. -
Page 45: Direct Setting Of A Slave Address To A Passive Profibus-Slave
Söllnerstr. 9 92637 Weiden info@traeger.de +49 (0)961 48 23 0 0 Config Navigate in the Config menu to “PG / PC”. Press the Enter PD/PC key. PD/PC Press Enter to configure the “baudrate” to 38.4k. Baudrate PG/PC Press down once and press Enter to set the the “parity” to parity None. -
Page 46: Graphical Description
Söllnerstr. 9 92637 Weiden info@traeger.de +49 (0)961 48 23 0 0 elements”. 7.1.1 Graphical Description With enter you will get in the menu of the cable. This menu has the following structure: MENU ⇒ MENU ⇒ Info Message MENU ⇒ Config MENU ⇒... - Page 47 Söllnerstr. 9 92637 Weiden info@traeger.de +49 (0)961 48 23 0 0 • Mode: Choose this menu to configure the cable mode. Mode Meaning MPI SER MPI-communication over RS232-interface MPI USB MPI-communication with PLCVCom/Step7-driver over USB-interface PPI 9K6 PPI-communication with 9600 baud over RS232-interface...
-
Page 48: Bus
Söllnerstr. 9 92637 Weiden info@traeger.de +49 (0)961 48 23 0 0 menu) „Lock“ in the sub menu „Data“. (This sub menu is also described at the bottom of the next page) - Master In the case that the cable is connected with only one passive station, configure „Master“ to the cable to determine that the cable is configuring itself. -
Page 49: Language Selection
Söllnerstr. 9 92637 Weiden info@traeger.de +49 (0)961 48 23 0 0 8 S7-Interface Configurator Help Language selection User interface Bus configuration Network settings Parameterize TELEService Index "Network" Index "Modem" Index "Serial Parameter" Index "Access Protection" Index "GSM/ISDN/SMS" Index "Internet/Mail" Tuning Factory defaults PPI Boot off... - Page 50 Söllnerstr. 9 92637 Weiden info@traeger.de +49 (0)961 48 23 0 0 Below the buttons is a list of the found devices. In each line an image, the type of the device, name (if existing), interface, serial number (if possible) and the OS-version of the device is displayed. On the rightmost position the actual OS-version on the harddisk is displayed.
-
Page 51: Bus Configuration
Söllnerstr. 9 92637 Weiden info@traeger.de +49 (0)961 48 23 0 0 The button Update with FD updates the OS of the device and sets the factory default. The button Bootstrap sets the firmware/configuration to factory default. The button Factory defaults sets the configuration to factory default. -
Page 52: Network Settings
Söllnerstr. 9 92637 Weiden info@traeger.de +49 (0)961 48 23 0 0 Here you can parameterize the following: Use bus config for PC Tooks the bus configuration from the PC Baud rate chooses the Baut rate for the cable to bus communication... -
Page 53: Parameterize Teleservice
Söllnerstr. 9 92637 Weiden info@traeger.de +49 (0)961 48 23 0 0 Factory default This button sets all over the network reachable devices to factory default. DHCP-client active When set the device acts as DHCP-client. IP address Here you could enter the IP Address over which the device is accessed in the network. -
Page 54: Index "Network
Söllnerstr. 9 92637 Weiden info@traeger.de +49 (0)961 48 23 0 0 Depending on the version of your TELEService software choose Yes or No. The regular parameters can be changed manually in the following categories: 8.5.1 Index "Network": Here you can configure following:... -
Page 55: Index "Modem
Söllnerstr. 9 92637 Weiden info@traeger.de +49 (0)961 48 23 0 0 8.5.2 Index "Modem": In this dialog you could configure the modem related setup. Modem Settings: The initialization string consists of several commands to the modem together: AT ⇒ start command &F ⇒... -
Page 56: Index "Serial Parameter
Söllnerstr. 9 92637 Weiden info@traeger.de +49 (0)961 48 23 0 0 Number of redial At number of retries you could configure the number of retries for a attempts connection before the call is stopped. Using a retry you could enter the seconds the application should wait Redial after between calls. -
Page 57: Index "Gsm/Isdn/Sms
Söllnerstr. 9 92637 Weiden info@traeger.de +49 (0)961 48 23 0 0 TS-adapter). After changing the password for a user/administrator you must re-type it again correctly. You can enter a callback number which is used for a callback from the TS-adapter. After you dialled the number of the TS-adapter, you are asked for username and password. - Page 58 Söllnerstr. 9 92637 Weiden info@traeger.de +49 (0)961 48 23 0 0 PIN number of the SIM card, up to eight numeric characters (only for TELE-SERVICE GSM). With the button „Provider“ the provider could be chosen. Read the list of providers could be elapse more than a minute.
- Page 59 Söllnerstr. 9 92637 Weiden info@traeger.de +49 (0)961 48 23 0 0 SMS: Switches: NO SEND SMS RECEIVE SMS SEND+RECEIVE SMS DMTF CONFIRMATION SEND SMS+DTMF CONFIRMATION RECEIVE SMS+DTMF CONFIRMATION SEND+RECEIVE+DTMF CONFIRMATION SEND MAIL SEND MAIL+SEND SMS SEND MAIL+RECEIVE SMS SEND MAIL+SEND+RECEIVE SMS...
- Page 60 Söllnerstr. 9 92637 Weiden info@traeger.de +49 (0)961 48 23 0 0 Configure the SMS-Provider to use, including type, phone-number and char- code. Provider 0/1/2/3 First Input: Choose a type of the transmission. Second Input: Telephone number or email address. Third Input: Choose a character encoding.
-
Page 61: Index "Internet/Mail
Söllnerstr. 9 92637 Weiden info@traeger.de +49 (0)961 48 23 0 0 in the MPI-Bus. (FC=ZZh) ErrCode 04: The function-code (YYh) of the received State protocol from XXX is incorrect. The 7th Bit is High, but according to the specification the Bit has to be low. -
Page 62: Tuning
Söllnerstr. 9 92637 Weiden info@traeger.de +49 (0)961 48 23 0 0 The internet connection is configured by PPP, often a username and password is needed. Define them in “Internet access over PPP”. Attention: This is NOT the username and password of your E-Mail-account! In the next section “Mail”... - Page 63 Söllnerstr. 9 92637 Weiden info@traeger.de +49 (0)961 48 23 0 0 The following configuration is possible, it will be transferred to the Cable by pressing the button „OK“. The configuration is saved permanently in the Flash-ROM: The first selection areas:...
-
Page 64: Factory Defaults
Söllnerstr. 9 92637 Weiden info@traeger.de +49 (0)961 48 23 0 0 Send reset to cable. Console: Shows some information about the status of the connection. 8.7 Factory defaults This button sets the configuration of the selected device to factory defaults. - Page 65 The MPI cable manager can be used for the following products: • MPI-LAN cable– Art. ID. 9352-LAN • S7-LAN module– Art. ID. 9352-LANCon • MPI-USB cable– Art. ID. 9352-USB • S7-USB module– Art. ID. 9352-S7-USB • MPI-II cable (USB – operation) – Art. ID. 9352 + 9352.1 •...
- Page 66 Söllnerstr. 9 92637 Weiden info@traeger.de +49 (0)961 48 23 0 0 2.Following the Language selection the installation starts and a welcome-screen is displayed. Next click onto the button „Next“. To change the installation path, click on “Browse”. Then click “Continue”.
- Page 67 Söllnerstr. 9 92637 Weiden info@traeger.de +49 (0)961 48 23 0 0 4. Wait for the installation of the files. 5. End the installation after a successful copy of data with “Finish”. 9.3 Overview 9.3.1 Language After starting the application the tab Language is displayed at first:...
- Page 68 Söllnerstr. 9 92637 Weiden info@traeger.de +49 (0)961 48 23 0 0 In this Dialog you could choose the used language in the application. You could choose between German and English and confirm by clicking on the desired language. 9.3.2 Interface In „set interface“...
- Page 69 Söllnerstr. 9 92637 Weiden info@traeger.de +49 (0)961 48 23 0 0 The diskette show the current operating system installed on your PC for corresponding product. The cabel-symbol on the right show the operating system which is installed on your product at the moment.
- Page 70 Söllnerstr. 9 92637 Weiden info@traeger.de +49 (0)961 48 23 0 0 9.3.4.1 Telephone book At the moment not implemented! In this dialog you could define new elements or edit/erase existing elements in your telephone-book. You could edit the following data: ⇒...
- Page 71 Söllnerstr. 9 92637 Weiden info@traeger.de +49 (0)961 48 23 0 0 In this dialog, all configuration to the TS-adapter is done. The actual state of the MPI-cable is displayed right of the button “TS-function”, where the follwing 4 possible Messages could apear: „TS-Adapterfunction is NOT activ.
- Page 72 Söllnerstr. 9 92637 Weiden info@traeger.de +49 (0)961 48 23 0 0 9.3.4.3.2 „TS-function“ With this button you select the function of the MPI-cable as TS- or PC-adapter. Right of this button the actual state of the MPI-cable is displayed. 9.3.4.3.3 „configure adapter“...
- Page 73 Söllnerstr. 9 92637 Weiden info@traeger.de +49 (0)961 48 23 0 0 station related: Here you can configurate following: The TS-Adapter is the one and only master in the MPI-bus Which local station-address is used for the TS-Adapter. Please consider that a programming device has normally the number 0, operator panel have 1, PLC’s use 2, FM/CP’s 3 etc.
- Page 74 Söllnerstr. 9 92637 Weiden info@traeger.de +49 (0)961 48 23 0 0 In this dialog you could configure the modem-related setup. The Init-String is composed out of several commands to the modem: AT ⇒ start command &F ⇒ use factory settings E0 ⇒...
- Page 75 Söllnerstr. 9 92637 Weiden info@traeger.de +49 (0)961 48 23 0 0 In this dialog the transfer-rate between modem and TS-Adapter is selected. The transfer-rate could choosen between the follwing values: 2400, 4800, 9600, 19.2k, 38.4k, 57.6k and 115.2kBaud The Parity could be choosen, but this is modem-dependant because some modems could not transfer the...
- Page 76 Söllnerstr. 9 92637 Weiden info@traeger.de +49 (0)961 48 23 0 0 The Access over a telephone-line on the PLC could be configured in this dialog. The Administrator could change the configuration over a telephone line, where an 2 User could not change the configuration.
- Page 77 Söllnerstr. 9 92637 Weiden info@traeger.de +49 (0)961 48 23 0 0 You could choose the Location of the Modem. ISDN modem: Type: Choose the type of the ISDN-network switch: AT&T 5ESS Nothern Telecom DMS-100 EuroISDN NET3 (Standard) INS64 US NI-1...
- Page 78 Söllnerstr. 9 92637 Weiden info@traeger.de +49 (0)961 48 23 0 0 Protocol: Choose the transfer-protocol-type: Modem like V.120 X.75 (Standard) ML-PPP SoftBonding HDLC CLEAR DN/MSN: Directory Number resp. Multiple Subscriber Number Is used for both ISDN-channels. When using the number 255 no DN/MSN is used.
- Page 79 Söllnerstr. 9 92637 Weiden info@traeger.de +49 (0)961 48 23 0 0 Display Description: Unknown: Unknown state of the GSM-network no registration: The modem is not registered in the GSM network, no provider found registration denied: Registration in the GSM-network is denied...
- Page 80 Söllnerstr. 9 92637 Weiden info@traeger.de +49 (0)961 48 23 0 0 The MPI/Profibus-Baudrate is not detectable Overflow in the internal MPI-Readbuffer Overflow in the internal LAN-Readbuffer Overflow in the serial Buffer The selected MPI/Profibus-Baudrate is wrong Overflow in internal LAN-Writebuffer...
- Page 81 Söllnerstr. 9 92637 Weiden info@traeger.de +49 (0)961 48 23 0 0 (SD1=XXh,SD1=YYh,CPU=ZZZ,FC=UUh) ErrCode 20: Unknown protocol at PPIMultimaster-Mode. (FC=XXh,Länge=YYY) ErrCode 21: Unknown baud-rate at PPIMultimaster-Mode. (Baudrate=XXh) After that additional hints are displayed. SMS: SMS: Switches Processing OFF / Only Receive / Only Send / Receive and Send.
- Page 82 Söllnerstr. 9 92637 Weiden info@traeger.de +49 (0)961 48 23 0 0 9.3.5 Tuning This tab is only used in some special cases. If you press the button „Check Adapter“ the cable is connected und after that the following dialog is displayed: There are the following configuration possible, they will be transferred to the MPI-Cable by pressing the...
- Page 83 The PLC-VCom application is needed for use with the following devices: • MPI-LAN Cable– Art. No.. 9352-LAN • S7-LAN Modul – Art. No.. 9352-LANCon • MPI-USB Cable– Art. No.. 9352-USB • S7-USB Modul – Art. No.. 9352-S7-USB • MPI-II Cable (USB – mode) – Art. No.. 9352 + 9352.1 •...
- Page 84 Söllnerstr. 9 92637 Weiden info@traeger.de +49 (0)961 48 23 0 0 10.2 Installation 1. Download the PLCVCom from the product-page of your MPI-product and start the installation. 2. After choosing language the welcome dialog appears in the chosen language. Click “Next“ to define the installation path (see right picture).
- Page 85 Söllnerstr. 9 92637 Weiden info@traeger.de +49 (0)961 48 23 0 0 6. On Windows XP this dialog appears while installation (see left picture). It is the “Windows Driver Qualifying Question”. Press “continue installation“ to go on. 7. After the driver has been installed, please disconnect your MPI-USB Cable and than connect it again.
- Page 86 Söllnerstr. 9 92637 Weiden info@traeger.de +49 (0)961 48 23 0 0 10. Plug the cable into the USB port of your computer and wait until the automatical hardware recognition starts . Alternative: „Control panel - Hardware“. 11. The “hardware assistent“ wants you to install the “USB < - > Serial“ driver. Click on “Next” to configure the driver search.
- Page 87 Söllnerstr. 9 92637 Weiden info@traeger.de +49 (0)961 48 23 0 0 14. Now the “Hardware - Assistent“ should show a dialog which is equal to the picture below. Click on “Next“ to start the installation. 15. After the installation finished successful click on “Ready“ to end this installation.
- Page 88 Söllnerstr. 9 92637 Weiden info@traeger.de +49 (0)961 48 23 0 0 1. Configuration: Select and open the configuration program for your products. ⇒ PLC-VCOM: Management, connection and communication with the cables ⇒ S5-LAN: configuration of your S5-LAN modules ⇒ MPI/S7-LAN: Configuration of your MPI-LAN or S7LAN 2.
- Page 89 Söllnerstr. 9 92637 Weiden info@traeger.de +49 (0)961 48 23 0 0 List of available cable / modules: ⇒ Linewise display of the products found with your properties 2. IP-Adress: ⇒ IP address and MAC address of the selected cable / module 3.
- Page 90 Söllnerstr. 9 92637 Weiden info@traeger.de +49 (0)961 48 23 0 0 10.4 Configuration 1. Start the PLC – VCom application, if this is not already running. 2. Open the PLC-VCOM by clicking on the icon PLC-VCOM in the system tray.
- Page 91 Söllnerstr. 9 92637 Weiden info@traeger.de +49 (0)961 48 23 0 0 to the PLC: PPI/MPI/Profibus interface: 9,6 KBd - 12 MBd Interfaces: to the PD/PC: USB 1.1 cable type A Galvanic separation: 1000V PPI/MPI/Profibus to the PC Operating temperature: 5 - 55°C...
- Page 92 Söllnerstr. 9 92637 Weiden info@traeger.de +49 (0)961 48 23 0 0 MPI-USB user manual 92 / 93 2022/01/21 01:28...
-
Page 93: Table Of Contents
Söllnerstr. 9 92637 Weiden info@traeger.de +49 (0)961 48 23 0 0 Table of Contents 2.1 Operating system(s) ........................2.2 Software ............................2.3 Hardware ............................2.4 Provided PLCs ..........................4.1 Hardware ............................4.2 Software ............................4.3 USB-driver-installation for 32-bit-systems ................4.4 USB-driver-installation for Win7 64-bit ..................
Need help?
Do you have a question about the 9352-USB and is the answer not in the manual?
Questions and answers