Subscribe to Our Youtube Channel
Summary of Contents for Mooreco 91785 Series
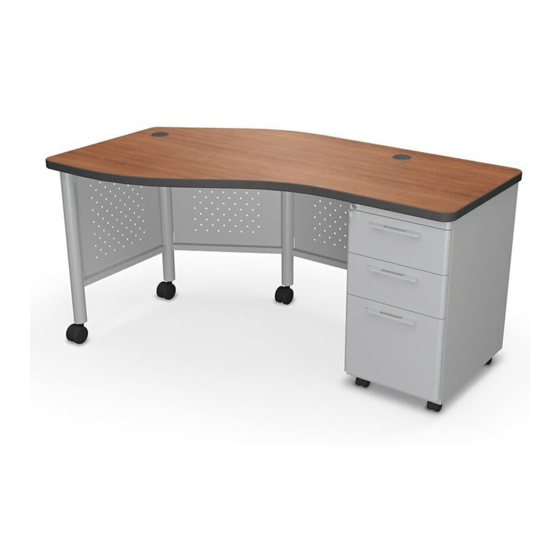
- Page 1 Instructor Teacher’s Desk Part Numbers: 91785-XXXX-XX, 91786-XXXX-XX ASSEMBLY INSTRUCTIONS INSTRUCCIONES DE ENSEMBLAJE INSTRUCTIONS DE MONTAGE DO NOT THROW AWAY! NO LA TIRE NE PAS JETER UPDATED AS OF: 05/07/2021 1 of 9...
- Page 2 Parts Hardware P1 - Table Top A - Wood Screw (#10 x 1.75”) P2 - Leg Panel A B - Machine Screw (M6 x 12mm) P3 - Leg Panel B C - Ped. Wood Screw (#12 x 1”) P4 - Back Panel D - Ped.
-
Page 3: Warranty
WARNINGS AND DISCLAIMERS ADVERTENCIAS Y RENUNCIAS AVERTISSEMENTS Review full assembly instructions and Previo a comenzar el proceso de Avant de commencer l’ assamblage check that all parts are present before ensamblaje favor revisar veuillez consulter instructions beginning assembly. Heavy or large instrucciones y asegurarse que cuenta con complètes et vérifier si vous avez toutes furniture may require multiple persons in... - Page 4 Open shelves and remove handle screws. Swap handles to front of shelves and insert STEP 1 handle screws from inside of shelves to secure handles in place. Remove shelves by first extending shelf to furthest setting until catch engages. To slide STEP 2 shelf off of rails, rotate visible catch levers on both sides of shelf either up or down while gently pulling shelf.
- Page 5 FOR RIGHT HANDED DESK: Set top on protected surface so that underside is facing STEP 3A up. Install legs and modesty panel pieces as shown using machine and wood screws provided. Use pre-drilled holes for proper panel alignment. (See STEP 3B for Left Handed Desk). NOTE: Must use panel with holes in location shown UPDATED AS OF: 05/07/2021...
- Page 6 FOR LEFT HANDED DESK: Set top on protected surface so that underside is facing STEP 3B up. Install legs and modesty panel pieces as shown using machine and wood screws provided. Use pre-drilled holes for proper panel alignment. NOTE: Must use panel with holes in location shown UPDATED AS OF: 05/07/2021 6 of 9...
- Page 7 Set empty pedestal box upside down on top in position shown. Secure to panel with two STEP 4 screws through side inserts. (Instructions that follow depict right handed desk installation. For left handed desk installation part positions will be mirrored.) Set Crossbar on top between pedestal and panel.
- Page 8 Screw pedstal box into top with five wood screws through holes shown. STEP 6 Insert Pedestal Casters by sliding tabs into slots then locking in place with screws. STEP 7 Be sure to place locking casters in front and non-locking in back. UPDATED AS OF: 05/07/2021 8 of 9...
- Page 9 STEP 8 Insert threaded stems on Leg Casters into posts, placing single non-lcoking caster in the back. Be sure to include a Lock Washer with each and tighten with Caster Wrench. With at least two people, flip desk upright. Insert shelves back into pedestal box and STEP 9 place accessories as desired within shelves.


Need help?
Do you have a question about the 91785 Series and is the answer not in the manual?
Questions and answers