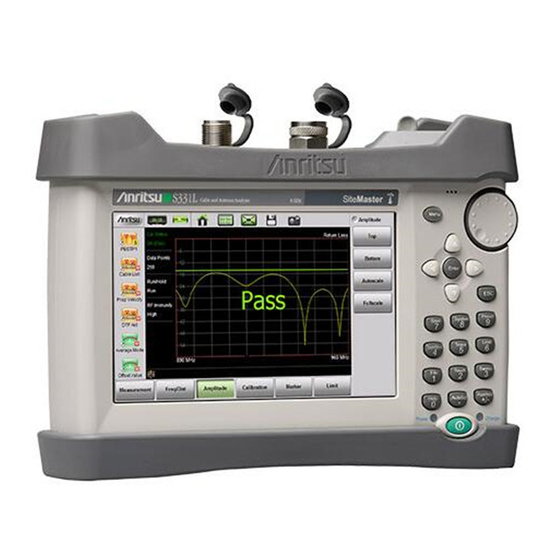
Anritsu Site Master S331L Maintenance Manual
Handheld cable and antenna analyzer featuring classic and advanced modes
Hide thumbs
Also See for Site Master S331L:
- User manual (284 pages) ,
- Scpi programming manual (96 pages)
Table of Contents
Advertisement
Quick Links
Maintenance Manual
Site Master™
S331L
Handheld Cable and Antenna Analyzer
Featuring Classic and Advanced Modes
2 MHz to 4 GHz Cable & Antenna Analyzer
50 MHz to 4 GHz Power Meter
Anritsu Company
Part Number: 10580-00323
490 Jarvis Drive
Revision: B
Morgan Hill, CA 95037-2809
Published: August 2012
USA
Copyright 2012 Anritsu Company
Advertisement
Table of Contents

Related Manuals for Anritsu Site Master S331L


Summary of Contents for Anritsu Site Master S331L
- Page 1 Featuring Classic and Advanced Modes 2 MHz to 4 GHz Cable & Antenna Analyzer 50 MHz to 4 GHz Power Meter Anritsu Company Part Number: 10580-00323 490 Jarvis Drive Revision: B Morgan Hill, CA 95037-2809 Published: August 2012 Copyright 2012 Anritsu Company...
- Page 2 Site Master is a trademark of Anritsu Company. NOTICE Anritsu Company has prepared this manual for use by Anritsu Company personnel and customers as a guide for the proper installation, operation and maintenance of Anritsu Company equipment and computer programs. The drawings, specifications, and information contained herein are the property of Anritsu Company, and any unauthorized use or disclosure of these drawings, specifications, and information is prohibited;...
- Page 3 Some or all of the following five symbols may or may not be used on all Anritsu equipment. In addition, there may be other labels attached to products that are not shown in the diagrams in this manual.
- Page 4 For Safety Warning Always refer to the operation manual when working near locations at which the alert mark, shown on the left, is attached. If the operation, etc., is performed without heeding the advice in the operation manual, there is a risk of personal injury.
-
Page 5: Table Of Contents
Anritsu Customer Service Centers ........ - Page 6 Contents-2 PN: 10580-00323 Rev. B S331L MM...
-
Page 7: Chapter 1-General Information
From here, you can select the latest sales, select service and support contact information in your country or region, provide online feedback, complete a “Talk to Anritsu” form to have your questions answered, or obtain other services offered by Anritsu. -
Page 8: Recommended Test Equipment
Power Output to +13 dBm options 2, 3, 4, 22, 15 Power Range: −70 dBm to +20 dBm Power Meter Anritsu Single Channel Model ML2437A Power Sensor Frequency: 100 kHz to 18 GHz Anritsu Model SC7400 Power Range: –55 dBm to +20 dB... -
Page 9: Replaceable Parts
Bracket for the Main Board, includes battery foam and 8 screws 2000-1687-R N-connector Thumb Wheel Firmware Updates Refer to the S331L User Guide (Anritsu Part Number 10580-00321) for the procedure on updating the firmware. S331L MM PN: 10580-00323 Rev. B... - Page 10 1-5 Firmware Updates General Information PN: 10580-00323 Rev. B S331L MM...
-
Page 11: Chapter 2-S331L Performance Verification
Equipment Required • Frequency Counter Frequency: 2 GHz Anritsu Model MF2412B • RF Coaxial Cable Freq: DC to 18 GHz, N(m) to N(m), 50 Ohm, Anritsu Model 15NN50-0.6B Procedure 1. Verify that the S331L is in Cable and Antenna Analyzer mode and preset the unit. -
Page 12: Return Loss Accuracy Verification
• Open/Short Frequency: DC to 18 GHz Anritsu Model 22N50 • Precision Load: Anritsu Model SM/PL-1 • 6 dB Offset Termination Frequency: DC to 18.0 GHz Anritsu Model SC5905 • 20 dB Offset Termination Frequency: DC to 18.0 GHz Anritsu Model SC5906 Procedure 1. -
Page 13: Power Meter Verification
• Power Sensor: Anritsu Model SC7400 • Synthensizer: Anritsu Model MG3692B • Power Splitter: Aeroflex/Weinschel Model 1870A • RF Coaxial Cable: Anritsu Model 15NN50-0.6B Procedure 1. Connect the SC7400 power sensor to the ML2437A power meter and zero/cal the sensor. - Page 14 2-4 Power Meter Verification S331L Performance Verification 8. Adjust the MG3692B’s power level so the ML2437A reads -30 dBm. 9. Record the S331L’s power reading in Table A-3. 10. Repeat Step 2 through Step 9 for the other frequencies within Table A-3.
-
Page 15: Instacal Verification
The following test can be used to verify the accuracy of return loss measurements using the InstaCal module to perform an OSL calibration on the S331L. Equipment Required • 6 dB Offset Termination Frequency: DC to 18.0 GHz Anritsu Model SC5905 • 20 dB Offset Termination Frequency: DC to 18.0 GHz Anritsu Model SC5906 Procedure 1. - Page 16 2-5 InstaCal Verification S331L Performance Verification PN: 10580-00323 Rev. B S331L MM...
-
Page 17: Chapter 3-Battery Information
Chapter 3 — Battery Information General Information The following information relates to the care and handling of the Anritsu PN ND74886 Lithium-Ion battery pack. The S331L has two separate batteries that should be replaced as a pair. The ND74886 includes two batteries. - Page 18 3-1 General Information Battery Information PN: 10580-00323 Rev. B S331L MM...
-
Page 19: Chapter 4-Assembly Replacement
Chapter 4 — Assembly Replacement This section will provide a list of tools and procedures to replace the sub-assemblies within the S331L. Tools Required: • #1 Philips Screw Driver • #6 Torx Screw Driver • 19mm wrench Replacing the S331L Batteries Electrostatic Discharge (ESD) can damage the highly sensitive circuits in the instrument. - Page 20 4-1 Replacing the S331L Batteries Assembly Replacement 2. Remove the six screws screws from the bottom of the unit holding the battery cover in place, and remove the battery cover. Figure 4-2. Battery Cover Removed 3. Remove the battery connectors from the Main board by gently pulling on them and then remove the batteries from the unit..
-
Page 21: Removing The Rear Case To Gain Access To Internal Assemblies
Assembly Replacement 4-2 Removing the Rear Case to Gain Access to Internal Assemblies Removing the Rear Case to Gain Access to Internal Assemblies 1. Remove the batteries as described in Section 4-1 “Replacing the S331L Batteries” 2. Remove the USB/Power cover assembly by removing the 4 screws. Figure 4-4. - Page 22 4-2 Removing the Rear Case to Gain Access to Internal Assemblies Assembly Replacement 4. Remove the InstaCal/PM module by removing the four screws holding the module in place and then gently pulling the module out. Figure 4-6. Remove 4 screws and InstaCal / PM Module 5.
- Page 23 Assembly Replacement 4-2 Removing the Rear Case to Gain Access to Internal Assemblies 6. Place the unit face down on a flat smooth surface, so the LCD and Touch screen will not get scratched and remove the four screws (one in each corner). Figure 4-8.
-
Page 24: Main/Vna Pcb Assembly Replacement
4-3 Main/VNA PCB Assembly Replacement Assembly Replacement Main/VNA PCB Assembly Replacement Procedures in this section are generic, and apply to many similar instruments. Photos and Note illustrations used are representative and may not match your instrument. This section describes the removal and replacement of the Main/VNA PCB which is attached to the S331L Case. - Page 25 Assembly Replacement 4-3 Main/VNA PCB Assembly Replacement 4. Remove the 7 screws holding the VNA assembly to the LCD bracket. Figure 4-11. Remove 9 Screws 5. Gently separate the VNA from the LCD bracket. 6. Installation is the reverse of removal. Take care to properly fit the connector panel into the grooves in the top of the case and confirm that none of the cables will be pinched when the back case is re-installed.
-
Page 26: Instacal / Power Meter Assembly Replacement
4-4 InstaCal / Power Meter Assembly Replacement Assembly Replacement InstaCal / Power Meter Assembly Replacement 1. Remove the four screws circled in Figure 4-12. Figure 4-12. InstaCal / Power Meter Removal 2. Gently pull the InstaCal / Power Meter Assembly out of the unit. 3. -
Page 27: Lcd And Touch Screen Assembly Replacement
Assembly Replacement 4-5 LCD and Touch Screen Assembly Replacement LCD and Touch Screen Assembly Replacement This procedure provides instructions for removing and replacing the Liquid Crystal Display (LCD) and touch screen assembly. 1. Remove the batteries as described in Section 4-1 “Replacing the S331L Batteries” on page 4-1. - Page 28 4-5 LCD and Touch Screen Assembly Replacement Assembly Replacement 6. Remove the red and white cable from the keypad PCB by gently pulling it out of the connector. Figure 4-15. Remove Red and White Cable 7. Unlock the flex cable connector and remove the flex cable from the keypad PCB. Figure 4-16.
- Page 29 Assembly Replacement 4-5 LCD and Touch Screen Assembly Replacement 8. Once the flex cable connector is in the unlocked position, then gently pull the flex cable out of the connector. Figure 4-17. Flex Cable Connector in Unlocked Position 9. Gently remove the LCD and touch screen assembly from the front case. 10.
-
Page 30: Keypad Pcb And Rubber Keypad Replacement
4-6 Keypad PCB and Rubber Keypad Replacement Assembly Replacement Keypad PCB and Rubber Keypad Replacement 1. Remove the batteries as described in Section 4-1 “Replacing the S331L Batteries” on page 4-1. 2. Remove the rear case as described in Section 4-2 “Removing the Rear Case to Gain Access to Internal Assemblies”... -
Page 31: Som Module Replacement
Assembly Replacement 4-7 SOM Module Replacement SOM Module Replacement This procedure provides instructions for removing and replacing the SOM module attached to the Main/VNA PCB. 1. Remove the batteries as described in Section 4-1 “Replacing the S331L Batteries” on page 4-1. - Page 32 4-7 SOM Module Replacement Assembly Replacement 6. With the shields removed the SOM Module can now be removed by gently prying up at each end where the arrows are located until the module releases from the Main/VNA PCB, see Figure 4-21.
- Page 33 Assembly Replacement 4-7 SOM Module Replacement 7. After the SOM module has been replaced, then Test Fixture T4011 is needed to re-install the two shields to the Main board. Figure 4-22. Test Fixture T4011 with Lever in Up Position S331L MM PN: 10580-00323 Rev.
- Page 34 4-7 SOM Module Replacement Assembly Replacement 8. Install the bottom shield, main PCB and top shield into the T4011 test fixture. Align the screw holes and press the lever to the down position to secure the parts. Once the parts are secure, install the 14 screws to secure the shields to the main PCB.
-
Page 35: Chapter 5-Troubleshooting
DC converter (Anritsu part number 40-187-R) to the unit allowing the batteries to charge. 2. Battery may be the wrong type. Use only Anritsu approved battery packs. Some non-approved battery packs will fit into the S331L, but are electrically incompatible and will not charge correctly. - Page 36 5-1 Introduction Troubleshooting Other Problems Battery Pack Charging Problems: refer to Chapter 3, “Battery Information”. Power Meter, Problems: 1. If measured power is slightly out of specification, verify the measurement frequency is set to the same frequency as the power being measured. 2.
-
Page 37: Appendix A-Test Records
Appendix A — Test Records This appendix provides test records that can be used to record the performance of the S331L. Anritsu recommends that you make a copy of the following test record pages and document the measurements each time a Performance Verification is performed. Continuing to document this process each time it is performed provides a detailed history of instrument performance, which can allow you to observe trends. -
Page 38: Test Records For Cable And Antenna Analyzer Verification
A-1 Test Records for Cable and Antenna Analyzer Verification S331L Firmware Rev: ______________ Operator: _________________ Date: _____________ Serial Number: _______________ Options: ___________________________________________________ Test Records for Cable and Antenna Analyzer Verification Table A-1. Cable and Antenna Analyzer Frequency Accuracy Frequency Measured Value Specification 1 GHz (1000 MHz) 1 GHz ±... -
Page 39: Test Records For Power Meter Verification
A-2 Test Records for Power Meter Verification S331L Firmware Rev: ______________ Operator: _________________ Date: _____________ Serial Number: _______________ Options: ___________________________________________________ Test Records for Power Meter Verification Table A-3. Power Meter Verification Frequency Input Power Measured Values Specification 0 dBm 0 dBm ± 1.50 dB 100 MHz –30 dBm –30 dBm ±... -
Page 40: Test Records For Instacal Verification
A-3 Test Records for InstaCal Verification S331L Firmware Rev: ______________ Operator: _________________ Date: _____________ Serial Number: _______________ Options: ___________________________________________________ Test Records for InstaCal Verification Table A-4. Insta Cal Verification Offset Minimum Value Maximum Value Specification Start Frequency = 2 MHz, Stop Frequency = 4 GHz –4.3 dB ≥... - Page 44 Anritsu Company 490 Jarvis Drive Anritsu prints on recycled paper with vegetable soybean oil ink. Morgan Hill, CA 95037-2809 http://www.anritsu.com...
Need help?
Do you have a question about the Site Master S331L and is the answer not in the manual?
Questions and answers