Advertisement
Quick Links
11.09.2020
UHS800
IMPORTANT - PLEASE READ
Before starting please ensure you are aware of the type of wall that you are about to install to.
No wall fixings are supplied with this unit, it is the resposibility of the installer to ensure they are using
fittings that are suitable for the wall type.
The following steps will only show guidance for assembly of the bookcase, location of brackets to align
with the hangers of the bookcase as well as connection instructions to hang the bookcase.
If you are anyway unsure about fixing to your wall please contact a local builder or tradesperson to have
this unit hung by a professional.
1
2
1
RM-INS150
Advertisement

Related Manuals for dams UHS800


Summary of Contents for dams UHS800
- Page 1 11.09.2020 UHS800 IMPORTANT - PLEASE READ Before starting please ensure you are aware of the type of wall that you are about to install to. No wall fixings are supplied with this unit, it is the resposibility of the installer to ensure they are using fittings that are suitable for the wall type.
- Page 2 1,2,3...
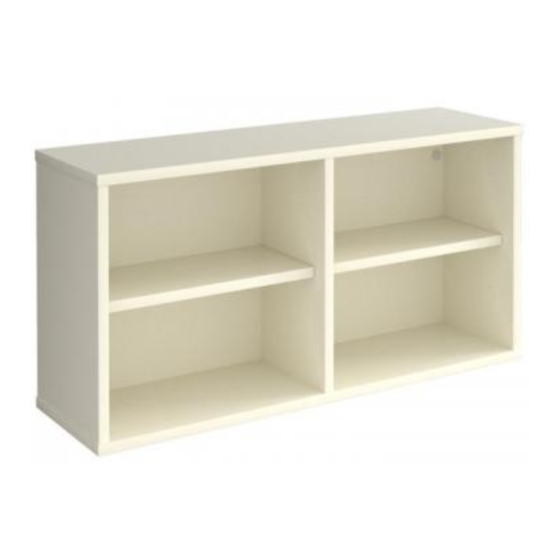
- Page 3 Please check that you have all the panels LH SIDE RH SIDE PARTITION RM-SID244 RM-SID245 RM-PRT020 BACK RM-BAC162 WALL BOOKCASE PACK A SHELF SHELF RM-SHE044 RM-SHE044 BASE RM-BAS088 RM-TOP462 WALL BOOKCASE PACK B Please check that you have all the hardware QUANTITY - 12 QUANTITY - 12 QUANTITY - 8...
- Page 4 Prepare all the panels by inserting the listed fittings into the corresponding holes. Step 1 Insert pins and dowels into the pre drilled holes on both top and base panels. WOW01 BLT06 Qty 4 Qty 8 Step 2 Insert the pins and shelf pins into pre drilled holes on LH &...
- Page 5 Prepare all the panels by inserting the listed fittings into the corresponding holes. Step 3 Insert the bung shelf supports into the pre drilled holes on the underside of each shelf. Note: Ensure the opening in the bung Diagram A aligns with the opening in the edhe of the shelf.
- Page 6 Prepare all the panels by inserting the listed fittings into the corresponding holes. PIN01 PIN07 Step 5 Before inserting any fittings familiarise yourself with the panel ensuring that you have it in the same orientation as the image below. Qty 2 Qty 4 Use the distance between the drill holes as a guide.
- Page 7 Join the panels together and tighten all cam fittings Step 7 Attach sides to back panel. Once the cams and pins are engaged ensure that the cams are fully tightened. Step 8 Attach top panel to unit. Once the cams and pins are engaged ensure that the cams are fully tightened.
- Page 8 Step 9 Attach base panel to unit using confirmat screws provided. A 4mm Allen key is required to insert these screws. QUANTITY - 6 70mm CONFIRMAT SCREW RM-CFM02 Step 10 Stand unit upright and insert the shelves into the cupboard, ensure that the shelf support bungs fully engage into the shelf pins.
-
Page 9: Important - Please Read
Hanging your bookcase Diagram C Step 11 Step 12 Unlocked Turn the unit around so you are now Once inserted lift the tab of the working on the back of the bookcase. hanger to the locked position. See diagram C Insert the wall hanger into the side panel. -
Page 10: Adjustment Points
OVERALL LENGTH Step 14 820mm Once you have decided on the location 410mm 410mm you want your bookcase we are going to mark the wall for mounting the brackets. CENTRE MARK 1 MARK 1 POINT Using a level and a tape measure we will MARK 2 MARK 2 mark 4 points for the brackets. - Page 11 11.09.2020 CSI-C RM-INS146...
- Page 12 Please check that you have all the panels! SINGLE DOOR Please check that you have all the hardware! QUANTITY - 2 QUANTITY - 2 QUANTITY - 4 SINGLE DOOR HARDWARE KIT M4 x 6mm SLOTTED SCREW M4 x 20mm BOOK SCREW 3.5 x 15mm WOOD SCREW RM-SCR27 RM-SCR28...
- Page 13 Join the panels together and tighten all cam fittings Step 3 Attach leather handle to door using binding screws provided. Slotted part of screw to the inside of door. Diagram 1 Step 4 Attach the hinge plates to the pre drilled holes on the inside face of the bookcase side panels, these plates are fitted with pre attached...
- Page 14 Step 5 Attach door to the unit. Diagrams 2 & 3 show how to lock the hinge to the plate. Always lock the top hinge into place first before repeating for bottom hinge. Once the door is attached insert the door stop peg to prevent the door from closing in too far. Ensure the hook of the hinge locates into the hinge plate.
Need help?
Do you have a question about the UHS800 and is the answer not in the manual?
Questions and answers