Cuppone PZF/30 Pre-Installation And Installation Manual
Hide thumbs
Also See for PZF/30:
- Instructions for installation, use and maintenance manual (76 pages) ,
- Use and maintenance manual (30 pages) ,
- Use and maintenance manual (24 pages)

Related Manuals for Cuppone PZF/30


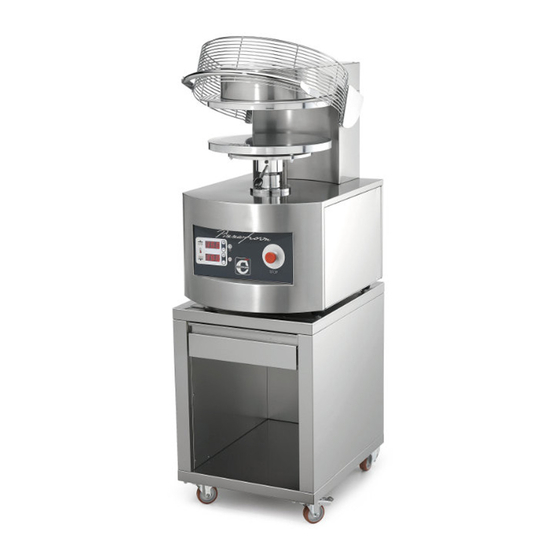
Summary of Contents for Cuppone PZF/30
- Page 1 Pizzaform HOT-FORMER Pre-installation and installation manual PZF/30 PZF/35 PZF/40 PZF/45 PZF/50 Ed. 0121 - 70702570 REV02 Pizzaform - Pre-installation...
-
Page 2: Table Of Contents
Technical data ................8 qualified staff, that can take responsibility for the installation binding. PZF/30 hot-former technical data ...........8 and guarantee the best safe operating conditions. The original language used to prepare this manual is English: PZF/35 hot-former technical data ...........8 the Manufacturer is not responsible for any translation/ PZF/40 hot-former technical data ...........9... -
Page 3: Checks Before Purchasing
CHECKS BEFORE PURCHASING Before purchasing the product and installing it, check the fol- • there is adequate ventilation according to the reg- Fig. 1 lowing conditions, necessary for the correct installation, opera- ulations in force in the Country of installation. If this is tion and maintenance of the product. - Page 4 Checks before purchasing Fig. 3 Minimum distances √ Make sure that: • the following minimum distances of the product from walls, other appliances, objects combustible materials are complied with: Left hand side: 500 mm [19.7”] from walls to allow easy access to the electrics;...
- Page 5 Checks before purchasing Electrical data Electrical connection (qualified electrician’s inspection) Upper Lower Absorbed Cust. panel Model Supply Motor Cable type* √ For a correct connection during the installation: h.elem. h.elem. Tot. kW current prot. Pizzaform n x mm • provide a socket connecting to the electrical network near the single-phase 230V/50Hz 1790...
- Page 6 Checks before purchasing The selection of Pizzaform model is vital to obtain disks of the desired dimensions and characteristics. TYPE OF AVAILABLE PLATES In the standard configuration of the machine, the lower and upper plates are slightly flared at the end. This serves to accumulate a greater quantity of dough in the peripheral area of the disk;...
-
Page 7: Technical Data
TECHNICAL DATA The main parts of the machine are: Fig. 4 Cycle start and protection grille: prevents you from inserting your hands between the plates while the cycle is in progress; if the protection is released during flattening, the movement of the lower plate is immediately interrupted and reversed. -
Page 8: Pzf/30 Hot-Former Technical Data
PZF/30 hot-former technical data PZF/35 hot-former technical data hot-former weight 136 kg [300 lb] hot-former weight 143 kg [315,2] weight of packaging + hot-former 151 kg [332,8 lb] weight of packaging + hot-former 158 kg [348,3 lb] 540 x 680 x 970 mm... -
Page 9: Pzf/40 Hot-Former Technical Data
PZF/40 hot-former technical data PZF/45 hot-former technical data hot-former weight 201 kg [443.1 lb] hot-former weight 210 kg [462.9 lb] weight of packaging + hot-former 218 kg [480.6 lb] weight of packaging + hot-former 227 kg [500.4 lb] 620 x 770 x 1030 mm 620 x 770 x 1030 mm hot-former packaging measurements hot-former packaging measurements... -
Page 10: Pzf/50 Hot-Former Technical Data
PZF/50 hot-former technical data Notes hot-former weight 217 kg [478.4] weight of packaging + hot-former 234 kg [515.8] 620 x 770 x 1030 mm hot-former packaging measurements [24.40 x 30.31 x 40.55”] plate external dimensions 508 mm [20”] pizza diameter 500 mm [20”] working range (dough ball weight) from 600 g [1.32lb] to 800 g [1.76 lb]... - Page 11 PZF support technical data PIZZAFORM 30-35 PIZZAFORM 40-45-50 24,25in 27,17in 616mm 690mm 17,48in 444mm 60mm (2.36 in.) , 4 8 , 9 8 20mm (0.79 in.) 58mm (2.28 in.) 33mm (1.3 in.) 33mm (1.3 in.) 58mm (2.28 in.) Ed. 0121 - 70702570 REV02 Pizzaform - Pre-installation...
-
Page 12: Installation
INSTALLATION Symbols used in the manual and on Safety instructions holes of this or other equipment. • Persons not involved with the appliance installa- the labels applied to the machine • Read this guide carefully before installing the tion may not pass through or stand in the work appliance, and keep it with care in an accessible Indicates that caution is required when performing area during appliance assembly. -
Page 13: Symbols Applied To The Machine
Installation Symbols applied to the machine Hazard due to Risk of electrocution moving parts Area with risk of finger and head crushing Risk due to scalding surface ATTENZIONE Prima di utilizzare l'apparecchiatura leggere attentamente il manuale allegato. ATTENTION Before using the appliance, carefully read the enclosed booklet. -
Page 14: Transport
Installation Transport Fig. 5 Fitted with personal protection equipment, transport the appli- ance to the installation location. Use suitable equipment, capable of dealing with its weight: persons not involved with the appliance installation may not pass through or stand in the work area during the appliance assembly. - Page 15 Installation Fig. 8 Position the appliance on the base provided. This must: • be flame and heat resistant; • be perfectly flat; • be stable; • withstand the weight of the appliance. Pizzaform PZF/30DS - PZF/30DA - 136 kg [300 lb] Pizzaform PZF/35DS - PZF/35DA - 143 kg [315,2 lb] Pizzaform PZF/40DS - PZF/40DA - 201 kg [443,1 lb] min.
-
Page 16: Serial Number Plate Reading
Installation The stated distances must be increased in case of Model Year of production objects or equipment made with heat-sensitive Electrical parameters materials. To reduce the risk of a fire, comply with the stated minimum distances and install the appliance in fire- proof environments that are... -
Page 17: Electrical Connection
Installation Electrical connection The following pages show earth the electrical diagrams: The electrical connection must be carried out exclu- neutral please refer to the one of sively by qualified personnel after reading the safety the specific model to connect. warnings at the beginning of the manual. R - S - T...L: phases Before installing the appliance,... - Page 18 Installation Electrical data Upper Lower Absorbed Cust. panel Fig. 12 Model Supply Motor Cable type* h.elem. h.elem. Tot. kW current prot. Pizzaform n x mm single-phase 230V/50Hz 1790 1790 3.95 17.2 3x2,5 2 x 20 three-phase 3x230V/50Hz 1790 1790 4.13 10.4 4x1,5 3 x 16...
-
Page 19: Wiring Diagrams
Wiring diagrams 230 50-60Hz Abbreviation Description CTRL Product control panel CTRL.SF Chimney adding board Fuses Safety contactor BF09-MC09 Top res. half power BF09-MC09 Top res. full power BF09-MC09 Bottom res. half power BF09-MC09 Bottom res. full power BF09-MC09 Cooking chamber lights Board cooling fan motor Chimney opening motor RA1,2,3... - Page 20 Wiring diagrams 3 230 50-60Hz Abbreviation Description CTRL Product control panel CTRL.SF Chimney adding board Fuses Safety contactor BF09-MC09 Top res. half power BF09-MC09 Top res. full power BF09-MC09 Bottom res. half power BF09-MC09 Bottom res. full power BF09-MC09 Cooking chamber lights Board cooling fan motor Chimney opening motor RA1,2,3...
- Page 21 Wiring diagrams 3N400 50-60Hz Ed. 0121 - 70702570 REV02 Pizzaform - Pre-installation...
- Page 22 Wiring diagrams 208 60Hz Inverter UL SQ1, SQ4 Lever microswitch MOTOR SQ2, SQ3, SQ5 Threaded push-button microswitch with roller motor thermal protection (inside the wiring compartment) Safety contactor L1 L2 type: BF09/MC09 for PZF 30/35 T1 T2 BF26/MC32 for PZF40/45/50 KMRA KMRB RL1,RL2:...
- Page 23 Wiring diagrams 3 208 60Hz UL-VRN Abbreviation Description CTRL.B Product control panel Motor start capacitor Noise filter Fuses Digital input for remote ignition Contactor BF09-MC09 Cooking chamber lights Board cooling fan motor Chimney opening motor PW.B Power board RA1,2,3 Top heating elements RB1,2,3 Bottom heating elements Safety thermostat...
-
Page 24: Final Operations
FINAL OPERATIONS Pre-testing and final inspection The product is checked and tested in the Manufacturer’s plant before being delivered to the customer. The “production process check sheet” enclosed with it guarantees that each step in the production process, from assembly to packaging, was carefully checked from both the operating and safety standpoints. -
Page 25: Preparing The Appliance For Use
Final operations Preparing the appliance for use and checking it operates correctly OPERATION TO CARRY OUT WHAT IT IS FOR WHEN TO CARRY IT OUT REFERENCE PAGE AND CHAPTER With the machine cold, carefully clean This operation must be performed at first Cleanliness guarantees optimal hygienic Use and maintenance manual, chapter the external stainless steel surfaces and... - Page 26 Final operations Fig. 14 OILING THE PLATES AND RELEASING THE STARCH This operation must be carried out on first use and after each thorough cleaning of the plates. Degrease the plates with a product suitable for stainless steel surfaces in contact with food;...
- Page 27 Final operations Lower the protective grille. The lower plate will automatically get near the upper plate to flatten the dough ball. After the set contact time, the lower plate will go back to its starting position. Release the protection grille and remove the disk of dough being careful not to burn yourself on the warm plates (use personal protection equipment...
- Page 28 Final operations PIZZA COUNTER PREPARATION PROCEDURE Fig. 17 After the dough disks have been flattened and placed on the pizzeria counter, it could happen that after topping them, it is somewhat difficult to pick them up with the shovel. This happens because, after flattening, the dough disks normally release humidity which makes them stick to the pizzeria counter.
- Page 29 Final operations Fig. 18 5’’sec Ed. 0121 - 70702570 REV02 Pizzaform - Pre-installation...
- Page 30 Final operations Method 2 Fig. 20 Fig. 20 Lightly spray the pizza counter with a mixture of water (90%) and oil (10%) (shake the solu- tion to mix the two compounds as much as possible). Dust with flour where it is wet. Fig.
- Page 31 Final operations Fig. 21 5’ Ed. 0121 - 70702570 REV02 Pizzaform - Pre-installation...
-
Page 32: Information On Use To Give To The User
Final operations Information on use to give to the user Finish by providing the user with all the information on the correct and safe use of the appliance. SAFETY WARNINGS FOR USE Some parts of the appliance (e.g. the plates) can reach high temperatures. We advise you to avoid touching surfaces and not to get materials either flammable or sensitive to heat near the appliance. - Page 33 Final operations TIPS ON SETTING THE PIZZAFORM PARAMETERS WHAT IT DETERMINES RECOMMENDED VALUES recommended temperature to be increased in case of intense work: PLATE TEMPERATURE Set the same temperature for both upper and lower plate. 150°-160°C (302°F - 320°F) recommended time: 0.6-0.8 seconds this time varies according to the state of ripeness of the dough, its temperature PLATE CONTACT TIME...
-
Page 34: Problems During Use
PROBLEMS DURING USE Problems during use During use, some problems may occur that can be easily solved following the instructions detailed below. PROBLEM FOUND PROBABLE CAUSES SOLUTIONS FOR THE USER Clean, oil and carry out the starch releasing procedure on the plates (see page 26) The plate preparation procedure has not been This operation must be carried out after each thorough cleaning of the plates. - Page 35 Problems during use Fig. 22 In the standard configuration of the machine, the lower and upper plates are slightly flared at the end. This serves to accumulate a greater quantity of dough in the peripheral area of the disk; it will be used to develop the edge during cooking. If the amount of dough used is too little or the flattening setting is not correct , the dough disk may not have a...
- Page 36 Problems during use DISPLAYED MESSAGE PROBABLE CAUSES SOLUTIONS FOR THE INSTALLER Check that the dough has ripened. The dough is not completely ripened or it is too Check the temperature of the dough, it must cold not be too cold. Minimum recommended temperature 10°...
- Page 37 Problems during use DISPLAYED MESSAGE PROBABLE CAUSES SOLUTIONS FOR THE INSTALLER The top display shows “Err” and the bottom shows “rES”. The alarm blocks Check that the maximum top temperature that can be set is 200°C / 392°F. the heating of the upper heating element and also the movement of the lower plate.
- Page 38 Problems during use DISPLAYED MESSAGE PROBABLE CAUSES SOLUTIONS FOR THE INSTALLER The displays show “PiF 197” The appliance has been stopped pressing the To reset the conditions of use, unlock the emergency button rotating it in a clockwise direction: display will show “PIF 197” emergency button which is NOT an alarm but stands for the board version.
- Page 39 Ed. 0121 - 70702570 REV02 Pizzaform - Pre-installation...
- Page 40 CUPPONE 1963 Cuppone F.lli S.r.l. Via Sile, 36 31057 Silea (TV) - ITALY T +39 0422 361143 F +39 0422 360993 info@cuppone.com - www.cuppone.com...
Need help?
Do you have a question about the PZF/30 and is the answer not in the manual?
Questions and answers