Advertisement
Advertisement

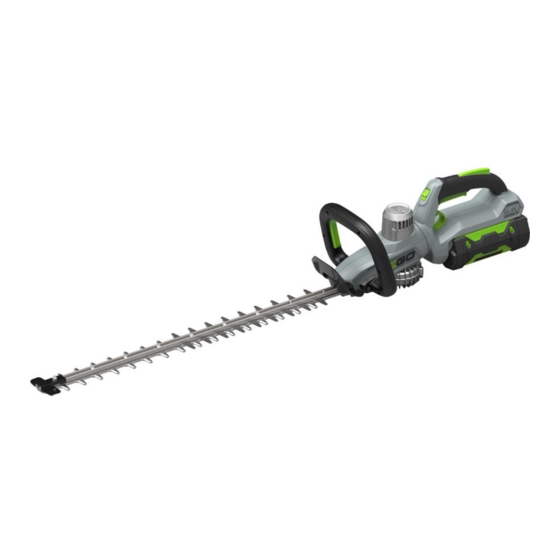
Related Manuals for EGO HT5100E


Summary of Contents for EGO HT5100E
- Page 1 REPAIR GUIDELINE Hedge Trimmer_HT5100E/HT6500E Version: 1 Issue Date: 2016/12/02...
-
Page 2: Table Of Contents
Table of Contents HT5100E/HT6500E Hedge Trimmer Contents Page Troubleshooting Tool List Replacing the Front Handle Set 5-13 Replacing the Blade Assembly 14-25 Replacing the PCB Assembly 26-41 Replacing the Motor and Gear Box ASSY. 42-49 Repairs to the Gear Box... -
Page 3: Troubleshooting
Troubleshooting HT5100E/HT6500E Hedge Trimmer Problem Possible Cause Fault Position Test & Solution Main PCB or its wires are broken PCB Assembly Replace the PCB assembly. The blade is jammed when an Clear any obstructions or obstruction is stuck in the blade... -
Page 4: Tool List
Tool List For Repair HT5100E/HT6500E Hedge Trimmer NO. Tool List SPEC Remark Magnetic tool Bits To remove the hexagon lobular Hexagon Lobular Screwdriver screw Screwdriver Rated torque should Torque Wrench To tighten the blade bolt exceed 12 Nm Hex wrench... -
Page 5: Replacing The Front Handle Set
Part 1: Replacing the Front Handle Set... - Page 6 Replacing the Front Handle Set HT5100E/HT6500E Hedge Trimmer 1. Loosen and remove the two hexagon screws in the guard and remove the guard from the housing. 2. Replace the guard if it is broken. Guard Front Handle Hexagon Screw Description...
- Page 7 Replacing the Front Handle Set HT5100E/HT6500E Hedge Trimmer 3. Loosen and remove the 6 self tapping screws from the front handle. 4. Loosen the 4 hexagon socket screws with their washers at either side of the front handle set and remove them.
- Page 8 Replacing the Front Handle Set HT5100E/HT6500E Hedge Trimmer 6. Remove the internal wires and front switch from the rear half of the handle, separate the rear half handle from the front handle. NOTICE: If the serial number of Hedge Trimmer is from EHT02160300001 to EHT02160400500 , replace all the parts in front handle set, including front switch, spring, front switch trigger and front handle set following the slides from 10 to 13.
- Page 9 Replacing the Front Handle Set HT5100E/HT6500E Hedge Trimmer 6. Remove the internal wires and front switch from the rear half of the handle, separate the rear half handle from the front handle. NOTICE: If the serial number of Hedge Trimmer is not between EHT02160300001 to EHT02160400500 , replace or repair the damaged part.
- Page 10 Replacing the Front Handle Set HT5100E/HT6500E Hedge Trimmer 7. Replace the front handle set if broken. 8. To replace the front switch: (a) Remove the heat-shrinkable sleeves with a scissor, then separate the wires from the trigger using an electric soldering iron.
- Page 11 Replacing the Front Handle Set HT5100E/HT6500E Hedge Trimmer 9. Mount the rear half handle to the housing. 10. Position the switch into the locating pin in the rear half handle as the figure shows below. Rear Half Handle Front Switch...
- Page 12 Replacing the Front Handle Set HT5100E/HT6500E Hedge Trimmer 11. Align the internal wires in the handle grooves, make sure the brown wire is on the top and white wire is in the bottom. 12. Fit the spring to the green trigger and mount the trigger into the rear half handle.
- Page 13 Replacing the Front Handle Set HT5100E/HT6500E Hedge Trimmer 13. Assemble the front handle and tighten it with the 6 self tapping screws with a torque of 1.1~1.3Nm . 14. Assemble the front handle on the housing with the 4 hexagon screws with a torque of 2~2.5Nm.
-
Page 14: Replacing The Blade Assembly
Part 2: Replacing the Blade Assembly... - Page 15 Replacing the Blade Assembly HT5100E/HT6500E Hedge Trimmer 1. Use a 5mm hex wrench to remove the 6 hexagon screws in the lower housing assembly and remove the lower housing assembly. Support Plate Sponge Pad Lower Housing Assembly Description Old Part Number...
- Page 16 Replacing the Blade Assembly HT5100E/HT6500E Hedge Trimmer 2. Use an inside caliper to remove the circlip which is on the shaft and remove the two washers. 3. Remove the link assembly from the eccentric block. Eccentric Block Description Part Number...
- Page 17 Replacing the Blade Assembly HT5100E/HT6500E Hedge Trimmer 4. Loosen the two hexagon screws on the blade and remove the 2pcs hexagon screws, upper support plate and support plate from the blade. Bush Description Part Number Hexagon Screw 5620216005 Upper Support Plate...
- Page 18 Replacing the Blade Assembly HT5100E/HT6500E Hedge Trimmer 5. Remove the two bushes out of the blade set and remove the blade set. 6. Replace the blade set and other parts if they are worn or broken. Description Part Number Blade Set...
- Page 19 Replacing the Blade Assembly HT5100E/HT6500E Hedge Trimmer 7. Loosen the 6 nuts on the blade assembly to remove the protective teeth, tip protector, replace the parts if they are worn or broken. Torque Hexagon Nut Protective Teeth Tip Protector Description...
- Page 20 Replacing the Blade Assembly HT5100E/HT6500E Hedge Trimmer 8. Loosen the 6 hexagon screws 1# and the one hexagon screw 2# out of the blade assembly and remove the blade, support plate, clamp plate in turn, Replace any parts if they are worn or broken.
- Page 21 Replacing the Blade Assembly HT5100E/HT6500E Hedge Trimmer 9. Put the support plate, blade on the clamp plate in turn, mount the 6 hexagon socket screws 1# and the one hexagon socket screw 2# with a torque of 3.4~3.6Nm. NOTICE: Keep the burr surface on the clamp plate .
- Page 22 Replacing the Blade Assembly HT5100E/HT6500E Hedge Trimmer NOTICE: The difference between HT5100E and HT6500E is the length of the blade as well as the number of the hexagon socket screws, bushes, washers and nuts on them. See below. HT6500E HT6500E Hedge Trimmer...
- Page 23 Replacing the Blade Assembly HT5100E/HT6500E Hedge Trimmer 11. Mount the lower support plate, blade set, link assembly, bushes, support plate and upper support plate in turn. NOTICE: Keep the bulge of the link assembly down and make sure that the blade set is well matched with the link assembly.
- Page 24 Replacing the Blade Assembly HT5100E/HT6500E Hedge Trimmer 12. Mount 2pcs hexagon socket screws 1# with a torque of 4.5~5Nm. Use Loctite. 13. Mount the plain washer, washer and circlip in sequence. 14. Mount the lower housing Assembly and tighten 6pcs hexagon socket screws 2# with a torque of 2.5Nm...
- Page 25 Replacing the Blade Assembly HT5100E/HT6500E Hedge Trimmer 15. Install the battery, press the front trigger first then press the rear switch trigger. Test for proper operation for at least 30 seconds. If not, reassemble all the parts, making sure every step is correct.
-
Page 26: Replacing The Pcb Assembly
Part 3: Replacing the PCB Assembly... - Page 27 Replacing the PCB Assembly HT5100E/HT6500E Hedge Trimmer 1. Following the instructions for “Replacing the Front Handle Set” to remove the guard, front handle set. 2. Loosen and remove the 8 self tapping screws in the right rear handle and open the housing.
- Page 28 Replacing the PCB Assembly HT5100E/HT6500E Hedge Trimmer 4. Remove the speed adjustment knob, lock off trigger, rear switch trigger, battery release button, latch, ejection lever, lock lever as well as the four springs. 5. Remove the PCBA from the left rear handle .
- Page 29 Replacing the PCB Assembly HT5100E/HT6500E Hedge Trimmer Description Old Part Number New Part Number Rear Handle Set 2824556001 L R Housing Set 2824845001 2824553001 Lock off Trigger 3127212001 Rear Switch Trigger 3128270001 Battery Release Button 3127201001 Latch 3127202001 Ejection Lever...
- Page 30 Replacing the PCB Assembly HT5100E/HT6500E Hedge Trimmer 6. Remove the left rear handle(as well as the damping ring) and the left housing . Left Rear Handle Damping Ring Description Part Number Damping Ring 5690350001...
- Page 31 Replacing the PCB Assembly HT5100E/HT6500E Hedge Trimmer 7. Loosen the 3 thread forming screws to remove the motor top cover. 8. Remove the silicone sealant and unlatch the plug softly from the outlet on the motor (Fig. 1.) Fig.1...
- Page 32 Replacing the PCB Assembly HT5100E/HT6500E Hedge Trimmer 9. Remove the whole PCB assembly from the gear box assembly. 10. Remove the soft sleeves, remove the shrinkable sleeves with a scissor , disconnect the 3 solder joints with a electric soldering iron as indicated on the below figure.
- Page 33 Replacing the PCB Assembly HT5100E/HT6500E Hedge Trimmer 11. Replace with a new PCBA if it is broken. 12. Mount the soft sleeves first, then mount the heat-shrinkable sleeves and solder the 3 joints with the 3 terminals on the motor, making sure the colors match.
- Page 34 Replacing the PCB Assembly HT5100E/HT6500E Hedge Trimmer 13. Place the new PCBA in gear box assembly as shown in figure 2. 14. Insert the plug into the outlet softly and add the silicone sealant as shown in figure 3. Fig.2 Fig.3...
- Page 35 Replacing the PCB Assembly HT5100E/HT6500E Hedge Trimmer 15. Mount the top motor cover with 3 thread forming screws with loctite and a torque of 1.4~1.6Nm. 16. Mount the left rear handle and left housing as well as the damping ring.
- Page 36 Replacing the PCB Assembly HT5100E/HT6500E Hedge Trimmer 17. Mount the speed adjustment knob, PCBA and add the silicone sealant. 18. Align the thin red wire 1# and thin black wires in the left rear handle housing. Speed Adjustment Knob Red wire 1#...
- Page 37 Replacing the PCB Assembly HT5100E/HT6500E Hedge Trimmer 19. Mount the rear switch and align the two white wires, brown and red wire. Rear Switch Brown Wire White Wire Red Wire...
- Page 38 Replacing the PCB Assembly HT5100E/HT6500E Hedge Trimmer 20. Mount the PCBA, align the thin red wire 2#, white and thick black wire in turn. Add silicone sealant to the PCBA as the figure shows below. Red wire 2# White Wire...
- Page 39 Replacing the PCB Assembly HT5100E/HT6500E Hedge Trimmer 21. Align the thick red wire above the thick black wire.
- Page 40 Replacing the PCB Assembly HT5100E/HT6500E Hedge Trimmer 22. Mount the lock lever, ejection lever, lock-off trigger, rear switch trigger, battery release button, latch in the left rear handle. Rear Switch Speed Adjustment Lock-off Trigger Knob Rear Switch Trigger Battery Release...
- Page 41 Replacing the PCB Assembly HT5100E/HT6500E Hedge Trimmer 23. Mount the right rear handle and right housing, tighten the 13 tapping screws with a torque of 1.1~1.3Nm. 24. Following “Replacing the Front Handle Set” to assemble the front handle and guard.
- Page 42 Part 4: Replacing the Motor and Gear Box Assembly...
-
Page 43: Replacing The Motor And Gear Box Assy
Replacing the Motor and Gear Box ASSY. HT5100E/HT6500E Hedge Trimmer 1. Following the instructions for “Replacing the Front handle Set” to remove the guard, front handle set. 2. Following the instruction for “Replacing the PCB Assembly” to separate the PCBA from the motor. - Page 44 Replacing the Motor and Gear Box ASSY. HT5100E/HT6500E Hedge Trimmer Link Assembly Eccentric Block...
- Page 45 Replacing the Motor and Gear Box ASSY. HT5100E/HT6500E Hedge Trimmer 4. Use a 5mm hex wrench to remove the 3 hexagon socket screws from the gear box cover and remove the gear box assembly. 5. Remove the 3 hexagon screws inside the gear box cover to separate the motor from the gear box cover.
- Page 46 Replacing the Motor and Gear Box ASSY. HT5100E/HT6500E Hedge Trimmer Description Part Number Hexagon Socket Screw 5620446003 Hexagon Lobular Screw 5620424002 Gear Box Cover 3421741001 Motor & Gear Assembly 2824568001...
- Page 47 Replacing the Motor and Gear Box ASSY. HT5100E/HT6500E Hedge Trimmer 6. Mount the motor into the gear box cover by tightening the 3 hexagon screws inside the gear box cover. 7. Mount the motor and cover set onto the gear box assembly by tightening the 3 new hexagon socket...
- Page 48 Replacing the Motor and Gear Box ASSY. HT5100E/HT6500E Hedge Trimmer 8. Following the instructions for “Replacing the PCB Assembly” to connect the main PCBA to the motor and following the instructions for “Replacing the Blade Assembly” to mount the blade assembly onto the gear shaft.
- Page 49 Replacing the Motor and Gear Box ASSY. HT5100E/HT6500E Hedge Trimmer 10. Following the instructions for “Replacing the Front Handle Set” to mount the front handle and guard.
-
Page 50: Repairs To The Gear Box
Part 5: Repairs to the Gear Box... - Page 51 Repairs to the Gear Box HT5100E/HT6500E Hedge Trimmer 1. Following the instructions for “Replacing The Motor and Gear Box Assembly” to separate the motor and gear box assembly from the PCBA. 2. Loosen the 3 hexagon socket screws on the gear box cover to separate the gear box assembly from the gear box cover and motor set.
- Page 52 Repairs to the Gear Box HT5100E/HT6500E Hedge Trimmer 3. Remove the parts in the gear box in turn. Washer Planet Gear 1#...
- Page 53 Repairs to the Gear Box HT5100E/HT6500E Hedge Trimmer Ring Gear 1# Sun Gear...
- Page 54 Repairs to the Gear Box HT5100E/HT6500E Hedge Trimmer 4. Replace the parts if they appear worn or damaged. Ring Gear 2# Planet Gear 2# Carrier...
- Page 55 Repairs to the Gear Box HT5100E/HT6500E Hedge Trimmer Description Part Number Motor & Gear Assembly 2824568001 Washer 5650529001 Ring Gear 1# 3520889001 Planet Gear 1# 2824554001 Sun Gear 2824336001 Planet Gear 2# 3520887001 Ring Gear 2# 3520888001 Carrier 2824387001...
- Page 56 Repairs to the Gear Box HT5100E/HT6500E Hedge Trimmer 5. Assemble gear box parts in turn. (1) Align the rib of the ring gear 2# with the slot of the gear case, place the ring gear 2# into the gear case. Distinguish ring gear 1# and ring gear 2# by the different height size. Ring gear 2# is higher than ring gear 1#.
- Page 57 Repairs to the Gear Box HT5100E/HT6500E Hedge Trimmer (2) Insert the sun gear among the planet gears, making sure they are properly engaged.
- Page 58 Repairs to the Gear Box HT5100E/HT6500E Hedge Trimmer (3) Align the rib of the ring gear 1# with the slot of the gear case, place the planet gear 1# into the gear case and add about 6g grease (SYN-setral-PU 2).
- Page 59 Repairs to the Gear Box HT5100E/HT6500E Hedge Trimmer (4) Place the washer into the gear case. (5) Ensure that the surface of the washer is under the edge of the slot in the gear case. If not, reassemble all the parts from Step (1), making sure every step is correct.
- Page 60 Repairs to the Gear Box HT5100E/HT6500E Hedge Trimmer 6. Mount the gear box cover with the motor onto the gear box and fix it with 3 hexagon screws. Gear Box Gear Box Cover...
- Page 61 Repairs to the Gear Box HT5100E/HT6500E Hedge Trimmer 7. Mount the gear box cover with 3 new hexagon screws. The torque is 1.4~1.6Nm, seal them with loctite.
- Page 62 Repairs to the Gear Box HT5100E/HT6500E Hedge Trimmer 8. Follow the instructions for “Replacing the PCB assembly” to align the wires and close the housing. THE END...
Need help?
Do you have a question about the HT5100E and is the answer not in the manual?
Questions and answers