ARM DSTREAM-ST Reference Manual
System and interface design
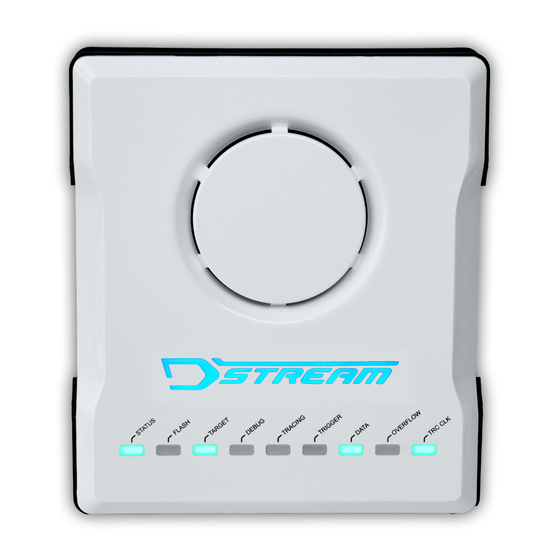
Hide thumbs
Also See for DSTREAM-ST:
- Getting started manual (30 pages) ,
- System and interface design reference manual (49 pages) ,
- Getting started manual (31 pages)

Subscribe to Our Youtube Channel
Related Manuals for ARM DSTREAM-ST


Summary of Contents for ARM DSTREAM-ST
- Page 1 DSTREAM-ST ® Version 1.0 System and Interface Design Reference Guide Copyright © 2017–2019 Arm Limited or its affiliates. All rights reserved. 100893_0100_06_en...
- Page 2 Use of the word “partner” in reference to Arm’s customers is not intended to create or refer to any partnership relationship with any other company.
- Page 3 This document is Non-Confidential. The right to use, copy and disclose this document may be subject to license restrictions in accordance with the terms of the agreement entered into by Arm and the party that Arm delivered this document to.
-
Page 4: Table Of Contents
Arm JTAG 20 connector ..................2-34 CoreSight 10 connector ..................2-35 ™ CoreSight 20 connector ..................2-36 ™ TI JTAG 14 connector ....................2-38 Mictor 38 connector ....................2-39 100893_0100_06_en Copyright © 2017–2019 Arm Limited or its affiliates. All rights reserved. Non-Confidential... - Page 5 Target board design Overview of high-speed design ................3-48 JTAG port buffering ....................3-51 Series termination ....................3-54 Modeling ........................3-55 Target design checklist .................... 3-56 100893_0100_06_en Copyright © 2017–2019 Arm Limited or its affiliates. All rights reserved. Non-Confidential...
- Page 6 Arm JTAG 20 connector pinout ....................2-34 Figure 2-2 CoreSight 10 connector pinout ....................2-35 Figure 2-3 CoreSight 20 connector pinout ....................2-36 Figure 2-4 TI JTAG 14 connector pinout ....................2-38 100893_0100_06_en Copyright © 2017–2019 Arm Limited or its affiliates. All rights reserved. Non-Confidential...
- Page 7 Figure 3-7 Daisy-chained JTAG connection without buffers ..............3-51 Figure 3-8 Daisy-chained JTAG connection with TCK buffers ..............3-52 Figure 3-9 Fully buffered JTAG connection ..................... 3-52 100893_0100_06_en Copyright © 2017–2019 Arm Limited or its affiliates. All rights reserved. Non-Confidential...
- Page 8 MIPI 60 pinout table ....................... 2-43 Table 2-10 User I/O pinout table ......................2-46 Table 3-1 Typical series terminating resistor values ................3-54 Table 3-2 Target design checklist ......................3-56 100893_0100_06_en Copyright © 2017–2019 Arm Limited or its affiliates. All rights reserved. Non-Confidential...
- Page 9 Preface This preface introduces the Arm DSTREAM-ST System and Interface Design Reference Guide. ® It contains the following: • About this book on page 100893_0100_06_en Copyright © 2017–2019 Arm Limited or its affiliates. All rights reserved. Non-Confidential...
-
Page 10: Preface
DSTREAM-ST has an Arm JTAG 20 connector, a CoreSight 20 connector, an auxiliary connector, and a user I/O connector. Chapter 3 Target board design When you design a target board to connect to the DSTREAM-ST unit, you must consider the rules that are discussed in this chapter. Glossary... -
Page 11: Table
A concise explanation of your comments. Arm also welcomes general suggestions for additions and improvements. Note Arm tests the PDF only in Adobe Acrobat and Acrobat Reader, and cannot guarantee the quality of the represented document when used with any other PDF reader. Other information •... -
Page 12: Debug And Trace Interface
Chapter 1 Debug and trace interface The Arm debug and trace interface enables powerful software debug and optimization on an Arm processor-based target system. It is based on the IEEE 1149.1 (JTAG) interface coupled with various additional signals. This chapter introduces these signals and describes their use within the interface. -
Page 13: Jtag Signals
1.1 JTAG signals JTAG signals Most Arm-based devices are physically equipped with several pins that are dedicated to debug and test purposes. Four of these pins make up the IEEE 1149.1 interface, also known as the JTAG interface. This interface is often used for boundary-scan testing during the manufacture of printed circuit boards. The interface also provides a useful way to access one or more cores and other components in a device, while running its application software. -
Page 14: Figure 1-2 Chained Jtag Connection
(JTAG) specification. TDI and TMS are set up by DSTREAM-ST on the falling edge of TCK. These signals are then sampled by the target device on the rising edge of TCK. The target device must set up its TDO signal when it detects the falling edge of TCK which, in turn, will be sampled by DSTREAM-ST on the next rising edge of TCK. -
Page 15: Figure 1-3 Jtag Timing Diagram
Note There are no separate timing requirements for the adaptive clocking mode. In adaptive clocking mode, the DSTREAM-ST samples TDO on the rising edge of RTCK instead of TCK, so TDO timing is relative to RTCK. Table 1-1 JTAG timing Characteristics... -
Page 16: Figure 1-4 Basic Jtag Port Synchronizer
Chain Shift En RTCK TAP Ctrl CKEN State nCLR nCLR nCLR Machine nTRST nRESET Figure 1-6 JTAG port synchronizer for single rising-edge D-type ASIC design rules 100893_0100_06_en Copyright © 2017–2019 Arm Limited or its affiliates. All rights 1-16 reserved. Non-Confidential... -
Page 17: Figure 1-7 Timing Diagram For The D-Type Jtag Synchronizer
RTCK and TDO signals so that they only change state at the edges of TCK. TCKRisingEn TCKFallingEn RTCK TAPC State Figure 1-7 Timing diagram for the D-type JTAG synchronizer 100893_0100_06_en Copyright © 2017–2019 Arm Limited or its affiliates. All rights 1-17 reserved. Non-Confidential... -
Page 18: Return Clock (Rtck) Signal
Adaptive clocking mode is not recommended unless the target design requires it. • Adaptive clocking can be enabled using the configuration settings in Arm Development Studio. For more information, see Debug Hardware configuration in the Arm Development Studio User Guide. -
Page 19: Reset Signals
TAP controller state is changed. It is expected that the assertion of the nSRST line by the DSTREAM-ST unit causes a warm reset of the target system. If the nSRST line triggers a full, Power On Reset (POR), then the debug connection might be lost. -
Page 20: Figure 1-8 Example Reset Circuit
Power On Reset (POR) input, any voltage monitoring devices would typically connect to that instead. If the target device is equipped with internal voltage monitoring circuitry, external monitoring devices can be omitted. 100893_0100_06_en Copyright © 2017–2019 Arm Limited or its affiliates. All rights 1-20 reserved. Non-Confidential... -
Page 21: Run-Control Signals
Debug Request (DBGRQ) The Debug Request (DBGRQ) pin stops the target processor and puts it into its debug state. Arm recommends that this signal is no longer used. It can be left open on the target board. Warning If the signal is used, it must be pulled on the target. -
Page 22: Serial Wire Debug (Swd) Signals
Figure 1-9 SWD timing diagrams The debug unit: • Writes data to SWDIO on the falling edge of SWCLK. • Reads data from SWDIO on the rising edge of SWCLK. 100893_0100_06_en Copyright © 2017–2019 Arm Limited or its affiliates. All rights 1-22 reserved. Non-Confidential... - Page 23 T[is] Input setup time that is required between SWDIO and rising edge SWCLK. T[ih] Input hold time that is required between SWDIO and rising edge SWCLK. 100893_0100_06_en Copyright © 2017–2019 Arm Limited or its affiliates. All rights 1-23 reserved. Non-Confidential...
-
Page 24: Trace Signals
Some target devices can output high-bandwidth parallel trace data while the target application is running. Capturing this data and decoding it in Arm Development Studio allows you to examine the sequence of instructions, and changes in data, around a given point or trigger. -
Page 25: Figure 1-10 Traceclk Timing Diagram
50% of this voltage. For example, on a 3.3V target system, the switching thresholds are set to 1.65V. Leakage current If you connect an unpowered DSTREAM-ST unit to a powered target, on any of the debug or trace signals, there is a maximum leakage current into the DSTREAM-ST unit of ±10μA. -
Page 26: Target Voltage Reference (Vtref) Signals
If only the TRACE_VTREF signal is connected on a Mictor, MIPI-34, or MIPI-60 connector of a target, DSTREAM-ST uses that signal to determine the logic levels of both the debug and trace signals. Arm recommends connecting VTREF signals directly to one or more appropriate power rails on the target board. - Page 27 1 Debug and trace interface 1.7 Target Voltage Reference (VTREF) signals The input and output characteristics of the DSTREAM-ST unit are compatible with logic levels from TTL-compatible, or CMOS logic in target systems. 100893_0100_06_en Copyright © 2017–2019 Arm Limited or its affiliates. All rights 1-27 reserved.
-
Page 28: I/O Diagrams For Dstream-St Signals
TCK signal The TCK output signal is similar to a standard output signal, but also has a switchable capacitor, forming a T-filter, which can reduce the TCK slew-rate. Enabling this filter is not currently supported in Arm Development Studio. 16.5R 16.5R... -
Page 29: Figure 1-15 Trace Signals
VTREF/2 through 50Ω resistors. These resistors prevent signals from being reflected back to the target system, increasing signal integrity and the maximum data rate. Disabling the input terminations is not currently supported in Arm Development Studio. VTREF/2 VTREF/2... -
Page 30: Typical Swd Circuit
To improve signal integrity, it is good practice to provide an impedance-matching resistor on the SWDIO and SWO outputs of the processor. The value of these resistors, added to the impedance of the driver, must be approximately equal to 50Ω. 100893_0100_06_en Copyright © 2017–2019 Arm Limited or its affiliates. All rights 1-30 reserved. Non-Confidential... -
Page 31: Typical Jtag Circuit
To improve signal integrity, it is good practice to provide an impedance matching resistor on the TDO and RTCK outputs of the processor. The value of these resistors, added to the impedance of the driver, must be approximately equal to 50Ω. 100893_0100_06_en Copyright © 2017–2019 Arm Limited or its affiliates. All rights 1-31 reserved. Non-Confidential... -
Page 32: Target Interface Connectors
Chapter 2 Target interface connectors DSTREAM-ST has an Arm JTAG 20 connector, a CoreSight 20 connector, an auxiliary connector, and a user I/O connector. To adapt debug connectors for other target connectors, you can use cables and adapter boards. Some of these cables and adapter boards are supplied with DSTREAM-ST. -
Page 33: Target Connector Selection Guide
Note 1. The trace width supported by the connector. DSTREAM-ST supports up to 4-bit wide parallel trace. 2. Through-hole variants of connectors are more durable than SMD variants. 3. Assumes an SMD part is being used. Through-hole parts use additional space on the opposite side of the board. -
Page 34: Arm Jtag 20 Connector
The Arm JTAG 20 connector is a 20-way 2.54mm pitch box header which supports JTAG debug, Serial Wire Debug, and SWO trace. To use this connector with DSTREAM-ST, use the Arm JTAG 20 debug cable supplied in the box contents. -
Page 35: Figure 2-2 Coresight 10 Connector Pinout
The CoreSight 10 connector is a 10-way 1.27mm pitch box header which supports JTAG debug, Serial Wire Debug, and SWO trace. To use this connector with DSTREAM-ST, use the CoreSight 20 debug cable supplied in the box contents. Figure 2-2 CoreSight 10 connector pinout... -
Page 36: Figure 2-3 Coresight 20 Connector Pinout
The CoreSight 20 connector is a 20-way 1.27mm pitch box header which supports JTAG debug, Serial Wire Debug, SWO trace, and up to 4-bit wide continuous-mode TPIU trace. To use CoreSight 20 connector with DSTREAM-ST, use the CoreSight 20 debug cable supplied in the box contents. -
Page 37: Arm Coresight 20 Pinout Table (Dstreamcs20=1)
Warning Using a non-shrouded header on the target board can lead to short-circuits or signal contention. To ensure the correct polarity and position, Arm recommends that you use a fully shrouded box header. 100893_0100_06_en Copyright © 2017–2019 Arm Limited or its affiliates. All rights 2-37 reserved. -
Page 38: Ti Jtag 14 Connector
The Texas Instruments (TI) JTAG 14 connector is a 14-way 2.54mm pitch box header which supports JTAG debug, Serial Wire Debug, and SWO trace. To use this connector with DSTREAM-ST, the supplied TI JTAG 14 adapter must be used with the Arm JTAG 20 debug cable. -
Page 39: Mictor 38 Connector
Typically, the socket used is a 2-767004-2 from TE Connectivity. To use this connector with DSTREAM-ST, the supplied Mictor adapter must be used in conjunction with both the Arm JTAG 20 debug cable and the CoreSight 20 debug cable. - Page 40 DSTREAM-ST unit can support separate debug and trace VTREFs. If only TRACE_VTREF is powered, the DSTREAM-ST unit assumes that both debug and trace are to operate at that voltage. 3. These signals are not used by the DSTREAM-ST unit. To maintain compatibility with other debug units, connect the signals to the appropriate power rails.
-
Page 41: Mipi 34 Connector
MIPI 34 pinout table Table 2-8 MIPI 34 pinout table Pin Signal name Pin Signal name DEBUG_VTREF 2 TMS/SWDIO TCK/SWCLK TDO/SWO Key (NC) nSRST GND (1) RTCK 100893_0100_06_en Copyright © 2017–2019 Arm Limited or its affiliates. All rights 2-41 reserved. Non-Confidential... - Page 42 Warning Using a non-shrouded header on the target board can lead to short-circuits or signal contention. To ensure the correct polarity and position, Arm recommends that you use a fully shrouded box header. 100893_0100_06_en Copyright © 2017–2019 Arm Limited or its affiliates. All rights 2-42 reserved.
-
Page 43: Mipi 60 Connector
The MIPI 60 connector supports separate voltage domains for the debug and trace signals. It is necessary to supply the appropriate voltages to both of the VTREF pins. • The MIPI 60 connector is not supplied with DSTREAM-ST, but is available on request. To request one, contact Arm support. - Page 44 For more information, see the MIPI debug connector specification. Note • DSTREAM-ST only supports one channel of parallel trace. • Pins marked as RESERVED might be internally connected in DSTREAM-ST, but are not currently supported. 100893_0100_06_en Copyright © 2017–2019 Arm Limited or its affiliates. All rights 2-44 reserved.
-
Page 45: Auxiliary (Aux) Connector
2 Target interface connectors 2.9 Auxiliary (AUX) connector Auxiliary (AUX) connector The Auxiliary (AUX) connector on the front of DSTREAM-ST is reserved for future use and is intended to support external probes for high-speed trace capture (for example, 32-bit, HSSTP, or PCIe). Warning This connector is not intended for user I/O. -
Page 46: User I/O Connector
To set up custom input or output signals to your target, use the user Input/Output (I/O) connector. The user I/O connector is a standard 10-way 2.54mm pitch box header on the rear of DSTREAM-ST. Figure 2-8 User I/O connector pinout... - Page 47 Chapter 3 Target board design When you design a target board to connect to the DSTREAM-ST unit, you must consider the rules that are discussed in this chapter. It contains the following sections: • 3.1 Overview of high-speed design on page 3-48.
-
Page 48: Overview Of High-Speed Design
3.1 Overview of high-speed design Overview of high-speed design When designing a target board that will be connected to a DSTREAM-ST unit, it is important to use good digital design practice to achieve high Signal Integrity (SI). While many target boards already take SI into consideration for trace signals, it is also important to use the same design methodology for the debug signals. -
Page 49: Figure 3-3 Long Stub Causing False Edges
When the return path is interrupted, it causes distortion and some loss in the signal. 100893_0100_06_en Copyright © 2017–2019 Arm Limited or its affiliates. All rights 3-49 reserved. - Page 50 There are several ways to minimize electric and magnetic field coupling: — Space the signal tracks further apart. Arm recommends to keep adjacent signals at least three times further apart than they are from the nearest plane (the 3W rule).
-
Page 51: Jtag Port Buffering
Figure 3-6 JTAG connection with TDO buffer Sometimes, two or more devices are chained together in the target system: Debug Target Connector Device Target Device Figure 3-7 Daisy-chained JTAG connection without buffers 100893_0100_06_en Copyright © 2017–2019 Arm Limited or its affiliates. All rights 3-51 reserved. Non-Confidential... -
Page 52: Figure 3-8 Daisy-Chained Jtag Connection With Tck Buffers
This causes some skew between the TDI, TMS, and TCK signals. To correct this skew, use the same type of buffers on the TDI, TMS, and TCK signals. For example: Debug Target Connector Device Target Device Figure 3-9 Fully buffered JTAG connection 100893_0100_06_en Copyright © 2017–2019 Arm Limited or its affiliates. All rights 3-52 reserved. Non-Confidential... - Page 53 For added noise rejection, Schmitt buffers can be used instead of standard buffers. • Arm recommends you use buffers with a drive strength of 24mA or above. • For any buffered signal, place the signal pull-up or pull-down resistor at the input-side of the buffer.
-
Page 54: Series Termination
The receiver observes a perfect 100% logic transition, without any overshoot or ringing. To ensure that a reliable signal is delivered to the DSTREAM-ST unit, Arm recommends that all outputs from the target system are simulated, and, if necessary, series terminated. Some overshoot or undershoot is acceptable, but Arm recommends ensuring this is kept less than ~0.5V. -
Page 55: Modeling
3.4 Modeling Modeling For trace bit rates of 0-600Mbps, basic signal integrity can be established using simplified modeling. Most of the transmission line model consists of the cable that is used to connect the DSTREAM-ST unit to the target. •... -
Page 56: Target Design Checklist
3 Target board design 3.5 Target design checklist Target design checklist To ensure your target design is compatible with the DSTREAM-ST unit, your answer to each applicable question in this checklist must be ‘Yes’. Note Not all questions are applicable to every target design.
Need help?
Do you have a question about the DSTREAM-ST and is the answer not in the manual?
Questions and answers