Advertisement
Quick Links
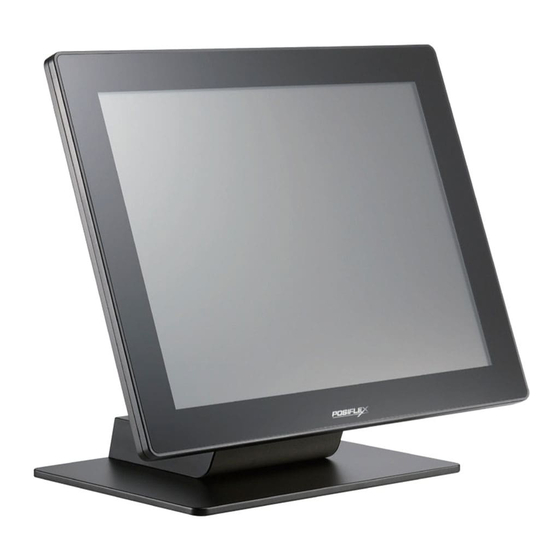
RT-2015E/2016E/2015Q/2016Q
Fanless Touch POS Terminal
User Manual
16950902040
Ver. D0
http://www.posiflex.com
Package Contents
RT-2015E/Q 15" fanless touch terminal or
RT-2016E/Q 15.6" fanless touch terminal..x1
Power adapter...................................x1
Power cord.......................................x1
User manual.....................................x1
Screw for back cover...........................x1
1
Advertisement

Related Manuals for POSIFLEX RT-2015E


Summary of Contents for POSIFLEX RT-2015E
- Page 1 RT-2015E/2016E/2015Q/2016Q Fanless Touch POS Terminal User Manual Package Contents RT-2015E/Q 15” fanless touch terminal or RT-2016E/Q 15.6” fanless touch terminal..x1 Power adapter……………………………..x1 Power cord………………………………...x1 User manual……………………………….x1 Screw for back cover……………………...x1 16950902040 Ver. D0 http://www.posiflex.com...
- Page 2 SOME IMPORTANT NOTES FCC NOTES This system meets industry & government requirements and applicable standards. This equipment generates, uses, and can radiate radio frequency energy and, if not installed and used in accordance with the instructions manual, may cause interference to radio communications. It has been tested and found to comply with limits for a Class A digital device pursuant to subpart B of Part 15 of FCC Rules, which are designed to provide reasonable protection against interference when operated in a commercial environment.
- Page 3 警告使用者 這是甲類的資訊產品,在居住的環境中使用時,可能會造成射頻干擾, 在這種情況下,使用者會被要求採取某些適當的對策。 BATTERY CAUTION NOTES Dispose of used batteries according to the instructions. Replacement of a battery with an incorrect type that can defeat a safeguard (for example, in the case of some lithium battery types) Disposal of a battery into fire or a hot oven, or mechanically crushing or cutting of a battery that can result in an explosion.
- Page 4 Views of RT-2015E/2016E/2015Q/2016Q Front View Camera (Optional) P-Cap Touch Panel LED indicator LED indicator 15” RT-2015E/2015Q 15.6” RT-2016E/2016Q Rear View Thumbscrew for VESA Mount Bracket System Back Cover Attachment Bay Wall- Mount Screw Hole Bottom View Screw Hole Release Lever for System Back Cover...
- Page 5 Right-Side View Power Button Brightness Adjustment Button + Brightness Adjustment Button - Left-Side View Rubber Shield for USB2.0 Port View of I/O Interface of RT-2015E/2016E/2015Q/2016Q Bottom Side DB9 COM Port CR Port USB 2.0 Ports LAN Port RJ50 COM Ports...
- Page 6 Left Side USB 2.0 Port Connecting Power Adapter and Cables The following provides instructions required to connect your cables. 1. To remove the back cover, hold down the release levers at the bottom of the system back cover and then pulling the cover outwards.
- Page 7 6. Locate the dedicated back cover screw from the packing box. Then, please insert the screw into the screw hole indicated in the figure, and secure Cable connectors like the connector of LAN cable have to be gently inserted until a click sound is given. It is recommended that the I/O ports, such as COM (DB9) port and VGA port, should be fastened with connector thumb screws after the I/O cable connectors are completely connected.
- Page 8 Adjustment for VESA Mount Bracket There are two thumbscrews on the VESA mount bracket. Loosen the two thumbscrews. After loosening the thumbscrews, you can carefully move the monitor downward around 45° to do the service. To close the VESA mount bracket, please gently move the monitor back and then fasten the two thumbscrews.
- Page 9 Installing Optional Upgrade Kits and Peripherals RT-2015E/2016E/2015Q/2016Q is an expandable model which allows you to upgrade its own capacity by additionally installing multiple peripheral devices, such as magnetic stripe reader (MSR), fingerprint or iButton sensors, and 2 POS monitor, according to your preference. The following will give you brief instructions on how to expand on your current POS system with these optional upgrade kits.
-
Page 10: Installing An Operating System
Operation Environment To prevent RT-2015E/2016E/2015Q/2016Q from overheating, it is suggested to position your terminal in a well-ventilated working environment. In doing so, please be advised to keep the POS terminal at least 25mm away from other devices to ensure the machine is properly cooled down and functioning normally. - Page 11 USB port replicator (USB 2.0 x 4, installed in base RT-560 stand) ※ The product information and specifications are subject to change without prior notice. To get the detailed information on the RT- 2015E/2016E/2015Q/2016Q, please check this model from Posiflex Global Website.
- Page 12 <MEMO>...
Need help?
Do you have a question about the RT-2015E and is the answer not in the manual?
Questions and answers