Pima FORCE User Manual
Advanced intruder alarm system
Hide thumbs
Also See for FORCE:
- Installation manual (56 pages) ,
- Programming manual (40 pages) ,
- User manual (32 pages)

Subscribe to Our Youtube Channel
Related Manuals for Pima FORCE


Summary of Contents for Pima FORCE
- Page 1 FORCE Advanced Intruder Alarm System User Guide (Including the Lite version) Version: 1.2.X...
-
Page 2: Table Of Contents
FORCE Alarm System User Guide Table of Contents Chap. 1 Introduction ................4 Main features ................... 4 Technical specifications ................5 Chap. 2 Keypads ..................6 KLT/KLR500 ..................... 6 2.1.1 Main features ..................6 2.1.2 Technical specifications ................6 2.1.3 Quick guide ................... - Page 3 Signs in this guide Warning Note Enter sub-menu, select/deselect, save selection. Menu with sub-menus (on the display) Menu with sub-menus (in this guide) Options menu Return/Esc, Cancel Selectable parameter (enabled/disabled) Scroll between zones, partitions, users, etc. PIMA Electronic Systems...
-
Page 4: Chap. 1 Introduction
FORCE alarm system from anywhere. Note: This alarm system must be checked by a qualified technician at least once a year. This User guide refers to the FORCE alarm system, version 1.2.X. The system is supplied with two guides: ... -
Page 5: Technical Specifications
Introduction Technical specifications AC power input: 11-18V Backup battery DC input: 13.8V Maximum output current: 13.8VDC, 1.1A (FORCE Lite: 0.9A) Maximum idle output current: 50mA EOL resistors: programmable Operating temperature: -10 to +50 °C... -
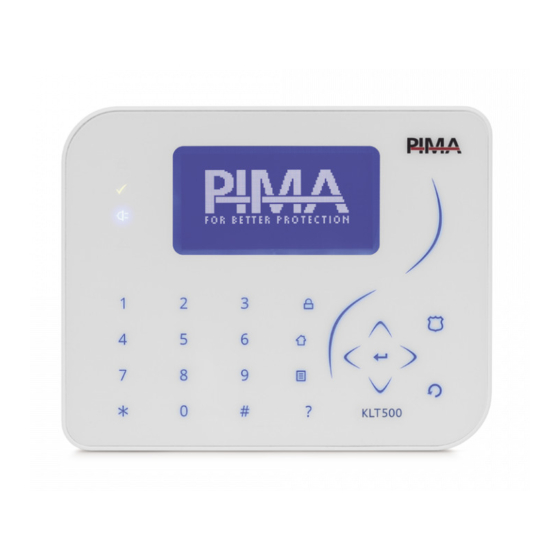
Page 6: Chap. 2 Keypads
FORCE Alarm System User Guide Chap. 2 Keypads KLT/KLR500 FORCE’s LCD keypads are the KLT500 with touch keys, and KLR500 with rubber keys. Both keypads connect to the control panel’s bus and have 7-line LCD screen with a graphic display. 2.1.1 Main features ... -
Page 7: Operation Keys And Keypad Alarms
Medical You can trigger 3 alarms at the keypad: , and . When these alarms are triggered, FORCE activates the programmed responses, including triggering the sirens and reporting the CMS (where relevant), and the contacts. Alarm Press & hold Medical... -
Page 8: Other Indications
FORCE Alarm System User Guide 2.1.6 Other indications Letters displayed on the keypad’s upper line indicate the following: Letter Indication Cellular data communication SMS message Network communication (including with PIMA cloud) PSTN communication Relay (device) activation/deactivation The siren is currently sounding... -
Page 9: Technical Specifications
Press and hold the keys described in the next table, for the following operations: Key Operation Home 1-4 Arm to modes Turn on/off the chime Technical specifications Powered by 13.8VDC, nominal Operating Voltage Range: +9 to +14 VDC Current consumption: Min.: 50mA, Max.: 90mA PIMA Electronic Systems... -
Page 10: Chap. 3 System Programming
FORCE has two separate menus, User and Technician, with two matching Master codes. In addition, there are up to 144 user codes (FORCE Lite: up to 64). The Master user code allows setting all the user menus. Other user codes can be restricted by permissions. -
Page 11: The User Menu
Press the menu key on a keypad and enter a user code in the code screen (the user must have a permission to enter the menu - see section 7.1.1, on page 16). Navigate in the FORCE menus as follows: Press to select, save, or enter a sub-menu. -
Page 12: Arm Away
FORCE Alarm System User Guide Chap. 4 Arming and Disarming You can find detailed information on the arming modes in the Glossary, on page 29. From here onwards, in addition to the Master code you can use any user code with permissions. -
Page 13: Disarming
1, 4, and 6. As a result, only partition no. 4 will be disarmed, being the only partition that both the user and the keypad are allocated to. PIMA Electronic Systems... -
Page 14: Chap. 5 Bypass Zones
FORCE Alarm System User Guide Chap. 5 Bypass Zones Open zones - doors, windows, moving objects - must be closed or fixed, or you cannot arm the alarm system. When there is no other option, you can bypass the zone and arm the system. -
Page 15: Chap. 7 Users And Codes
Event Memory Event no. Time Stamp 246) 15 Oct 01:53 Event Description Burglary Alarm Kitchen Event Source (17) Reference no.: zone, user, etc. Figure 2. The event memory screen PIMA Electronic Systems... -
Page 16: Users
Signal: the selected device’s signal strength - , or Poor . If the signal is poor, change the location of the device. Enroll: press to enroll the selected device. Only systems that are approved by PIMA Electronic Systems. PIMA Electronic Systems... - Page 17 Delete all the definitions of the user, including its password. Operation codes Operation codes FORCE offers 8 , for activating different devices such as electric gates, garage shutter doors, and floodlights. You activate the peripheral (switch on/off, open/close) by entering an activation code (toggle) in a keypad, or in the PIMAlink app. Refer to the technician to use these codes.
-
Page 18: Chap. 8 Communication
Contacts are allocated to partitions the same as system users (where relevant). Note, that contacts of the PIMAlink app are different from the FORCE contacts, and that you set their notifications in the app. -
Page 19: Communication Test
Phone Notifications User Menu Communication Phone Notifications When the alarm is set off, FORCE calls the contact that is set to receive notifications, and sounds an alarm sound over the phone. Parameter Description Default Range (sec) Alarm Sound... -
Page 20: Cms Registration
FORCE Alarm System User Guide Parameter Description Connect: the alarm system allows the technician to connect remotely with a special software. CMS Registration Registering the alarm system by the CMS is meant to prevent criminals from transmitting false transmissions. After the registration the CMS starts monitoring the transmissions and can detect illegal activity. -
Page 21: Chap. 9 System Options
Name & Location: zone name and location. This information is set by the technician. Zone Status: the status of each defined zone is represented by letters, listed in the table bellow. If a fault cannot be overridden, call a service technician. PIMA Electronic Systems... -
Page 22: Armed Partitions
System Options Date and Time The system time must be set after a prolonged power failure (when the backup battery is discharged). If the alarm system is connected to PIMA cloud, time can be automatically updated Auto-Arming Disarming Window of (see below). -
Page 23: Auto Arming
When the auto-arming starts, the keypad buzzer sounds a series of beeps for a period of 45 seconds, after which the exit delay runs and the system is armed. If a user stops the process by entering a user code, FORCE will try to re-arm itself, according to the parameters you set in this menu. -
Page 24: Technician Permit
From now on, the technician will not need your approval to enter its menu. FORCE allows you to be serviced by several CMS’s. The settings of each CMS are set separately and are protected by a password. Only the Master technician can enter the Technician menu without your approval (except for the first time) –... -
Page 25: Chap. 10 Partitioning
If the center has a lobby (or an entrance door) that serves all Figure 5. Partitions, example C the shops, its keypad can be allocated to all the partitions (shops) and allow some users (such as the shop owners), to view the status of the partitions. PIMA Electronic Systems... -
Page 26: How To Clean The Lcd Screen
FORCE Alarm System User Guide If a detector (such as the door magnet) in this area is allocated to all the partitions, it will arm only when all the partitions will be armed. 10.2 How to clean the LCD screen To keep your keypad screen clean and without scratches, follow the next instructions: ... -
Page 27: Appendix A Troubleshooting Faults
Partitioning Appendix A Troubleshooting Faults The FORCE alarm system is constantly monitoring the status of the control panel, the detectors, and the peripherals. When a fault occurs, this is what happens: The fault LED starts flashing The buzzer starts sounding beeps. To silence it, press and hold the key. - Page 28 FORCE Alarm System User Guide Fault Description Network Local network (LAN) connection fault Anti-mask Anti-mask detector at fault or open box Invalid Code Code keystrokes exceeded limit (keypad is locked out for a period set by the technician) Internal/External Siren...
-
Page 29: Appendix B Glossary
When entering a user code, the exit delay that allows you to leave the premises without triggering a detector, starts. When the delay time elapses, all the zones are armed. The FORCE can be armed only if the message “Ready to Arm” is displayed and the green Open Zones Faults LED illuminates. - Page 30 FORCE Alarm System User Guide Partitions Partitions allow dividing the premises into separate areas, with detectors, keypads, and users for each partition. Users can be allocated to one or more partitions, so they can arm and disarm only these partitions. Keypads are also allocated to partitions.
-
Page 31: Appendix C Zone Number And Location
Partitioning Appendix C Zone Number and Location Zone Name/Location Zone Name/Location Zone Name/Location PIMA Electronic Systems... -
Page 32: Appendix D Menu Map
Press ? for warning Allow Access Noe IP/URL: Over Network Connect Over Cellular Data CMS 1 CMS 2 Pair to PIMAlink Pairing Code: Unpair Some screens are not available in FORCE Lite PIMA Electronic Systems... - Page 33 No Mov.-All Part. Retry Period: Arming Mode: Reset Smoke Detector Partition: Period: Technician Permit Arming Mode: Control Panel: GSM Firmware: System Information IMEI: Local Expander MAC: 8-Zone Expander Peripherals Output Expander Keypads PIMA Electronic Systems...
- Page 34 PIMA’s prior written consent is granted. All efforts have been made to ensure that the content of this manual is accurate. Pima retains the right to modify this manual or any part thereof, from time to time, without serving any prior notice of such modification.
- Page 36 P/N: 4410460 * 4 4 1 0 4 6 0 * Revision: XX en, B, Mar. 2019...
Need help?
Do you have a question about the FORCE and is the answer not in the manual?
Questions and answers