Pima FORCE Programming Manual
Hide thumbs
Also See for FORCE:
- Installation manual (56 pages) ,
- User manual (36 pages) ,
- Installation manual (16 pages)
Table of Contents
Advertisement
Quick Links
Programming Guide
the FORCE and VISION
Control panel ver. 1.6 and up
TABLE OF CONTENTS
1
How to Connect LCD Keypad ............................................................... 3
1.1
FORCE ....................................................................................................... 3
1.2
VISION ...................................................................................................... 3
2
Menus and codes ................................................................................. 4
2.1.1
Code setting guidelines ........................................................................... 4
2.1.2
Activation codes ..................................................................................... 4
2.2
Changing the default Master and Technician codes ........................................... 4
2.3
The technician menu .................................................................................... 4
2.3.1
System Configuration .............................................................................. 5
2.3.2
Tests & Diagnostics ................................................................................. 5
3
Peripherals.......................................................................................... 6
3.1
Zone expanders .......................................................................................... 6
3.2
Tampers and EOLs ....................................................................................... 6
3.3
3.4
Wireless peripherals ..................................................................................... 7
4
Zones ................................................................................................ 11
4.1
Zone Settings ............................................................................................ 11
4.2
Zone Types Settings ................................................................................... 13
4.2.1
Attributes ............................................................................................. 13
4.3
Copy Zones ............................................................................................... 14
4.3.1
Single to Multiple ................................................................................... 14
4.3.2
Multiple to Multiple ................................................................................ 14
4.4
Partitions Names ........................................................................................ 14
5
Outputs ............................................................................................. 15
5.1
Onboard .................................................................................................... 15
5.2
Zone Expanders ......................................................................................... 16
5.3
Outputs Expander ....................................................................................... 16
5.4
Wireless Sirens .......................................................................................... 16
6
CMS & Communications .................................................................... 17
6.1
Monitoring Stations ..................................................................................... 17
6.1.1
CMS 1-3 ............................................................................................... 17
6.1.2
Radio ................................................................................................... 19
6.1.3
Custom Zones Reports ........................................................................... 20
6.2
PIMA Cloud ................................................................................................ 20
6.3
General Settings ......................................................................................... 21
6.4
Telephone Settings ..................................................................................... 21
Alarm Systems
2
......................................................................................... 7
or
f
Advertisement
Table of Contents

Related Manuals for Pima FORCE


Summary of Contents for Pima FORCE
-
Page 1: Table Of Contents
Programming Guide the FORCE and VISION Alarm Systems Control panel ver. 1.6 and up TABLE OF CONTENTS How to Connect LCD Keypad ............... 3 FORCE ....................... 3 VISION ...................... 3 Menus and codes ................. 4 2.1.1 Code setting guidelines ................4 2.1.2... - Page 2 Appendix C. Programmable Output Types ......... 35 Appendix D. Technician and CMS Codes ..........36 Appendix E. Text and Characters ............37 Appendix F. Zone and System Status ..........38 Appendix G. CMS Event Reporting ............. 39 PIMA Electronic Systems...
-
Page 3: How To Connect Lcd Keypad
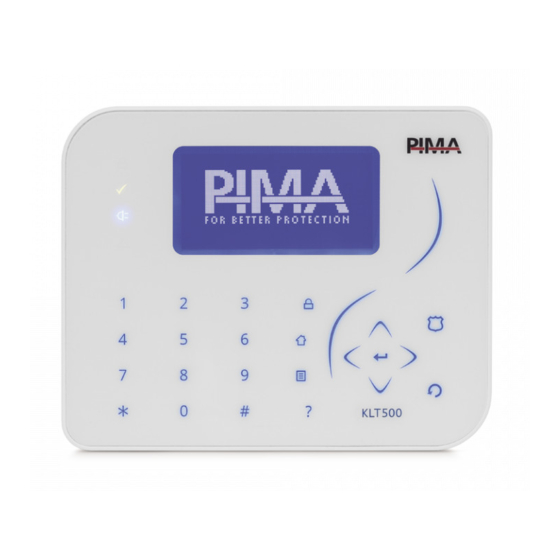
(no. 2 in the image). 2. Connect four wires (not supplied) between the FORCE BUS terminals in the control panel (no. 3 in the image) and the keypad’s terminal block (open the keypad’s back cover). -
Page 4: Menus And Codes
Master technician code. This code only allows the technician/CMS to set and access the CMS’ communication definitions, including the account ID and the paths. 2.1.1 Code setting guidelines Note the following when setting codes in the FORCE security system: Quick Arm • All codes are made of four to six digits, except the... -
Page 5: System Configuration
Zone and zone type definitions, copy zones. Outputs Control panel and expanders’ relay outputs. CMS & Communications CMS 1-2 definitions, PIMA cloud, and radio report codes. Faults System responses to faults and entering false code. Timers & Counters Programmable output types and other timers... -
Page 6: Peripherals
Zone Expanders; see below. Tampers and EOLs; see below. Keypads (addressable): ▪ FORCE: ID=1-16; FORCE Lite/32: ID=1-8. Keypad with ID=0 is not supervised, nor can use partitions. ▪ VISION: ID=0 Keypad Settings; see section 3.3, on page 7. -
Page 7: Keypad Settings
Description Default Range Expanders The no. of wireless receivers. Note, that FORCE automatically allocates wireless zones with numbers higher than any hardwired zone. If a hardwired zone expander is installed when wireless zones are already defined, FORCE will reallocate the wireless zones. - Page 8 When using the additional zone of the door contact, the first zone must be enrolled, even if it is not going to be used. After enrolling the two zones, the first zone can be deleted and re-used. PIMA Electronic Systems...
- Page 9 3: Peripherals ▪ Sirens Parameter Description Enroll Manual: ▪ Serial no.: the siren’s serial number. ▪ Enroll: press to enroll the selected siren. 2) Auto: for 1-way (SRO143) press the siren’s enrollment button. For 2-way (SRo743) press the tamper switch for at least 3 seconds. See the SRO743 for detailed description.
- Page 10 Partitions: for each arming station, select its allocated partitions. Name: user text, up to 28 characters. Notes for You can use only 4-digits codes KAS743 Up to 4 unit can be installed in the system. See the KAS743 manual for full details. PIMA Electronic Systems...
-
Page 11: Zones
Partition Allocation: allocate the zone to partition/s; the selected number/s will stay on. Wireless Zones This menu refers to wireless zones parameters only. Each parameter is relevant to specific detector type or types. See the following table: FORCE only Depending on the defined number of resistors. See section 9, on page 42. - Page 12 2-way detector parameters Parameter Options PIR Standard PIR PET PIR+MW Curtain Outdoor curtain Dorr contact Smoke& Heat Flood detector DPS743 DPP743 outdoor DPD743 detector detector DCD DCM743 detector DSH743 DFL743 DPC743 PIR sensitivity High/Low ...
-
Page 13: Zone Types Settings
5.1, on page 15 for a warning). External Siren The external siren will activate in alarm (via the Ext. Siren at Disarm programmed output type) while at disarm. Reports to the CMS will be transmitted while at disarm Reports at Disarm Some are FORCE only... -
Page 14: Copy Zones
Zones Partitions Names Partitions can have unique names that will appear in the contacts reports and the event memory. Use # or * to scroll and select the partition. ▪ Name: user text, up to 16 characters. PIMA Electronic Systems... -
Page 15: Outputs
(or all partitions) is armed in Home 1-4 Technician on-site Technician code is entered Walk test Walk test started The default programmable output types do not need to be changed in most installations. Wireless Sirens FORCE only, except... -
Page 16: Zone Expanders
Relay 1-8: press the desired relay and set its parameters. 5.4 Wireless Sirens System Configuration Outputs Wireless Sirens Press # or * to scroll between sirens, and set its programmable output type, partitions, and name. PIMA Electronic Systems... -
Page 17: Cms & Communications
You can configure up to 3 different CMS (monitoring station) independently. Each one can be configured to communication paths, account IDs, telephone numbers and more. Force will report the events to all the CMS's. Backup paths are defined within each CMS. - Page 18 System Configuration CMS & Communications Monitoring Stations CMS 1-3 Event Reporting Select the events to report to the CMS. The optional events are: ▪ Alarms: Burglary, Panic, Fire, Duress, Medical, Tamper, Custom Zone 1-5. PIMA Electronic Systems...
-
Page 19: Radio
For each zone, set codes for the following events: Fault+Restore, Bypass+Restore . Press # or * to scroll between zones. Arming Disarming Arm/Disarm- For each user, set event codes for . Press # or * to User scroll between users. FORCE only... -
Page 20: Custom Zones Reports
Network (Ethernet) 1. Select the communication path to the cloud. Cellular Data 2. The cloud’s URL (force.pimalink.com) and IP address (13000) 3. Set the Port to zero for the other path. Main Path Select if the cloud will be the main communication path. When cleared, this path will back up the main path. -
Page 21: General Settings
Static IP Netmask, DNS, Default Set when using Gateway Callback Address, Port Set an IP address and port number for the FORCE Manager upload/ download software. These parameters are in the user menu, under Remote Service/Over Network : unavailable FORCE L... -
Page 22: Cellular Settings
Use SIM 2 Temporary parameter for tests. After the tests system will return to use SIM 1. Firmware upgrade Please consult PIMA support for using this option. APN-1/2 Settings Name. The options are: a. Enter the APN’s name (up to 16 characters). -
Page 23: Faults
7: Faults Faults Faults AC Fault, Low Battery, Phone Line Fault, menu includes the following sub-menus: Network Fault, Cellular Modem Fault, CMS Comm. Fault, Tamper Open, Invalid Code, and Other Faults; see below. 7.1 AC Fault System Configuration Faults AC Fault Parameter... -
Page 24: Timers And Counters
▪ AC Fault The time between the occurrence of the fault and reporting the event. If the fault is fixed before the ▪ Telephone fault delay expires, no event is reported. ▪ Cellular Modem Fault ▪ Network Fault PIMA Electronic Systems... -
Page 25: Programmable Output Types
8: Timers and Counters Parameter Description Default Range ▪ Phone Line Fault 0 min Back to SIM 1 When SIM 1 is at fault, the control panel switches 24 hr. 6-72 to SIM 2. Set here after how long the control panel will switch back to SIM 1. -
Page 26: General Settings
Zone Bypass-Auto Arm Open zones are automatically bypassed when auto-arming Momentary Key • Selected: momentary key switch Cleared: toggle key switch Keyfob-Force Arming Allows arming with a keyfob with open zones and faults Beep on Arming • No beep •... -
Page 27: Arming Prevention
9: General Settings 9.1 Arming Prevention System Configuration General Settings Arming Prevention For some faults, you can allow the users to arm the alarm system only after they override AC Fault Low Battery Expander/Tamper Telephone Line Cellular them . -
Page 28: Reset To Defaults
Warning: this action cannot be undone! 10.1 Resetting to factory defaults If the Master technician code is unavailable, FORCE can nevertheless be reset to factory defaults. To reset to the factory defaults, do the following: 1. Disconnect FORCE from AC and battery power for five seconds. -
Page 29: Tests & Diagnostics
11: Tests & Diagnostics Tests & Diagnostics Tests & Diagnostics In the main screen, press . This menu includes the sub-menus that follows. Event Memory; see below. Zone Test; see below. Output Test; see below. Power Diagnostics; see next page. Communication Tests;... -
Page 30: Output Test
11.6 Communication Monitor Tests & Diagnostics Communications Monitor Select a path and view the FORCE’s online communication transactions. The transactions are displayed for several minutes and you can trigger events and follow the keyboard screen. 11.7 Wireless Peripherals ... - Page 31 11: Tests & Diagnostics Single Zone When testing wireless zone in option, the * sign may be displayed. This sign, attached to the signal strength, indicates that the detector is 2-way. For example: * Good If the sign * is not displayed for 2-way peripheral, there is incompatibility issue with this peripheral, and it should be replaced.
-
Page 32: Service And Remote Upgrading
The connection will be via the Ethernet port of the alarm system. Enter the remote server IP address and port. See also paragraph 5) for pre-defined address. Connect: make connection now. The server may be Force Manager software. Cellular The connection will be via the cellular channel of the alarm system. -
Page 33: Appendix A. Implementing Partitions
Appendix A. Implementing Partitions You can define up to 16 true partitions. Each partition is consisted of several zones, and is normally a defined area, such as a building floor, a store, or a compartment. Every partition can have its own subscriber ID no., user codes, keypads, peripherals, etc. Partitions’... -
Page 34: Appendix B. Remote Up/Download
FORCE for upload/download is enabled and if it requires a user approval. See the user guide on how the user approves the connection Uploading and downloading is done using the Force Manager PC software (see a separate guide). -
Page 35: Appendix C. Programmable Output Types
Chime Activation Chime triggered Activation time elapses 3 sec Output-Key fob: output activation • PIMA key fob: press the Activation time elapses, or 5 sec by a keyfob • key pressed again. -
Page 36: Appendix D. Technician And Cms Codes
Appendix D. Technician and CMS Codes There are two technician codes in the FORCE security system: Master and CMS lock code, which allows limiting the access to the CMS menus by a password. 1. Master technician code By default, and as long as no CMS lock code (see next) has been set, the Master technician code enables to access all the technician menus, including all the CMSs’. -
Page 37: Appendix E. Text And Characters
Changing default Master Technician code User must approve by New Master All the technician menus are accessible, 1234 Technician Code pressing Technician Permit as long as no CMS Lock code is set Setting CMS Lock code Only allows accessing the CMS’s menus. New CMS User must approve by 1234... -
Page 38: Appendix F. Zone And System Status
Low battery (wireless peripheral) Anti-mask alarm (wireless peripheral) Armed partition Zone test Supervision loss (wireless peripheral) 2. System status (main screen) Letter Indication Cellular data communication Network in use (including with PIMA cloud) Phone line in use Relay (device) activation Siren activation... -
Page 39: Appendix G. Cms Event Reporting
Appendix G. CMS Event Reporting Below is a table with a list of the events that are reported to the CMS and private users. Source Reporting Zone: Burglary, Shock sensor, Panic, Silent Panic, Fire, Alarm/Restore/Fault. Tamper: Duress, Medical, Tamper, Anti-mask, Custom + keypad including External and Internal alarms Siren and EOL supervised loops. - Page 40 Copyright © 2020 by PIMA Electronic Systems Ltd. All rights reserved. E&OE Manufactured by: PIMA Electronic Systems Ltd. www.pima-alarms.com 5 Hatzoref Street, Holon 5885633, ISRAEL Tel: +972.3.6506414 Fax: +972.3.5500442 Email: support@pima-alarms.com P/N: 4410526 Revision: D, XX en, Oct 2022...
Need help?
Do you have a question about the FORCE and is the answer not in the manual?
Questions and answers