Pima FORCE Series User Manual
Advanced intruder alarm systems
Hide thumbs
Also See for FORCE Series:
- Installation manual (48 pages) ,
- Quick start manual (4 pages) ,
- Installation manual (22 pages)
Table of Contents
Advertisement
Advertisement
Table of Contents

Subscribe to Our Youtube Channel
Related Manuals for Pima FORCE Series


Summary of Contents for Pima FORCE Series
- Page 1 FORCE Series Advanced Intruder Alarm Systems User Guide Version: 1.3.X...
-
Page 2: Table Of Contents
FORCE Series Intruder Alarm System User Guide Table of Contents Chap. 1 Introduction ................4 Main features ................... 4 System comparison table ................5 Technical specifications ................6 Chap. 2 Keypads ..................7 KLT/KLR500 ..................... 7 2.1.1 Main features ..................7 2.1.2... - Page 3 Signs in this guide Warning Note Enter sub-menu, select/deselect, save selection. Menu with sub-menus (on the display) Menu with sub-menus (in this guide) Options menu Return/Esc, Cancel Selectable parameter (enabled/disabled) Scroll between zones, partitions, users, etc. PIMA Electronic Systems...
-
Page 4: Chap. 1 Introduction
Chap. 1 Introduction Dear customer Congratulations on your purchase of PIMA Electronic Systems’ highly reliable FORCE Series (hereinafter, FORCE) intruder alarm system. This guide will introduce you with the alarm series that includes the FORCE, FORCE Lite and FORCE 32. -
Page 5: System Comparison Table
PSTN, cellular, radio, cellular, radio cellular, radio network (limited Output current 1.1A 750mA 750mA Siren outputs Relay output Requires a wireless receiver Requires a wireless receiver See the limited network connection features for each system above the table. PIMA Electronic Systems... -
Page 6: Technical Specifications
FORCE Series Intruder Alarm System User Guide Technical specifications AC power input: 11-18V Backup battery input: 13.8VDC Relay: 1A max. On/Off and Alarm outputs (minus, open drain): 10A max., external power: +25V max. Output current ... -
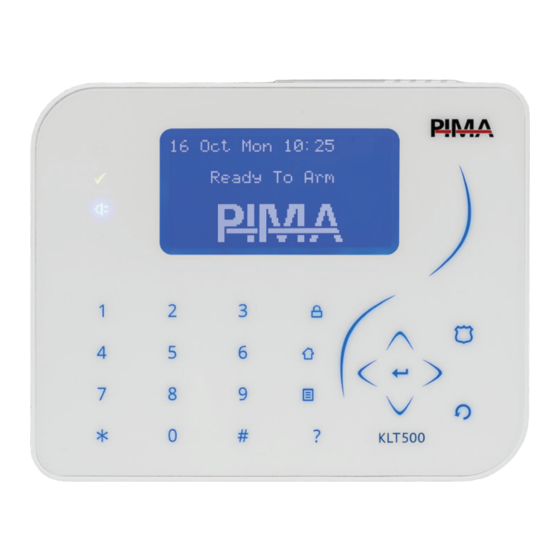
Page 7: Klt/Klr500
7-line LCD screen with a graphic display. 2.1.1 Main features Graphic LCD screen 4 system status LEDs Uses PIMA proprietary communication protocol Tamper switch protection 2.1.2 Technical specifications Screen size: 128X64 pixel ... -
Page 8: Operation Keys And Keypad Alarms
FORCE Series Intruder Alarm System User Guide Type Status Indication Green Ready Steady On No alarm or fault exist, all non-delayed zones are closed. To Arm A zone is open, or a fault exists. Blue Steady On AC power OK... -
Page 9: Other Indications
2.1.6 Other indications Letters displayed on the keypad’s upper line indicate the following: Letter Indication Cellular/data communication SMS message Network communication (including with PIMA cloud) PSTN communication Relay (device) is activating The siren is currently sounding Radio transmission Cellular/Voice communication How to enter text and characters Text in the FORCE is entered like in a telephone: each key is assigned with several characters;... -
Page 10: Kla500 Arming Station
FORCE Series Intruder Alarm System User Guide KLA500 arming station The KLA500 is a wired arming station. It is used for arming and disarming, and activating Operation codes; devices (using see page 17). The keypad connects to the control panel’s bus and has touch keys. -
Page 11: Chap. 3 System Programming
4-6 digit Technician code. Write down the code and keep it in a safe place. Press Press to save and return to the main screen. The new code has now been saved. Set the system time - see section 9.4, on page 22. PIMA Electronic Systems... -
Page 12: The User Menu
FORCE Series Intruder Alarm System User Guide The user menu The user menu includes the users and contacts settings, and some system parameters. As mentioned before, the Master user can enter all the sub-menus of the User menu and set every parameter. -
Page 13: Arm Away
User Menu Arming & Disarming Arm Home 1-4 User code Arming & Disarming You can also arm via the menu: press , enter a Arm in Home 1-4 See the Glossary, on page 29. PIMA Electronic Systems... -
Page 14: Disarming
FORCE Series Intruder Alarm System User Guide Disarming User Menu Arming & Disarming Disarming To disarm the alarm system, enter an authorized user code; if the alarm system is not disarmed, the user may not have a disarming permission, or is out of its disarming window of Arming &... -
Page 15: Chap. 5 Bypass Zones
Repeat steps 3-2 with other open zone, if there are any. Press to exit. Because of security considerations, bypassing a zone before arming is limited in time. Refer to the technician. PIMA Electronic Systems... -
Page 16: Users
Enrolled: indicates whether a key fob or a panic button is enrolled to the user. Enroll Manual: use it only with PIMA peripherals. Serial no.: enter the device’s serial number. Only systems that are approved by PIMA Electronic Systems. PIMA Electronic Systems... - Page 17 Operation codes are subject to keypad and user partitioning (where relevant). Press # or * to select a code. Press , enter a 4-6 digit code and press to save. See Chap. 10, on page 21. PIMA Electronic Systems...
-
Page 18: Chap. 8 Communication
FORCE Series Intruder Alarm System User Guide Chap. 8 Communication The sub-menus in this menu are as follows: Contacts PIMA Cloud Phone Notifications Remote Service CMS Registration Contacts User Menu Communication Contacts Contacts receive notifications on alarms and other events. Here you set which contact will receive what notification and in what medium. -
Page 19: Communication Test
When you press this menu, you allow a (authorized) technician to connect to the alarm system and control it remotely. Over Network IP/URL: enter the data in the form of IP:Port (no space) when asked by a (authorized) technician. Over Cellular System version 1.2 and higher PIMA Electronic Systems... -
Page 20: Cms Registration
FORCE Series Intruder Alarm System User Guide Parameter Description Connect: the alarm system allows the technician to connect remotely with a special software. CMS Registration In this menu, FORCE is registered at the CMS (where relevant) via network. PIMA Electronic Systems... -
Page 21: Chap. 9 System Options
Name & Location: zone name and location. This information is set by the technician. Zone Status: the status of each defined zone is represented by letters, listed in the table bellow. If a fault cannot be overridden, call a service technician. PIMA Electronic Systems... -
Page 22: Armed Partitions
System Options Date and Time The system time must be set after a prolonged power failure (when the backup battery is discharged). If the alarm system is connected to PIMA cloud, time can be automatically updated Auto-Arming Disarming Window of (see below). -
Page 23: Auto Arming
When a smoke detector detects smoke, it remains in detection mode and cannot reset itself. If the detector was activated because of the presence of smoke, read its instructions guide. If there was no smoke, press here to reset the detector. Someone may be sleeping also. PIMA Electronic Systems... -
Page 24: Technician Permit
FORCE (and will be able to view and change only the parameters of their CMS). In some cases, when the technician needs to connect remotely via PIMA cloud. System Information ... -
Page 25: Chap. 10 Partitioning
If the center has a lobby (or an entrance door) that serves all Figure 5. Partitions, example C the shops, its keypad can be allocated to all the partitions (shops) and allow some users (such as the shop owners), to view the status of the partitions. PIMA Electronic Systems... -
Page 26: How To Clean The Lcd Screen
FORCE Series Intruder Alarm System User Guide If a detector (such as the door magnet) in this area is allocated to all the partitions, it will arm only when all the partitions will be armed. 10.2 How to clean the LCD screen To keep your keypad screen clean and without scratches, follow the next instructions: ... -
Page 27: Appendix A Troubleshooting Faults
Troubleshooting Faults Appendix A Troubleshooting Faults The FORCE Series alarm systems are constantly monitoring the status of the control panel, the detectors, and the peripherals. When a fault occurs, this is what happens: The fault LED starts flashing ... - Page 28 FORCE Series Intruder Alarm System User Guide Fault Description Network Local network (LAN) connection fault Anti-mask Anti-mask detector at fault or open box Invalid Code Code keystrokes exceeded limit (keypad is locked out for a period set by the technician)
-
Page 29: Appendix B Glossary
These zones will not set off the alarm as long as the delay timer is in progress (but will if are still open when the delay elapses). The technician sets which faults you can override and which you cannot. PIMA Electronic Systems... - Page 30 FORCE Series Intruder Alarm System User Guide Partitions Partitions allow dividing the premises into separate areas, with detectors, keypads, and users for each partition. Users can be allocated to one or more partitions, so they can arm and disarm only these partitions.
-
Page 31: Appendix C Zone Number And Location
Zone Number and Location Appendix C Zone Number and Location Zone Name/Location Zone Name/Location Zone Name/Location PIMA Electronic Systems... - Page 32 PIMA’s prior written consent is granted. All efforts have been made to ensure that the content of this manual is accurate. Pima retains the right to modify this manual or any part thereof, from time to time, without serving any prior notice of such modification.
Need help?
Do you have a question about the FORCE Series and is the answer not in the manual?
Questions and answers